



In Part 1 of this article, we started building our miter saw stand. In Part 2, we’ll finish constructing the stand and share some tips for souping up your saw.
——————-
Chapter 1: Part 2
A serial publication of excerpts from Trim Made Simple by Gary Katz
Training techniques for apprentice carpenters and serious DIYers
——————-
Use pocket holes for easy joinery
Experienced carpenters use clever jigs, fixtures and techniques for fastening two boards together in perfect alignment. Newcomers frequently give up before they learn how to succeed. Avoid failure and frustration by using pocket hole joinery whenever possible.
Step-by-Step Instructions
| 1. Clamp the jig to a work table. Secure the pocket hole jig to a piece of 1/2 in. plywood. To support the workpiece, attach short pieces of 1x to the plywood exactly the height of the jig. Always clamp the plywood to a worktable. [NOTE: Click any image to enlarge. Hit “Back” button to return to article.] | 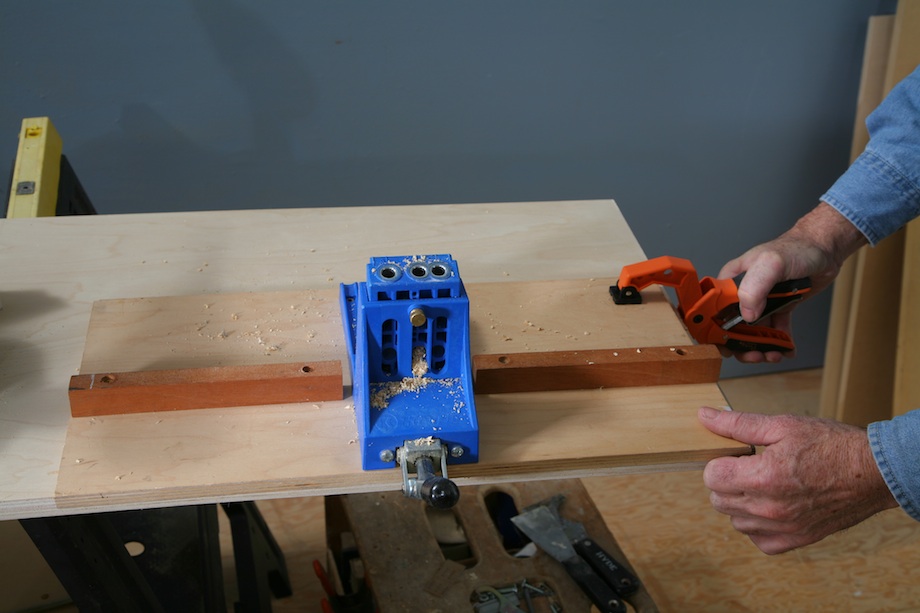 |
| 2. Adjust the clamping pressure. Lock the toggle clamp down, then thread the plunger up to the workpiece. Lift the toggle clamp and thread the plunger toward the workpiece one more turn, then back the lock nut all the way to the end of the threads. | 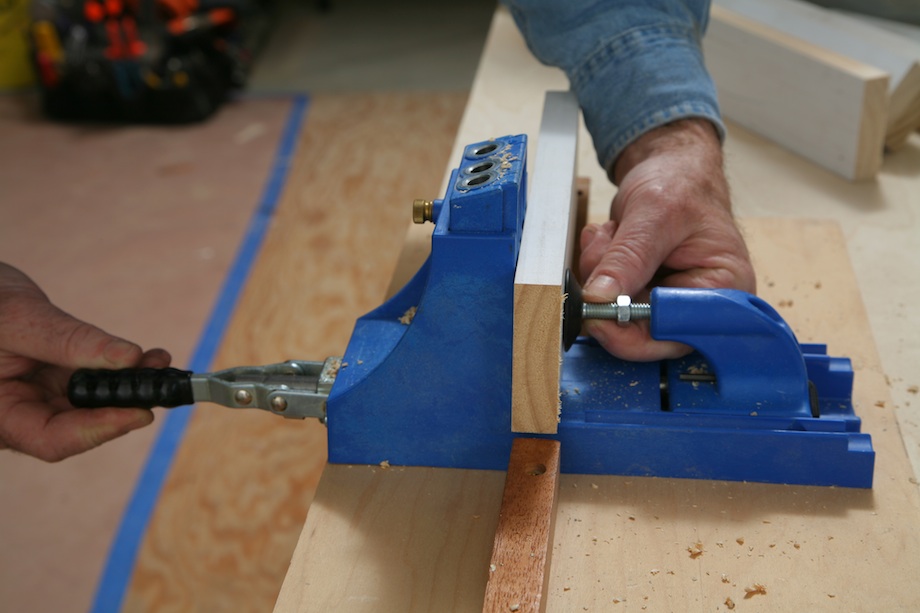 |
| 3. Adjust the stop collar. Place the bit in any of the three bushings. Slip the stop collar over the bit. Lift the bit until the tip is slightly above the jig—so you won’t be drilling into the jig. Then tighten the stop collar with an Allen wrench. | 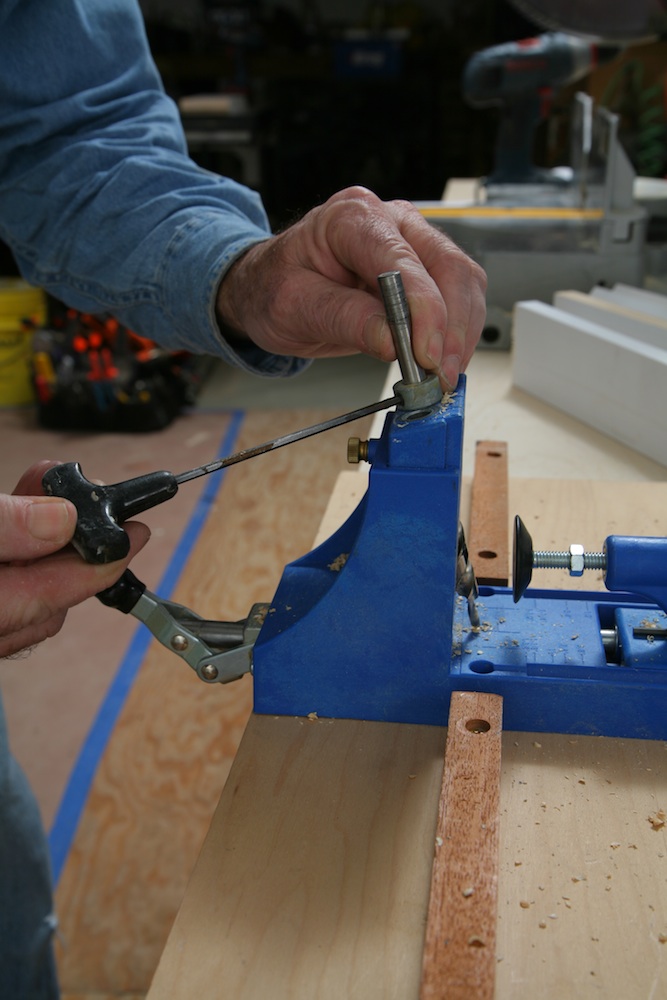 |
| 4. Use the bushings. To drill pocket holes in horizontal material, use any of the three bushings. To drill pocket holes in the ends of 3-1/2 in. material, use the outer two bushings; for 2 1/2-in. material, use the left two bushings; and for 1 1/2-in. material, use the right two bushings. | 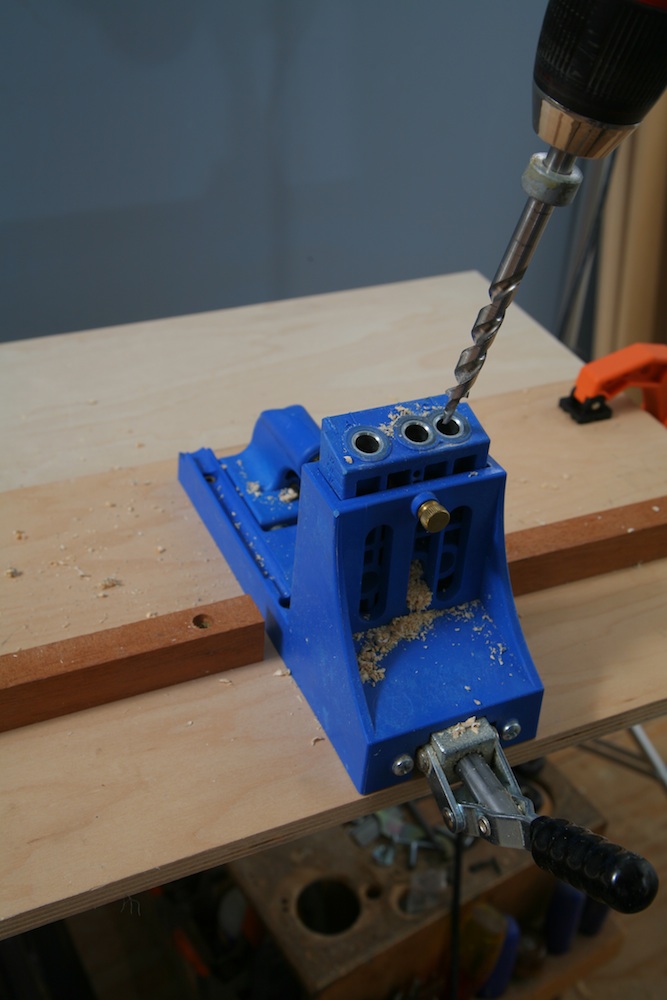 |
| 5. Use a high-speed drill. For drilling a few pocket holes, a cordless drill works fine. For drilling a lot of pocket holes, use a corded power drill. Place one hand on the work piece, to steady it. Hold the drill in the other hand, squeeze the trigger, wait for the bit to come up to top speed, then slowly push the bit straight down into the bushing. Feather the trigger off and on while removing the bit. | 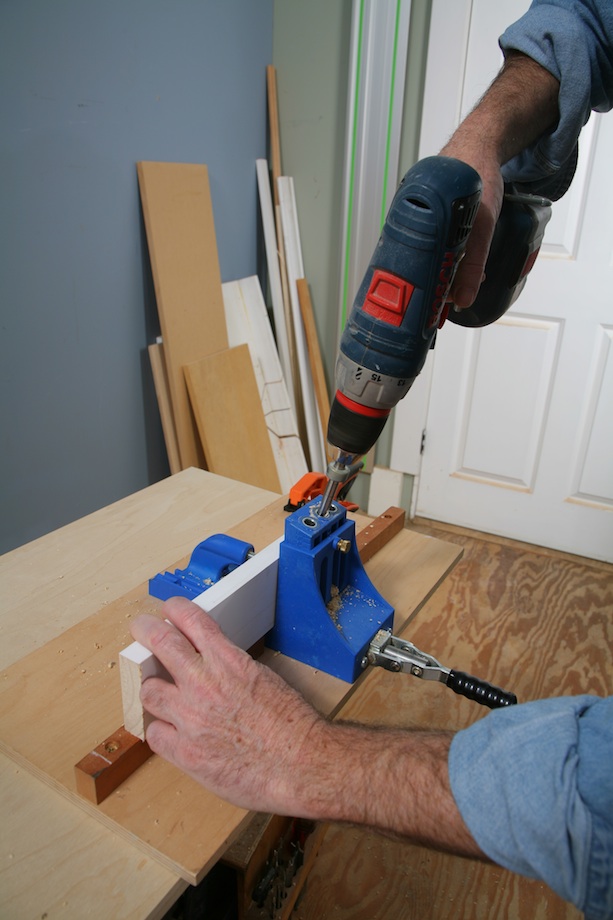 |
The real trick to doing fine finish work is careful layout. For most tasks, you don’t have to be a journeyman carpenter to achieve success. Just plan ahead and work slowly, methodically checking your work as you go to avoid mistakes. Though the supports don’t have to be installed perfectly, take pride in everything you do and your confidence and work will improve quickly.
Install the supports
| 1. Layout the inside supports. To allow plenty of room for your saw, measure over 2 in. from the base of the saw. | 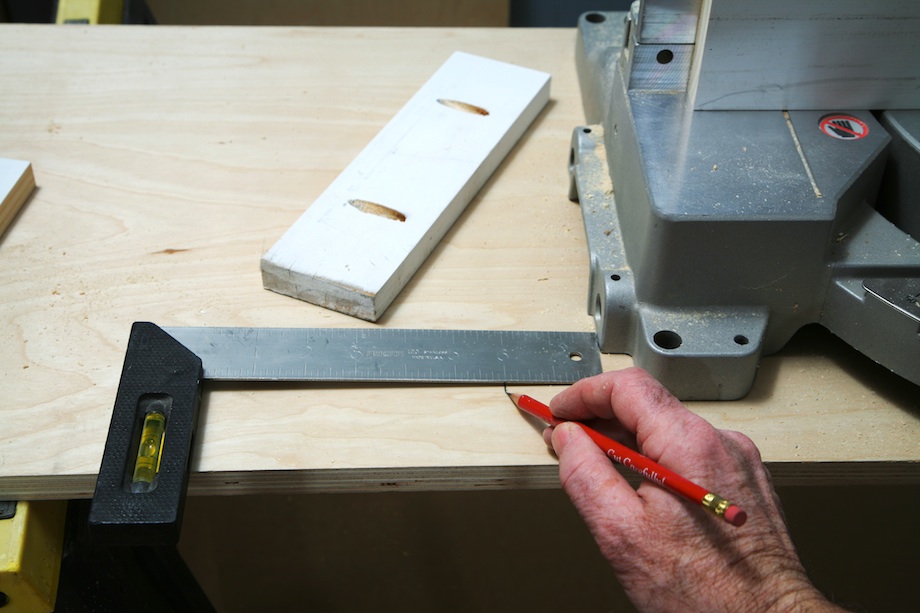 |
| 2. Draw layout lines. Use a carpenter’s square to draw layout lines for both supports, perpendicular to the edge of the base. | 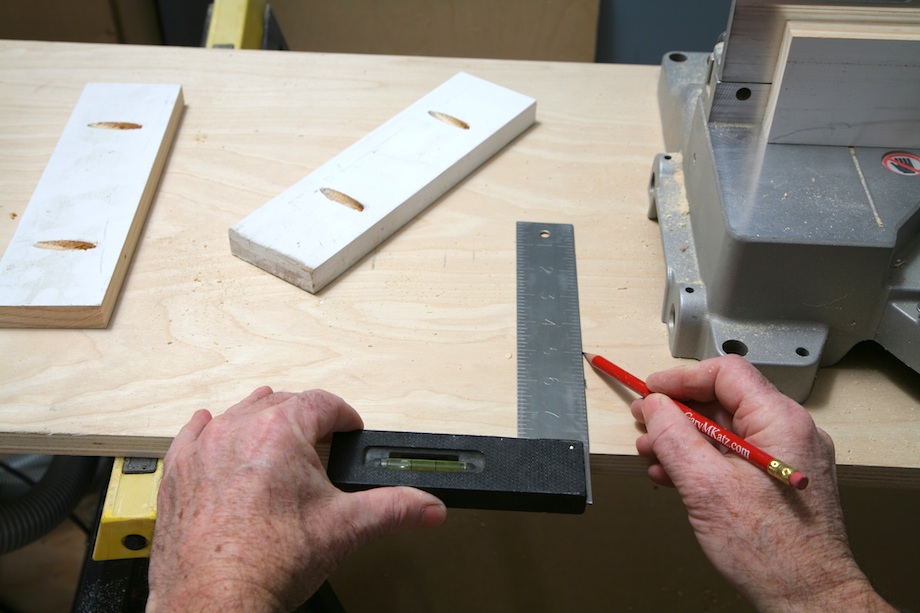 |
| 3. Locate center supports. The end supports are easy, make them flush with each edge. Then measure over and mark the center of the center supports. Remember, those marks are centered on the support. Draw layout lines 3/8 in. to one side. | 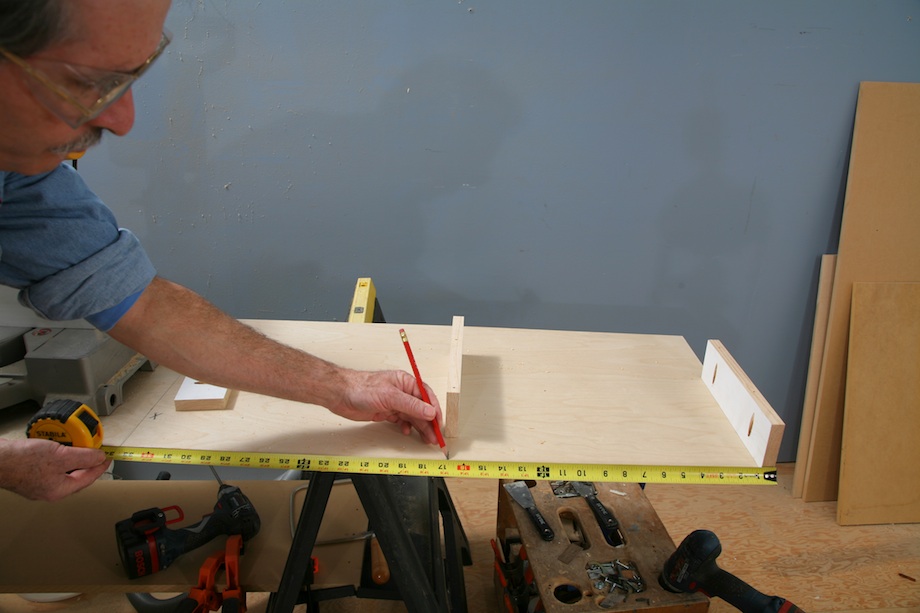 |
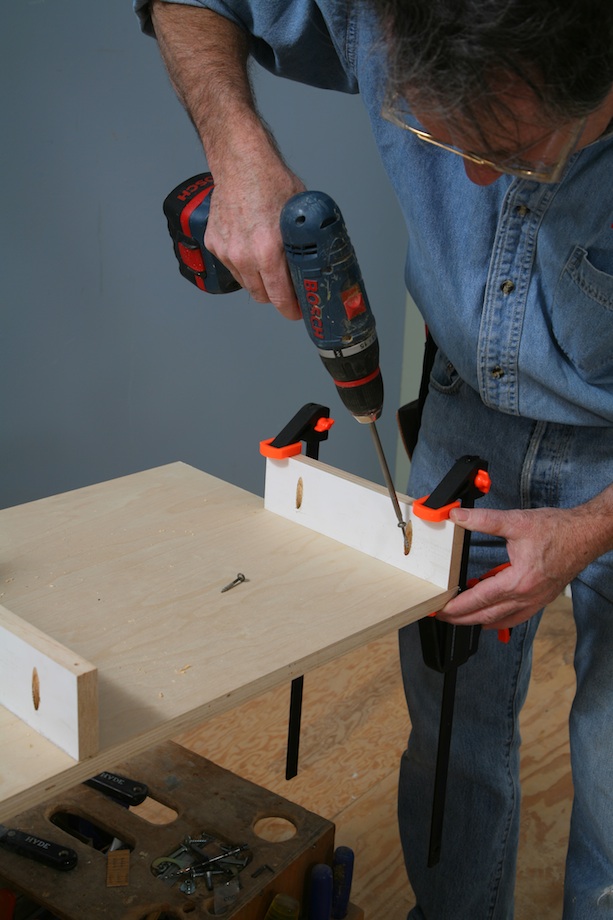
| 4. Glue and clamp supports. Don’t attempt to drive pocket screws, or any fastener, without clamping the material in place. Otherwise, the force of the screws will push the material off the layout line and the job won’t be successful or enjoyable. | 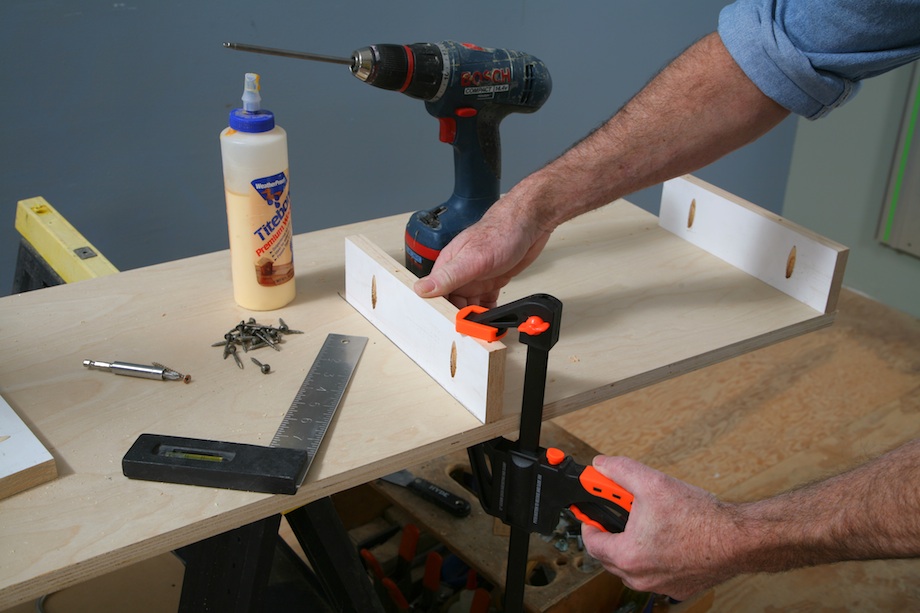 |
| 5. Drive in Pocket screws. Set the clutch on your cordless drill to a low setting, so the screw won’t strip. Steady the support with one hand. Use a long square-drive bit, align the bit with the hole, and apply even but gentle force directly in line with the screw, the hole, and the driver bit. | 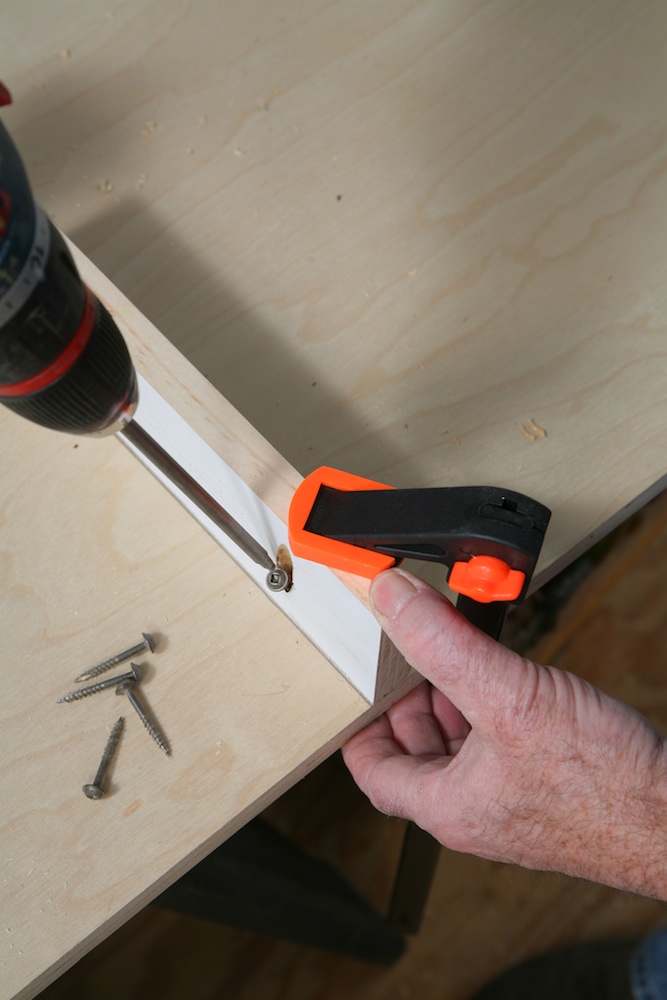 |
Tips From a Craftsman
| Don’t use drywall screws in pocket holes. Drywall screws are tapered beneath the head. As the screw reaches the shoulder of the pocket hole, the taper will split the material. Pocket screws have flat heads and won’t split the material. | 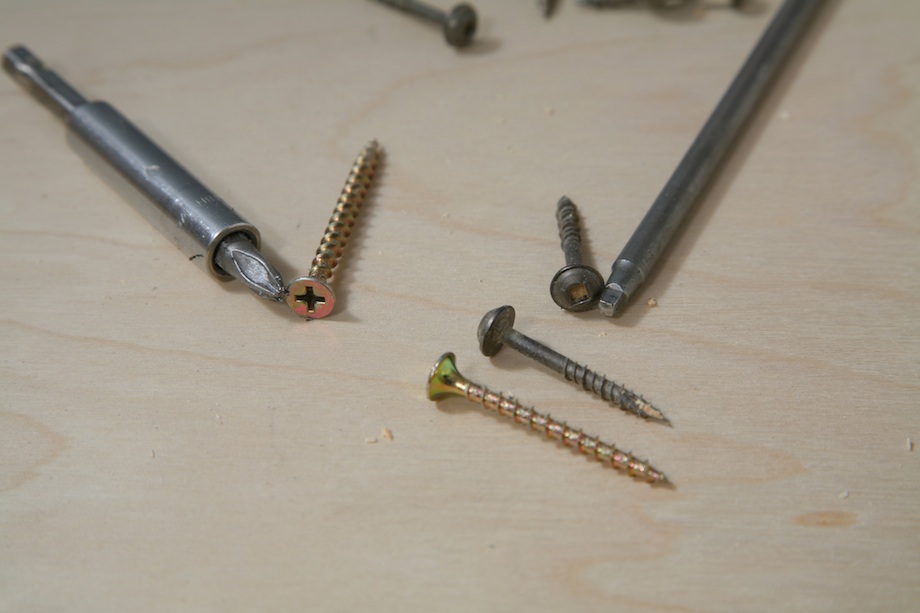 |
Most carpenters learn by making mistakes—sometimes a lot of them. Unfortunately, the more mistakes we make, the longer it takes to build confidence. Here are two tips that will help you avoid frustrating mistakes:
| 1. Measuring and Marking
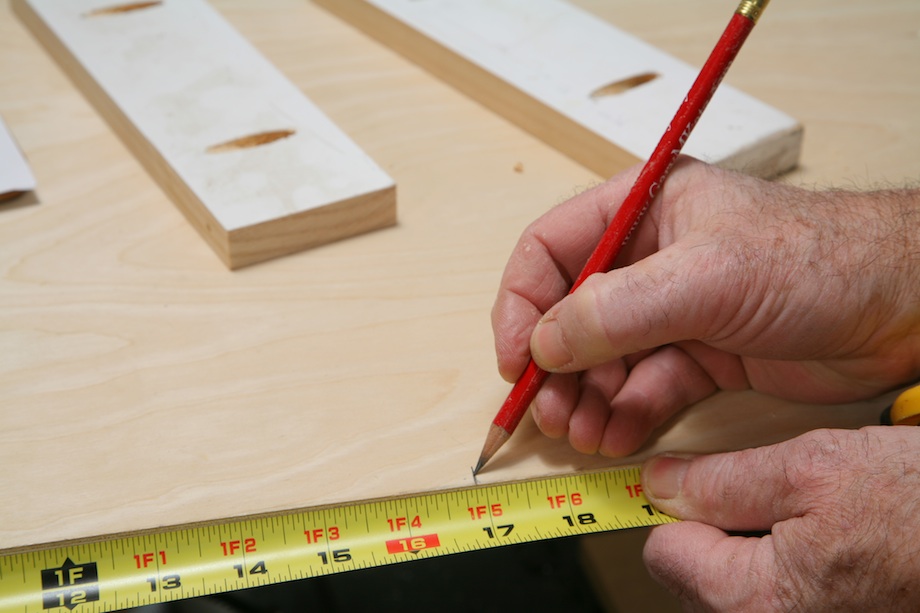
Always use a #2 1/2 (2 5/10) pencil. These pencils are available at office supply stores and online (www.officeworld.com: $2.00). Slightly harder than #2 lead, these pencils are great for carpenters because they leave a sharper, crisper line, and they stay sharp longer. |
 |
| 2. Use Clamps
Safety and craftsmanship are inextricably bound together. You can’t have one without the other. And you can’t do fine work if you’re using your hands as clamps. Before operating any tool, clamp the workpiece securely to a work bench or table. That way, rather than securing the workpiece, you can concentrate your mind and your body on the work. |
 |
Install the Top
Once all the supports are fastened, the top is easy to install. But don’t hurry the process. Set up the procedure carefully, so you won’t end up with any unnecessary holes or marks. Start by laying some scrap 3/4 in. material across the supports, so it’s easier to cut the top in half.
| 1. Cut the top in half. Some miter saws won’t cut all the way through a 12 in. wide board. No problem. Cut half way through from one direction, then turn the board over. Align the cut with the miter saw blade, then cut through the other half. | 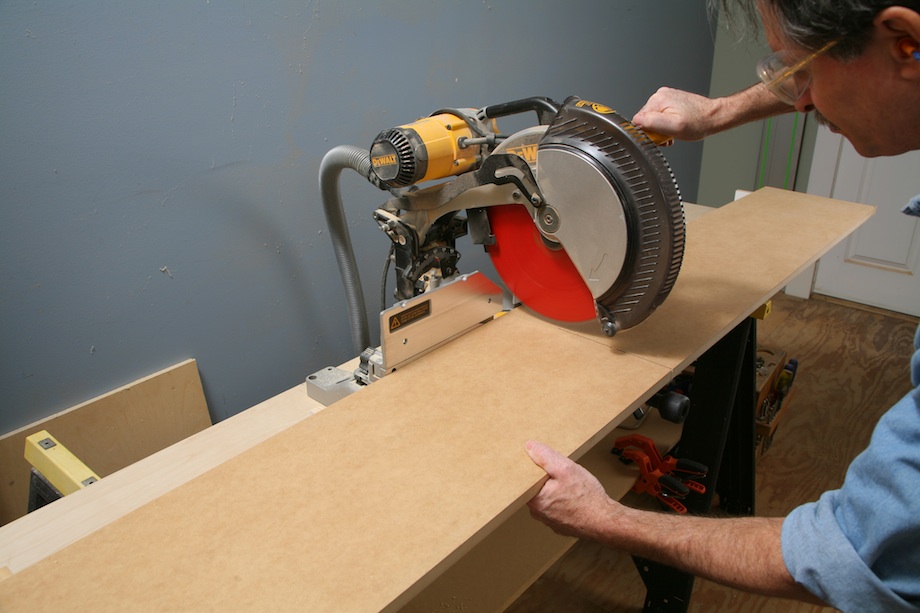 |
| 2. Position the tops. Lay each top upside down behind the supports. To allow room for the saw, slide the tops 1 in. past the inside supports. The top should hang over the supports and provide a 1-in. lip for clamps. | 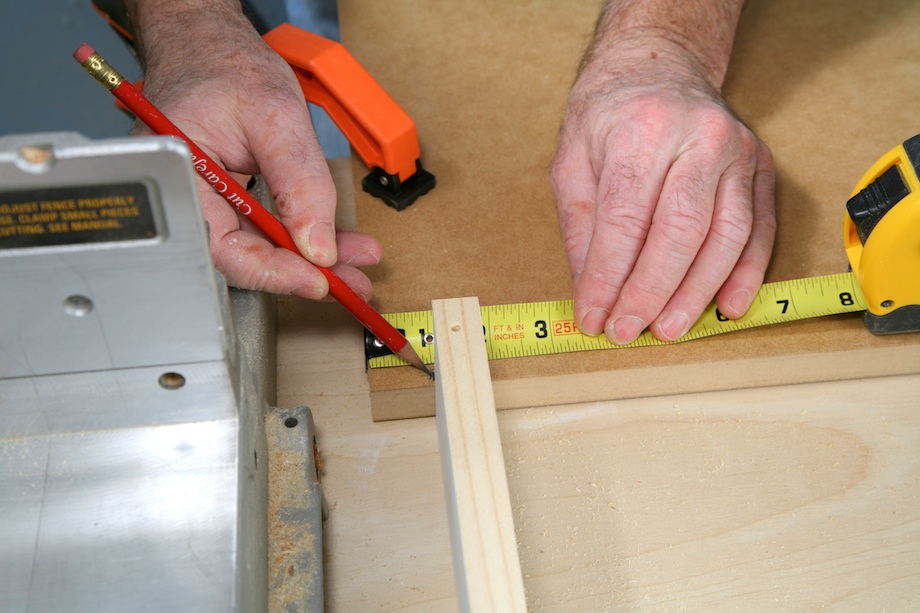 |
| 3. Mark center lines. Use a square to trace center lines on both tops for each support. | 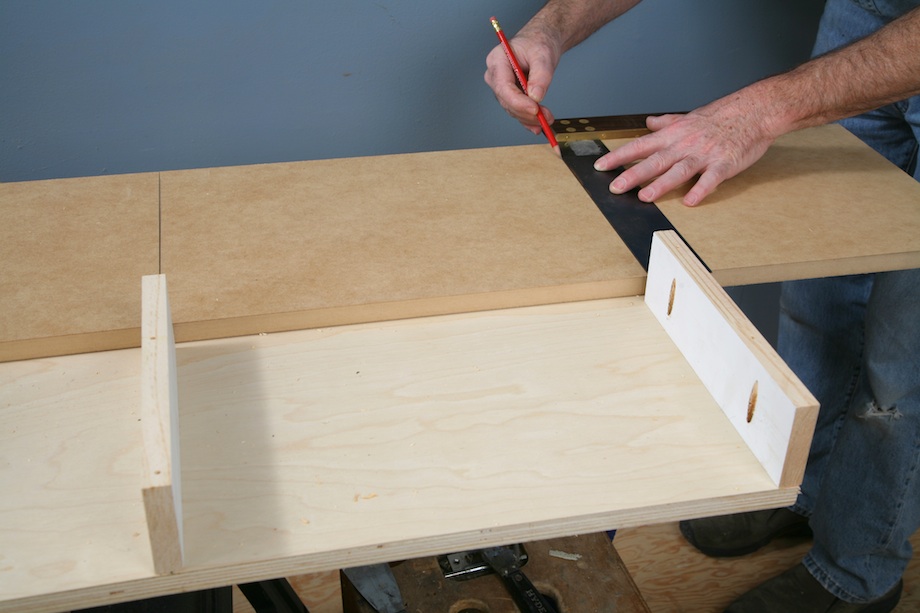 |
| 4. Glue and clamp the tops. Set each top on the supports, 1 in. past the inside support nearest the saw. Flush the tops with the base and the front edge of the supports, then clamp both tops in place. | 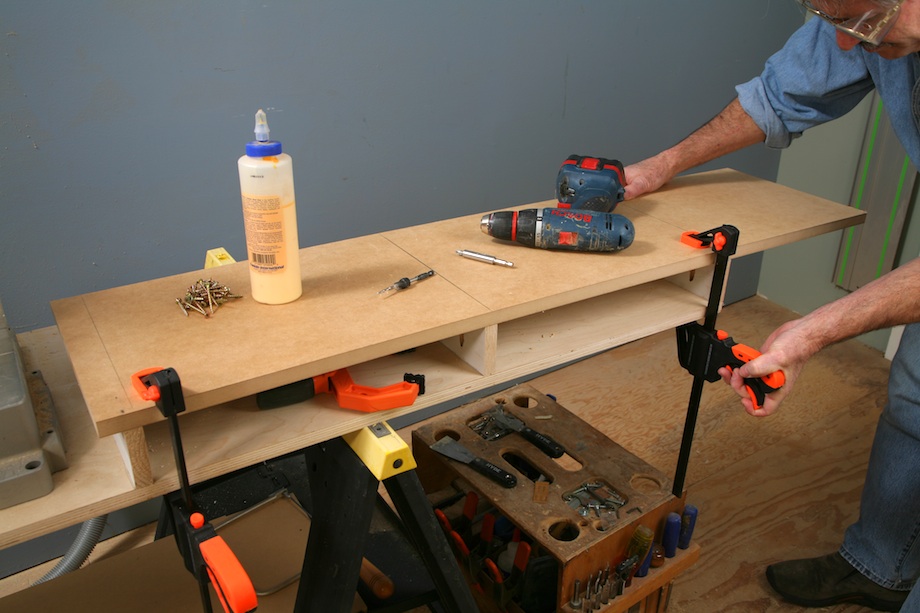 |
| 5. Drill countersunk holes. Use a countersink bit to drill two or three holes on each support line, 1 1/2 to 2 in. in from each edge. | 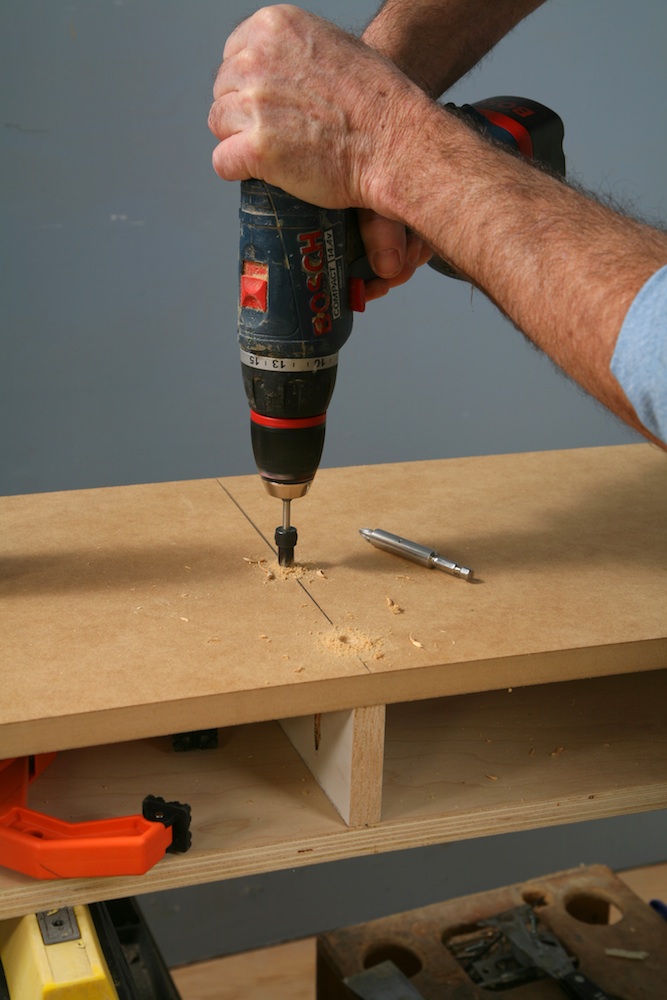 |
| 6. Fasten the top. Drywall screws are okay for many wood-working tasks, even for fastening down the top, but square drive screws are stronger and preferred by craftsman. | 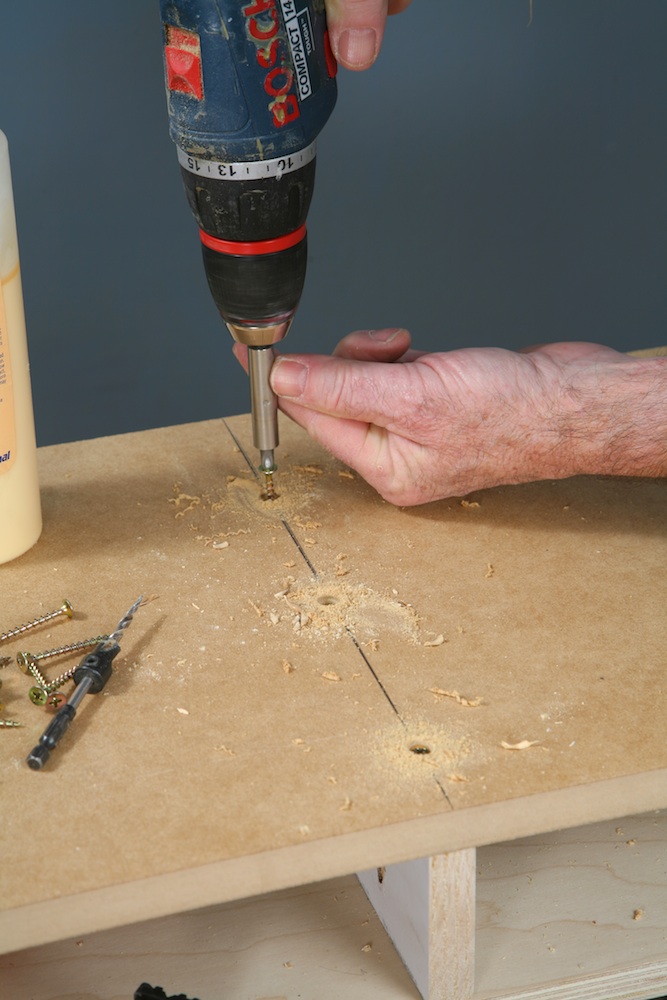 |
Soup up your saw
Installed on a good stand, a miter saw is more than just a saw, it’s a measuring, marking, and layout tool, too. Even the fence on a miter saw is important for layout and measuring, which is why I prefer installing an auxiliary fence on my miter saws. And because finish work is mostly repetitive—we rarely cut just one 32 1/2 in. head casing—a repetitive stop system is also a must: It takes too much time to pull out a tape measure for every cut, and besides, measuring and marking is more accurate with a jig. Here are two simple ways to improve your saw and your craftsmanship:
Attach an auxiliary fence
| 1. Cross cut the material. Rip or buy a short piece of material the same height as your miter saw fence. Cut the material the same length as your saw, measured all the way from one side of the saw to the other. | 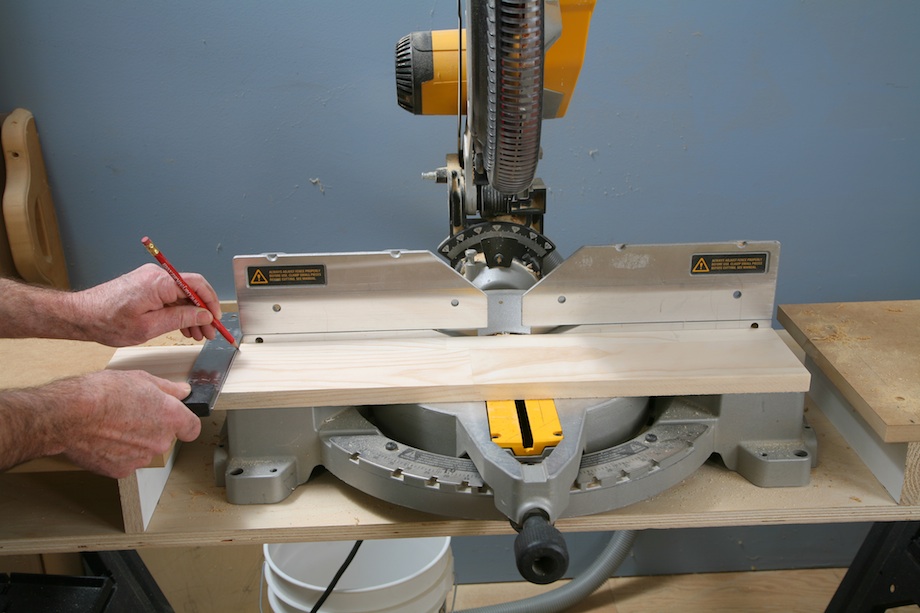 |
| 2. Fasten the auxiliary fence. The miter saw fence should have two holes in each side. Temporarily clamp then secure the auxiliary fence to the miter saw fence using four #10 x 3/4 in. screws. | 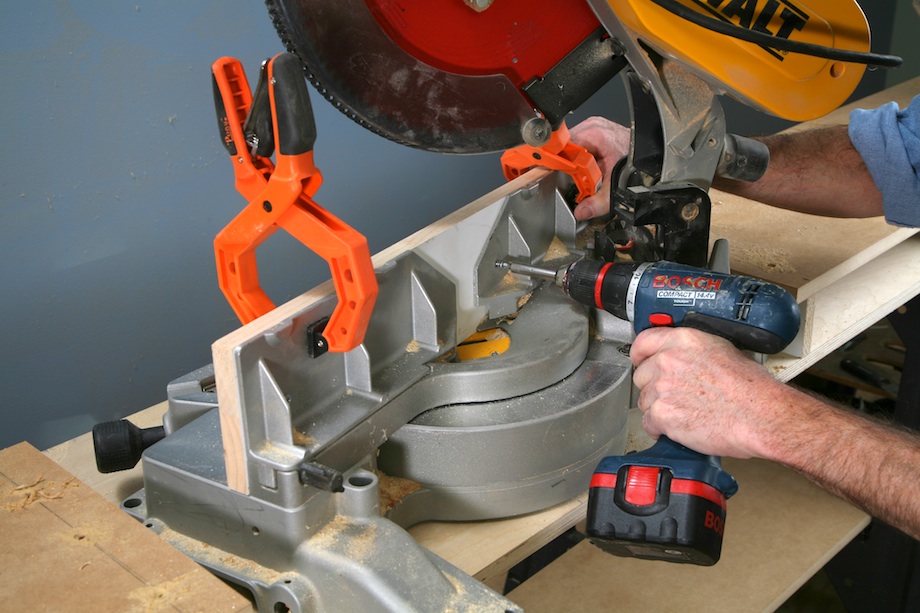 |
| 3. Cut through the fence. Set the saw at 45 degrees and make a cut through the auxiliary fence. Swing the saw to the opposite 45 degree miter detent, and make a second pass through the fence. Allow the blade to stop each time. | 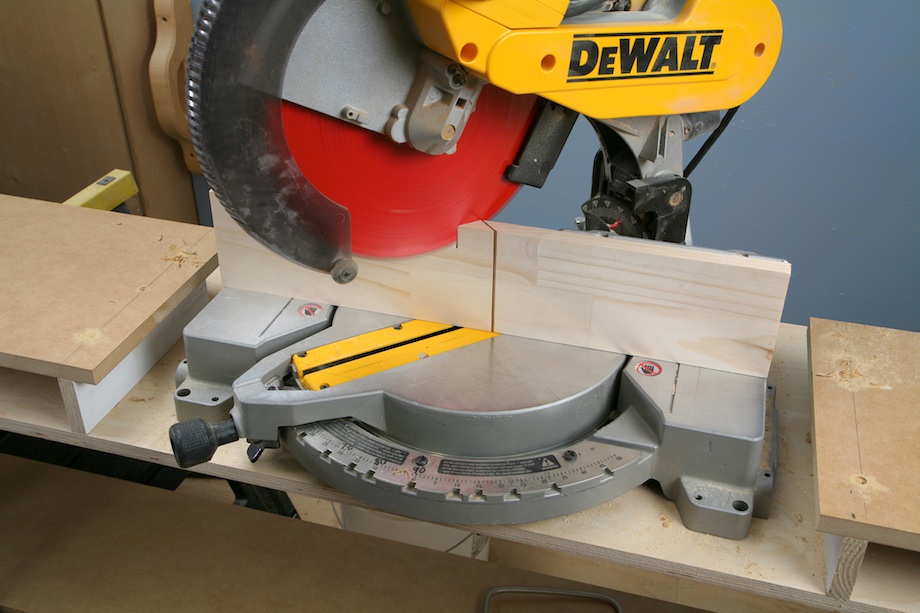 |
Make a repetitive stop system
| 1. Install a wooden fence. Cut a 1 x 4 the length of the extension wing. Use pocket screws to fasten the wooden fence about 1 in. behind the miter saw fence. To prevent binding from bowed boards and moldings, do not make the repetitive stop fence flush with the miter saw fence. | 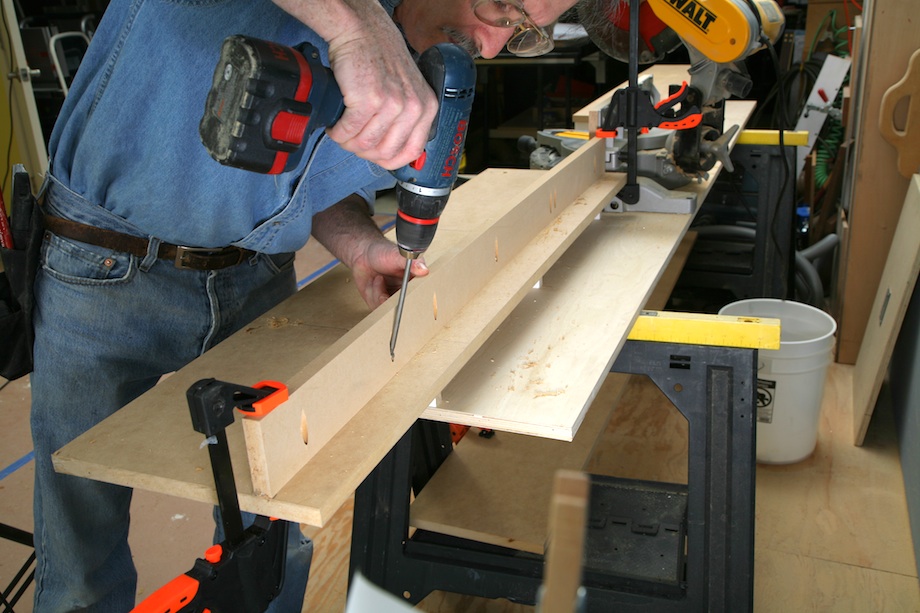 |
| 2. Make repetitive stop blocks. Cut two pieces of 1 x 4, each about 8 in. long. Clamp and fasten them together permanently with screws. | 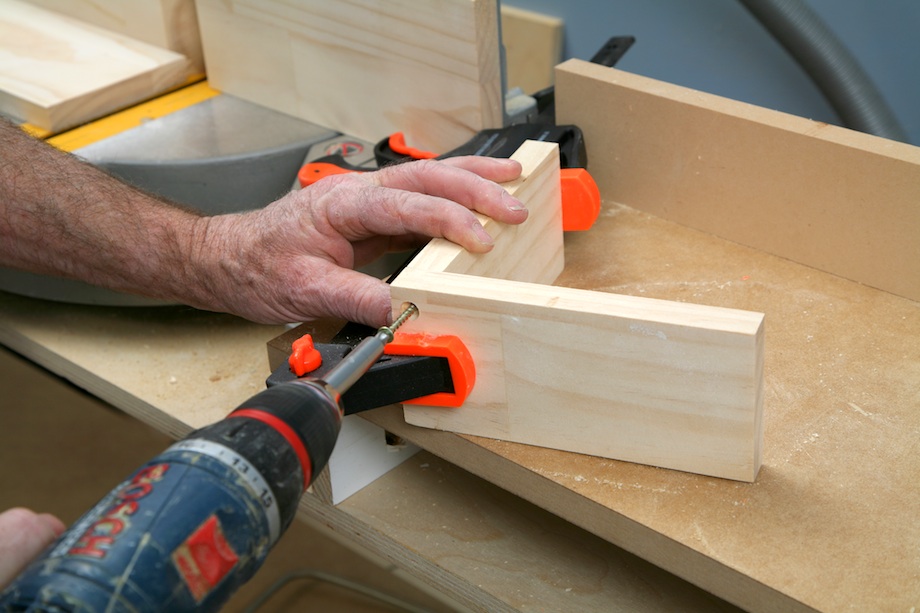 |
| 3. Cut a 45 degree cleat. Cut the cleat off the end of a 1 x 6. | 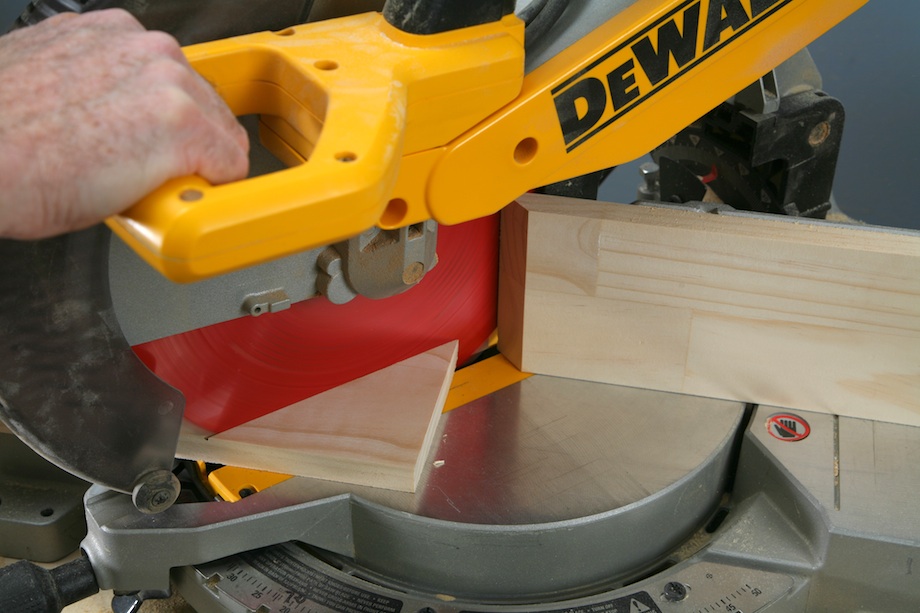 |
| 4. Drill pocket holes. Clamp the cleat securely in the pocket hole jig, with the right-angle edges down, and drill one pocket hole in each direction. | 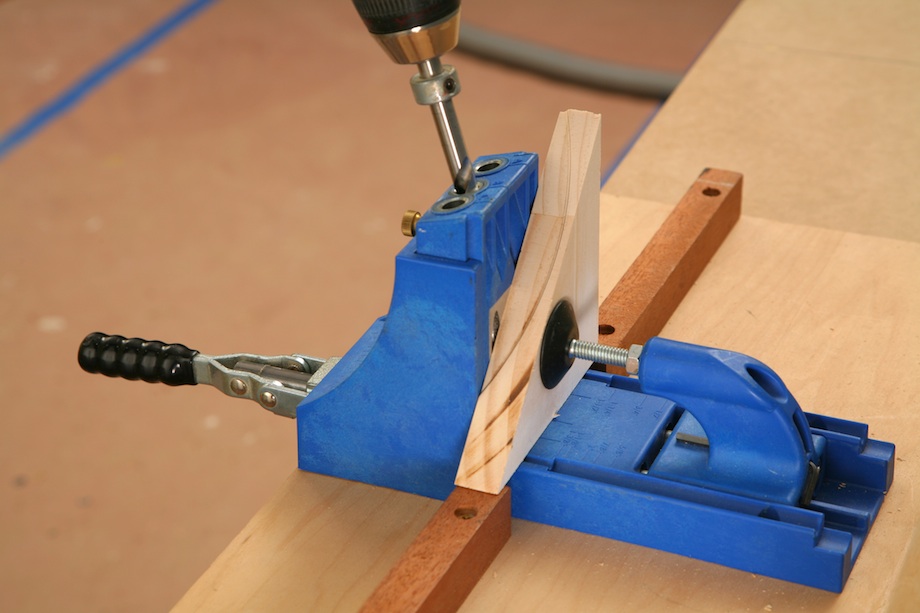 |
| 5. Fasten the cleat. Use pocket screws to secure the cleat inside the stop block. The cleat will create a perfectly square stop block. | 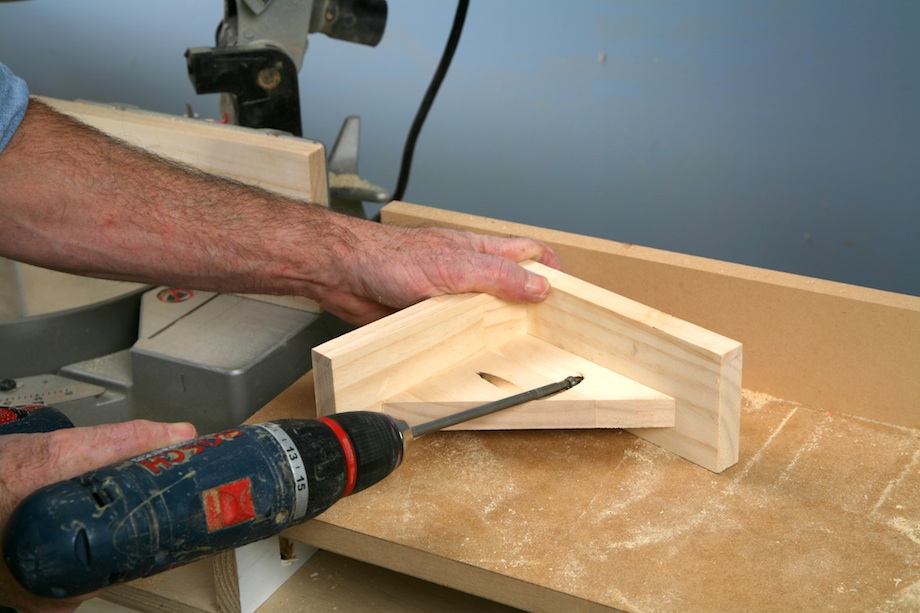 |
| 6. Clamp the cleat to the fence. For repetitive cuts, measure and cut the first piece. Use the first piece to position the stop block, then clamp the block to the fence. Cut a second piece and check that it’s identical to the first piece before proceeding. | 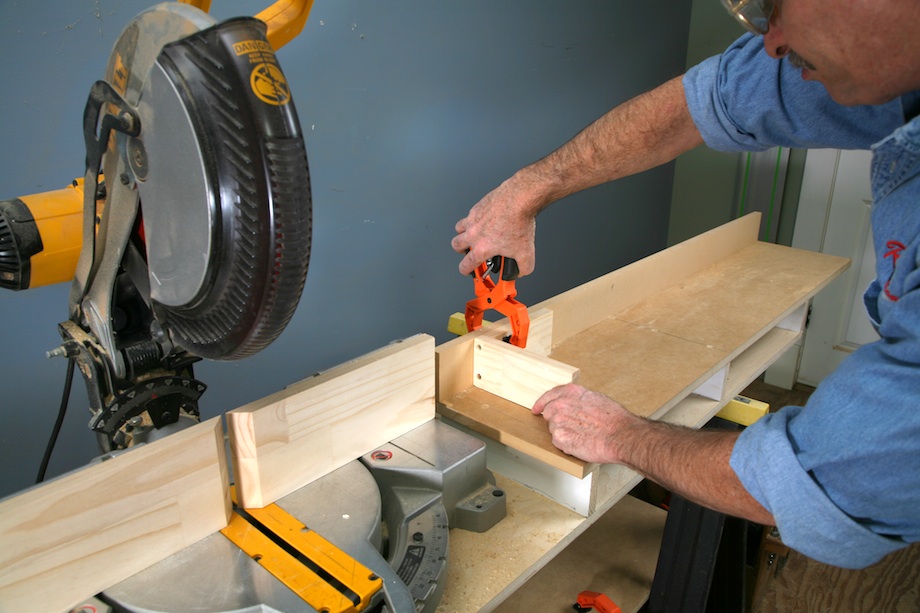 |
. . .
|
Please don’t try anything you see in THISisCarpentry, or anywhere else for that matter, unless you’re completely certain that you can do it safely. |
. . .
Gary: It’s always a pleasure to see the fine work you produce.
i have been debating a new setup for my saw for the past few weeks and i think i found how i will build it ;-)
i remember building my old one before i learned about the benefits of pocket screws and i can see using this new technology for my next one will make it a snap to build.
thanks for pointing me in the right direction.
Pocket screws are handy for lots of things, we’ve got a Castle machine, fast! Another machine that is very useful for holding things together is the Hoffmann key machine. Maybe you could review it here.
The process of building, then using such a work station can only improve on ones efforts, & work satisfaction. What a great tool. Thanks Gary for such a detailed explanation of the process.
Tagging on to the Master’s comments I’d like to emphasize & elaborate on Gary’s advice about using clamps & the right kind of screws. A very good general rule is to never depend on screws to pull your work together. If at all possible (& whether predrilling or not) bringing your work pieces together with clamps before driving screws will greatly enhance the end results. All your screws will retain their maximum holding power as you won’t have pulled half way through your top piece trying to get the screw to pull in tight. Also, the finish look with exposed screw heads is more consistent – read – cleaner & more professional. Clamping is an extra step that just makes your work better and the process more relaxed.
As for the right kind of screws – I am known among those who have worked with me, as a screw snob. Geez why make your work harder using cheap screws. Drywall screws are NOT for woodworking PERIOD. (Some will argue.) There are too many good and even great options out in the world, especially these days as most of us are driving screws with power tools. Why use screws that are so prone to snapping off and whose threads are so pitiful compared to deep thread screws designed for woodworking?
Here are a few opinions from the Screw Snob himself:
1) Spend money on your screws. They are one of your most important tools.
2) Kreg pocket hole screws are the best for that job.
3) Straight slotted screws are definitely out for power drivers. Little brass or bronze straight slot hardware screws have their place but should be driven by hand. (A handy tip for prepping holes for soft brass or bronze screws of any size or slot configuration is to drive the same size screw made of stainless or some other hardened alloy into place first. Withdraw the hard screw turn in your finish screw. Little bit extra work but you’ll never brake a soft alloy screw with this method.)
4) If you have a choice between a screw with a drill tip or not, get the drill tip.
5) Phillips beat straight, square or pozi drive beat phillips, tourque drive beats them all.
6) I have discovered that a lot of stainless screw drives screws are actually too soft and the heads will twist off or the square or phillips head will strip. Yes, I do know to control the torque with the clutch of my Panasonics. No matter some screws need to be babied. I try to keep those out of my screw bins.
7) Very pricey but well worth the price as they can be driven and removed and driven again and again without failure are the tourque drive GRK fasteners. Another very good brand are Spax screws.
8) Still for basic cabinet work as described in this article and building plywood cabinetry deep thread phillips screws with drill tips are well priced and introduce no compromise to the job. I haven’t had luck buying these at lumber yards but certainly Outwater Hardware or McFeely’s or other woodworker supply catalogs are good sources.
So does this constitute a rant? Sorry folks. I just though that in keeping with the teaching tone of Gary’s article, stating the not so obvious might save someone some easily avoidable aggravation.
I like what I do, I hope you do too!
Gary, where did all the Festool stuff go? :)
That’s funny Kent that was the first thing I noticed!!
These articles were written for a book I published a couple years ago with Taunton called Trim Made Simple. I thought more people might enjoy reading the articles, so we’re republishing extracts from the book.
Taunton limited me on the tools I used for the book. They wanted me to use tools that were popular among DIYers. They marketed the book in Big Box stores.
That should explain why I used the tools I used.
Gary
I have the Mikwakee sliding mitre saw.I’m going to be installing crown molding thoughtout an entire house and want to use this stand to make it easier.My saw doesn’t have crown molding clamps so I want to use the wooden fence and the mitre top to create a guide for the crown molding to sit in for repeditive cut. Any suggestions on what others have done? Thanks
Richard,
If you build the type of stand I described in this article, with continuous extension wings, you can clamp a wooden crown stop, like a 1×6, from wing to wing, right across the front of the saw. That’s the best and easiest way to cut crown.
Here’s a short video:
http://www.youtube.com/watch?v=EkPUp42ov2M
Regards,
Gary
explain to me why an additional wooden fence is mounted to the face of the extension faces that are already on the saw-
thx-
Ryan,
I use the sharp crisp edge of the wooden fence to fence off of–read any of my articles on using a miter saw and you’ll see what I mean. I also use the wooden auxiliary fences for measurement lines when cutting repetitive pieces (you’ll notice a lot of that in other articles, too!).
Gary
thanks for the quick reply-
that makes so much sense for nesting crown-
i’m sure a temporary stop could be tacked to those wooden fences as well for lots of cuts of the same profile-
I like this plan a lot. In fact, I built it this weekend. One comment I would make is that this is a good beginner project but most beginners probably don’t have a pocket hole jig. I ended up drilling from underneath to attach the supports, being careful not to split the plywood. I would have preferred the pocket holes but as I’m still amassing tools, I don’t know if a $50-100 jigs is my best move right now.
Other than that, I love the plans.
What is the brand nameof the pocket jig used?
That’s a Kreg Jig. I’ve recently purchased one, and the quality improvement in my building was far greater than the investment in the tool. It’s a fabulous invention, and the creates very strong joints. You’ll be glad you bought it.
Two comments. One, Dewalt miter saws suck big time for cabinet work. Not accurate. One big reason is that they don’t have a soft start motor. When starting, they shake the whole world and jar the workpiece out of exact placement.
Another, your stop is not anything I would have anywhere around my shop. A stop that places an adjustable small object in the same place is by far the best. Your stop will accumulate wood dust and not be accurate. Also hard to set accurate. I have found that making a metal clamp with an adjustment bolt on each side (place right or left of saw) works much better. The clamp is placed on back rail and then repeated movement of the first piece while adjusting the bolt, by screwing it in and our, will get incredibly accurate and repeated results. I use a 3/8″ bolt. The head is the stop.
I have multiple miter saws. One is used for rough cutting. The other for only the finest woods.
Kent,
I totally agree with both comments.
I used the DW saw in this ‘article’ because the story is taken right from my Trim Made Simple book, which Fine Homebuilding published. At the time, they asked me NOT to use a Kapex–which I’d grown very accustomed to and liked a lot. They wanted me to use a ubiquitous saw, something not too expensive that could be bought at a big box store–that’s where they hoped to sell the book.
And they asked me to write the book for beginners. I wasn’t sure how to do that, but I did feel comfortable writing it for ‘beginner’ carpenters, who were just starting out or maybe had been in another trade, and could use some serious ‘coaching’ to cut the learning curve. That’s why the miter saw stand and the coping jig…all of that stuff, is made in a very ‘basic’ and ‘simple’ manner.
Trust me, that’s that the saw I like using most and not the type of stand or repetitive stop system I use, either. At the same time, 90% of finish carpentry–at least 90% of the reason you succeed or fail at it–isn’t because you don’t have a top-of-the-line miter saw or a highly evolved miter saw stand, it’s because you probably don’t have a stand at all, and you’re using a saw that cost less than $200.00. I know a lot of carpenters who use Dewalt saws and love them–and they’re good carpenters. I still use that DeWalt 706 saw whenever I have to cut large crown. It will cut crown standing up that’s as big or bigger than anything my old Hitcahi 15″ saw will cut, and it’s much lighter, quieter, and with the right blade, cuts much much smoother.
Gary
Thanks very much for this article Gary. Just getting into woodworking now that I finally bought a house with a garage. Bought a used DeWalt mitre saw from a friend and decided this would be a great first project, and indeed it was.
One thing I didn’t see mentioned was what size screws to use. I went with #8 – 1 1/4″ and that seemed to work well. This is probably a no-brainer for most, but for the total beginner, might be a nice thing to list in the materials section at the beginning.
Thanks again! Scouting your website now for my next project, which will be much easier now that I have this saw table built. :)
-Tommy
Just built this for my chop saw. Thanks for posting it.
I am planning to build this miter saw stand in a few days, but, I have a question that I am stumped on. I want to have an adjustable stop block, with a measurement tape (ie take the tape part out of a regular tape measure) that is permanently attached to the stand, where I can adjust the stop block to any foot/inch setting that is on the tape. Make sense? Say, if you wanted to make some repetitive 42 & 7/16″ cuts, you would just loosen the stop block and slide it over to the 42 & 7/16″ setting on the permanently installed measurement tape and tighten the stop block, then make your cut, instead of having to measure and mark where the stop block would go. I would prefer to use the stop block that Grizzley makes for this usage. Any suggestions on how I could make this work?
For the auxiliary fence, is it possible to make it taller than the one that came with the saw provided the blade clears the fence? I need to cut some large (7 1/2″) crown molding and the current fence will only accommodate 5 1/2″.
Thanks for the reply.
I don’t know. Depends on your saw, Chris. Some saws will hang up on the fence if you make them too tall, and some saws will bottom out on the fence if you make them too tall, which means you won’t be able to cut all the way through ANYTHING! :) Try it. You’ll find out right away! Just be sure you can remove the auxiliary fence so you can cut it down!! :) Nothing is more of a learning experience than doing something twice.
Gary
I made one from your inspiration, but because I have less room than most, I made mine 6′ wide, and off centered my miter saw so it has an 18″ surface on the right side and a 32″ surface on the other side.
Gary,
As I’m just starting out in the carpentry world… the first question that comes to mind after reading the “souping up your saw” section is: Whats the purpose of the auxiliary fence? It seems somewhat redundant to me a first glance, but i’m sure I’m missing something. Does it have to do with tear out? Any info would be awesome!
I’m literally emerging myself in this whole website, it’s such a great resource.
Once I get enough extra cash i’m going to purchase your full DVD series. I’m certain that something like that will improve my skills and understanding immensely.
Thanks for all of the dedication and hard work, it’s very inspiring.
Andy
Andy, The auxiliary fence allows you to make measurement marks right on the fence, so you don’t have pull out a tape measure each time. Almost any production carpenter will tell you how important that is–we have to cut a LOT of pieces that are often the same length–small pieces, sometimes 3/4″ sometimes 1″, sometimes 3 1/2″, for mantelpieces, cabinets, etc. That’s the fastest way to do it accurately. Each time you pull out a tape, you risk making a taper-measure mistake. Also, the auxiliary fence provides a sharp edge that you can hook your tape measure on–which makes it very easy to pull measurements on pieces cut for an outside corner, where you have to measure from the short point of the miter. Again, most carpenters who want to be productive, do something similar, so that you don’t have to burn an inch on your tape measure. That’s another great way to make a tape-measure mistake. You can’t hook a tape measure on the a miter saw fence these days, they’re childproof–the edges are rounded over!
I guess saw securement is not important. Shame
May I have your permission to use your last photo in an academic essay on what artisans know. IF you say yes I will send you a form that the publisher requires. Alternatively you could say that youy photo is in the piublic domain with creative commons usage. I will of course site your name and the website where you have this picture. http://www.thisiscarpentry.com/wp-content/uploads/2010/06/Fig.45_1.jpg
thank you
So now many years later what would you do differently? Any updated versions of this published anyplace?
While the Dewalt saw may be an average saw 90% of the world is not a cabinet maker, to Kent’s point. Also many folks need something they can just toss up to do some outside work and then put away when done. I certainly would look at this as a full-time solution for a miter saw yet one for portable or remote work. More for contractors or weekend projects, not a $50k kitchen cabinet set.
So if anyone has built this or there are any update tips before I build it, likely in a few days. I’d love to hear any thoughts or see some photos.
I built it. Love it. What would I change if I build it again?
1) I’d make the nifty stop blocks 3″ so they would fit in the spaces under the stand.
2) it is too flexible, I’d add a 2×2 the length under the sand on the front and back to make it a little more ridged, and that should be added before you screw the spacers in so you can properly countersink the 3/8″ pan head bolts that hold the 2×2’s on. Or whatever size you choose.
3) I put the fence on as directed BUT I make it almost perfectly flush with the saw, so I could add the 3/4″ sacrificial fence to the miter saw and get that extra wiggle room or I could have it pretty close by adding a 3/4″ spacer on the fence as well as the saw for more flexibility.
4) Make it water-resistant as much as possible, it is inevitable that it will get rained on. Coat it well with a polyurethane and Boild linseed oil mix of some kind to buy yourself a few “hit points” of damage.
I enjoyed making it and it is working well. I’m making any kitchen cabinets out of it but if you build outdoor furniture or decks or birdhouses this thing rocks.