Miter saw gauges confuse a lot of finish carpenters for one simple reason—they aren’t designed for finish carpentry, they’re designed for framing and stairs. Let me show you what I mean. Read the full article…



Miter saw gauges confuse a lot of finish carpenters for one simple reason—they aren’t designed for finish carpentry, they’re designed for framing and stairs. Let me show you what I mean. Read the full article…

The trim that surrounds a door frame is called casing, and it’s always installed before baseboard and chair rail because they have to butt against it. Casing is also the easiest type of molding to install because the joinery is simple, making it a perfect first project.
I’ll start off by explaining the details of casing joinery and describing how to measure for new casing around a door frame. I also talk about making a cut list, so when you cut your casing it will be perfect the first time. Read the full article…

I used to close my eyes and visualize which way to swing my saw, especially if I was mitering a tricky corner. When I first started using a miter saw, there was a time I’d cut the wrong miter. And on tricky corners, even after years of experience, I still got them wrong nearly as often as I got them right. Read the full article…

There was a time—not too long ago, really—when carpenters approached problems differently than they do today, and the solutions they conceived were different, too. Some readers might suspect I’m talking about raked crown on an open pediment, but that’s a rare problem encountered in only a few homes. Read the full article…
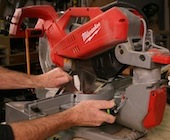
Every carpenter should know that when you buy a new chisel or hand plane it’s not razor sharp out of the box — you have to sharpen it before using it. Well, the same is true for miter saws. They don’t come from the factory in perfect tune.
Besides, after you’ve dragged your saw in and out of the truck a few dozen times, or jammed heavy stock against the fence, or maybe even had it flip off the back of a saw stand — or a tailgate — all those precise adjustments can get seriously out of whack. If you’ve noticed joints not quite closing up for you lately, it’s probably time to tune up your saw. Here are a few tricks to get that big investment dialed in just right. Read the full article…
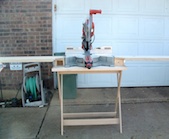
I am a cabinet maker. I own and operate a small shop. I do it all, from making the sale to installing the pulls. Crown molding is standard on all my cabinets, unless the client wants something different. So on 99% of my installs there is crown molding involved. I used to use a small 10-in. single bevel miter saw that worked just fine for most of the crown I needed to install. Occasionally, I would run into something that was too big for my saw to cut, but I was always able to find a way to “make do.” Sound familiar? Read the full article…
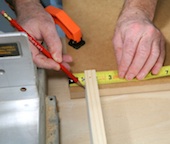
In Part 1 of this article, we started building our miter saw stand. In Part 2, we’ll finish constructing the stand and share some tips for souping up your saw. Read the full article…
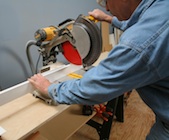
No matter how much or how little you invest in a miter saw, the quality and enjoyment of your work will depend more on your saw stand than on the miter saw itself.
A miter saw stand is more than just a place to set your saw—it’s a work station.
Manufactured stands are available that are easy to set up, transport, and store, but if you’re working at your home, in a couple hours, with $50 or $60 in material, you can make your own. In this chapter, I’ll show you how. Read the full article…