


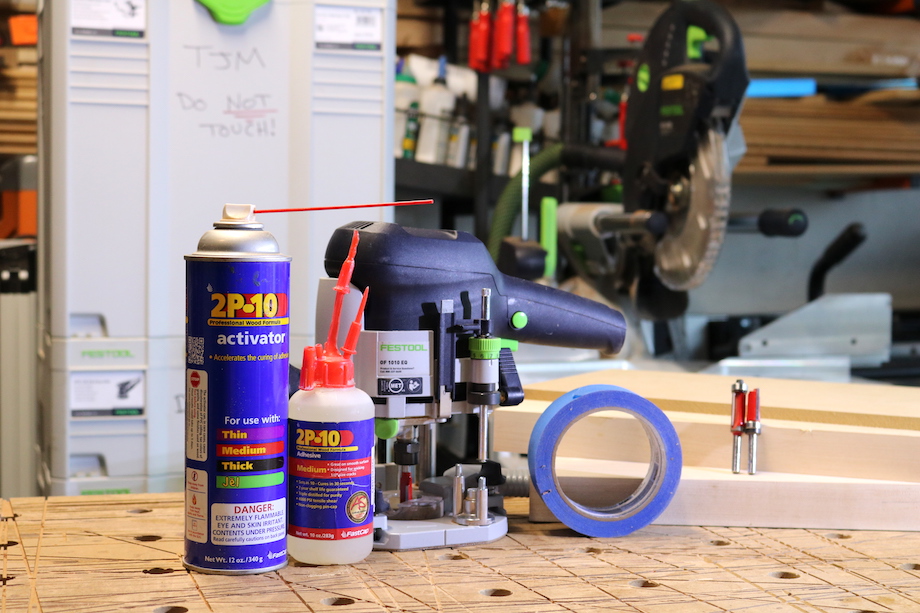
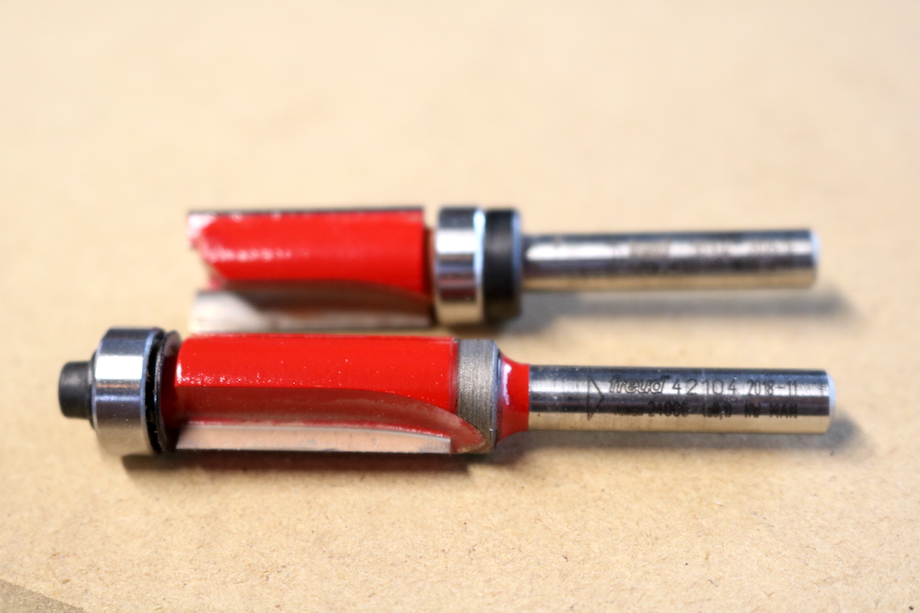
Have you ever wondered how a furniture builder can replicate several pieces that are all exactly the same without the use of any fancy CNC machines? Well fortunately there is a method that won’t break the bank, and can be done in a reasonable amount of time. All it requires is some scrap wood or MDF (your choice), a pencil and straight edge for marking lines, a French curve if you want to get extra fancy, blue tape, CA glue, and a router with two different types of pattern cutting bits—one top bearing and one bottom bearing.
(Note: Click any image to enlarge)
In this example, I’m going to demonstrate how I make the legs for a side table project, which I happen to be in the process of building. I start with a scrap piece of MDF that I’ll eventually use as a template. The height of the legs is 18 in., so I mark two lines that determine the top and bottom of the leg.
Between those lines is where creativity happens.
| The table I’m making is a mid-century modern design, so in addition to a slight taper, I also add a gentle curve at the top using my French curve template. | 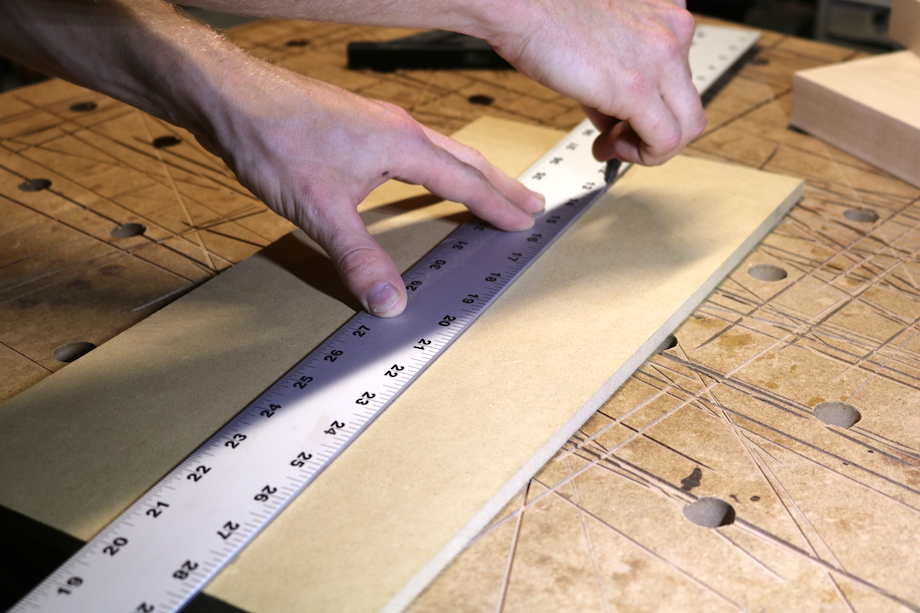 |
| If you don’t have a French curve, something as simple as a spray paint can be very effective. Take a look around, you’ll be surprised what you can use. | 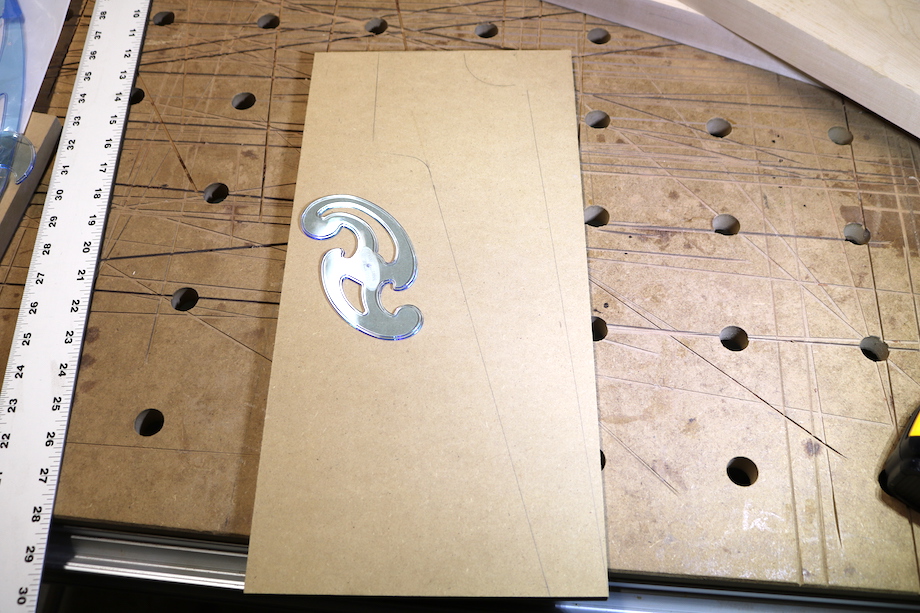 |
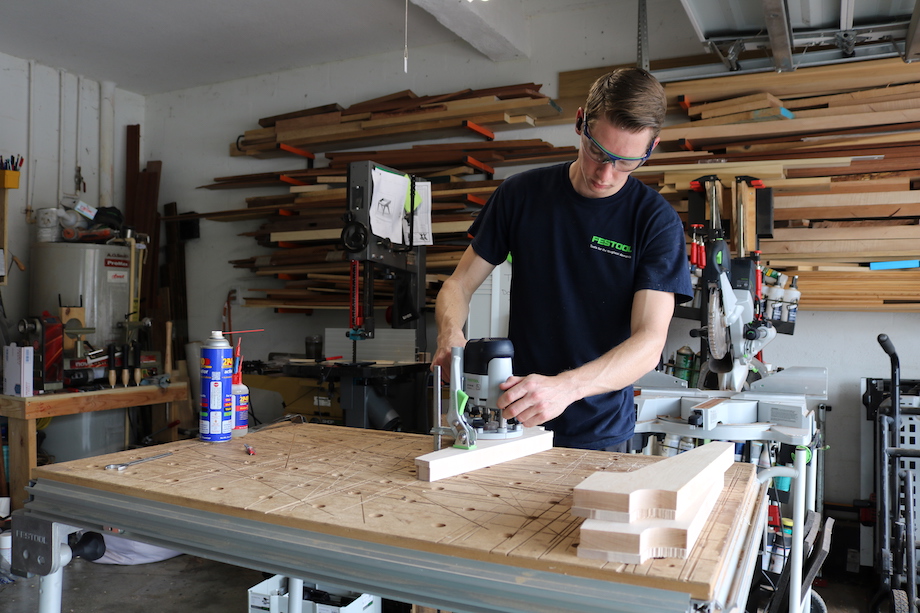
| With the lines laid out, I make some rough cuts. This can be done at the bandsaw, with a jigsaw, or my personal favorite, the track saw. | 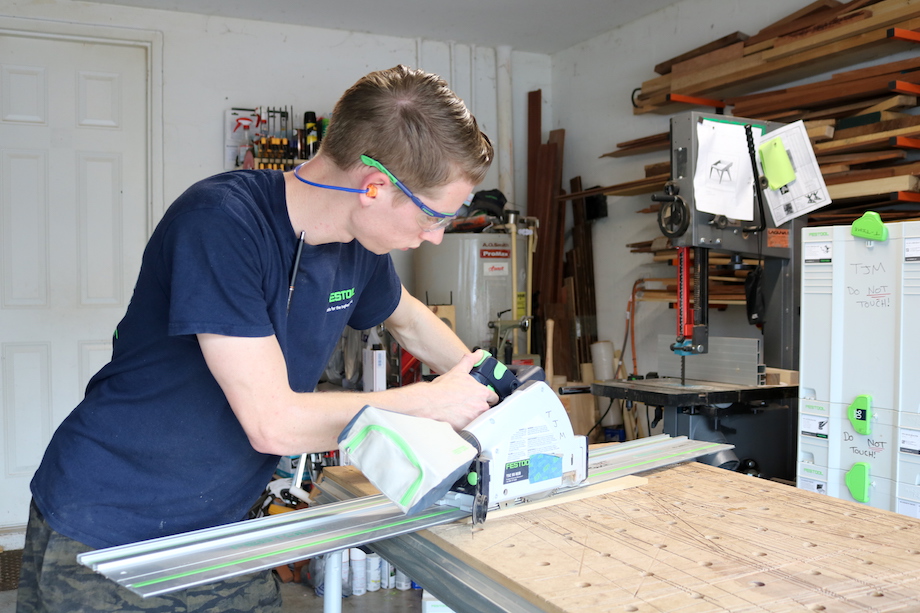 |
The shape can be tweaked and perfected afterward with a sander—I like using an oscillating sander (more on that soon).
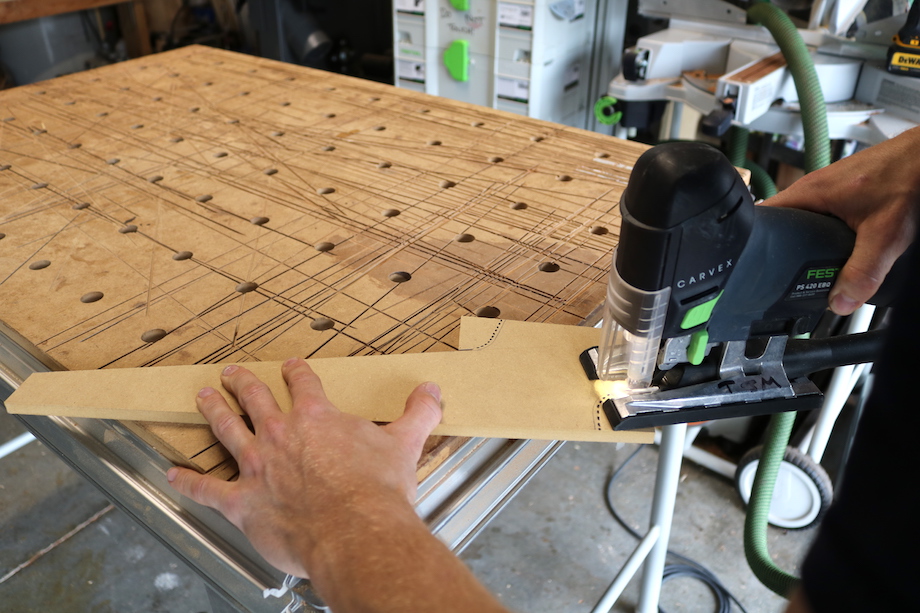
To remove material along the curved section, I use a jigsaw, but I always leave the line so I can see it and sand right to it. There are several strategies for making curved cuts.
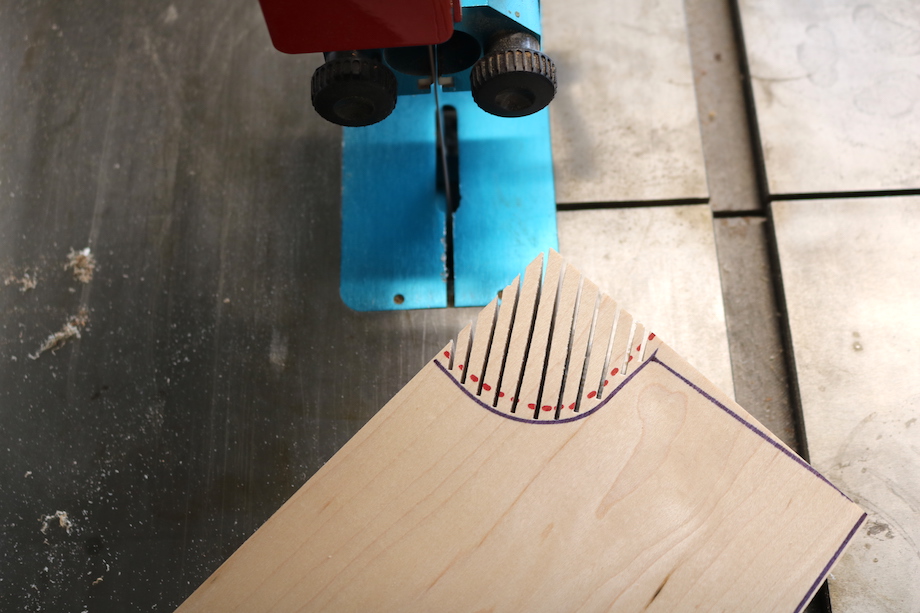
| Some folks make relief cuts—which is critical for tight radiuses. | 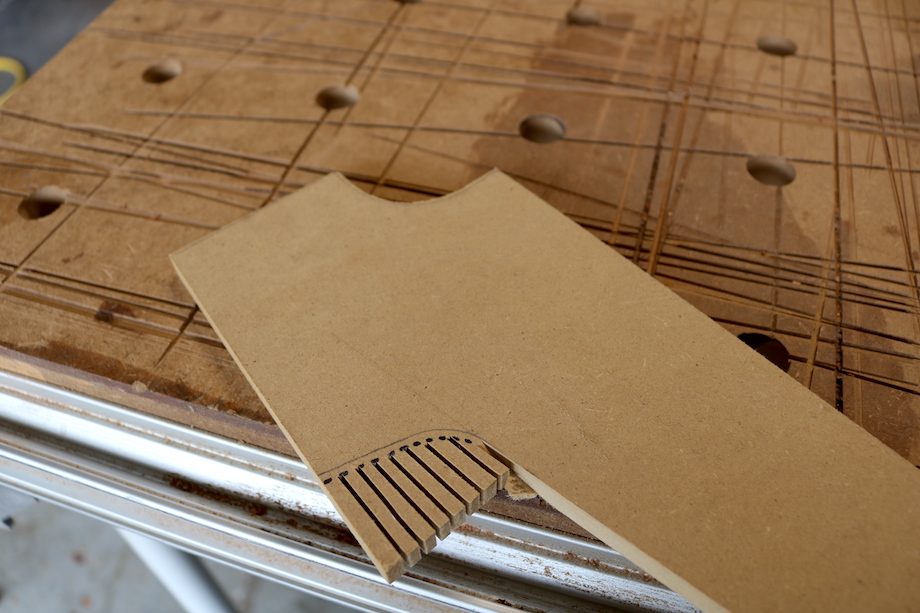 |
 |
I’ve also seen woodworkers draw a series of dashed lines so that they never get too close to the actual template line. |
| An oscillating sander makes curved work fast, fun, and precise. I take small passes, and ease up on the pencil line. | 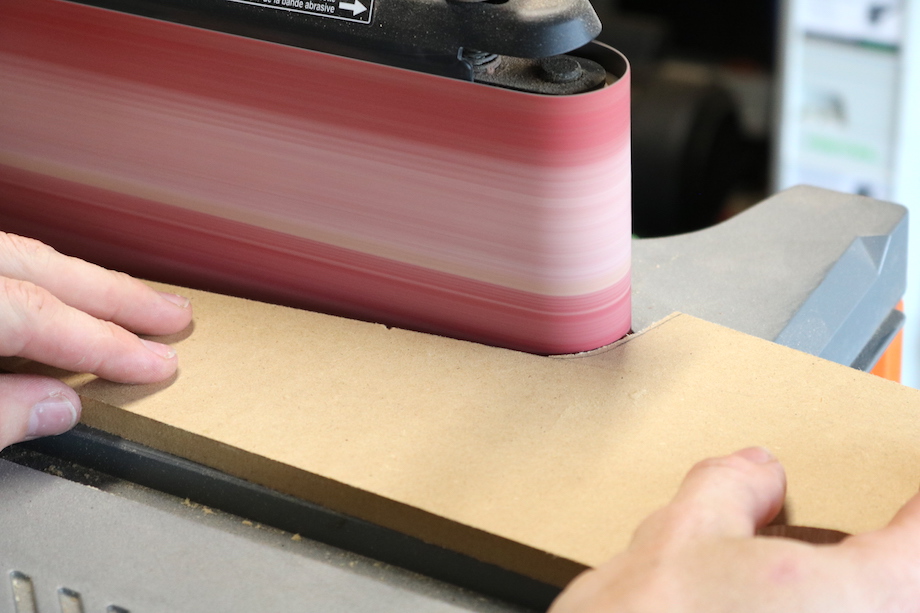 |
I like using 120-grit paper because it’s coarse enough to remove material quickly without biting in aggressively, and with a steady pace it leaves a nice smooth edge. The edges of a template must be perfect—smooth as glass, so that a small router bit bearing can ride effortlessly without any hiccups. If you’re in the market for an inexpensive oscillating sander, this Ridgid sander is a great choice and can be found at big box stores. While it’s not the most powerful, trust me, it’s effective!
I always joint my material perfectly square before shaping—that way it’s much easier to place the template precisely on a straight and crisp square edge. This straight and crisp square edge is also referred to as “true north.”
| The true north side is the flat edge of the template—the edge that’s often placed against a fence; the edge you might pull angle from with a bevel square or a protractor. | 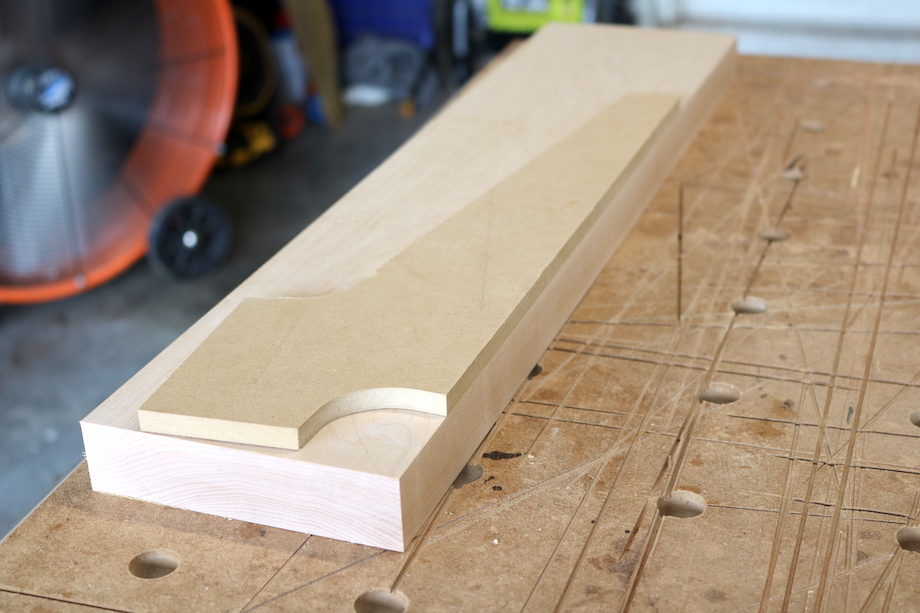 |
For this step, I hold the template securely against the workpiece and trace a line around the edge of the template with a pencil or even a marker.
| This is just a guideline so that I can remove most of the excess material with the bandsaw before applying the template and cutting the pattern with a router. | 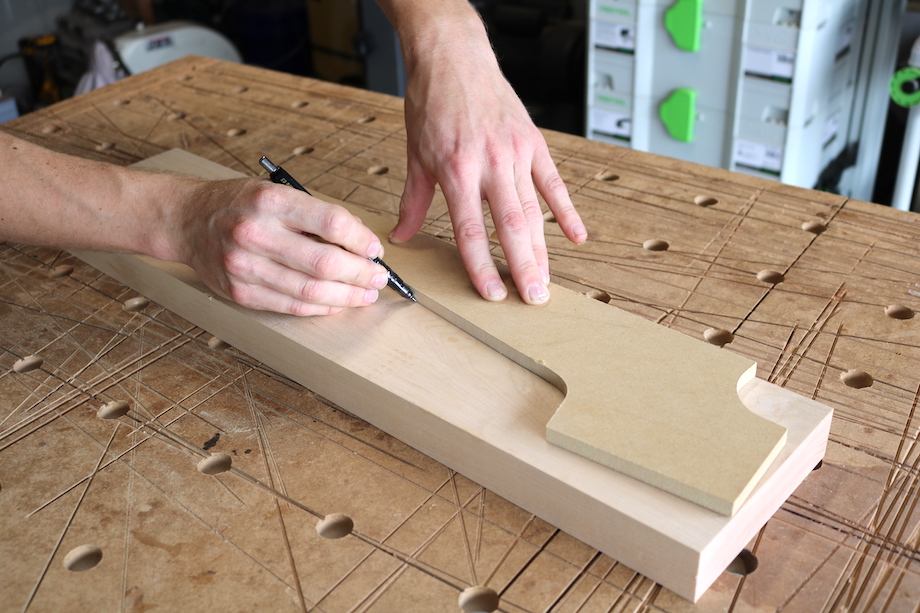 |
Like I said before, when cutting curves, sometimes it’s safer and more accurate to make relief cuts, so that the waste will fall out and make it easier to follow the cut line with a bandsaw or jigsaw; without the blade binding. Once you have made the relief cuts, start working the curve a little bit at a time. Each time a piece falls free, there’s more room for the blade to maneuver. Remember, with the bandsaw, you have to move the workpiece around the blade, so don’t dive in too deep or you may end up getting bound in the cut. Ease your way in. You can always take off more later, but once the material is gone, it’s gone!
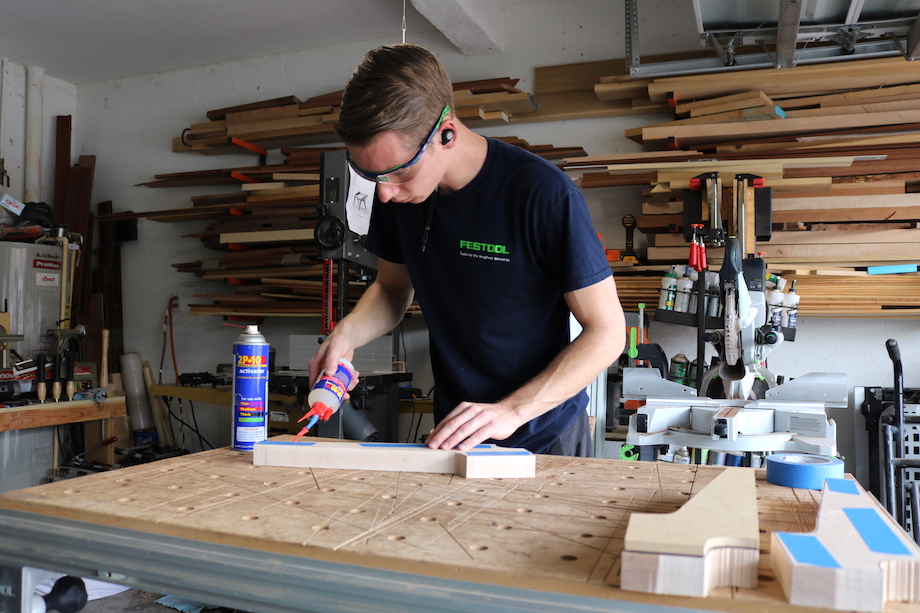
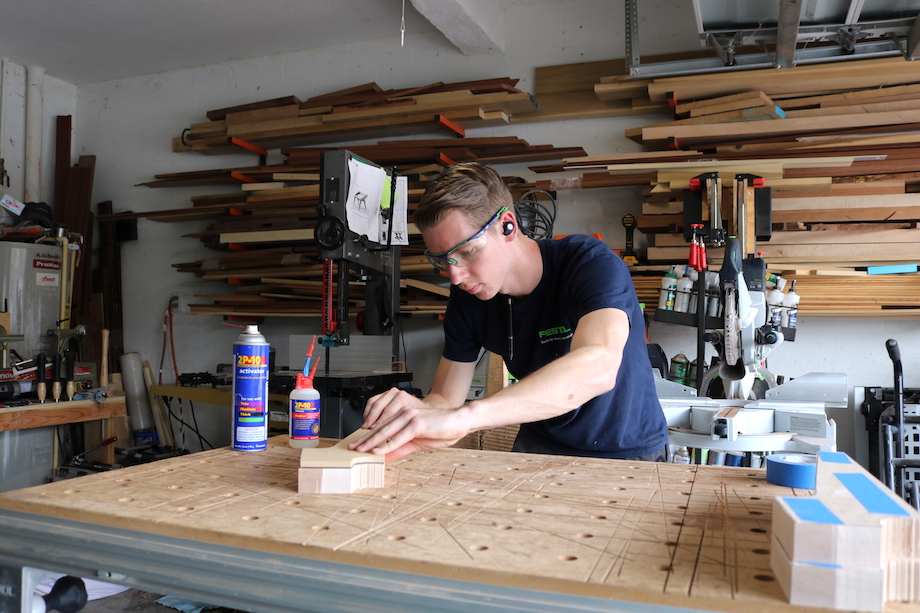
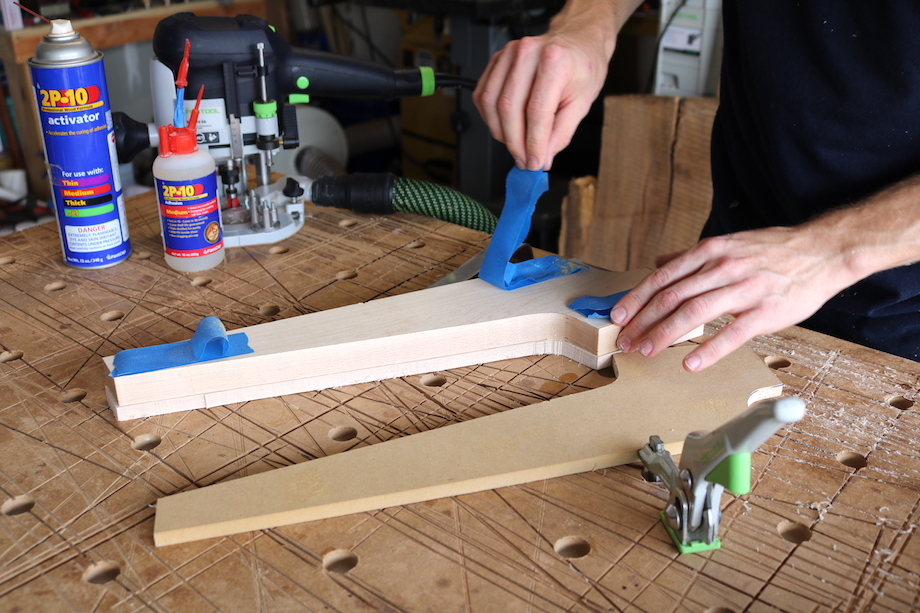
With the excess material removed it’s much easier to cut the workpiece with a router and template. You can clamp the template to the workpiece, but clamps always get in the way. And using screws, or brads, or even applying fast-acting glue directly to the work will mar the wood and require more time to repair. Here’s a great technique that’s becoming more and more popular: apply blue tape to the workpiece and template, and then use fast-acting cyanoacrylate glue (CA glue) to secure the template. You can also use double-sided tape.
To be sure the template doesn’t move, I use three strips of blue tape on the material, and three strips on the template. I apply a small drop of CA glue to each piece of tape on the workpiece.
 |
 |
I don’t find the need to use an accelerator spray, but it does speed things up. Skipping the accelerator allows me a little extra time to adjust alignment.
I start routing with a 1/4-in. top-bearing bit, which follows the template.
| When I plunge the router for this pass, you’ll notice I’m removing only half of the material stock, which is why I finish the process with a bottom-bearing bit. | 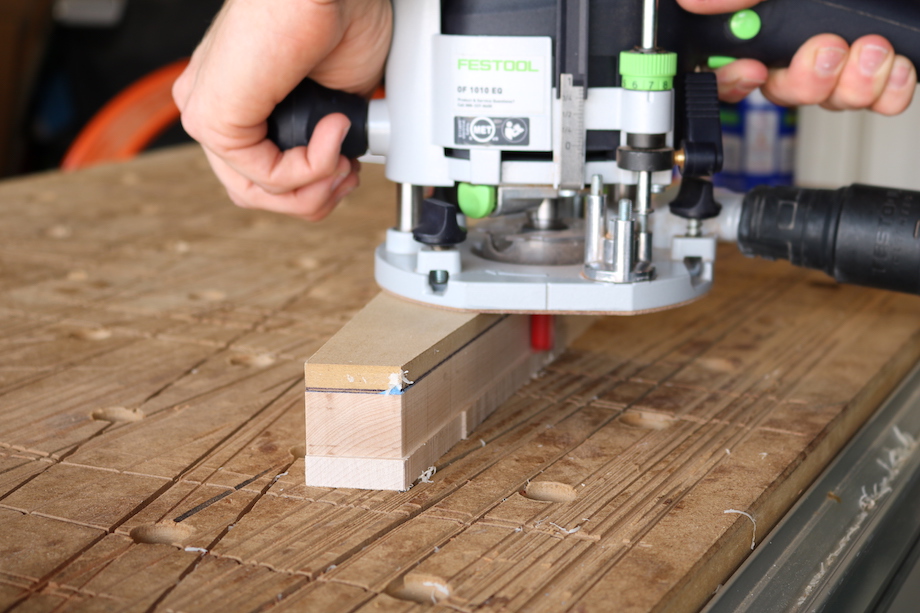 |
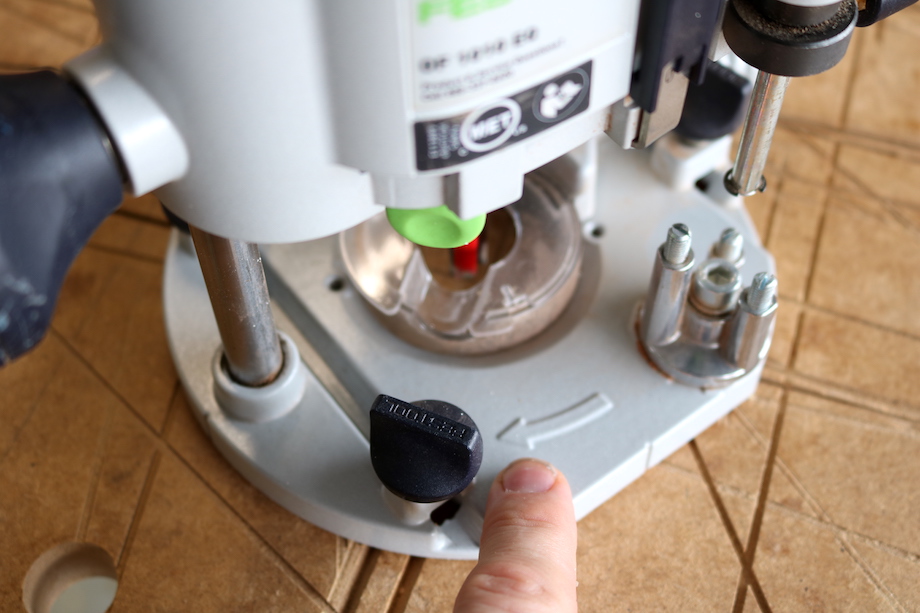 |
Regardless of which bit pattern I use, I always run the router against the rotation of the bit, which ensures more control and a smoother cut. If you’re not sure which direction your bit rotates, take a closer look for the arrow on your router. If your router doesn’t have an arrow on the base, draw one with a Sharpie! |
| With one side of the workpiece finished, I carefully pry off the template with a sharp, thin, flat bar. | 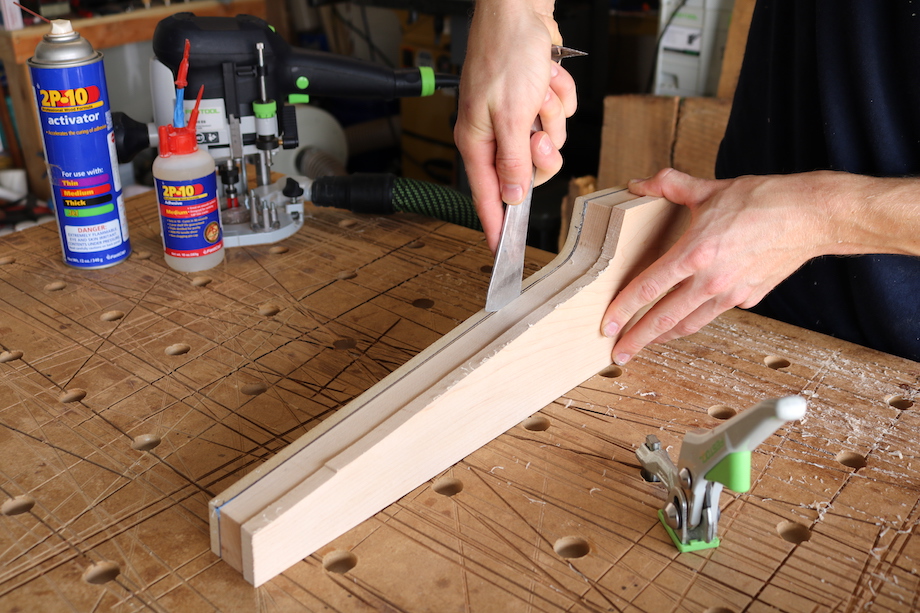 |
A 5-in-1 painters tool works, too. Anything that won’t mar the workpiece or damage the template. The glue and blue tape actually break free fairly easily, and the best part is, there’s no residual glue.
After I’ve run the top-bearing bit on all the legs, I switch to the bottom-bearing pattern bit—really just a flush-cutting bit. Of course, if you have two routers you can complete each leg at one time. The bottom bearing rides on the smooth edge cut previously by the top-bearing bit.
In the photograph above, it may appear like the template is still attached to the workpiece, but that’s just the raw edge that hasn’t yet been cut by the bottom-bearing bit.
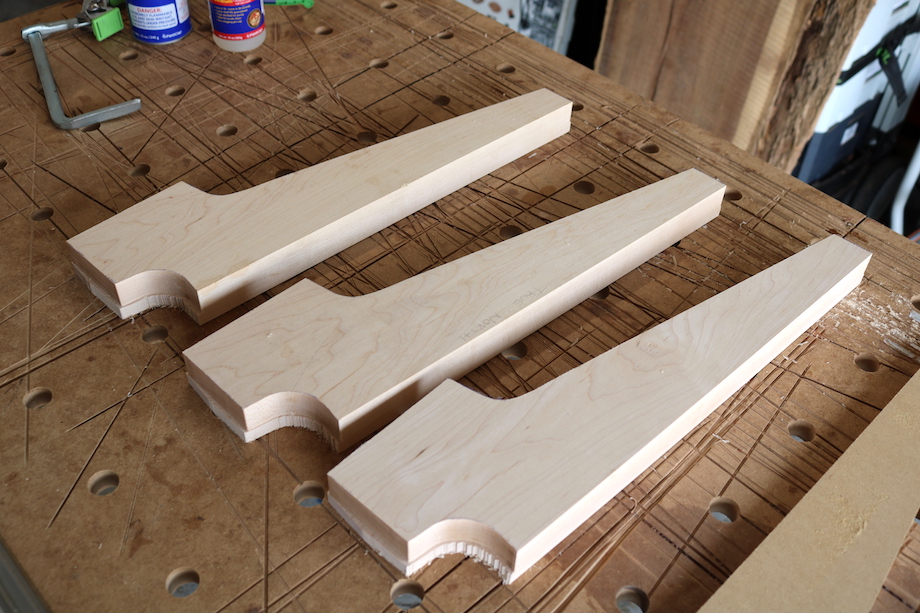
The end result is three legs that are all identical in every way—as if they were cut by a CNC machine, and all by using just ONE simple template and two router bits!
Of course, more tools are always better. If you have a larger router or a router table, you can use larger bits to remove the stock. But I know lots of woodworkers, like myself, with limited space and limited budgets, which makes this technique accessible to everyone.
If you enjoyed this short article, please let me know! It’s my FIRST published article. Any questions, don’t hesitate to ask in the comments section!
•••
AUTHOR BIO
Twenty-four year old Tommie Mullaney is a finish carpenter and custom furniture creator. Despite having only five years of experience in the finish carpentry field, and one year in custom furniture building, his passion and love for woodworking runs deep. The moment he started cutting wood on the miter saw, and nailing trim, he recognized a world had opened up for him, and it is a world he belonged in.

Faced with many challenges along the way, Tommie took them head on, relying on YouTube and easy access to a broad range of nationally recognized tradespeople and craftspeople. Four years into trim carpentry, he spotted a beautiful side table called “The Borg,” created by custom furniture builder, Jory Brigham, and decided to try his hand at replicating the table.

That project taught him an invaluable lesson: he was capable of almost anything he put his mind to.
Late nights, weekends, holidays—his tiny little garage shop began to feel like home. Work grew more serious, and so did the tools: investing profits in new machinery, upgrading old tools, and feeding a Festool habit.

Tommie learned early on that quality tools could help achieve quality work.
After creating Mullaney Woodworks in July of 2018, Tommie became more recognized in the woodworking community on social media. Now he enjoys showing his work and sharing his woodworking process. It’s not about having 100k followers. It’s about quality, not quantity, and quality means enjoying every moment.
While it might seem out of place for a twenty-four year-old to talk about “giving back,” after reading TiC for years, Tommie wanted to reach out and encourage other young craftspeople—NOT to “follow your passion” but to pursue opportunity, to develop a passion for the craft. If you want something bad enough, you’ll do whatever it takes to get there.

Skills are the essential, but passion is priceless.
As Mike Rowe says, “Just because you’re passionate about something, doesn’t mean you won’t suck at it.”
If you want to learn more about the difference between “following your passion” and hard work, check out Mike Rowe’s video.
If you want to reach out to Tommie Mullaney, you can find him on Instagram @MullaneyWoodworks, unless he’s on the ice or walking his dog, Bentley.
All great ideas Tommie and best of luck to you !
Thanks David! Really appreciate the support! Can’t wait to see what I can conquer.
Well done.
Clear, concise and written with an understanding of the strengths and weaknesses of the tools you use.
And I agree completely with the recommendation of the Rigid sander, having looked everywhere for a small industrial model, I settled for the Home Depot brand and have put many hours on it without problems.
Thank you for your kind words! I believe it’s essential to find the strengths and weaknesses for each tool, but in a way that you can make everything strong when put together. Many of us have the Ridgid sander simply because there doesn’t seem to be many offered at the big box stores, however, you can make do with these tools with a bit of patience. At the end of the day, even if a little slow or underpowered, you can still achieve fantastic results! Thanks for reading!!!!
Great article Tommie,
Keep up the good work and attitude. You’ll never go wrong with the quality over quantity view. It’s nice to see someone from your generation with such a passion for craftsmanship as it seems to be disappearing quickly.
Thanks Jeff! It is a shame to see it disappearing and technology isn’t helping but I plan to visit some schools in my future and hope to one day have a weekend school at my shop to try and show others the pure enjoyment!
Great article Tommie. I’m much like you with the Festool addiction and small shop space. I haven’t ventured too far into working with solid woods. I just haven’t jumped in with the jointer/planer/bandsaw and dust collector. Space restraints have kept them away. Festool wise I have just about everything. I’m building plantation shutters now and buying material pre milled and the cupping and bowing is making me really want to figure out how to get my own milling set up even if I have to take it outside. I’ll follow you on IG since your tool usage is pretty relevant to me and I’m not much older than you. My handle is @matts.garage
Thanks matt! The festool stuff is fantastic as you know, especially with the dust collection. You know being organized has been the key to the small shop, and there has been plenty of times I’ve had to wheel out a tool onto the driveway, but it’s oh so worth it!!! Being able to mill my own material is not only a great experience with figuring out how wood grows, but saves me money over time since I don’t have to buy s2s or s4s material. I’m tempted to learn plantation shutters myself now I’ve recently moved into a new shop (2 car garage with full power) and have some windows to cover. Ill look out on Instagram for you and make sure to give a follow back. Thanks for reading and taking the time to comment!
When you were sanding the curves in the legs, you appeared to use a belt sander. They don’t oscillate. Am I confused? Otherwise great presentation. Also I’m quite jealous of your tool collection.
Hey Nicholas, I was in fact using the Ridgid oscillating edge/belt spindle sander which is just like a belt sander but fixed onto the bench top and the belt oscillates in an up and down motion while the belt is rotating. I find this method to be the fastest while still achieving a nice smooth curve for the router bearing to follow. Thanks for reading and thank you for the compliment, it has taken 5 years to get here so far, but I find it’s best to buy your last tool first and festool really sets the standard!
Great Job Tommie,
It is very refreshing to see a young man like yourself doing such great work and enjoying every minute of it with a true passion for the craft. It’s guys like you that inspire many others to honor their craft. Keep up the great work and passion.
Thanks for the kind words Raymond! It is extremely enjoyable and relaxing at times to be out there creating stuff and very rewarding. I hope I can inspire others of all ages to get out there and build something no matter what tools or experience you have, we can all have fun doing it. I hope to eventually visit some schools and do a program to get younger people interested and show them that you can earn a good wage while having fun. It’s sometimes hard to call it work! Haha. Thanks for commenting!
Very nice article! I admire your techniques, and I’m very glad to see you and other talented younger men and women move into the trades! Makes a geezer like me feel that the craft is in good hands.
Thanks Thom! This has been a very valuable technique for me and i hope to get a good router table eventually to make it a little easier. But the good side to not always having access to every tool, is that it pushes you to be creative and not rely on one technique only. Cheers!
I never thought of “super gluing” tape together for the pattern. Nice trick. Have you ever thought about laying a sheet of styrofoam on top of the table to keep from tearing it up?
Hey Kenneth, yes the superglue tape trick comes in quite handy for many applications and is very cost effective! The table i am cutting on is a Festool MFT table with an mdf top which is meant to be used as a sacrificial cutting material, just don’t go deeper than say 1/8″. The table also has quick clamps so i like to have my material completely on the work surface vs having it on the foam. I have however used the purple foam insulation boards on job sites as i can lay down one 4×8 sheet of foam and cut plywood, or buy the smaller 2×2 sheets for better portability and storage and they work like a charm. sure beats carrying a table or 2 onto the job site just to cut down one sheet of plywood! thanks for the comment!
I really like the cuts made by the botton-rearing bit. I need to get a bandsaw for a home project. I’ll have to consider getting a circular saw as well.
Thank you! Yes those bearing bits sure do come in handy for many different tasks! The tracksaw continues to be a favorite tool of mine and an important one, wether I’m building furniture or cutting down a door slab for a trim out.