


Murphy Beds are incredibly popular, probably because they help us use space more efficiently, and today, with living space at a premium, that’s critical. It sure was for me. I wanted to use the guest cabin I built down by the river as a yoga studio—after all, guests aren’t that common, but yoga is.

(Note: Click any image to enlarge)
And with that queen-size bed in the way, there just wasn’t enough floor space!
There are a variety of different companies that offer Murphy bed plans, kits, and complete units, some with remote control! I opted for a simple solution and bought a kit from Rockler that’s manufactured by Create-A-Bed.
This was the very first time I had ever purchased a kit and built something from a set of plans; trust me, I was concerned. After all the foreign installation instructions I’ve read over the years, I didn’t have a lot of confidence that the plans would be adequate. But I was dead wrong. The kit and the plans were easy to follow—they even included a material cut list, and the measurements were spot on, within 1/32 in.
The plans came with templates and a plywood cutlist that helped get the most from the sheets of VG Douglas fir I used. Between my table saw and track saw, I had the plywood cut and started laying out the hardware.
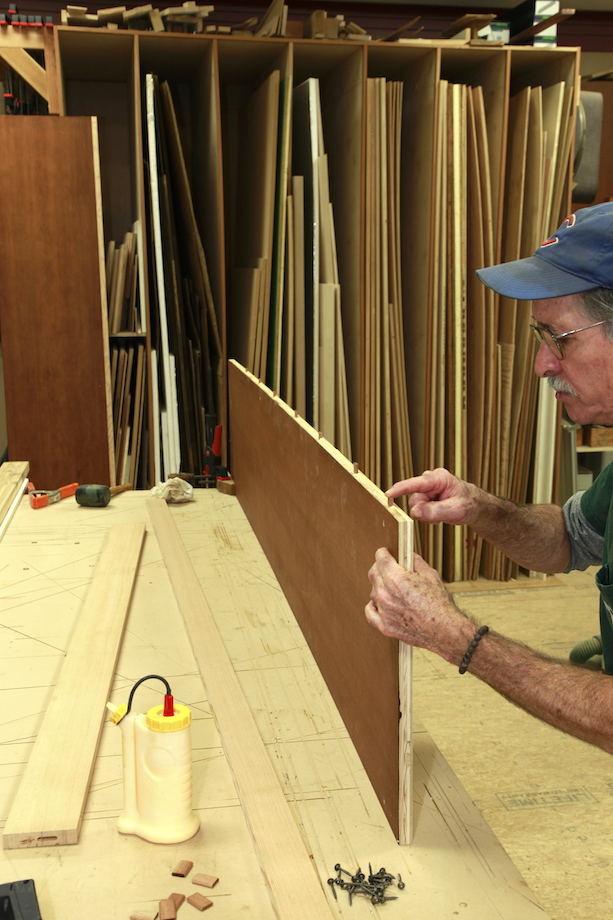
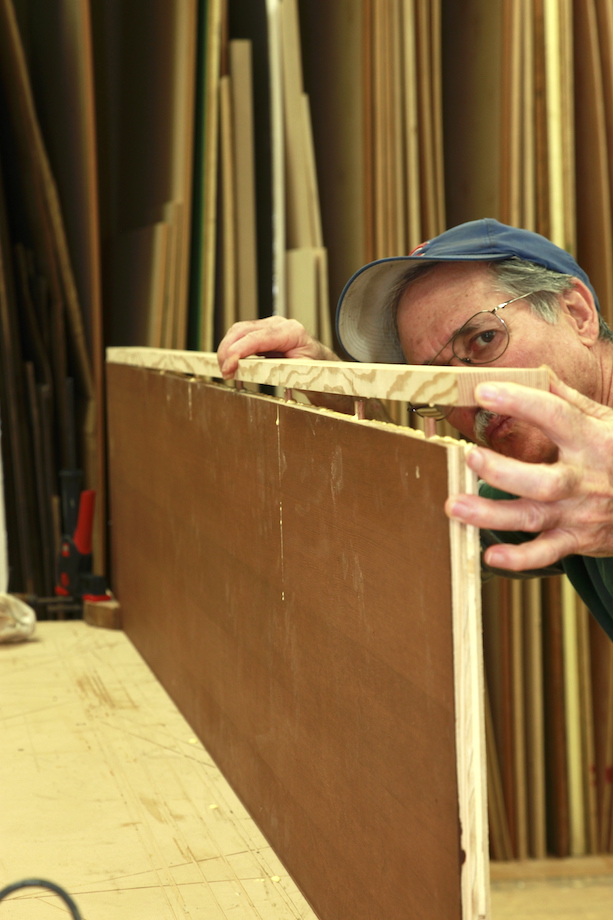
The first step was cutting out all the pieces. The bedframe sides had to be cut from plywood, so that they’d be strong enough to support the pivot hinges and the gas struts, without splitting. And those sides had to be cut with radiuses at the bottom, so they could pivot inside the cabinet, which meant…edgebanding.
Once I had the bed frame sides banded, I started laying out and preparing for the hardware.
| The plans were extremely precise. I followed them carefully. | 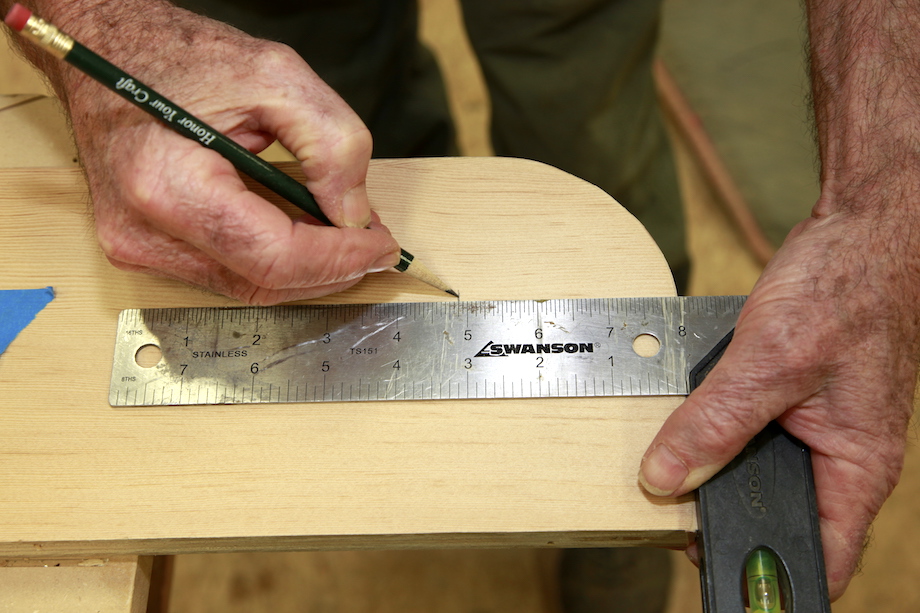 |
| And I labeled every center mark. | 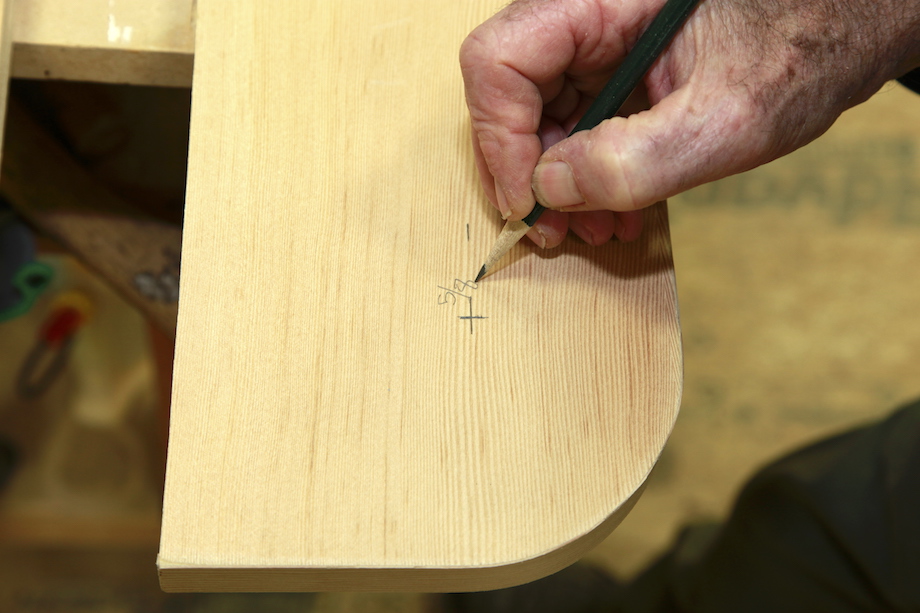 |
| Some of the holes had to be cut straight through. | 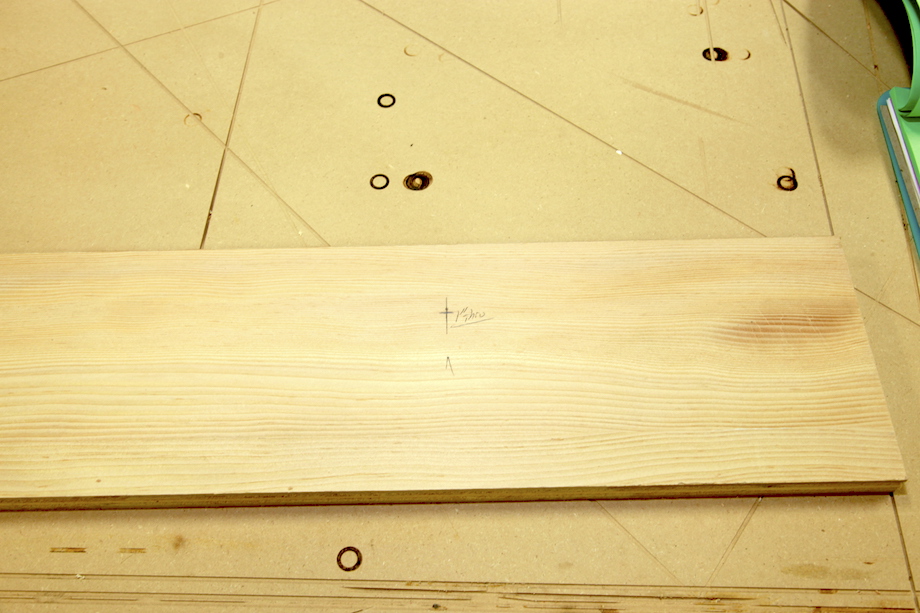 |
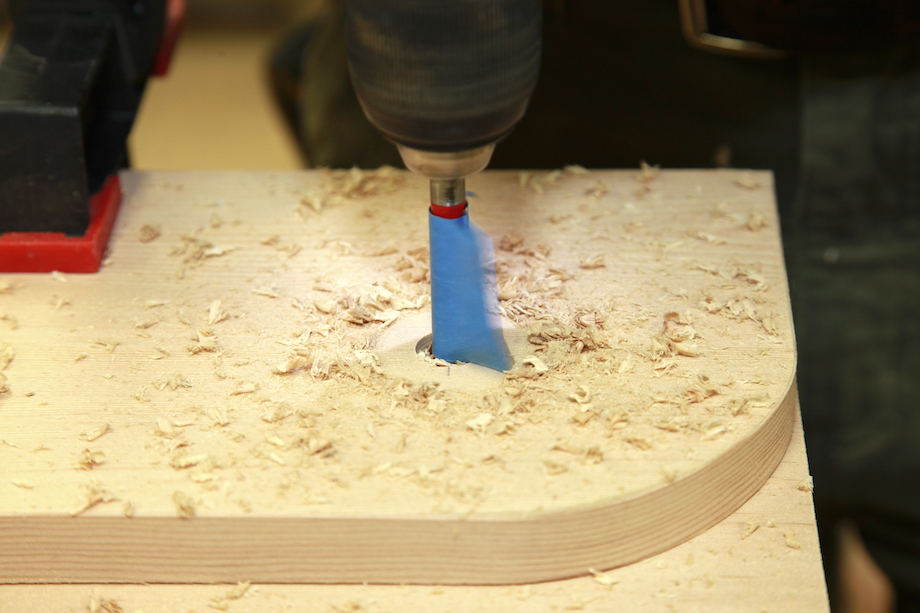 |
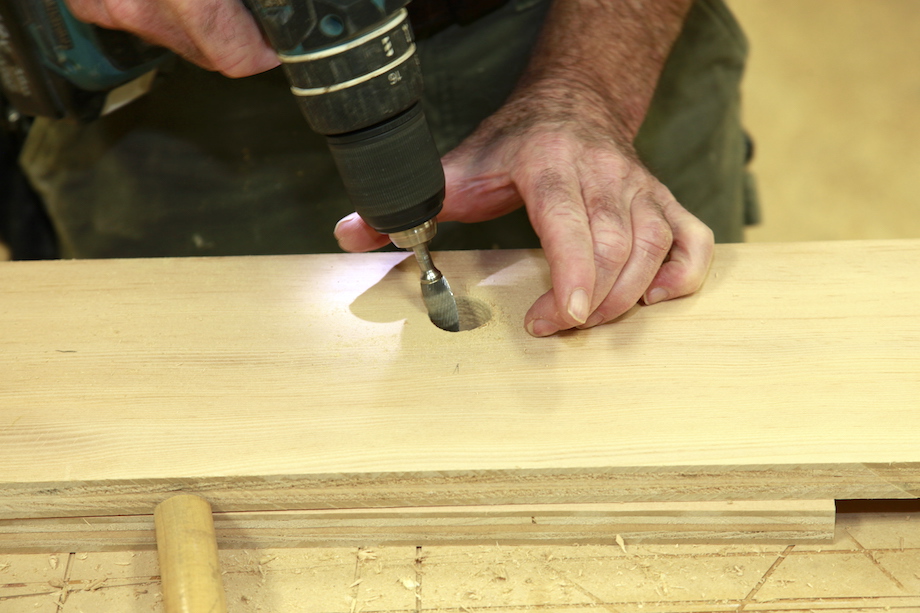
Some of the holes had to be drilled to a specific depth. |
| Using an awl ensured that my bit entered the wood exactly at the marked center point. | 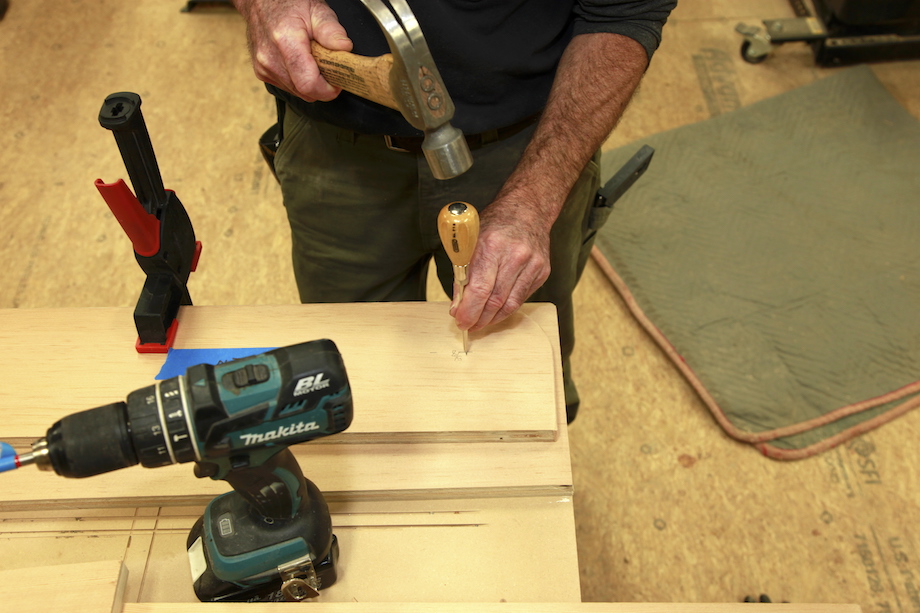 |
 |
Following the instructions, I chamfered the top edge of the hardware mounting holes just slightly, to allow for the welds. |
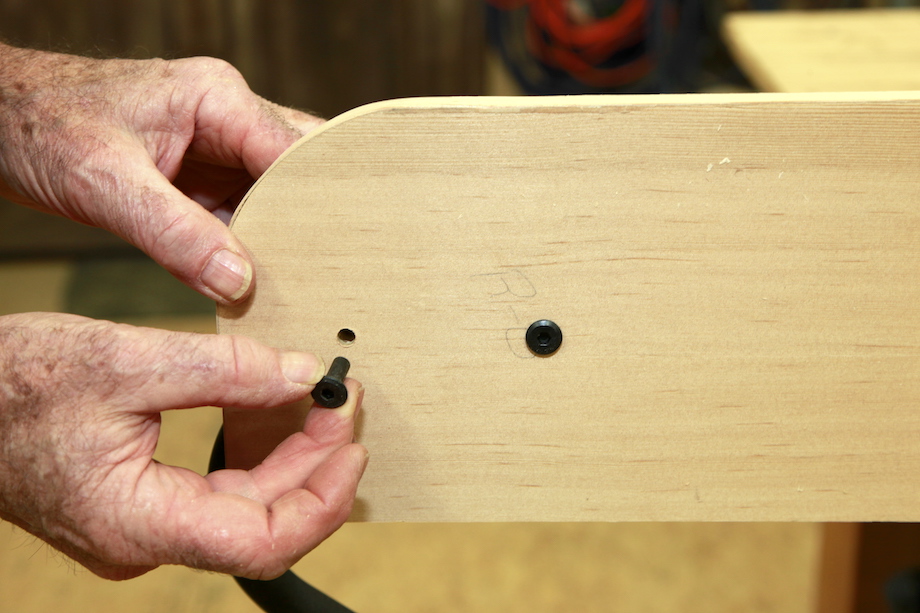
| A tri-square helped align the hardware plates. Wood screws were used for half the mounting hardware, which I predrilled with a Vix bit. | 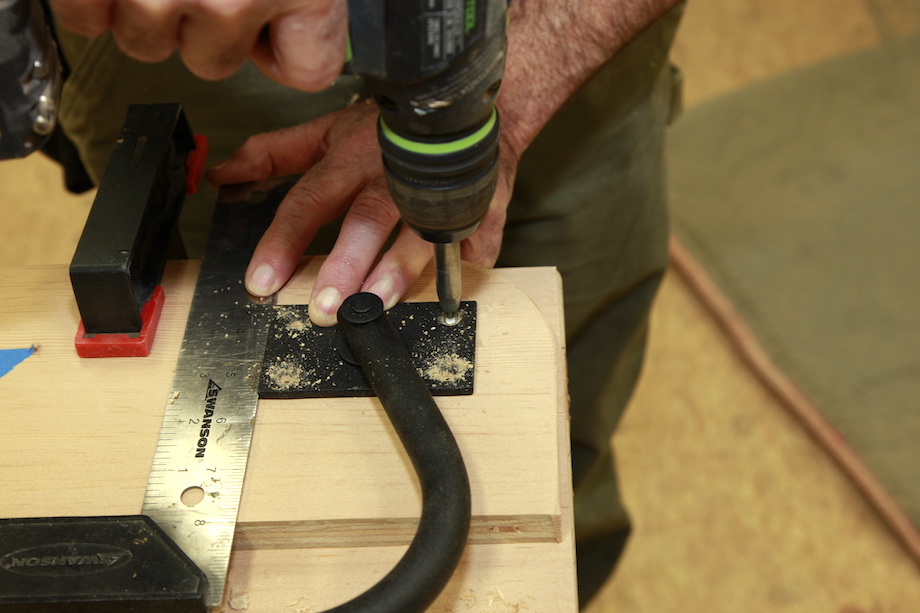 |
I drilled through-holes for the sex-bolts that made up the other half of the fastening system.
 |
 |
|
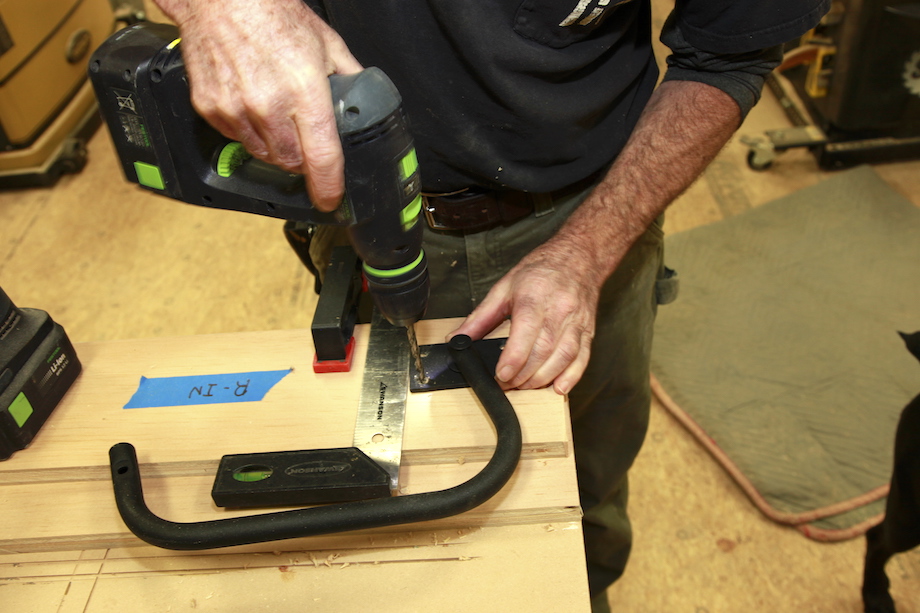
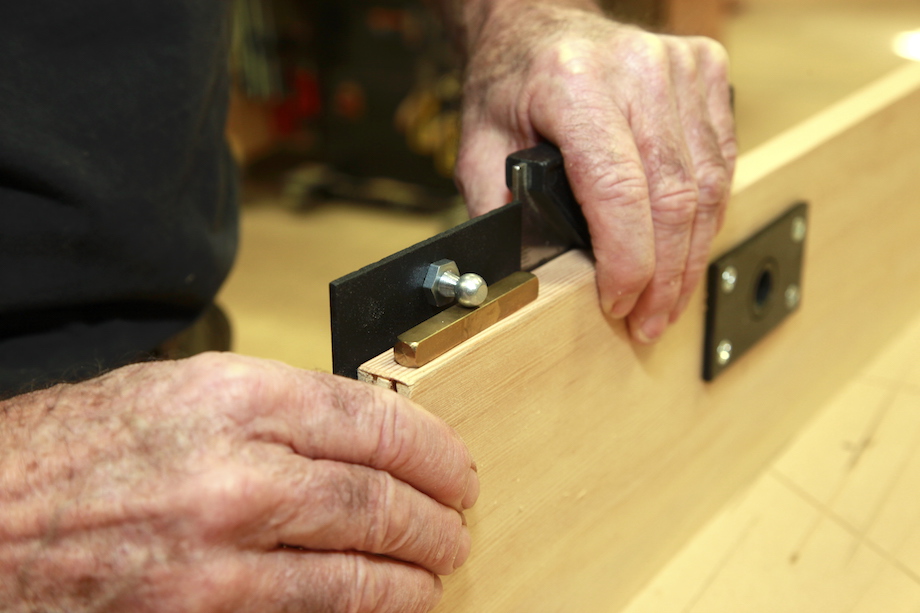
I positioned the gas strut plates exactly as the instructions directed, using a brass spacer to carefully locate the mounting plates. |
 |
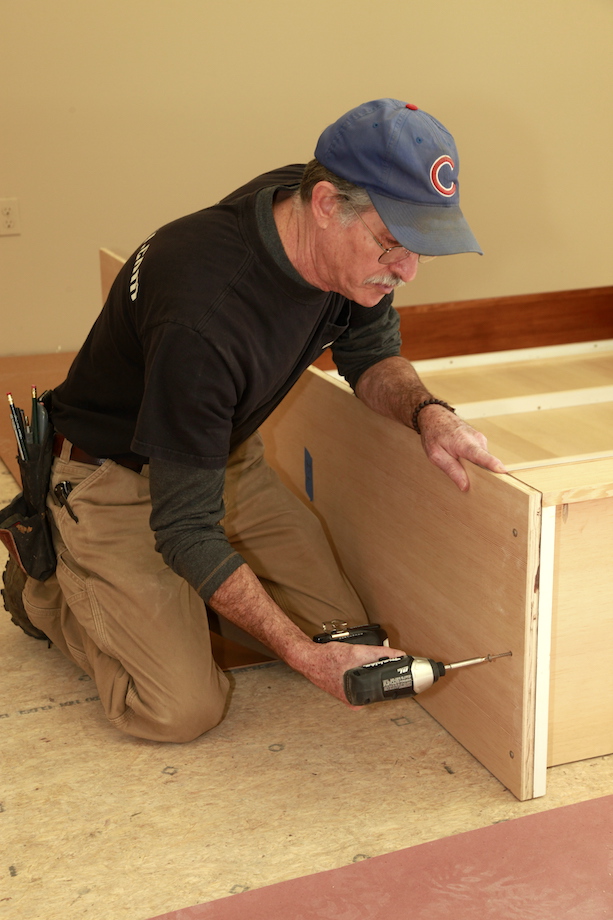
| With the hardware mounted to the two side panels, I was ready to assemble the entire frame, including the backing for the front panel; the underside—forming a slim torsion box—supports the bed. | 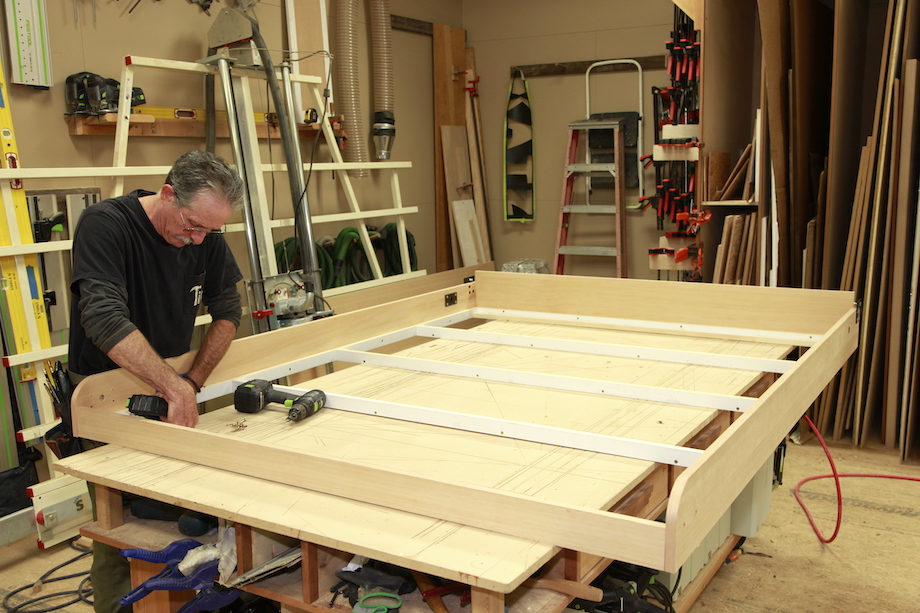 |
| Terrified that I’d make a mistake, I pre-assembled everything to be sure I hadn’t missed any critical detail—I hadn’t—before I pre-finished the sides. Then I re-mounted the hardware, and assembled the bedframe permanently. |  |
 |
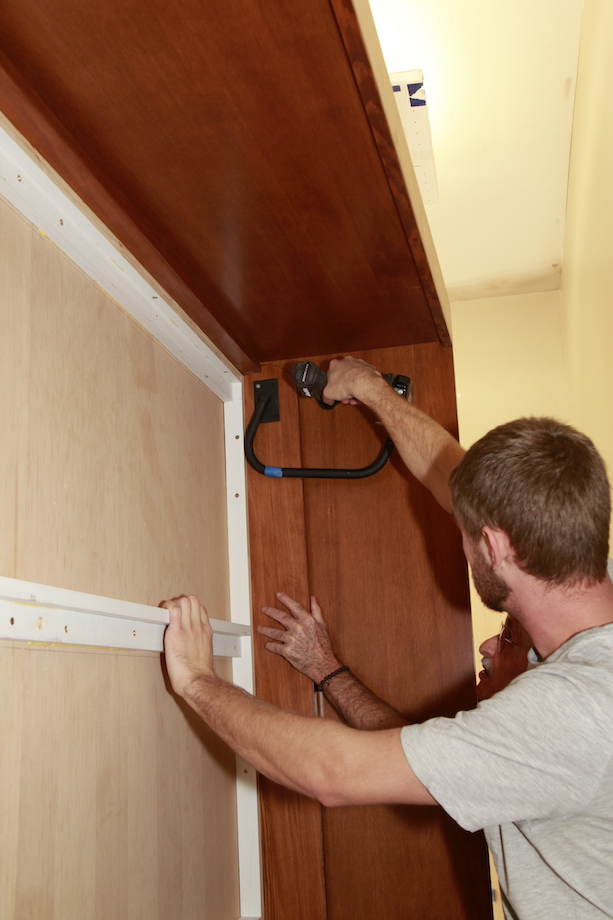
The instructions were very clear on installation, too… |
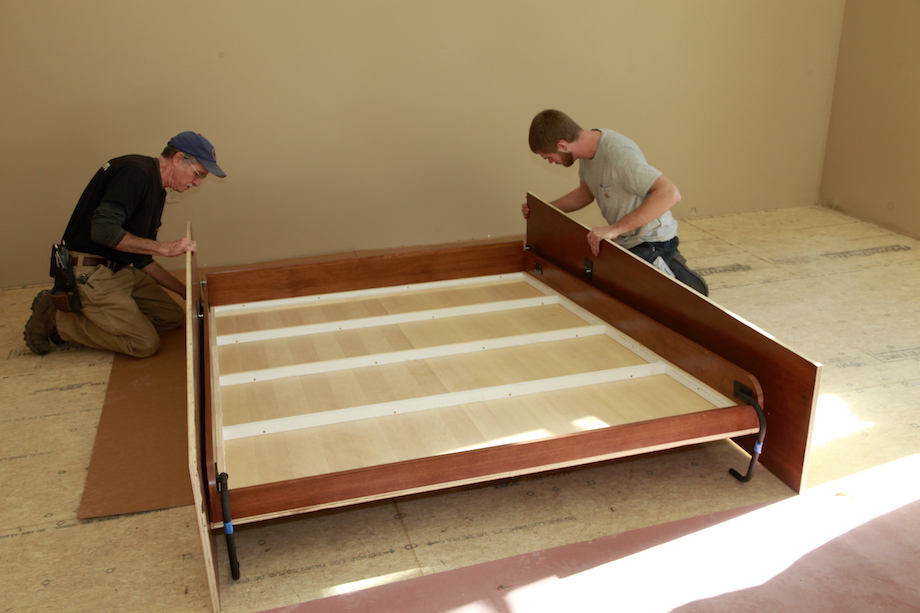
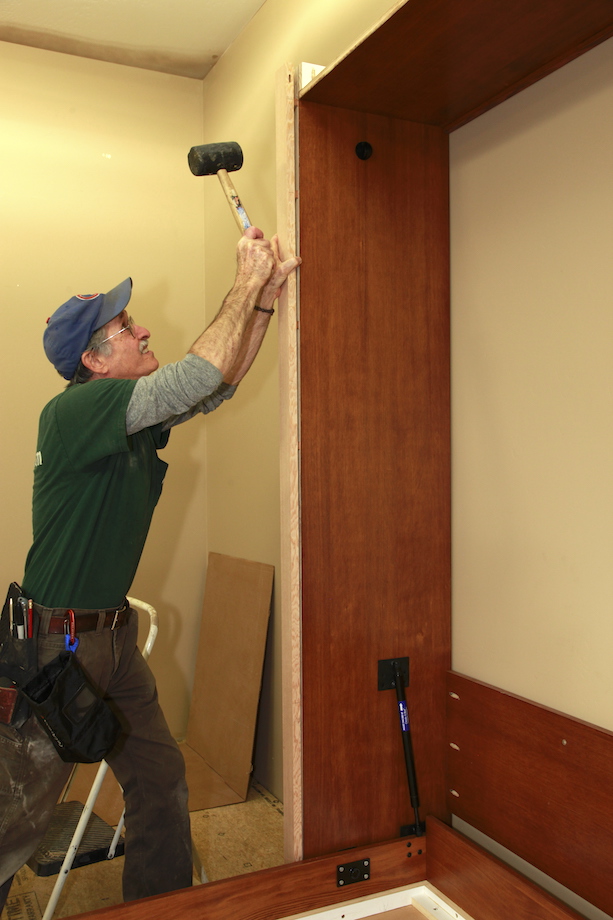
| We slipped the cabinet sides on over the pivot hinges… | 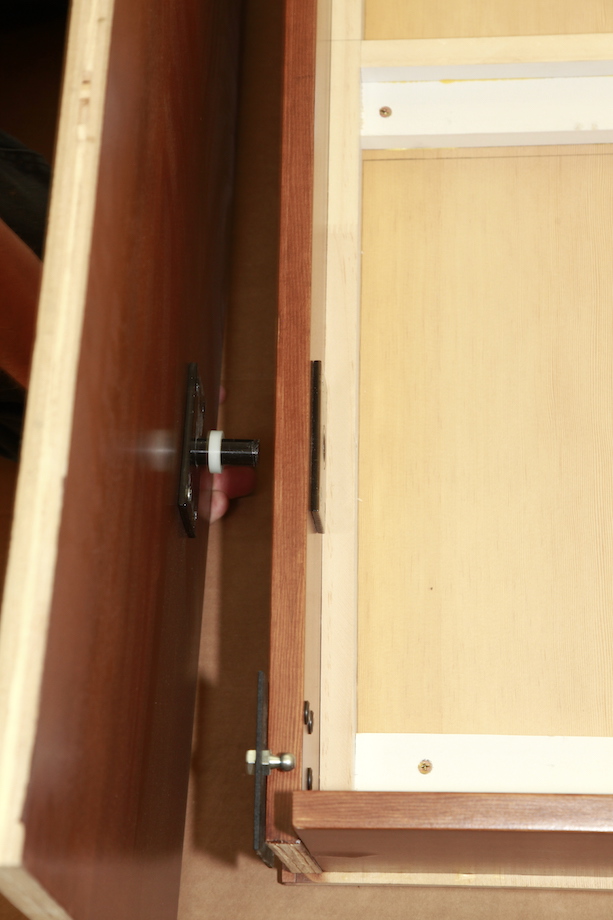 |
 |
Then fastened the top and bottom of the case. |
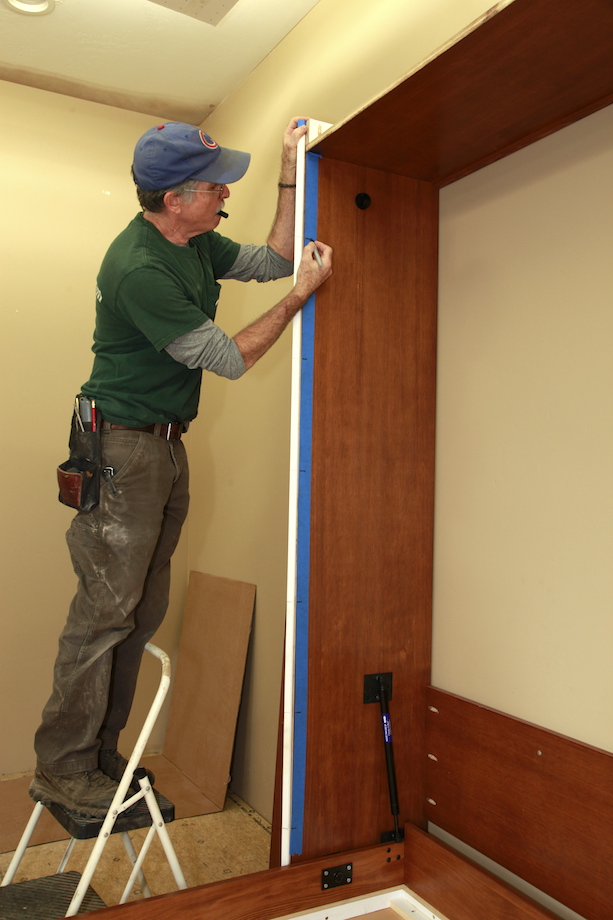
| I set the bed up temporarily in my shop, fastening the cabinet frame to the wall, and then pivoted the bed frame up into the cabinet. I designed the cabinet sides with both an inner and outer panel, which is why the outside of the inner panel wasn’t pre-finished. | 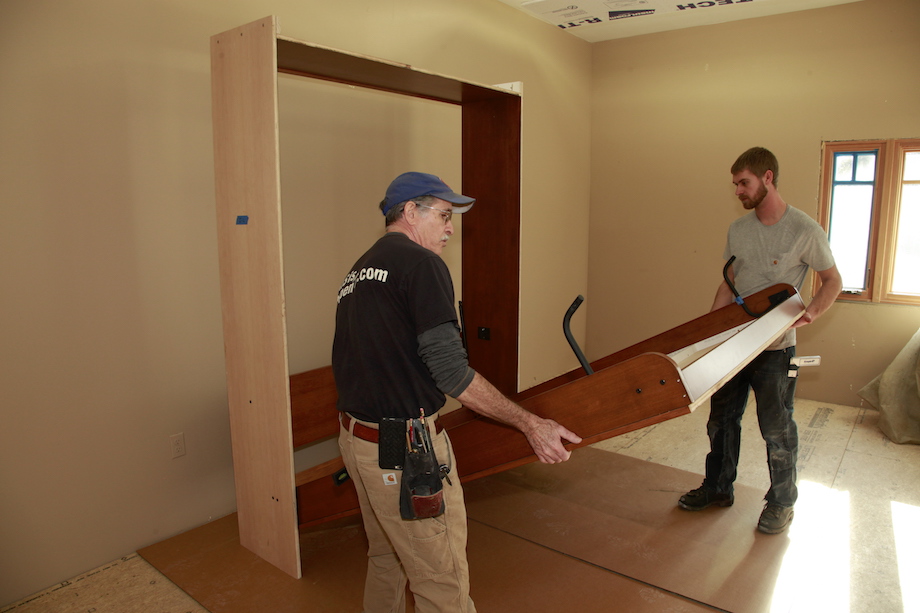 |
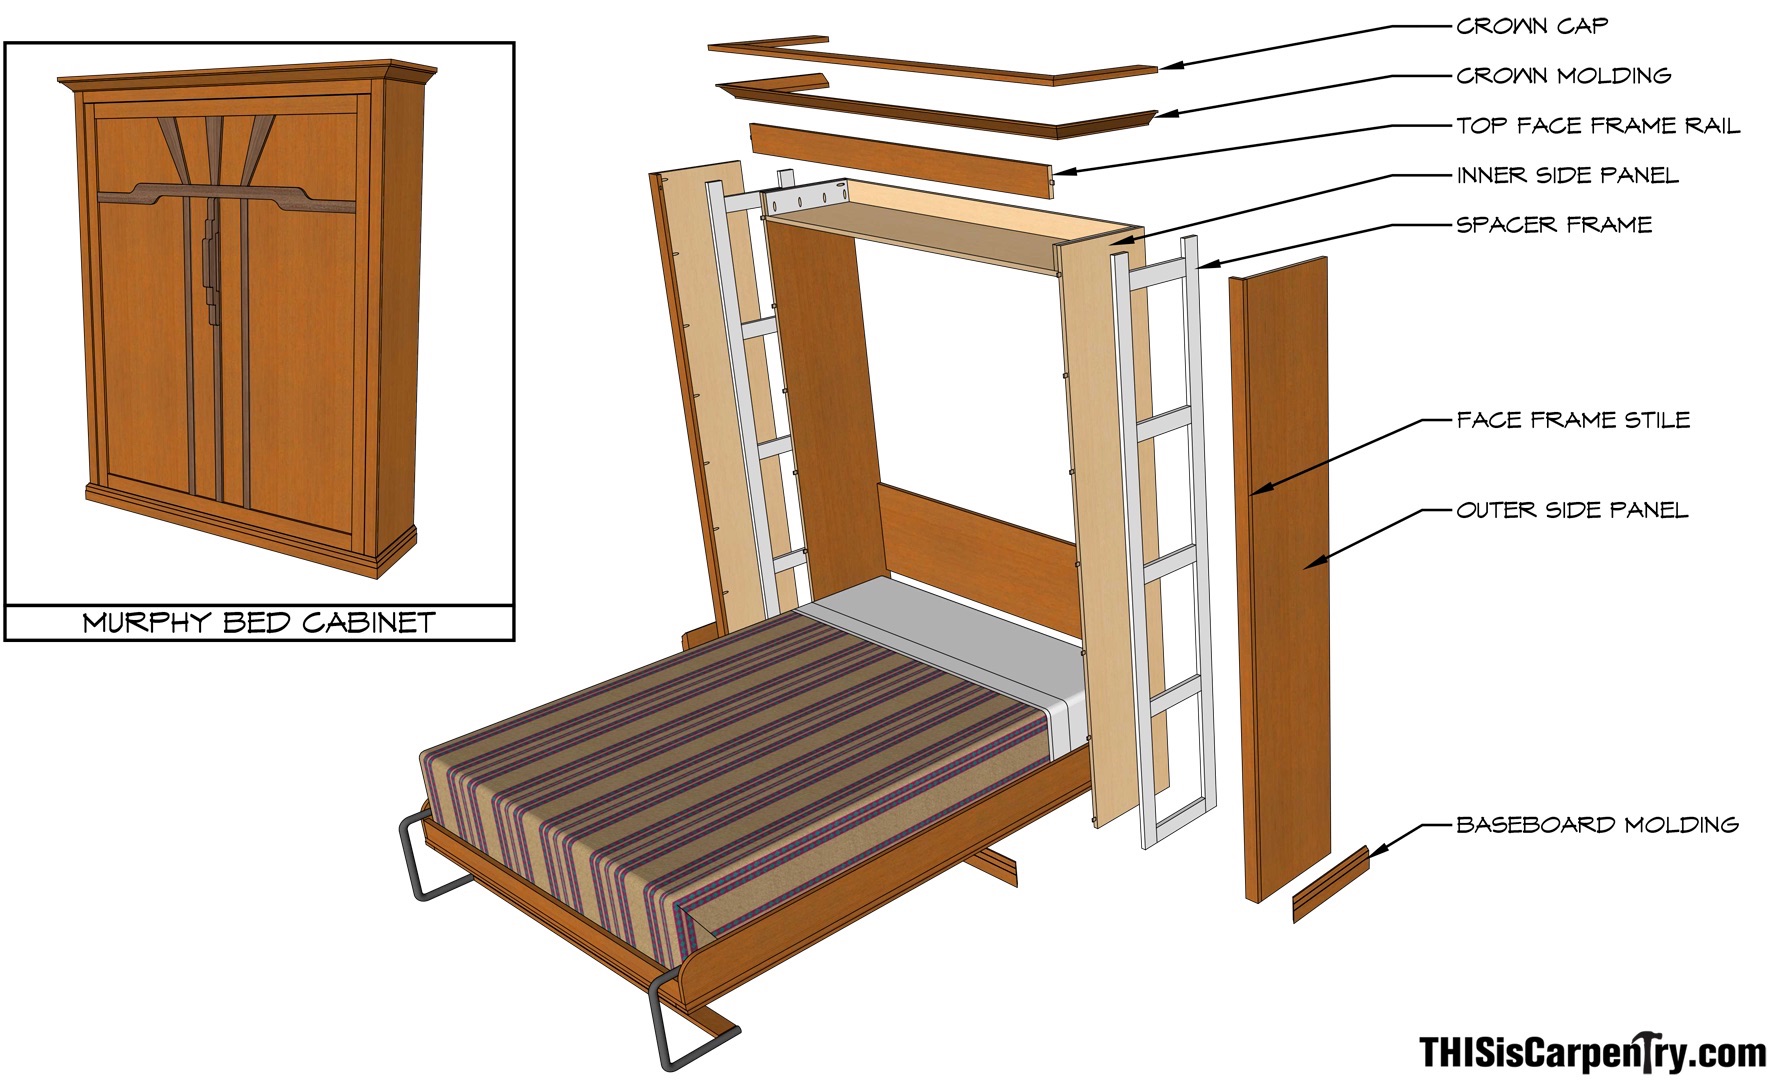
Doubling up the side panels allowed me to increase the width of the stiles, while keeping them flush to both the inside and outside of the cabinet sides.
The last bit of hardware—the bed-frame stops—must be installed with the cabinet away from the wall. We mounted the stops exactly according to the instructions. I was surprised that the face of the bed frame panel was perfectly flush with the cabinet sides. The rest of the job was woodwork. I set dominoes in the outer side panels…
 |
 |
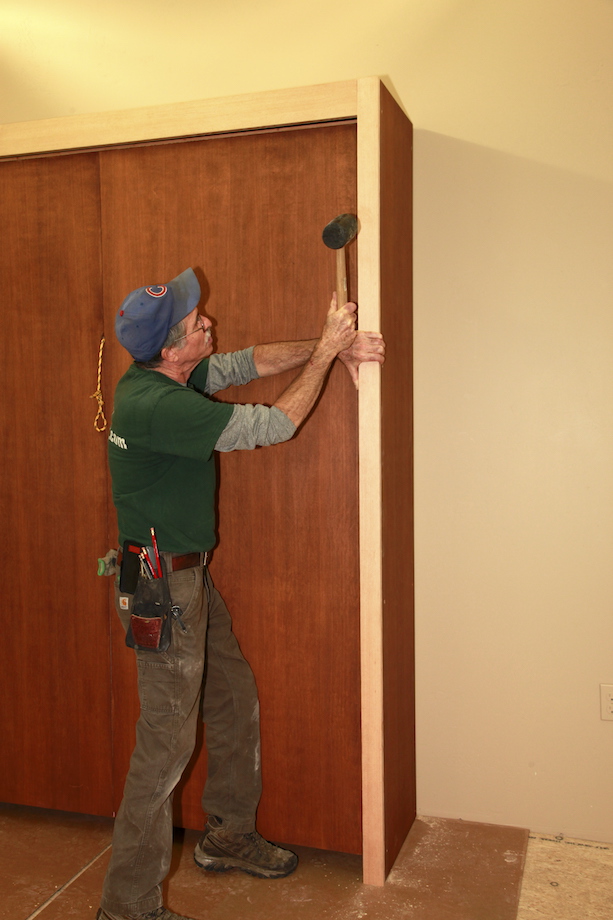
…which helped align the face frame stiles flush with the outside of each external panel. Pocket screws secured each stile. Look closely and you’ll also notice pocket screws in the temporary backer securing the cabinet to the wall, too! One day, hopefully soon, I plan to remove that panel and replace it with a full-size panel, maybe with a cloud lift pattern. But that’s another project.
 |
 |
| I used a story pole to align the dominoes for the stiles on the inner sides and cut those mortises in place. | 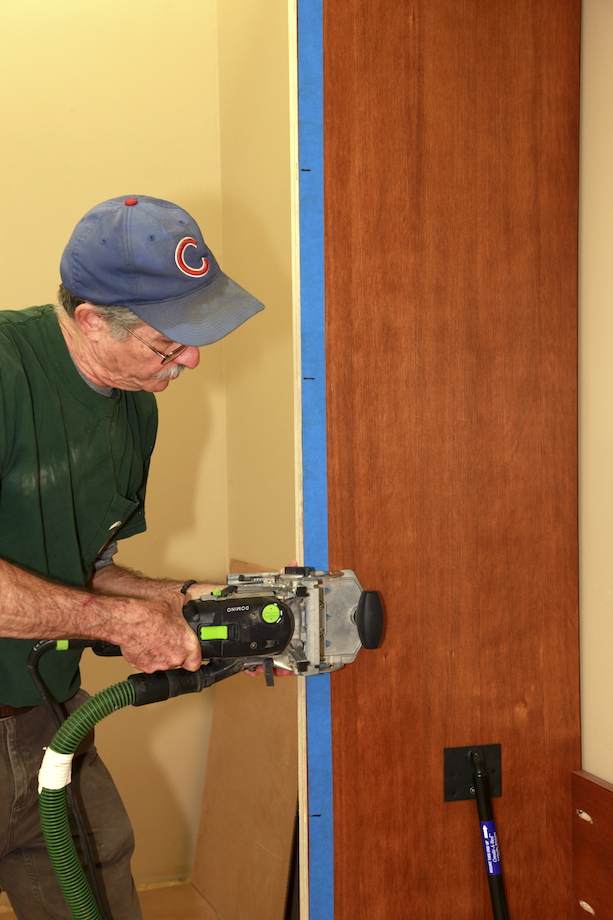 |
 |
The finished side stiles slipped over the dominoes in the inner sides, creating a rigid panel, with stiles flush on both faces. |
| On the opposite side, I assembled the top rail and the finished side simultaneously, locking the faceframe together. | 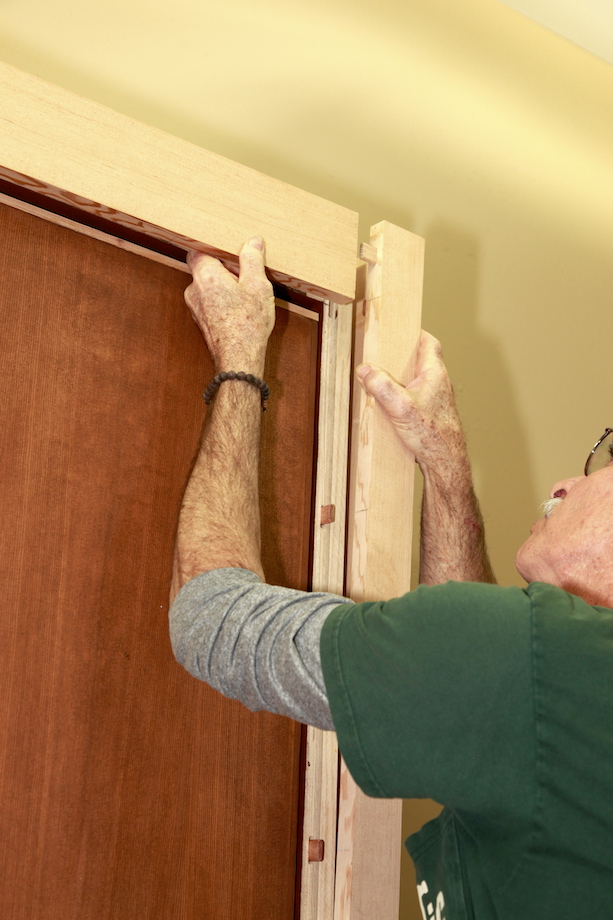 |
 |
Then I nudged the faceframe in place, over the dominoes. |
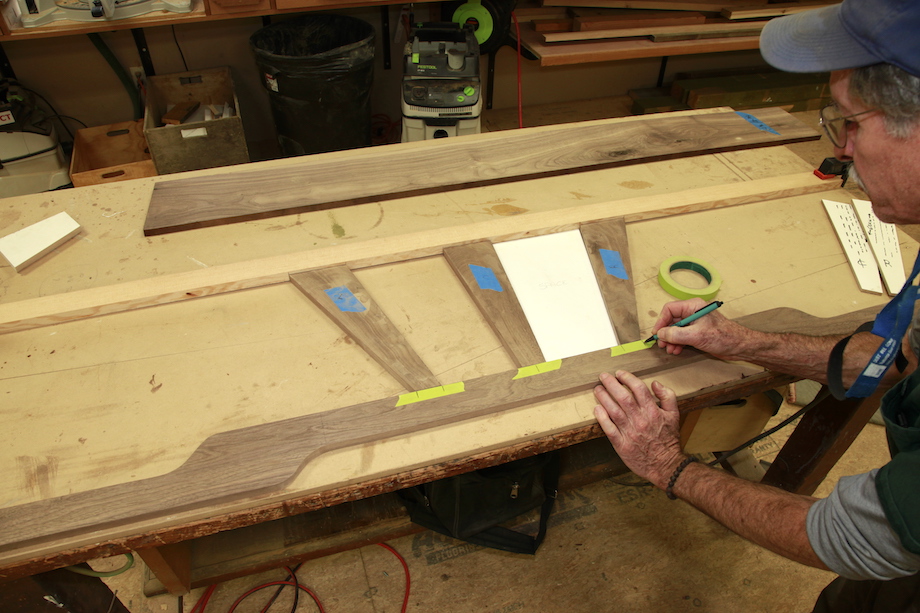
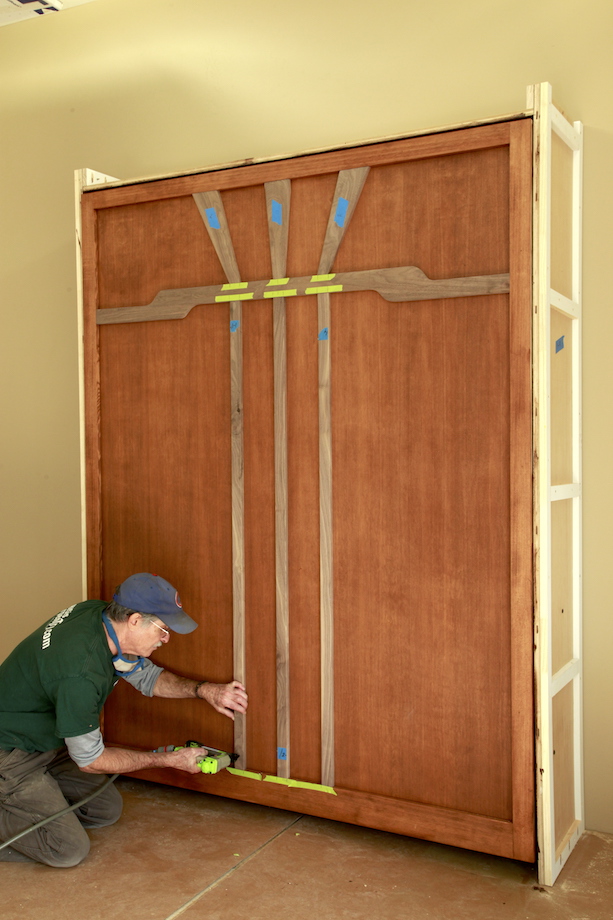
| All the decorative elements for the cloud lift and the sunrays were cut from full-scale templates that Todd Murdock generated in SketchUp! All I had to do was watch the direction of the walnut grain. | 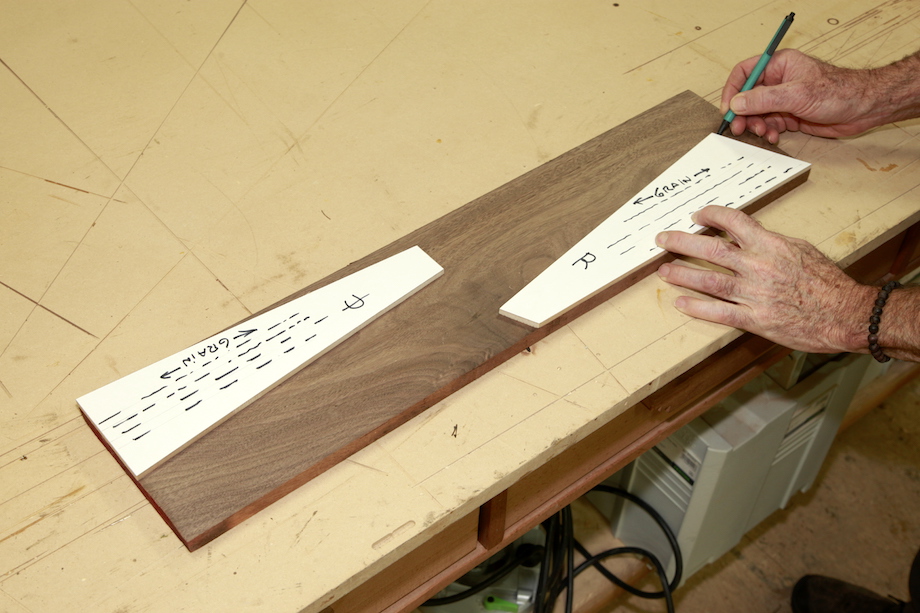 |
After sanding and easing the edges with a 1/16-in. radius round over bit, I laid out the location of each sunray.
 |
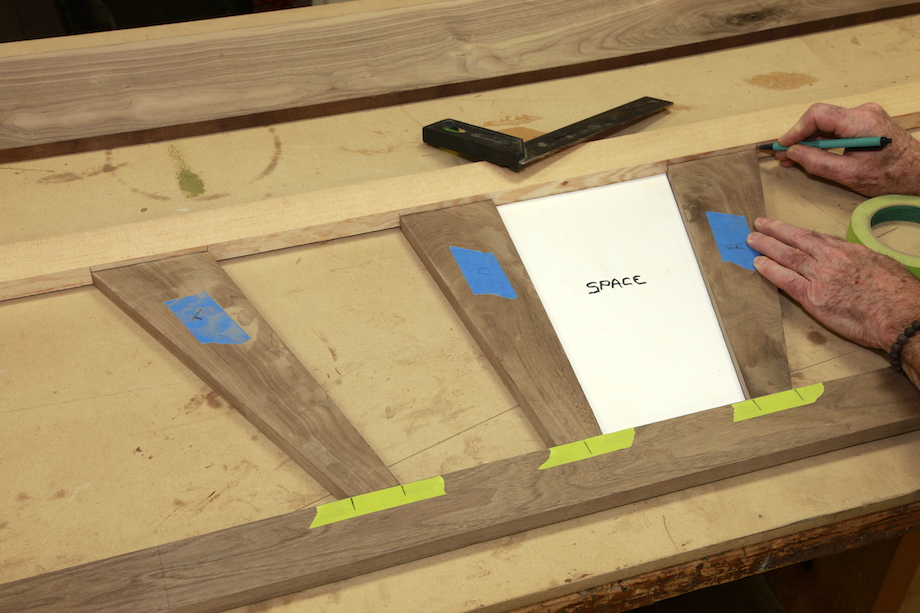 |
Todd even provided a template for spacing those rays!
I used the same spacer template to align the sunrays on the face of the cabinet, fastening them with TiteBond II and 23ga pins, before applying the cloudlift.
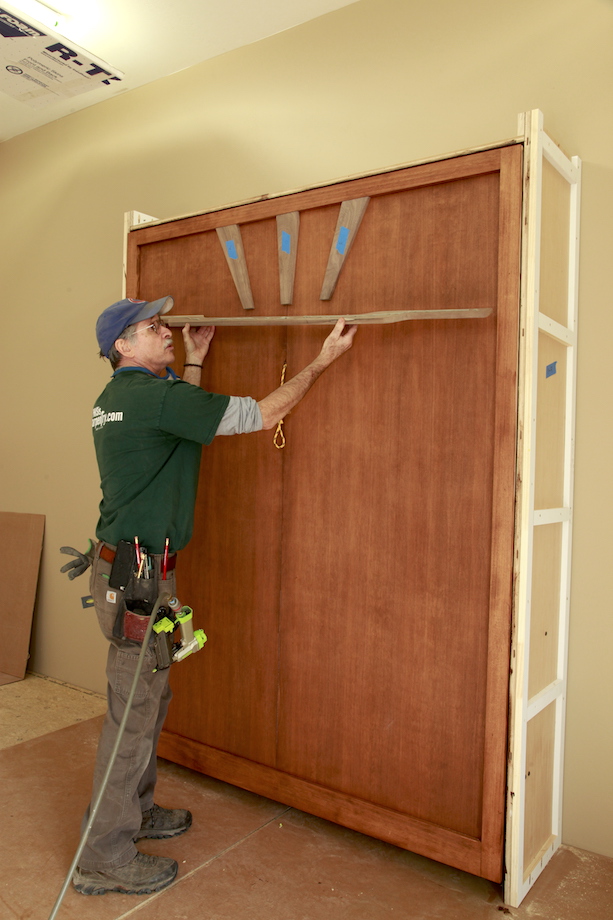
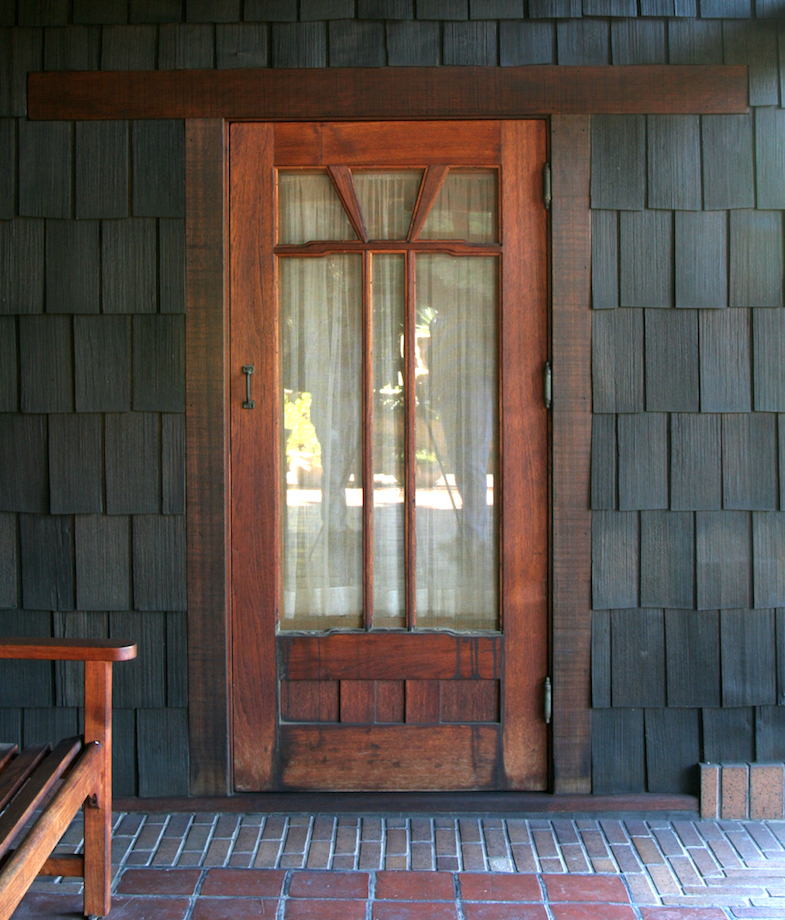
I borrowed this design from the Gamble House screen doors, where the sunrays break through the cloudlift and extend to the bottom rail.
Installing those long slender rays left me with a pretty special feeling.
Of course, it was more than a year later before I could carve out enough time to finish that built-in cabinet!
The Murphy bed was first introduced by William Lawrence Murphy in 1900 near San Francisco. To learn more about Murphy beds, read this article.
How timely – my wife has told me that I need to have a Murphy bed in our basement by September!
Ben,
Don’t you have to finish the windows first?
I don’t understand why beds in general, or legged furniture in general, aren’t made with toekick space like base cabinets. I can’t believe how many times I’ve stubbed my toes on bed frame legs.
“I drilled through-holes for the sex-bolts that made up the other half of the fastening system.”
For those of us puzzled readers who don’t know what those are, could you give a detailed description?
The name gives the design of sex-bolts away. They have male and female pairs. The female is basically a cylinder with an internal thread. The male goes inside.
Thank you, Nolan! I wasn’t sure if any description of that terminology would be PC. :) You did a good job!
Nice, Very nice. Now I know what to do with the study room. We can squeeze a guest there.
Those “sex bolts” are also known as Chicago bolts and pretty common in RTA furniture (Ikea). Cheers.
Dear Gary,
Just a side question…
On Your SU drawings You use a nice typeface.
Where could I find that typeface to use? Having a hard time to find a good one and also wood material for longer pieces (don’t like the patch lines)
Thank You for all Your fine articles and books over the years.
Absolutely LOVE it.
Sincerely
Jan Friberg
Sweden
Hi Jan,
That font is Architxt. You can download it from several sites for free!
Gary
Hi Gary,
I have been wanting to build a Murphy Bed for the past few years and I love the Murphy Bed that you built! I was wondering if there was a runner up to the Create-A-Bed hardware kit that you might recommend. I have heard good things about the Hafele hardware system (e.g., easier to install, but the instructions use metric measurements). Also, why is it that plywood has more structural strength than, say solid hardwood for this application – is it because of the potential stress that can be caused by the gas pistons? My goal is to build a Murphy Bed for every day use, not just for guests, so it is important that the final product be able to withstand daily use. Please let me know if you have any thoughts. Again, great job on your bed! I love the crown molding and the sunray design!
John,
I’m not familiar enough with the Hafele hardware, or the other brands that are available. I saw one Murphy bed in Denver that was extremely slick, and electric. But I raise and lower the one I built frequently–it functions very easily, and I suspect they all do. And I suspect they are all equally as durable. I can’t imagine any problem arising with the hardware, even if it’s used every day. Yes, the gas pistons and pivot hardware exerts considerable stress on the bed frame, and so does the weight of the frame and mattress, which you don’t ‘feel’ because of the pistons. I think solid would would have a tendency to split under that tension.
Good luck with your project!
Gary
Hi All –
I am finishing up a Murphy bed using Hafele hardware. It has been an adventure! Gary Katz, thank you for the inspiration. Several years ago I built a fireplace mantel using one of your designs as a starting point. If so inspired, check out a few pics of the bed on Instagram – kthib51. Cheers to all and stay safe!
Keith
Hola amigo, les escribo para expresarles mi conformidad con su web page. Soy Contratista en Construcciones y e disfrutado mucho de sus publicaciones, su experiencia dilatada hace un agrado navegar en su sitio.
Michel Lagos López
Chile
Hi Gary, I’m almost finished with a DIY Murphy bed. I decided not to use one of the kits that’s on the market. I was wondering if you can help me with selecting and installing gas struts or lifters. The bed is a queen size vertical bed. It weighs about 150 + pounds. Any help would be greatly appreciated.
Mike Riley
Hi Michael,
How courageous of you! I wish I could help you but from the start I knew that kind of engineering was considerably over my head. I have no real understanding of gas struts and the different sizes needed for various weights, as well as the leverage that would have to be engineered probably based somehow on the length and weight from the hinge point? See, I told you I had no qualifications to help! You may end up having to experiment? Or start with the struts supplied by one of the kit companies and see if they work?
I was wondering Gary have you seen a horizontal Murphy Bed before? We don’t have the ceiling height in our basement for a regular one but installing one horizontally would work great. Can I get your thought on this?