


In part one of this article, I explained that if you’ve built a straight stairway or two then you’ve already mastered most of the skills you will need to build a curved stairway. Tasks like setting hardwood treads, installing newel posts, and assembling the handrail parts are all very similar. There are really only a few things about a curved stairway that are unique. First is creating the curved skirt boards, second is making the tapered treads to fit your custom stairway, and finally bending the curved handrail to follow the rise and run of your stairway. There are a few tricks to learn along the way, but I’m certain that once we have walked through it, you’ll realize there’s no mystery—just a little extra work.
Curved skirt boards
At the end of the last article we had just set temporary treads so that all of the subcontractors had a way to get upstairs. One thing that I forgot to mention is that it’s important to cut those temporary treads an inch or so short of the inside and outside curved walls so that there’s room to laminate the curved skirt boards. Since most of the stairways we build are painted—except for the treads, handrail, and newel posts, I use 1/4-in. birch plywood for the skirt board laminations. Any seams can be hidden and the exposed edges will be covered by trim. On stain-grade jobs, I’ll re-saw the final lamination out of a long 1×12 for a consistent grain pattern and to avoid any visible splices.
(Note: Click any image to enlarge)
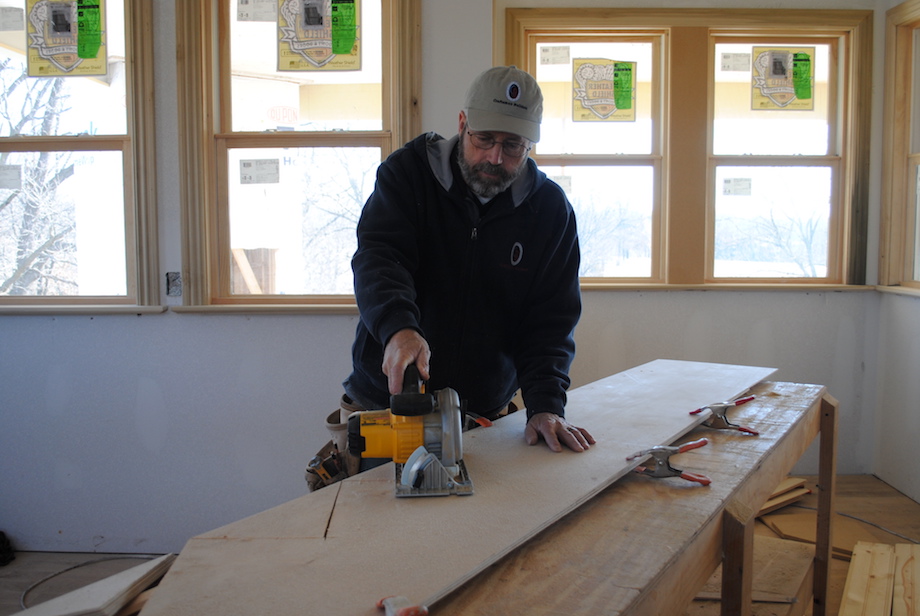
On this paint-grade job, I ripped my plywood laminations to around 15 1/2 in. and started with the face skirt on the inside stringer. It’s pretty straightforward—the top edge of my plywood lines up with the leading edge of each step in the curved wall.
| It’s a good idea to use a piece of scrap plywood to make a template of the cut where the skirt board will meet the floor and the top wall. | 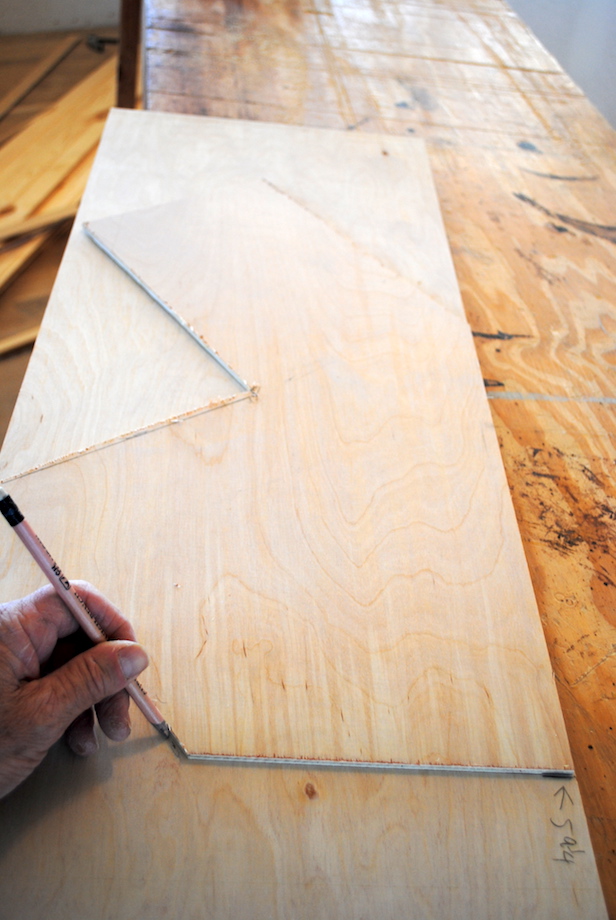 |
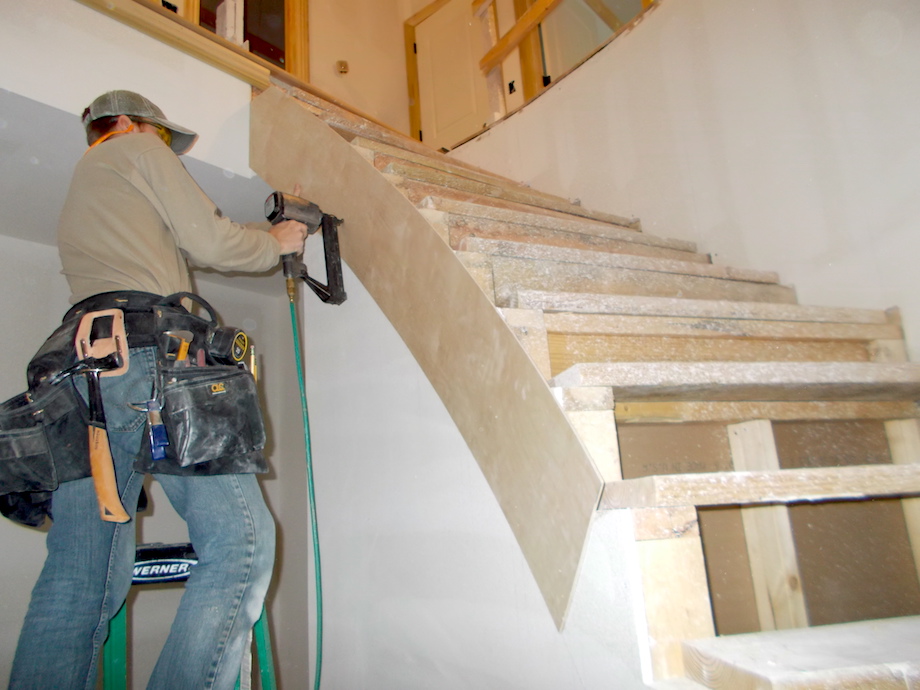
Then it’s just a matter of spreading glue (I use a glue roller with a hopper) and nailing three layers of plywood in place. I actually use staples for the first two layers and then brad nails for the final layer (try to put most of the brads where they will be covered up with trim later).
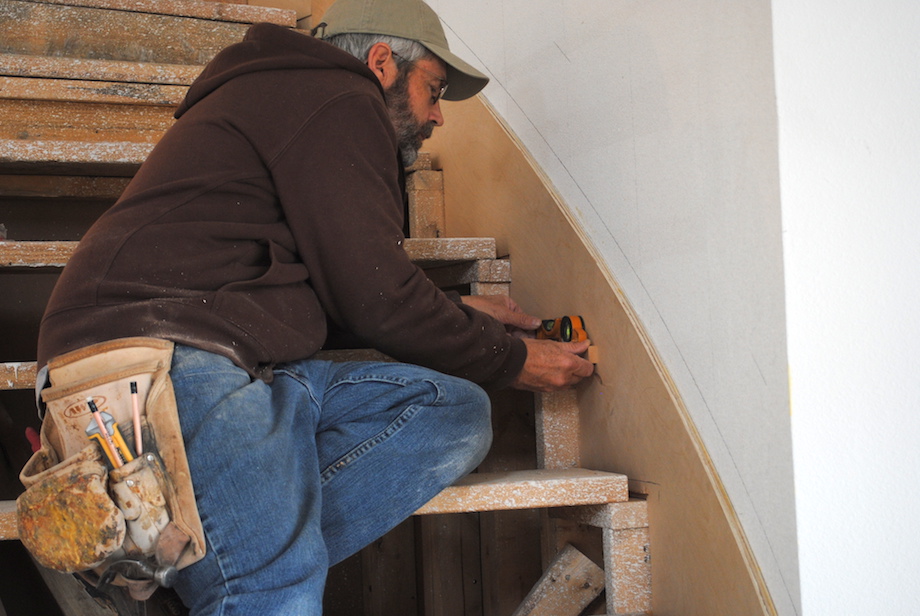
The notches for each step are cut in place using a router and long flush trim bit.
| The skirt board along the wall is a little more work. | 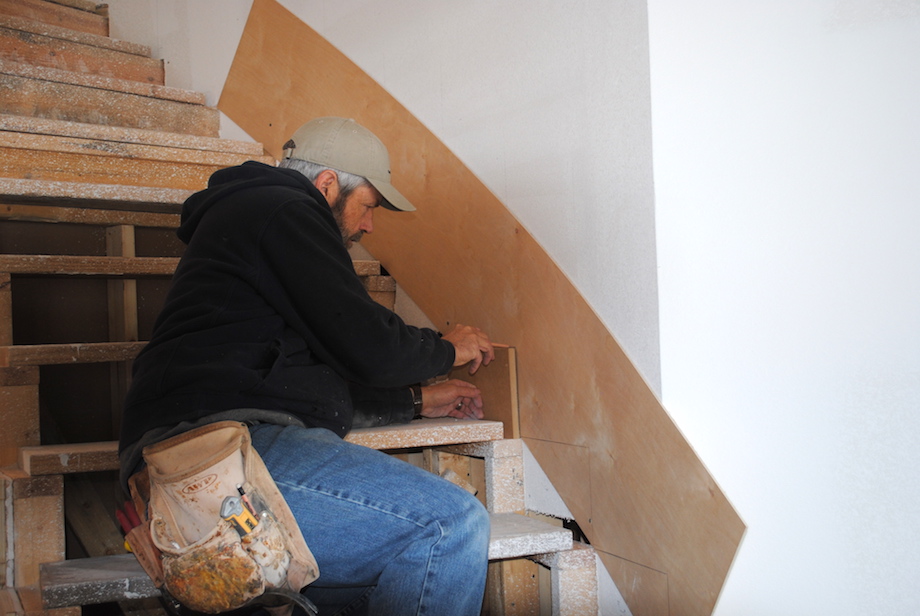 |
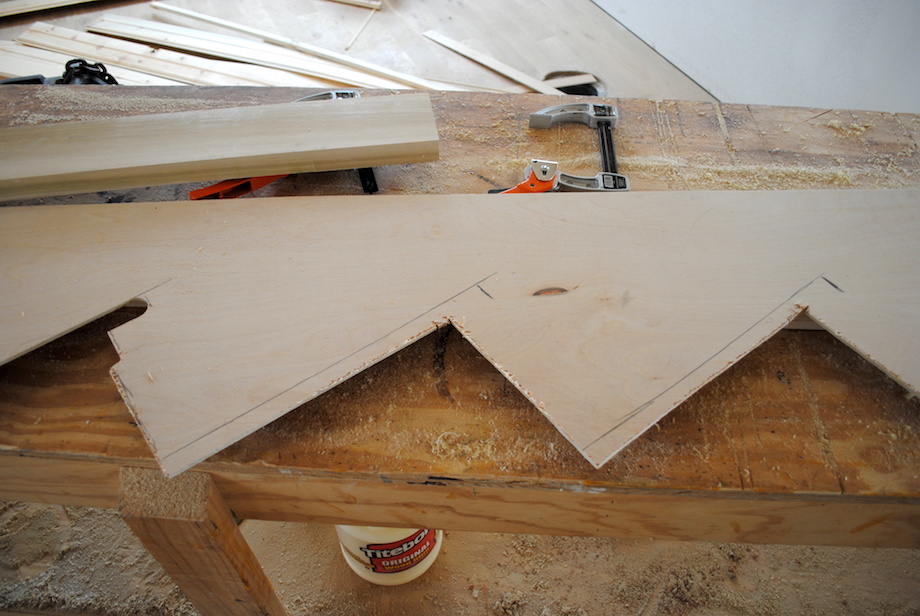
The step notches have to be cut before the plywood goes in place. I make a master template by tracing a plywood ripping right above the long points of the steps, and I use a block (as long as the run of a step and as tall as the rise of a step) to mark the steps.
I clamp that template to enough pieces of plywood for the first two layers of the skirt board, and gang cut them.
| Then it’s back to gluing… | 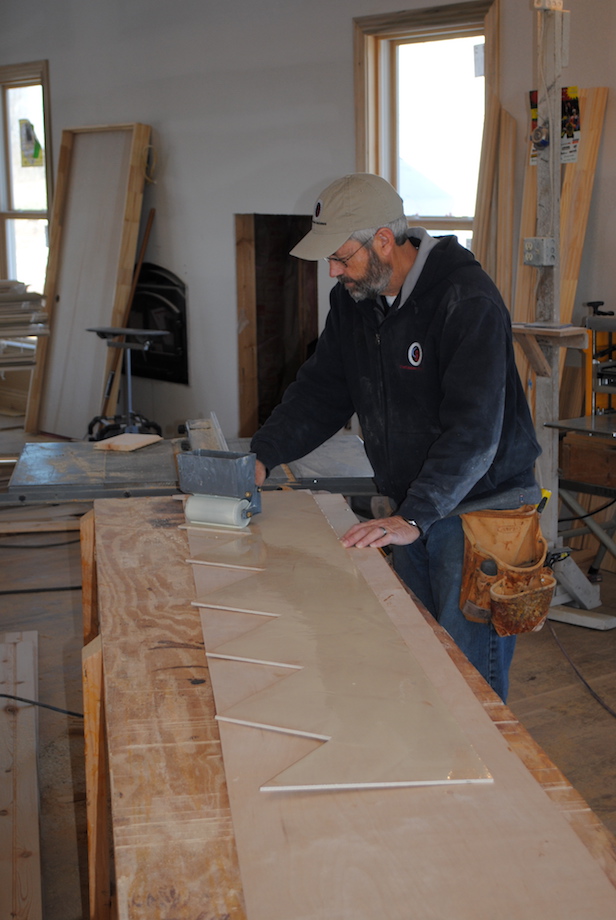 |
| …and nailing. | 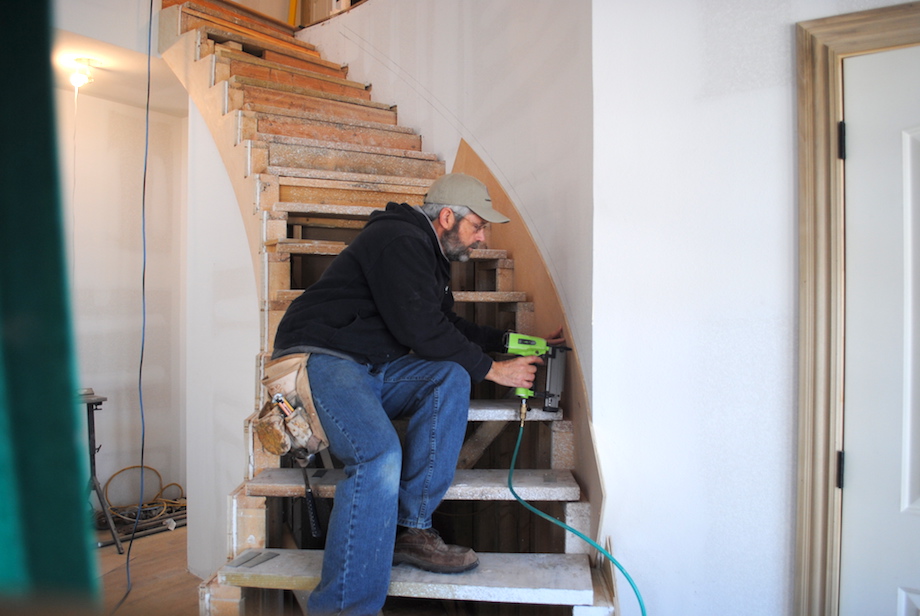 |
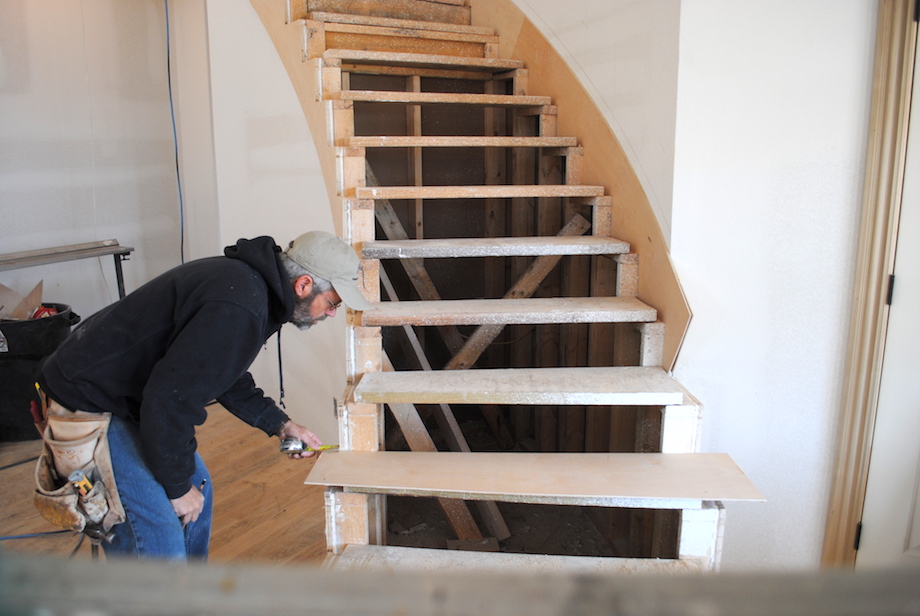
 For some reason on this job I started at the bottom and worked up, so for my top pieces I made a template of the cut, put it in place, and then measured from the end of the template down to the lower plywood layers to get a total length (hopefully you will be smarter than me and just start at the top).
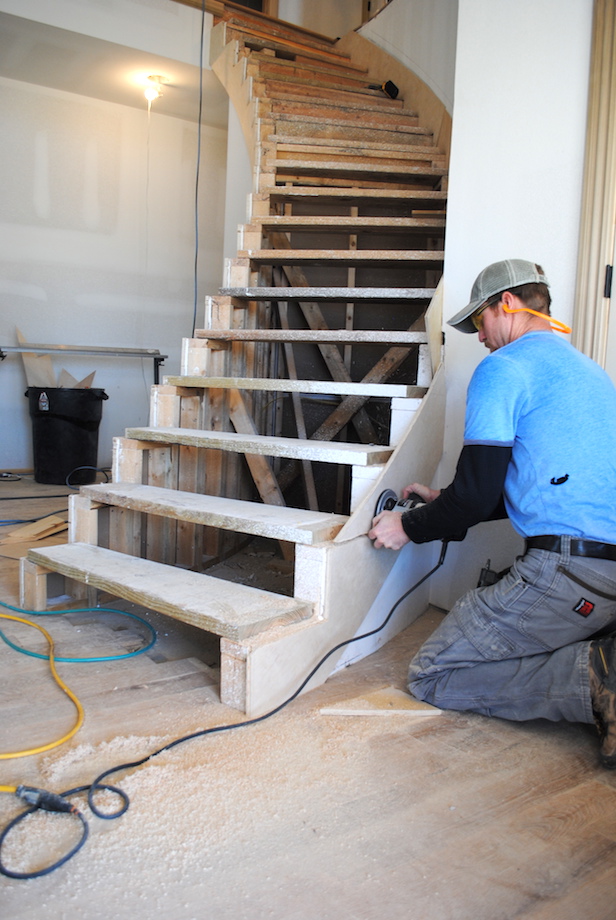
I have never been a fan of scribe-fitting stairs to a skirt board. I like to create a routed pocket so that I have a little wiggle room. And for this job, to get that pocket right where I wanted it, I dropped my finish pieces of plywood into position and marked each tread in place.
I cut a piece of MDF that was the thickness of a tread (one inch) and as long as the width of a tread at the wall, plus 3/4 in. to allow for a riser. That way, when the MDF was touching my framing stud, a mark at the other end would give me the right place to end the stair pocket. I used a torpedo level on top of the MDF to make sure the stair pockets would be level.
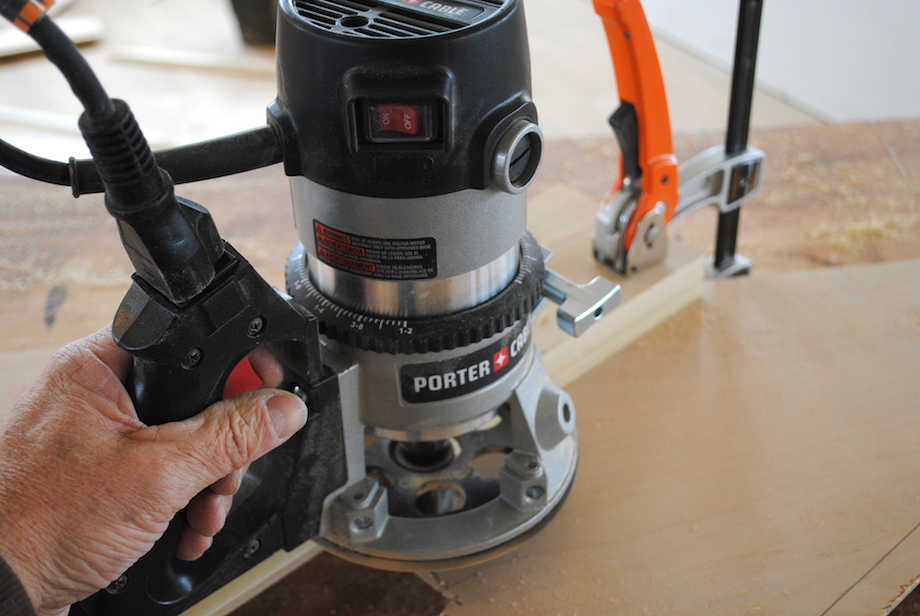
To cut the pockets, I used a simple straight edge for a guide and a router with a 1 1/8-in. pattern cutting bit.
 |
 |
Tapered treads
With the skirt boards finished, it was time for me to move to the shop and build the treads.
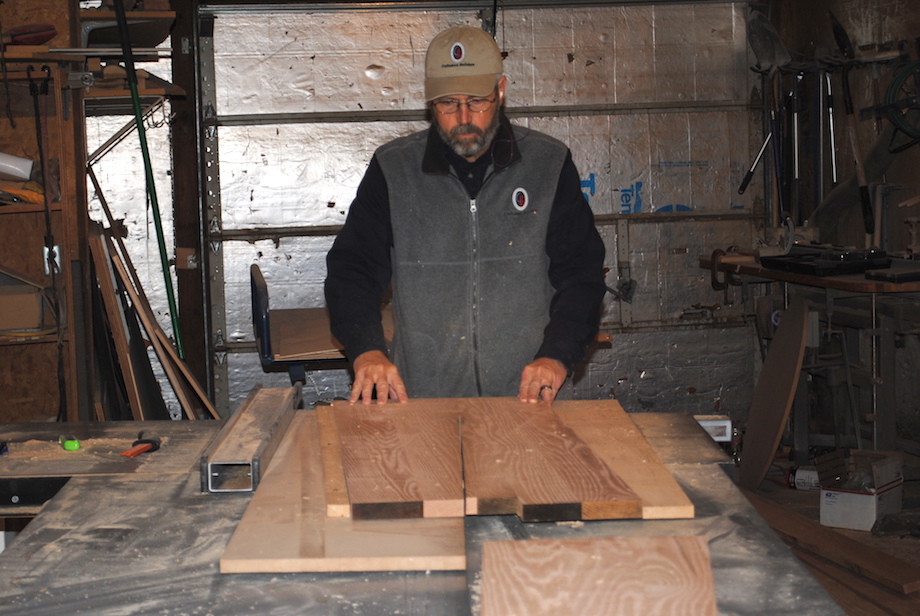
I learned the hard way (I was so sure I had all the measurements right) several years ago to make a full-size plywood template of the exact finished tread and check it at each tread location. I had to make two for this job since the first few steps were open on both ends.
I used 5/4 oak lumber that was skip-planed (hit and miss) and straight-line ripped on one edge for my tread stock. While assembling the tread blanks, I followed my four rules for glue ups:
| First, I like to rip the pieces between 3 and 5 in. wide. | 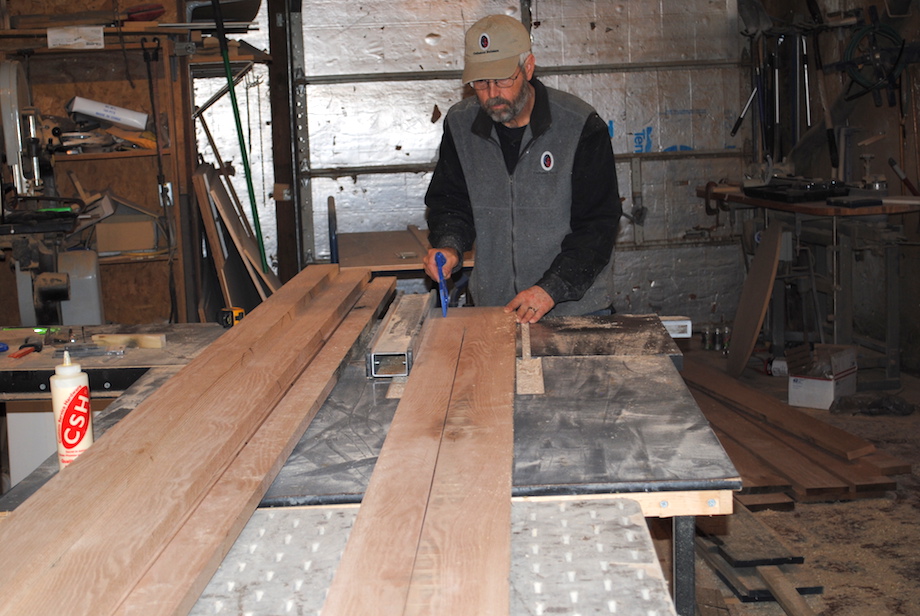 |
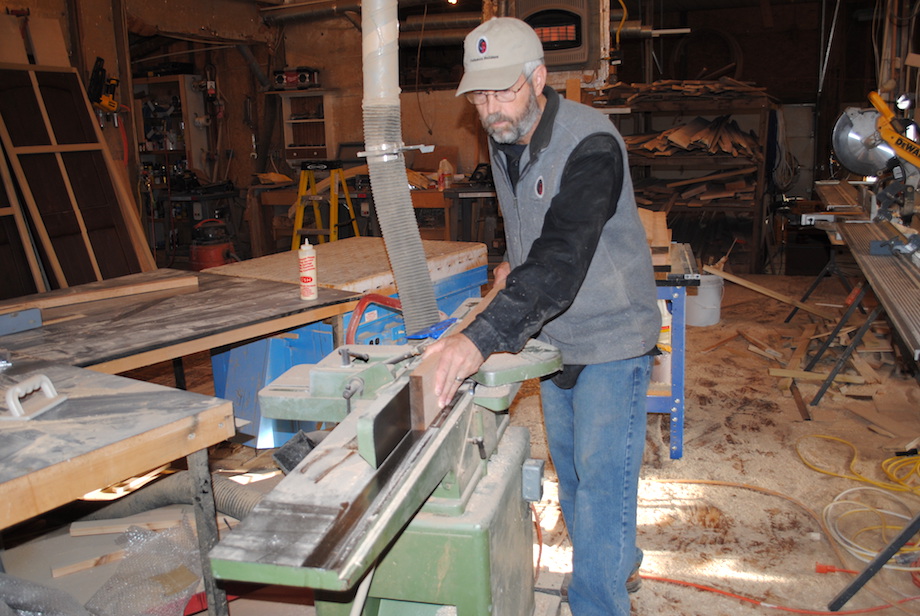 |
Second, I make sure each edge is straight and square. |
| Third, I alternate the direction of the growth rings for stability (looking at the end of each board). | 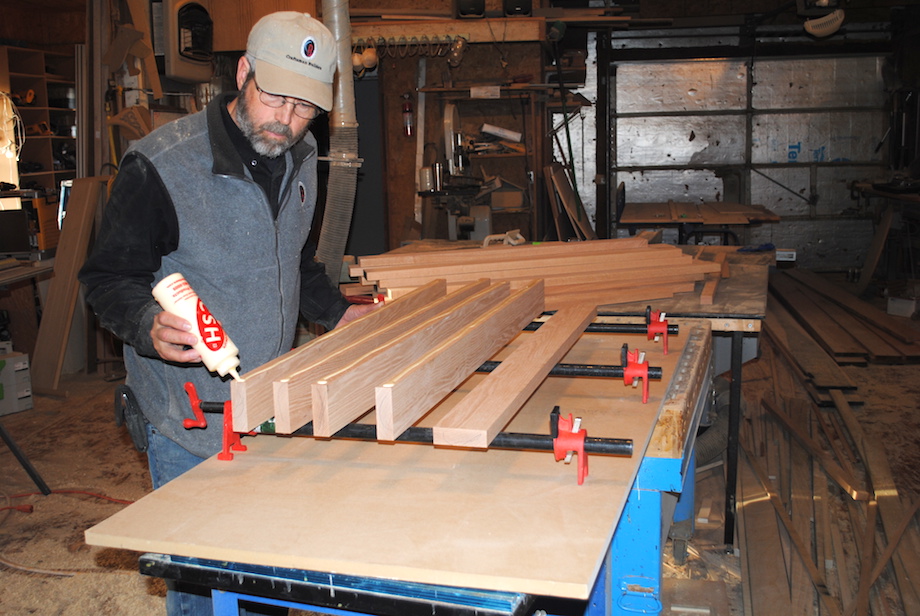 |
 |
And fourth, I try to match the grain pattern and color. |
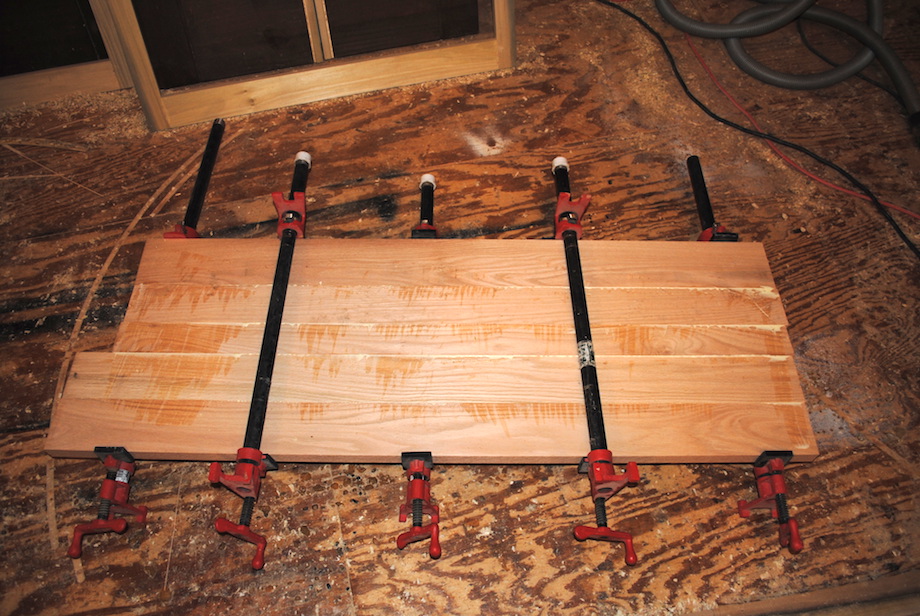
To make the best use of materials and to save time, I glue up blanks wide enough to make two stair treads at a time—taking into account the 2 in. nosing that I’ll attach later, and adding a little extra to be safe. I also make the blanks at least 4 in. longer than I think I’ll need. It is a pretty good idea to double-check your work with the pattern before adding any glue. I like to use a pipe clamp about every 8 in. to get really tight joints (glue should pop out along the entire length of the joint). I take a rag or stick and roughly wipe down the glue squeeze-out so I don’t have to scrape it off later, then I leave the clamps on for a couple of hours.
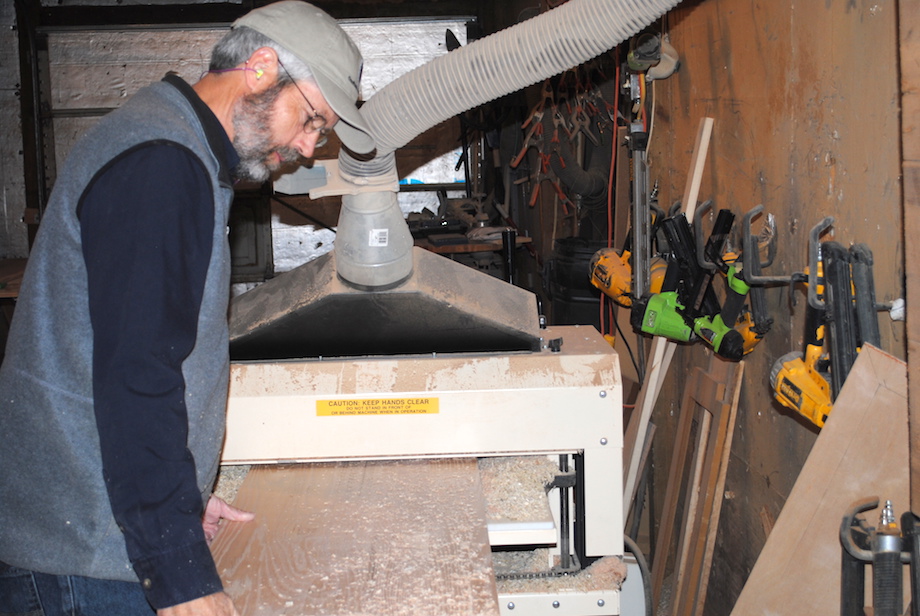
Since I have a 25-in. wide planer, I can plane the whole blank at one time before I split it. It is a little slower, but you can split the blanks first and then plane each piece on a smaller planer.
I use a pretty simple jig to taper cut the blanks. It’s just a wide piece of MDF with a straight-edge guide screwed on at the required angle and a stop block to hold the end of each tread blank in place.
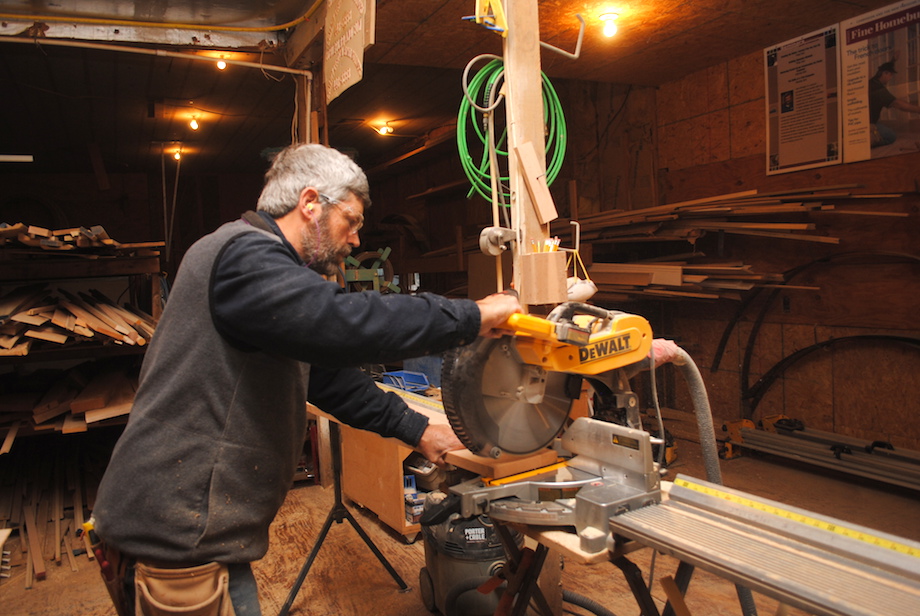
The next step is to go to my miter saw and cut the slight angle I need (taken directly from my pattern) on the inside edge of each tread. A few treads at the bottom get a return piece on the outside edge, too. I make this much wider cut using my Festool track saw.
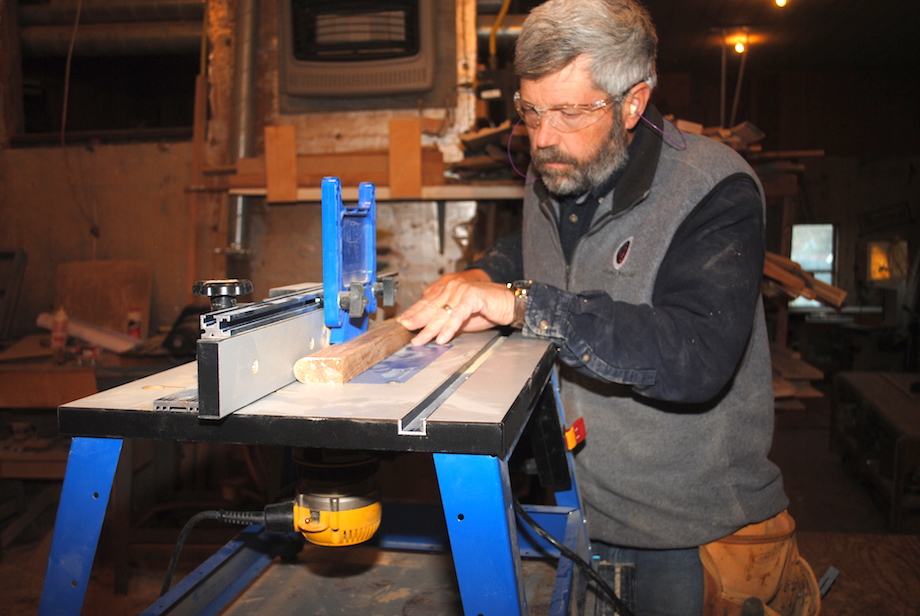
I make my nosing material on a router table using a standard 1/2-in. radius round-over bit.
| To attach the front and end pieces of nosing, I use a combination of pocket screws to pull the joints together and biscuits for alignment. | 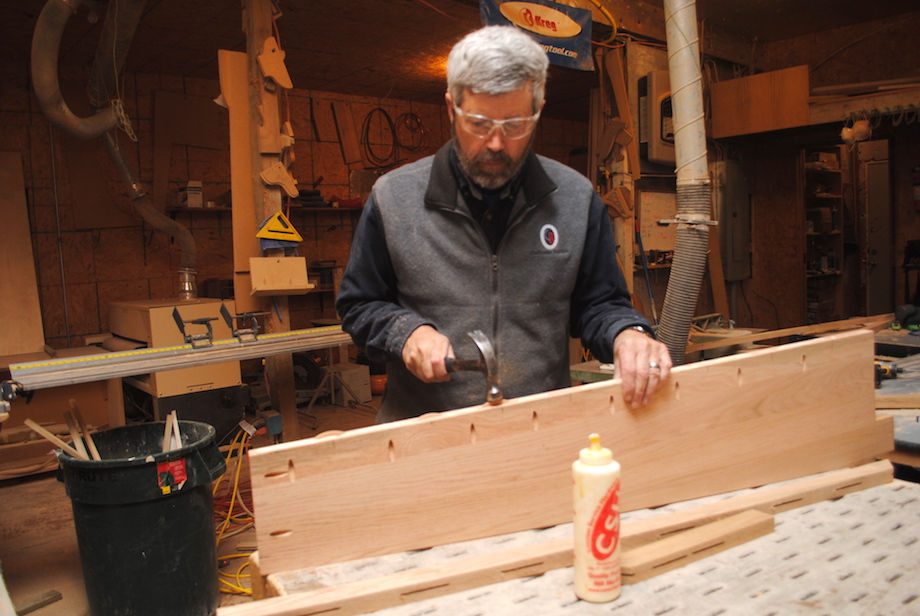 |
| We wait to attach the small return pieces until after the treads are set. | 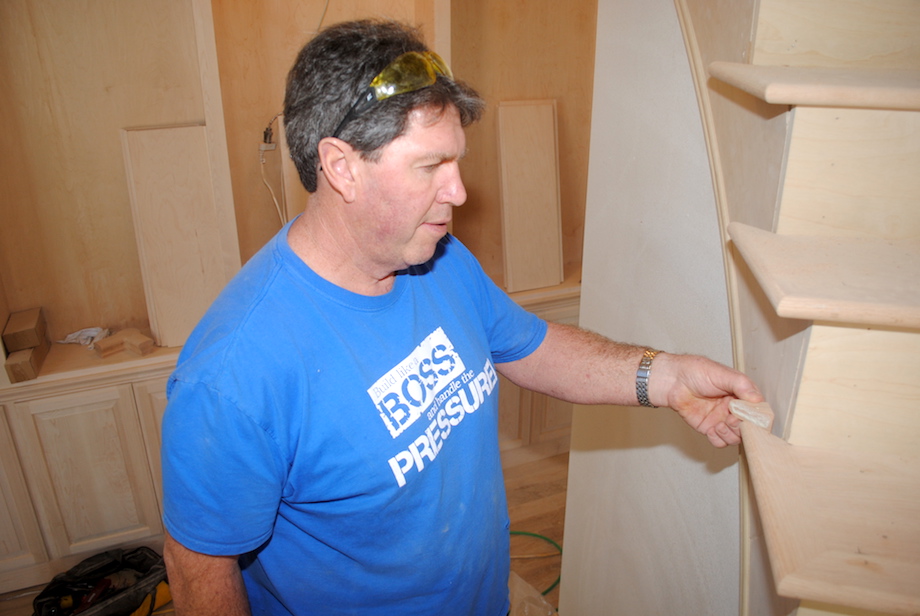 |
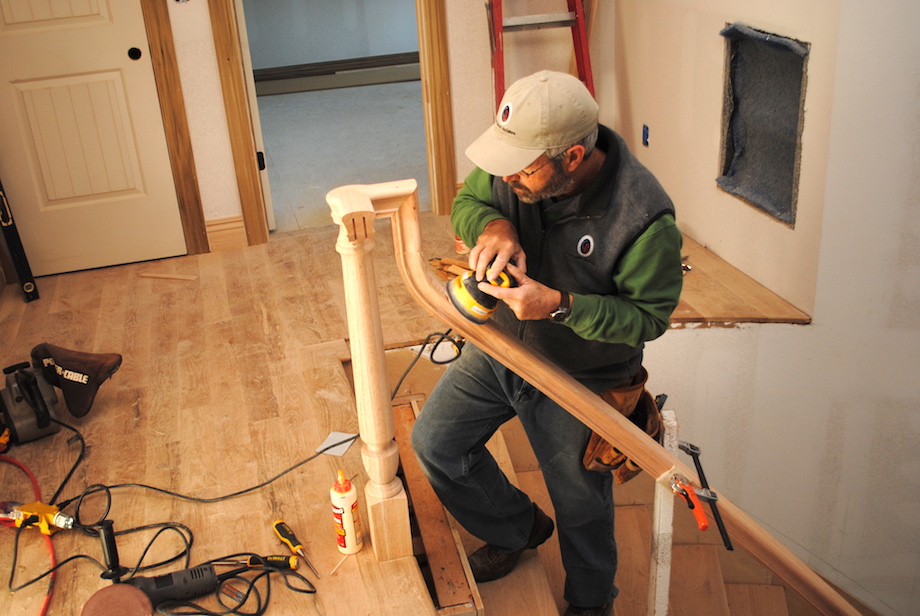
The final step is sanding. I am thankful to have a Woodmaster drum sander to speed up the process but you can do it with a good belt sander if you are patient.
Bending the handrail
Most people think the mysterious part of finishing a curved stairway is creating the curved rail. Sorry to disappoint, but once again it’s a pretty straightforward process. Stair companies sell a rail that is designed for bending.
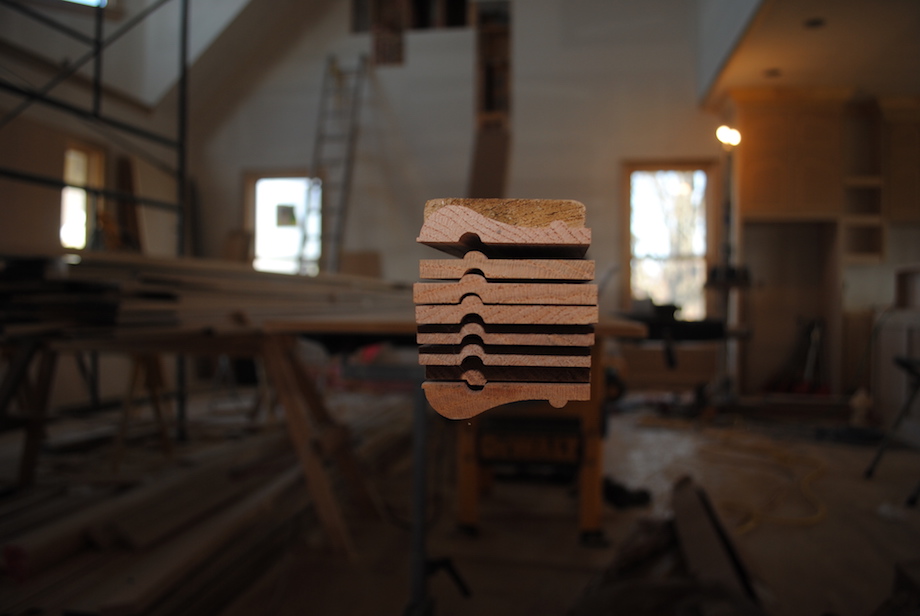
For this job, it came in eight thin pieces, and when combined, they create the exact same shape and size as their straight rail.
| The manufacturer also provides a sacrificial pad strip to avoid damaging the rail during clamping. We cut it into small pieces and use them at each clamping point. | 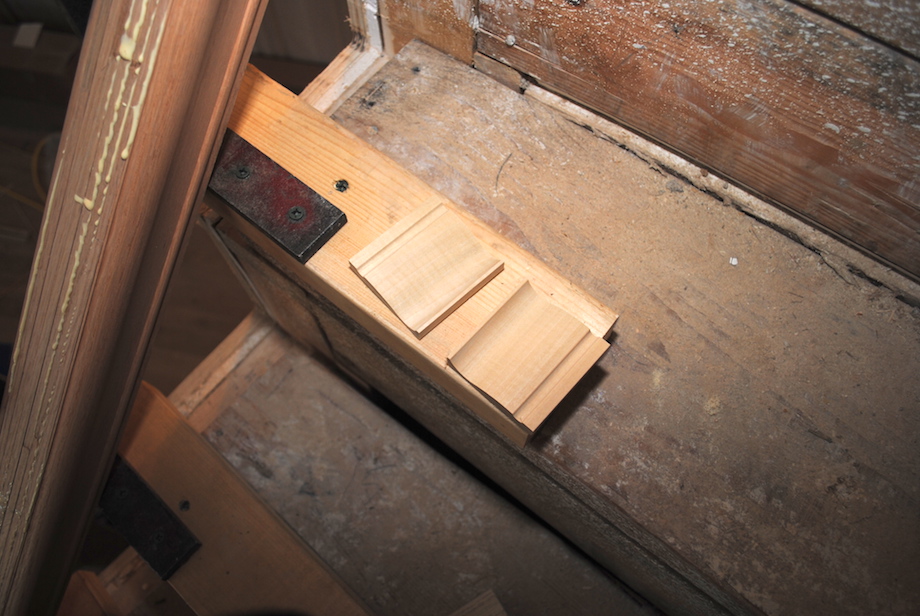 |
To make the bending form, we use metal L-brackets that are cut from angle iron and then secured to short pieces of 2×4. Those brackets are then screwed to each temporary tread. To determine the location of each bracket I start by finding the centerline of the handrail, which will also be the center of the balusters and newel posts. Using the back side of the sheet rock has always worked well for me so that was our standard on this job.

Since I like bending the rail around the outside of the curved form, all of the L-brackets need to be offset from the centerline towards the inside curve of the stair.
| In theory, the offset distance should be about 1 1/2 in. (half of handrail width plus the thickness of the clamping pad), but experience has taught me that you will always have a little spring back. So at the midpoint of my rail, I move the bracket in about 3/4 in. toward the outside wall. | 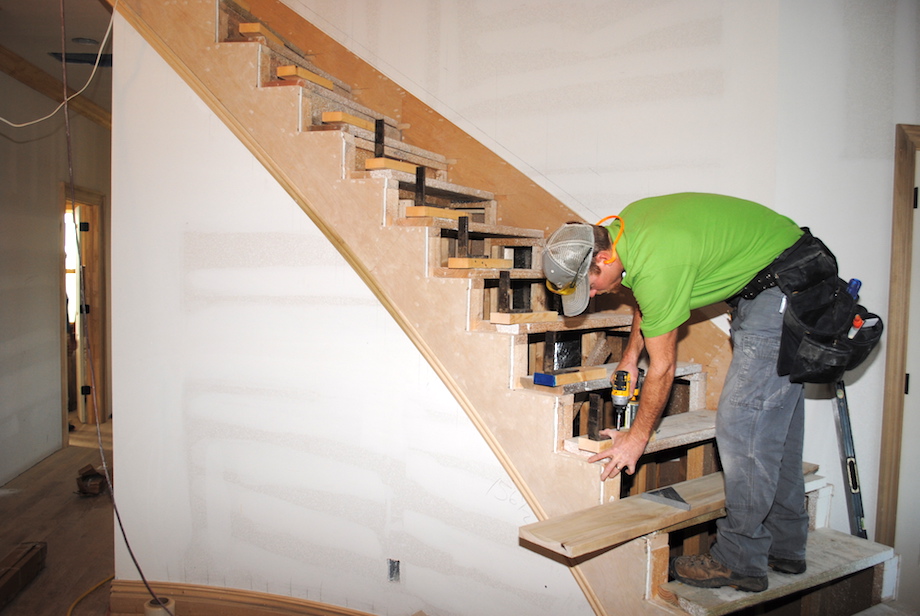 |
At the steps above and below this I use 5/8 in. I keep adjusting by 1/8 in. at each tread as I go up and down until the center of the rail lines back up with the back side of my drywall.
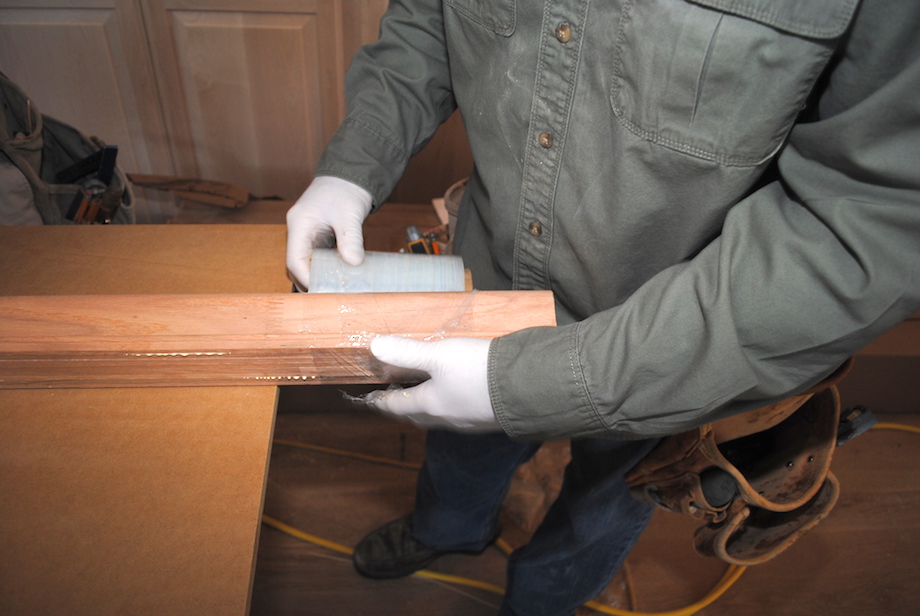
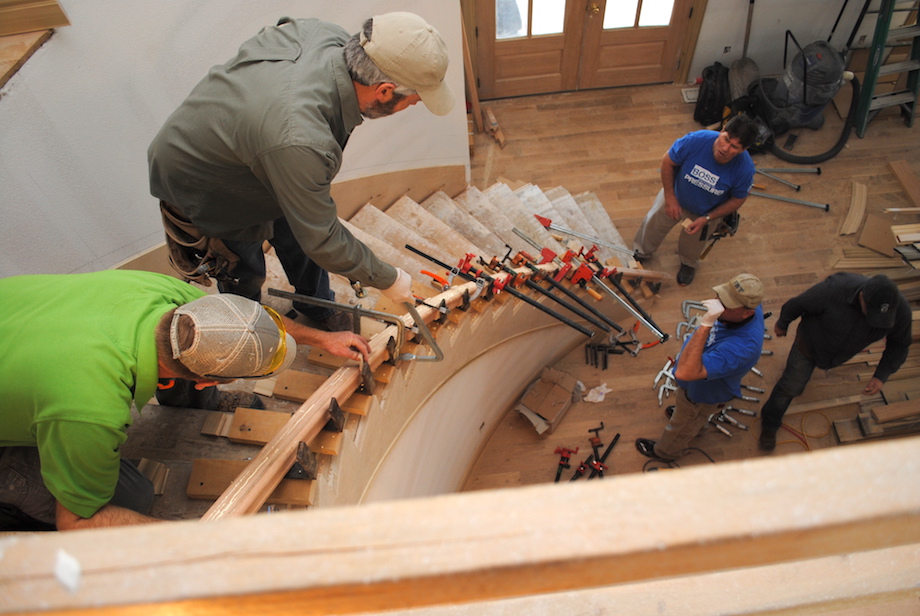
Gluing up the rail is exciting.
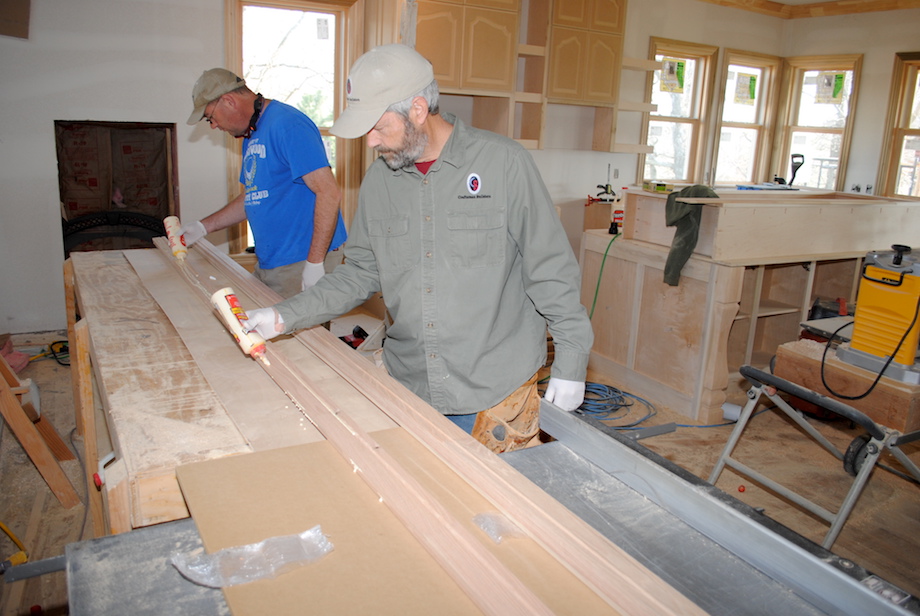
It is important to have all the clamps and pad strips staged close by before spreading any glue. This is a 3 or 4-man job and you will definitely want to use plastic gloves! We always have at least 2 guys with glue bottles and another man ready to refill bottles if needed. Just like gluing up treads, it’s important to use plenty of glue so it squeezes out when you clamp.
I like to use a little plastic wrap to help keep the ends together while we move the rail into position.
 |
 |
Generally, we start clamping at the bottom and work our way to the top. It’s just as important to keep the rail pushed down against the bracket as it is to clamp it tight to each bracket. Sometimes the rail wants to twist at the top and bottom.
| I like to use a pipe clamp there so that I have leverage to fight the twist, and I wedge a block between the pipe and temporary tread to keep things in line until the glue sets up. | 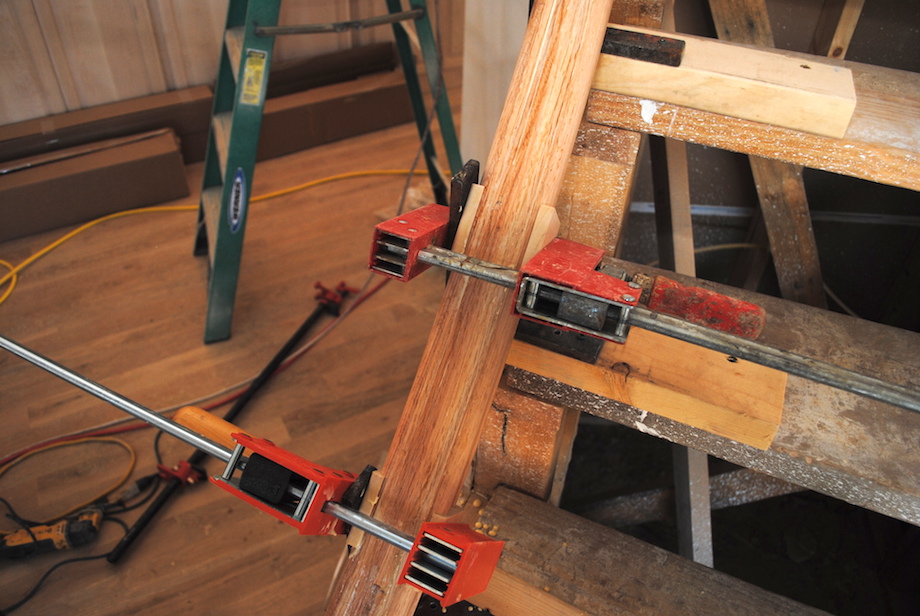 |
Once the clamping is finished, we take a damp rag and wipe off as much of the squeeze out as we can. It saves a lot of work later.
I always leave the rail clamped up for 24 hours and make sure the heat is on during the winter.
| Then we use a combination of sanding and scraping to make the rail look like it grew as one twisted piece. | 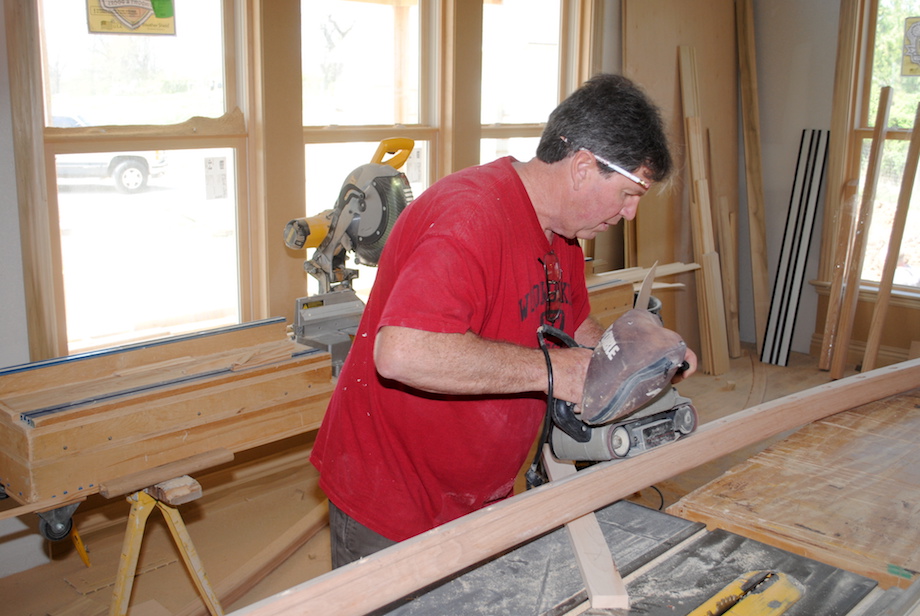 |
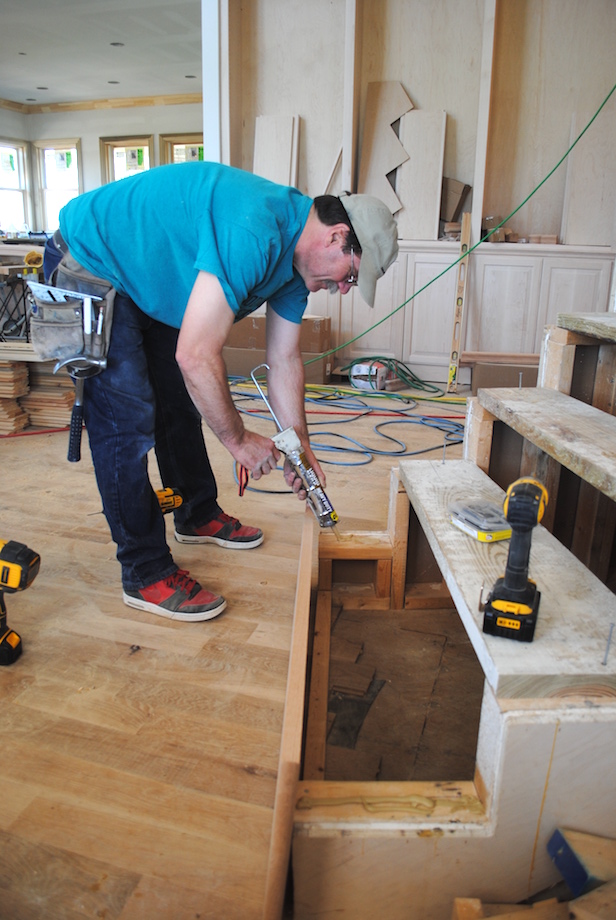
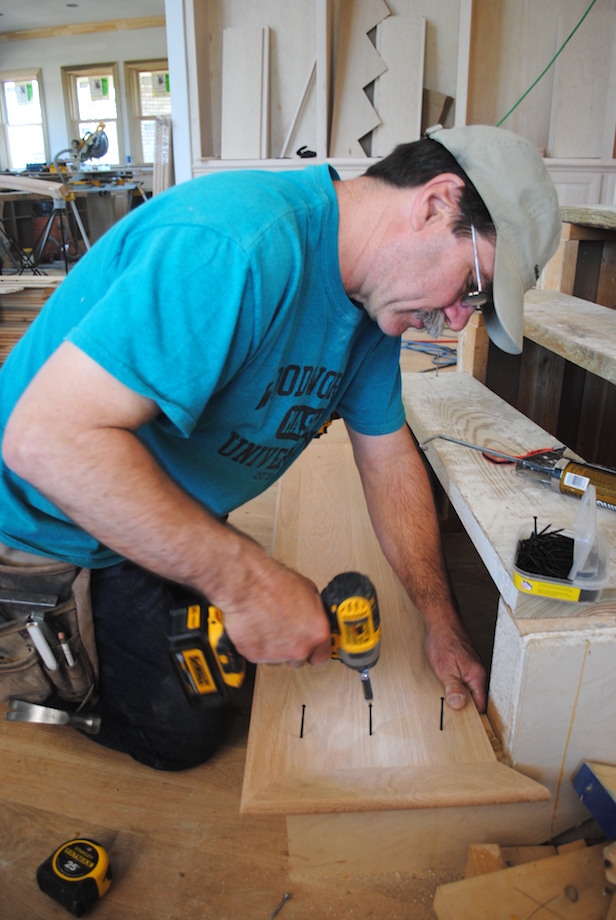
Installing the treads and risers
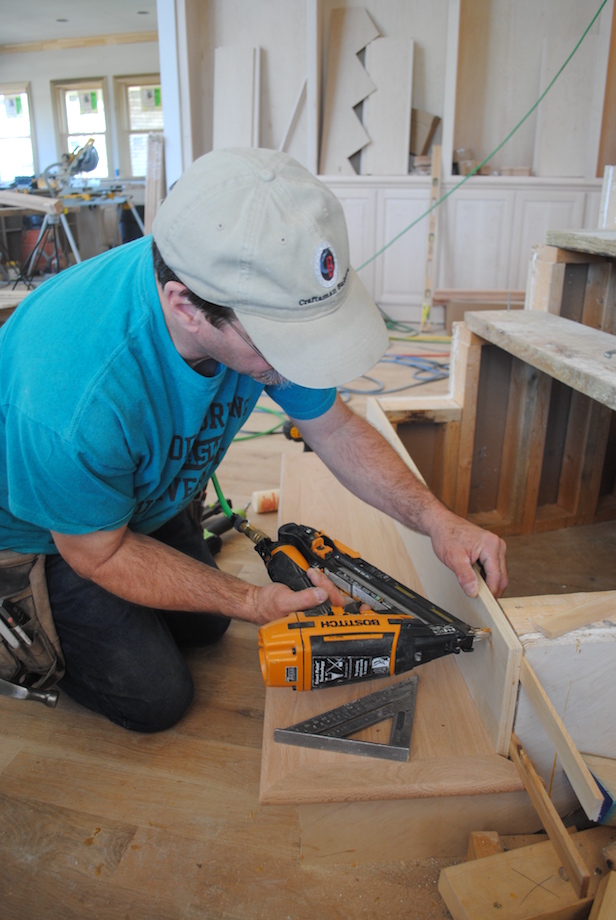
One of the most important things for me on any stair job is that you don’t hear any squeaking when you walk up and down the stairs. Squeaks occur when a tread moves and rubs on one of the fasteners or another part of the stair. To set a tread properly it just takes a few shims, a lot of construction adhesive, and some trim head screws.
 |
 |
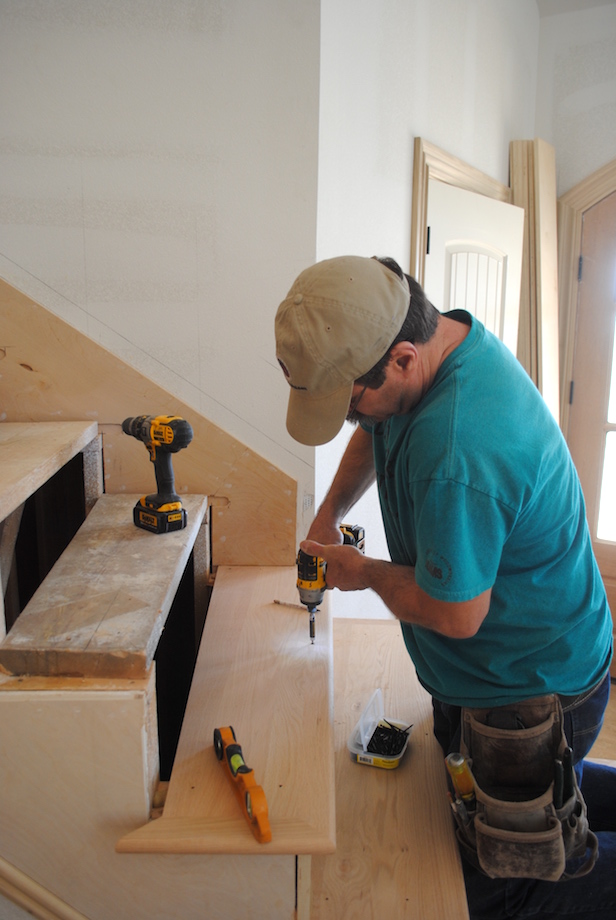
The 3/4-in. birch plywood risers get attached to the back edge of each tread with yellow glue and brad nails.
 |
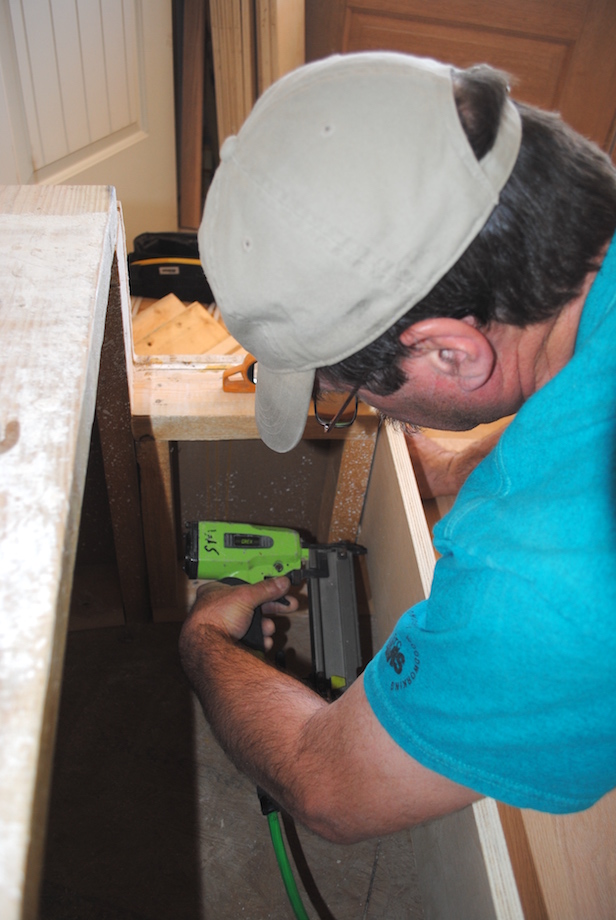 |
After a little shimming to get them plumb, I nail the risers to the rough framing with 2 1/2-in. finish nails.
 |
 |
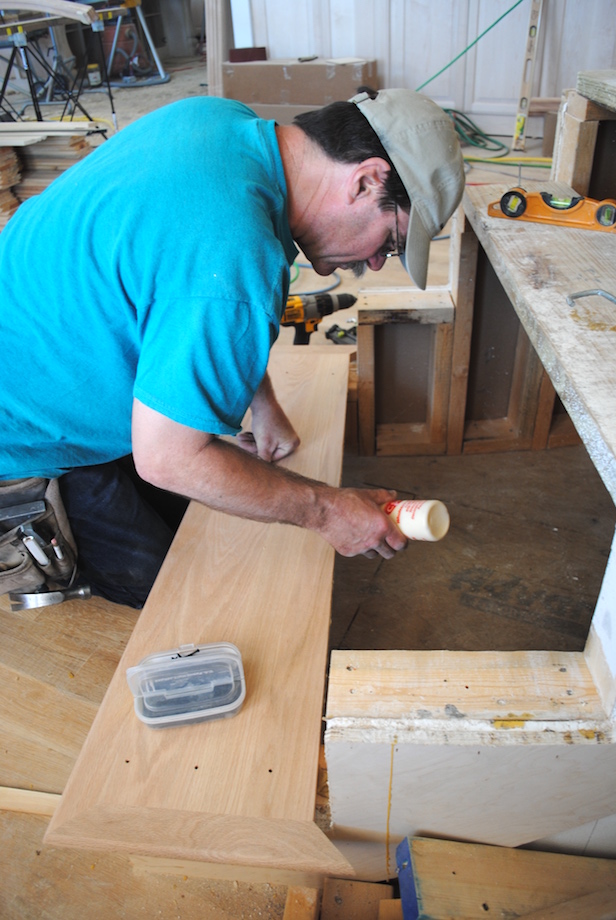
When I set the next tread, I add a few dabs of construction adhesive on the top edge of the riser…

…and run an additional trim head screw through the tread and into the riser.
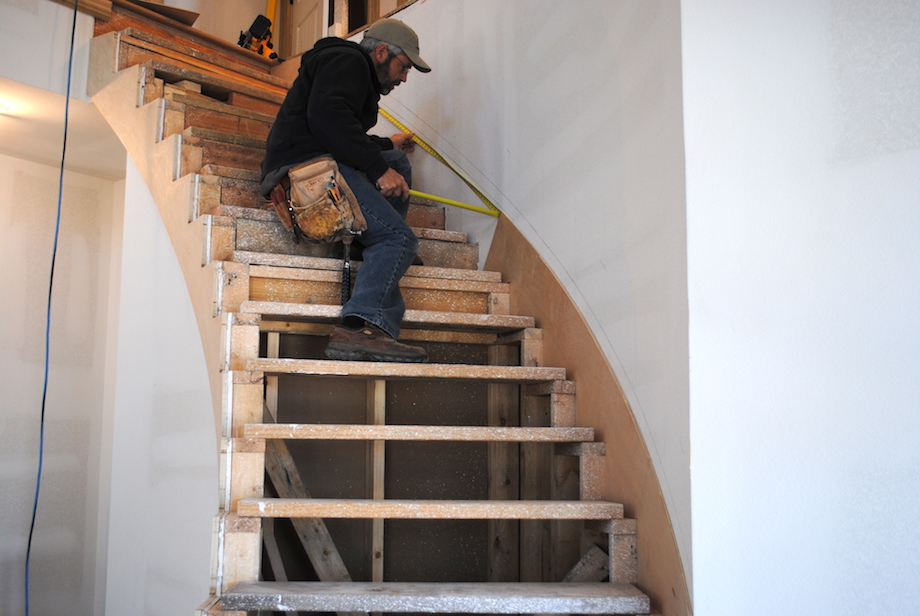
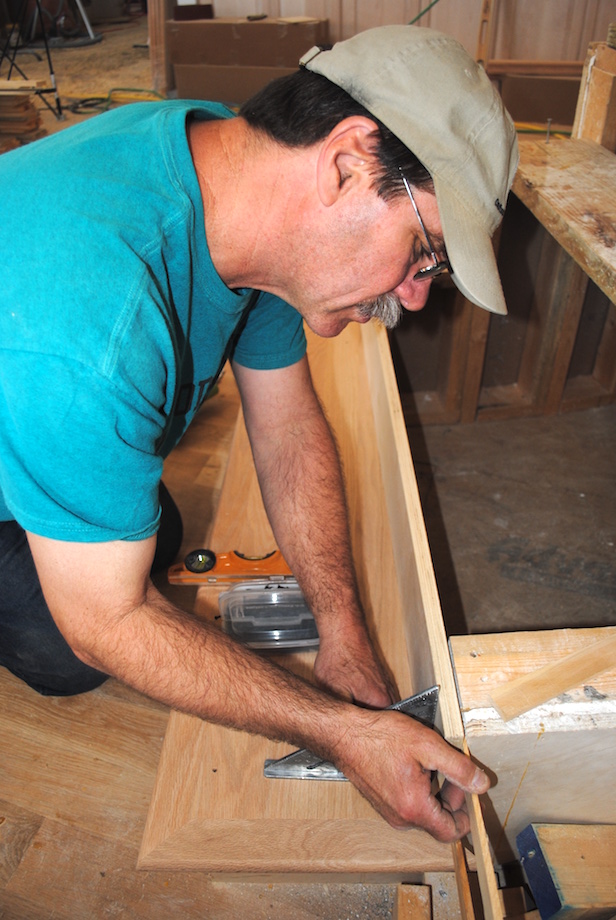
This process just repeats itself as I move up the stair, adding shims as necessary to keep the treads level. The whole assembly is a little like a box beam and is amazingly stout.
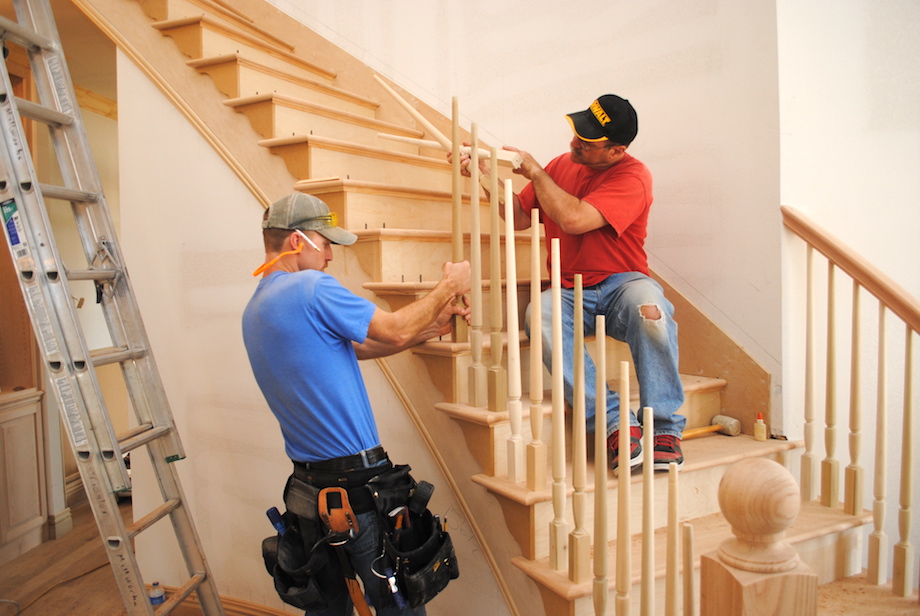
Setting the balustrade
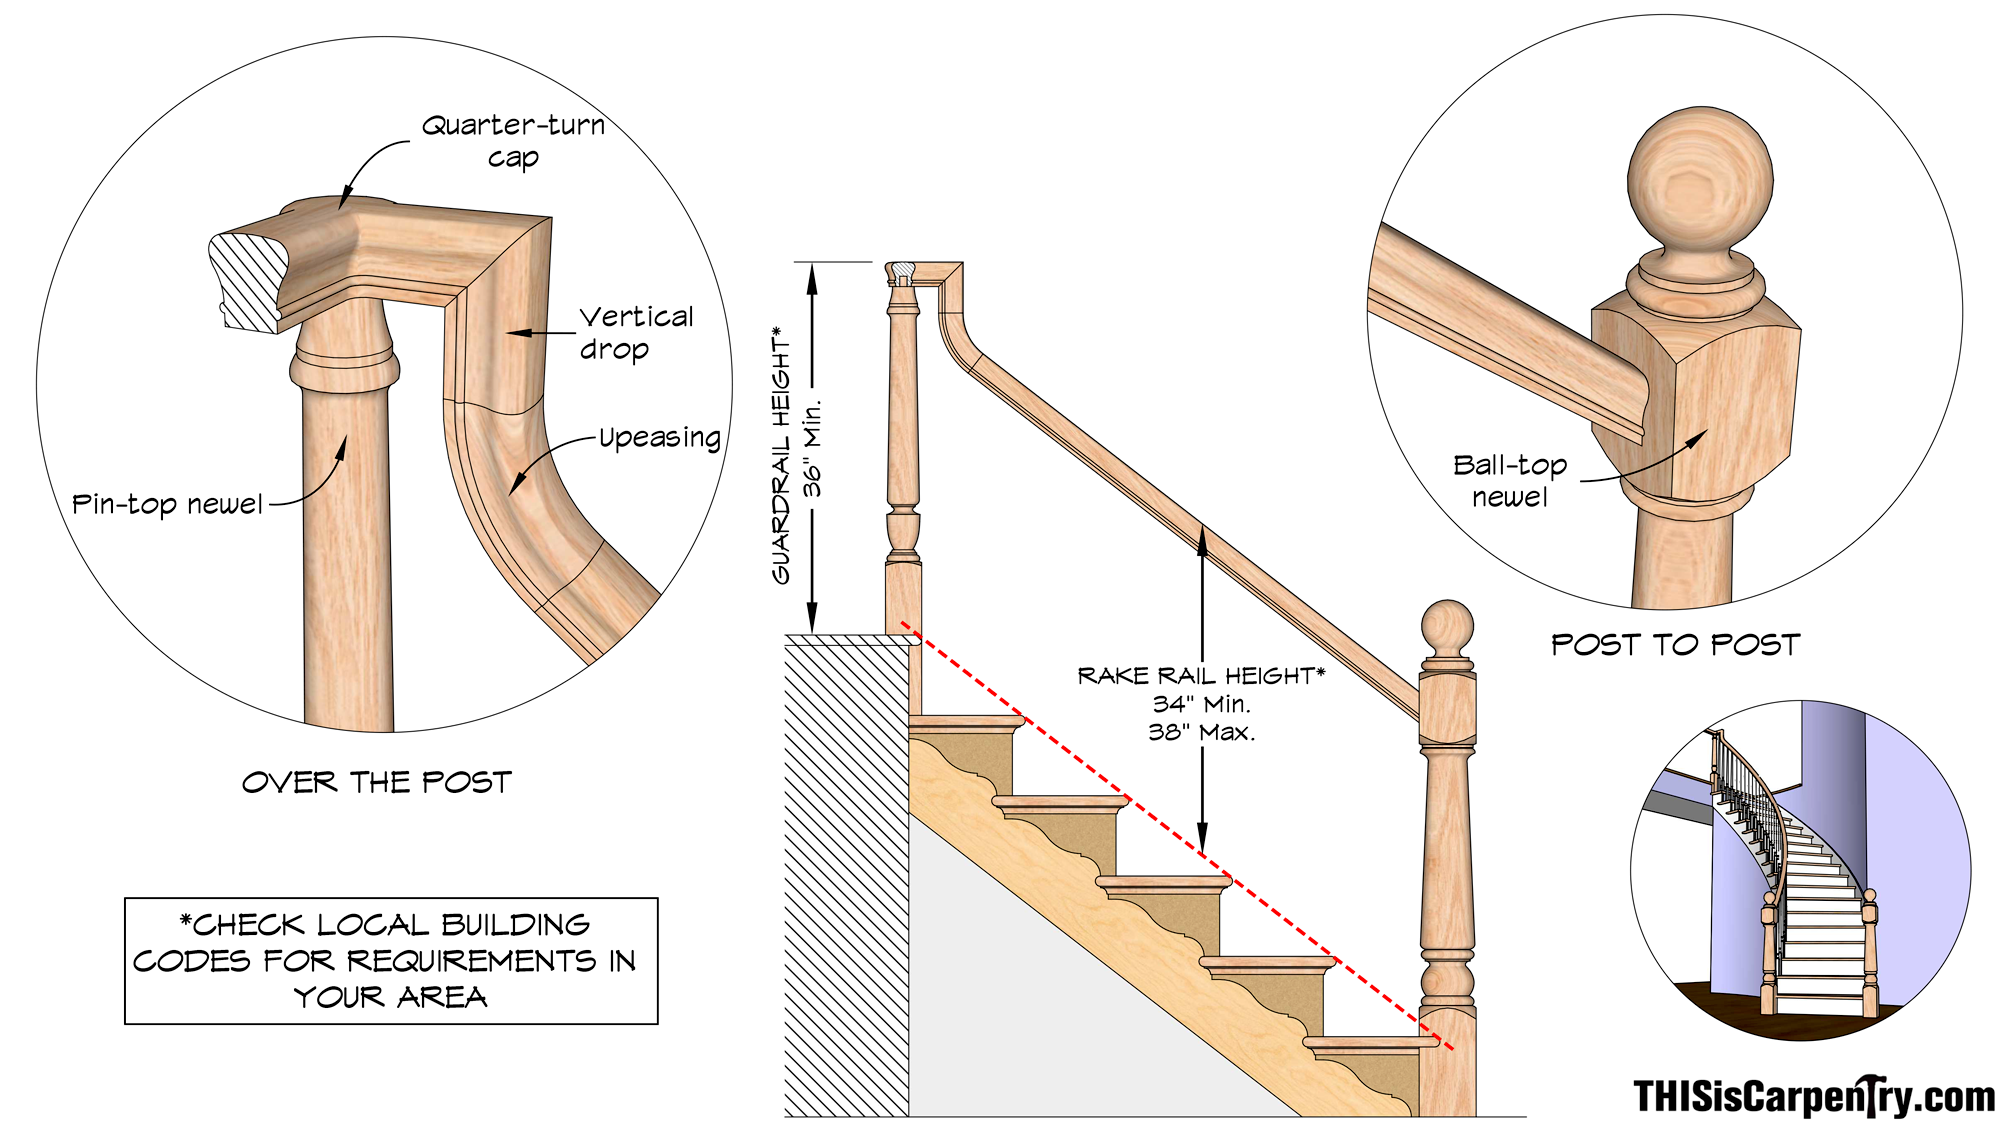
There are two different types of handrail installations: Over-the-Post and Post-to-Post. On this project we used a combination of both—pin-top newels at the top of the stair and along the balcony, and ball-top starting newels at the bottom of the stair.
As I mentioned at the beginning of this article, the methods used for setting newel posts and assembling stair parts are very similar for both straight and curved stairs. The basic calculations and techniques are the same. If you are not familiar with this aspect of the job or just need a refresher, the L. J. Smith Balustrade Installation Guide is a great step-by-step resource.
A word of caution though! Before you start cutting any of these expensive stair parts, I recommend having a good talk with your local inspector about the stair codes in your area. For instance, where I live, the horizontal guardrail height is still 36 in. off the finished floor, but in a lot of places it’s now 42 in.
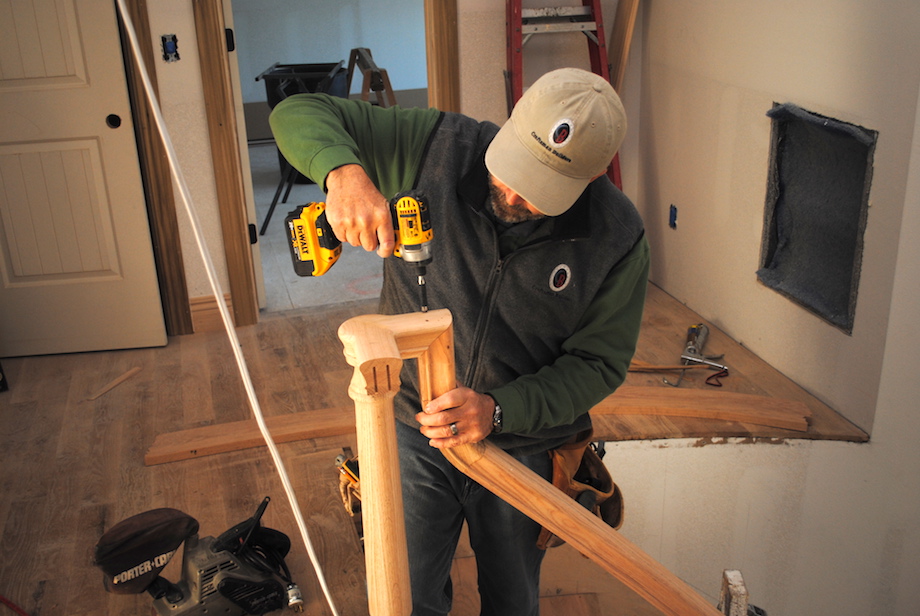
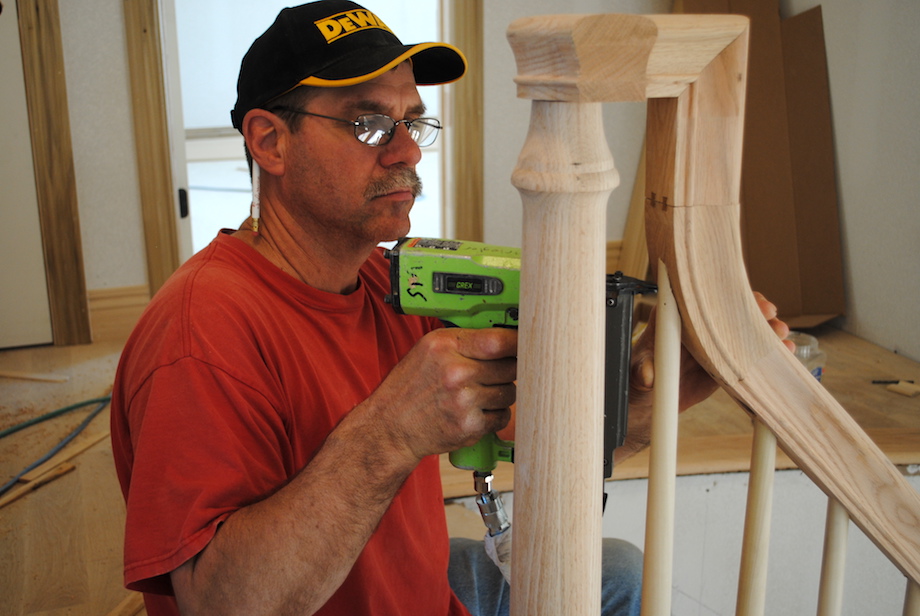
Once the newel posts are cut to height and installed, it’s time to start fitting the handrail. It just takes a simple mitered cut at the bottom post, but a few different handrail fittings are required at the top post. One fitting—a quarter-turn cap, sits on top of the post and makes a 90-degree level turn with one end mitered to turn down. Another piece—an upeasing, eases the railing transition between the stair pitch and vertical. And finally, a short piece of straight rail is added to bridge the gap between the quarter-turn cap and the upeasing. The tricky part is always deciding where the upeasing attaches to the curved rail, and determining the length of the piece of vertical straight rail.
| To make the job easier, we make temporary stands out of 2x4s and plywood and then set the rail in its installed position (my apologies for the blurred photos!). | 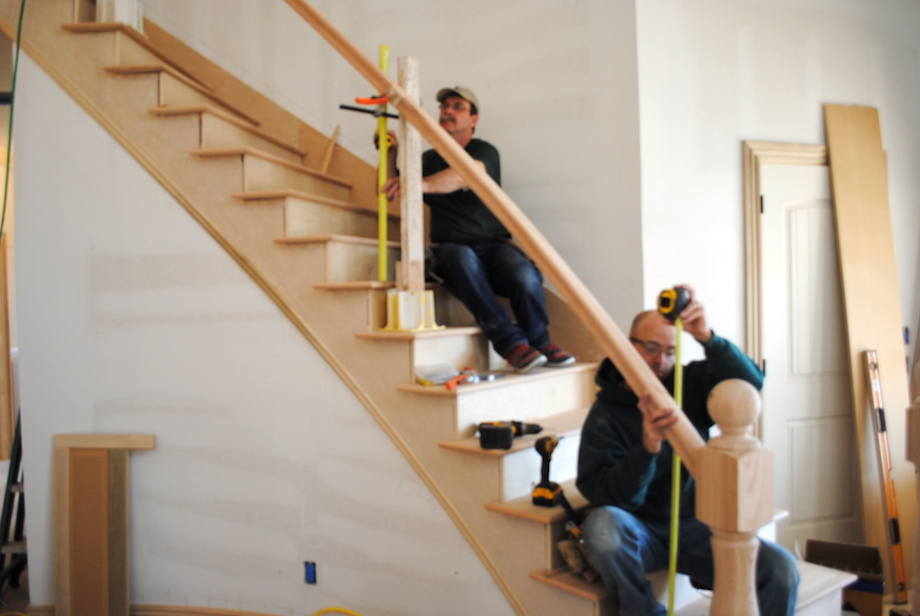 |
| Next, I attach about 12 in. of straight rail to the quarter-turn cap using trim head screws, glue, and headless pins. | 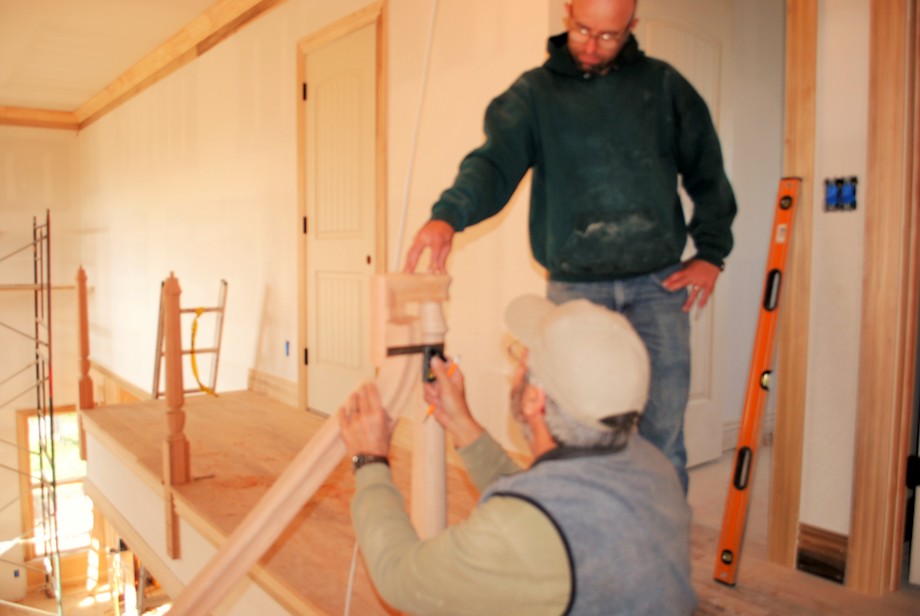 |
Then I hold the upeasing beside the curved handrail and vertical drop intersection, and I use a square to help mark the cut lines for all of the parts.
It takes at least one helper to hold the curved rail while I cut it. Most of the time I cut the parts a little long, and then I do a dry fit. It takes a little more time but it’s worth it. My goal is to create a smooth transition while keeping the vertical drop of the quarter-turn plumb, and its top level. The short rail at the outside radius just runs a short distance between the newel post and wall, so no fittings are needed.
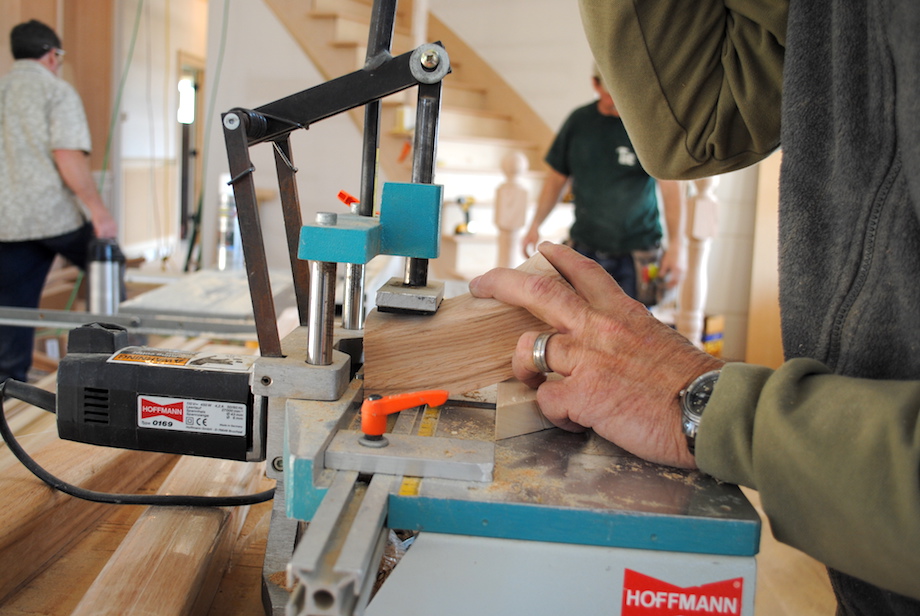
There are a couple of ways to make the connections between fittings and the rail. The most common way is using the rail bolts that come with fittings. Another method, which I think is faster, uses a special machine made by Hoffmann. I use the machine to make matching dovetail cuts in the rail and fitting, and then I drive in bowtie-shaped fasteners that pull the joint together.
 |
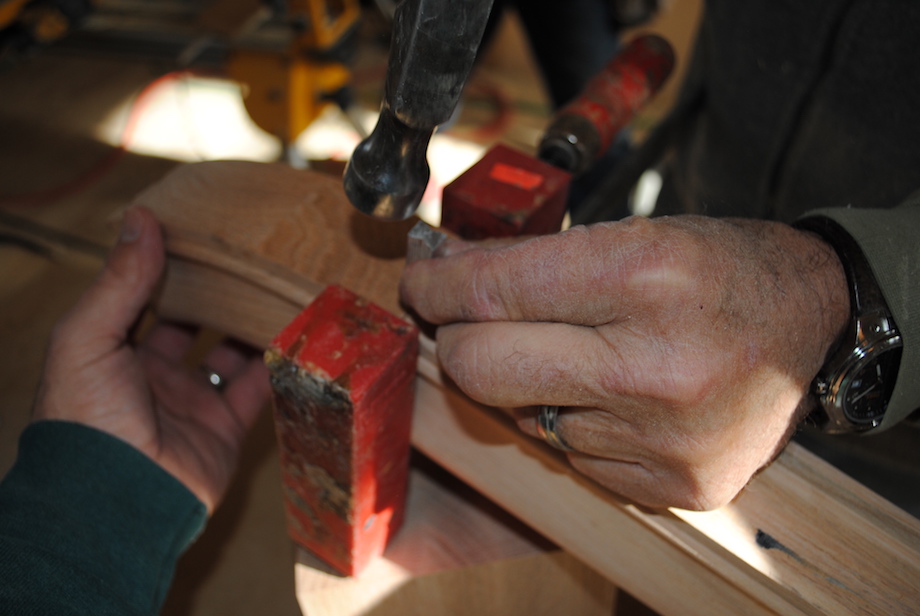 |
No matter which method you use, give the joint a good dose of glue, and plan on doing some chisel work and sanding on the joint.
While the handrail is still in place we locate all of the balusters. Since we had already determined the handrail and baluster centerline (the back of the sheetrock), I just had to decide on the front-to-back layout. Because of the maximum spacing requirements, I needed two balusters on each tread along the inside radius of the stair.
I start by locating the first baluster so that its leading edge lines up with the face of the riser below it.
| Once I determine the center point of that baluster, I make a wooden marking gauge and locate the center of the first baluster on each step. | 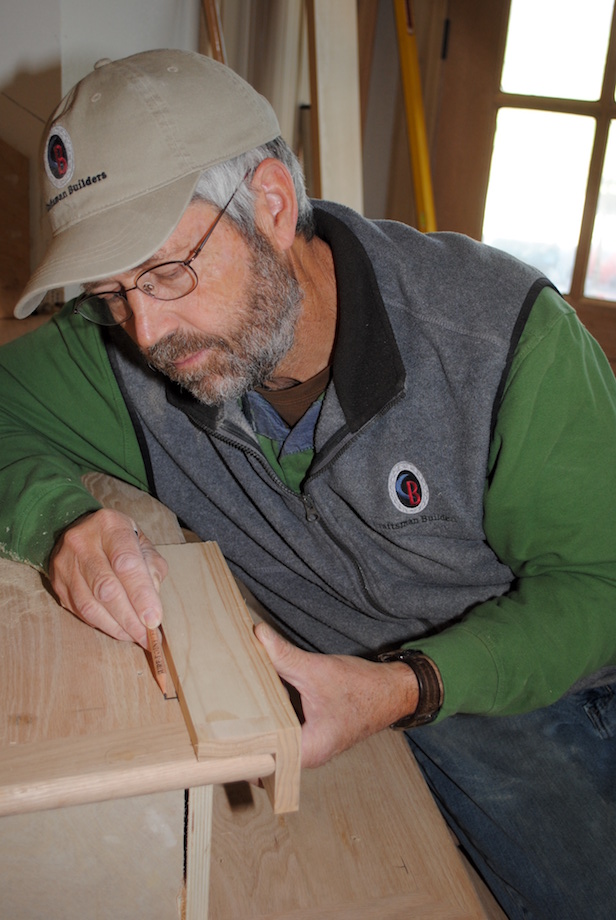 |
 |
Next I use a laser plumb bob to transfer the marks up to the bottom of the handrail. This next step may seem a little strange… |
| I use a tape measure to find and mark a point in the middle of each first baluster location on the rail, and then transfer those marks back down to the treads. | 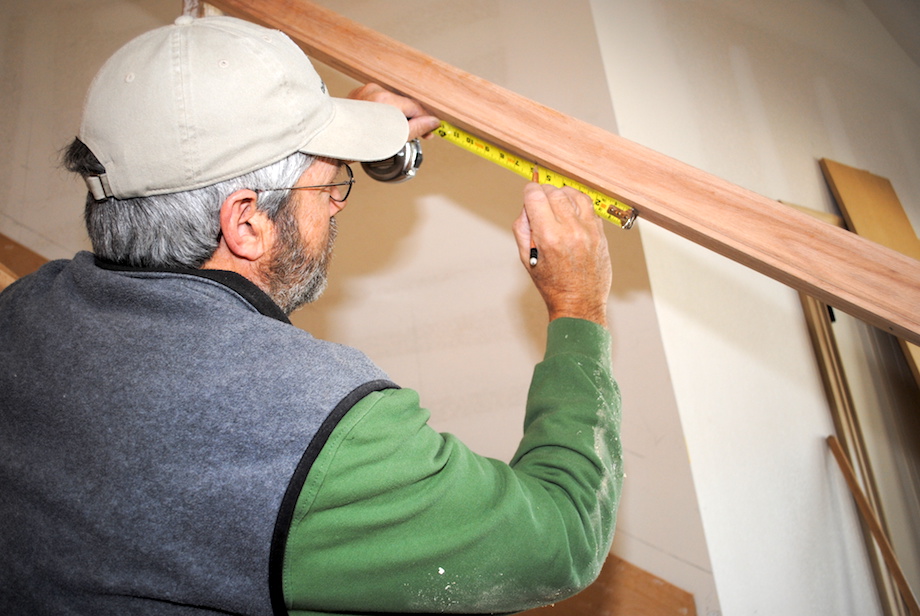 |
These marks are the centers of the second baluster for each step. This method lets me check my work and compensates for any slight differences in the way the treads were set.
Once I’ve located the balusters, I make a cut list starting at the bottom and working my way up. We cut each baluster so that they will penetrate about 1 in. into the bottom of the rail. On this installation I chose to trim the tops of the shorter balusters so that I could keep the bottom square portion of each baluster the same length.
We use dowel screws to attach each baluster to the stair treads. They are like a lag bolt but with threads on each end.
| You just drill a 1/4-in. pilot hole in the bottom of each baluster and one in the tread. | 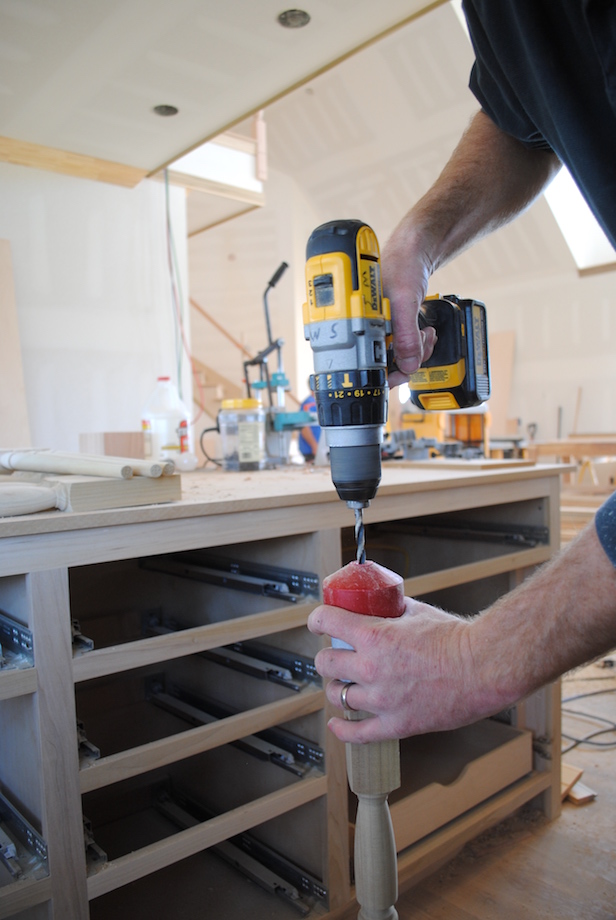 |
 |
We use a driver that fits in my 1/2-in. drill to screw each bolt into the tread. |
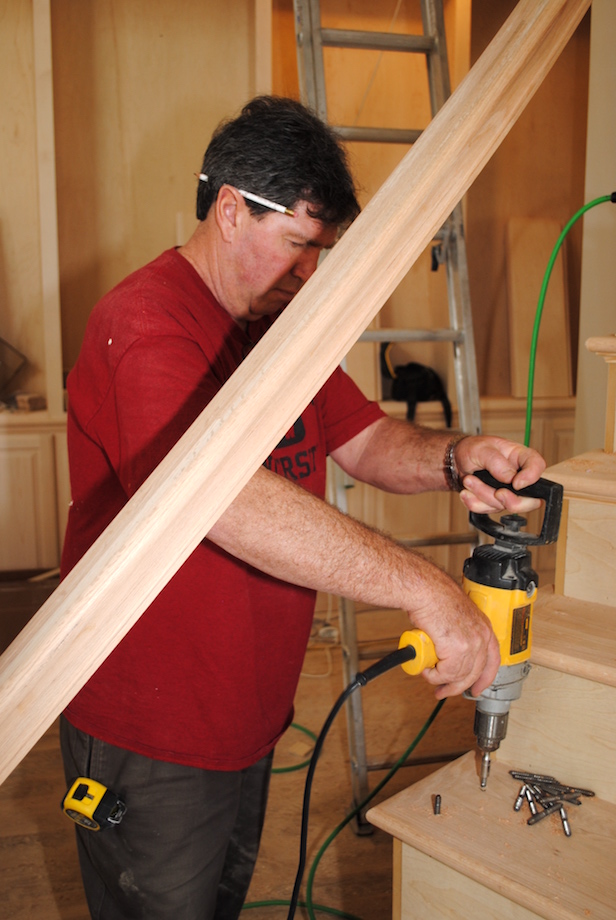
| While one of my men started working on the baluster cut list and drilling pilot holes, I drilled the bottom of the rail using a sharp 3/4-in. bit. Sometimes I will have a spotter to make sure I am holding the drill plumb for a straight hole. | 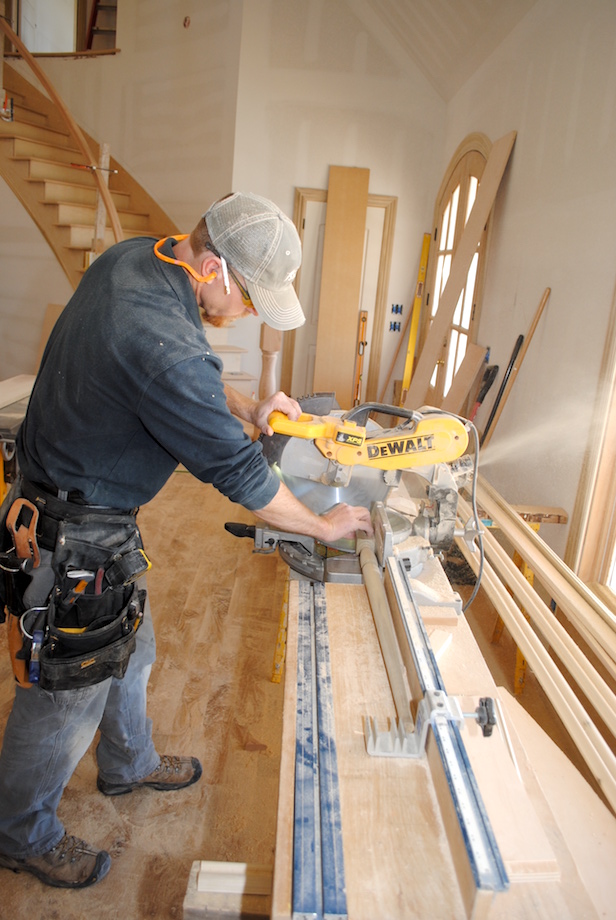 |
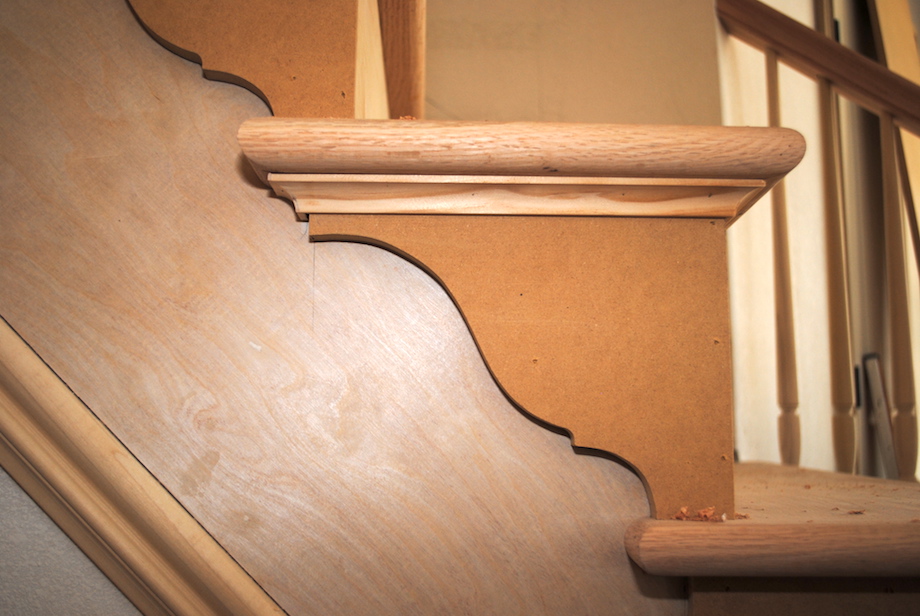
Once the drilling is done the railing comes off and I hit the bottom one more time with a belt sander. It’s almost impossible to do any more sanding once it’s installed because the balusters get in the way. This is also a great time to finish the trim details on the treads. We install custom stair brackets that we make out of scrap MDF left on the job, and then run cove molding underneath each stair tread and around the bracket.
Final assembly
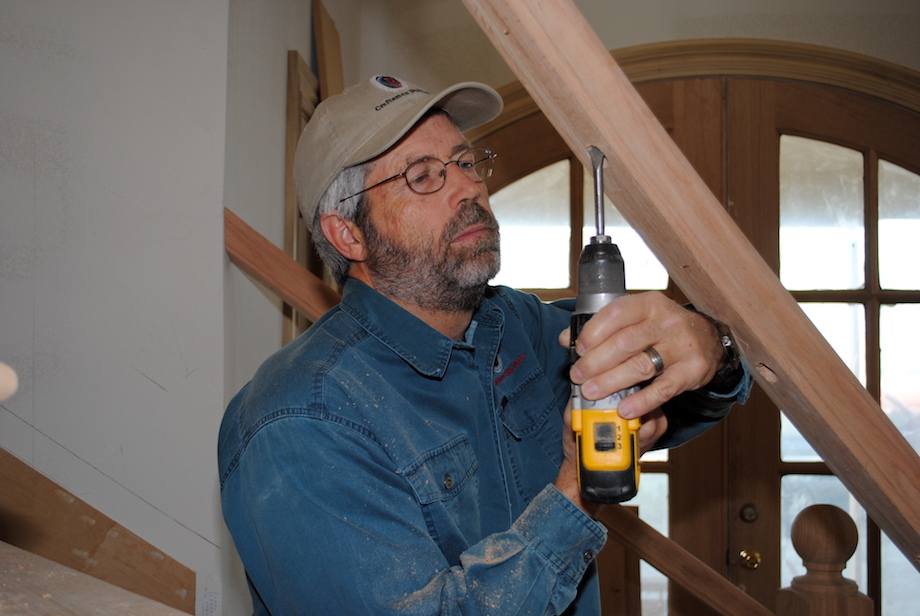
Everyone’s least favorite part of stair work is screwing the balusters in place.
It’s a good work out for your forearms! Sometimes we make a box out of plywood with a handle on top for leverage to slide over the balusters and spin them in place, but if you have enough help spinning them in by hand is faster. Sometimes you have to double up to get that last 1/8-in. turn to line up the baluster.
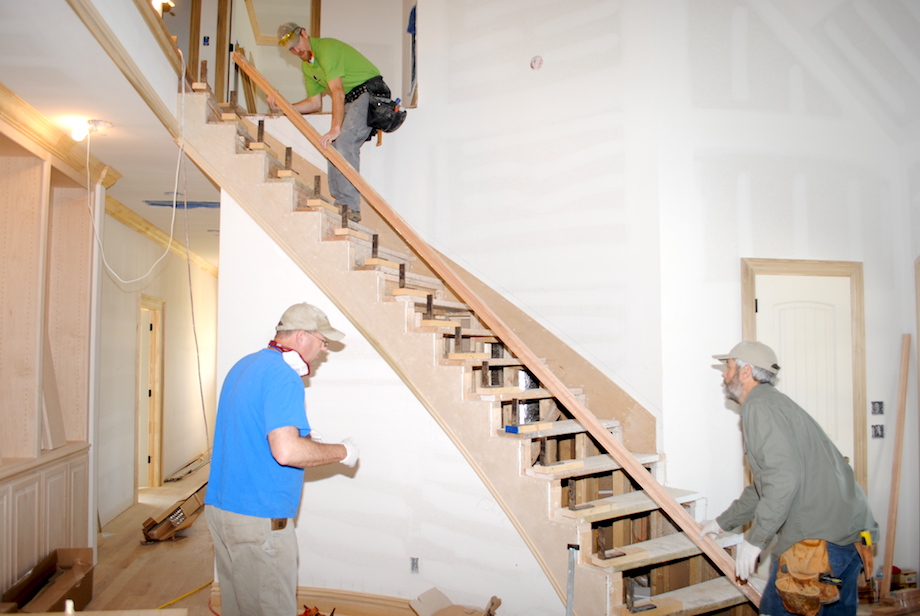
Setting the rail in place can be a real challenge. It’s a three-man job at least.
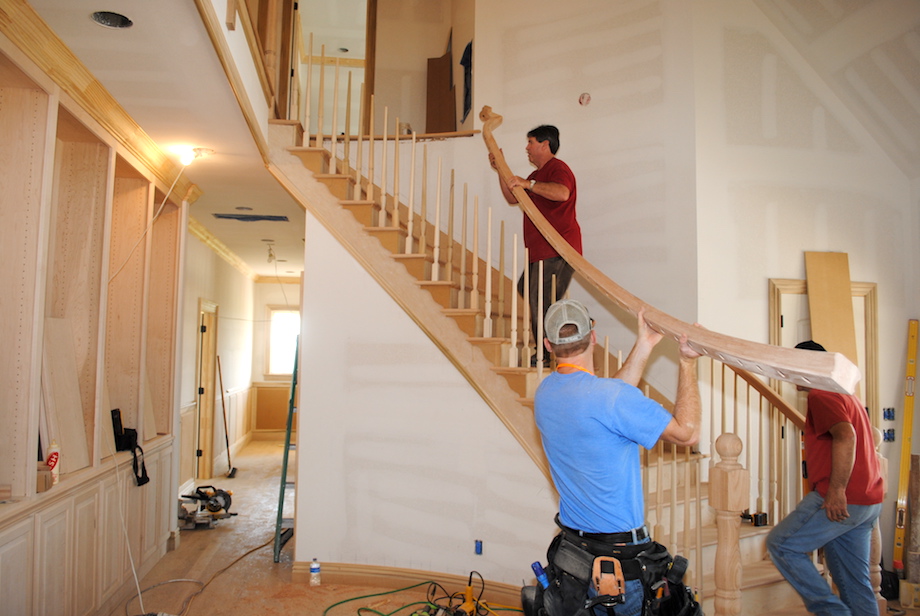
We always start at the bottom and work to the top, driving the railing down with rubber mallets and occasionally a scrap of wood and claw hammer for stubborn spots.
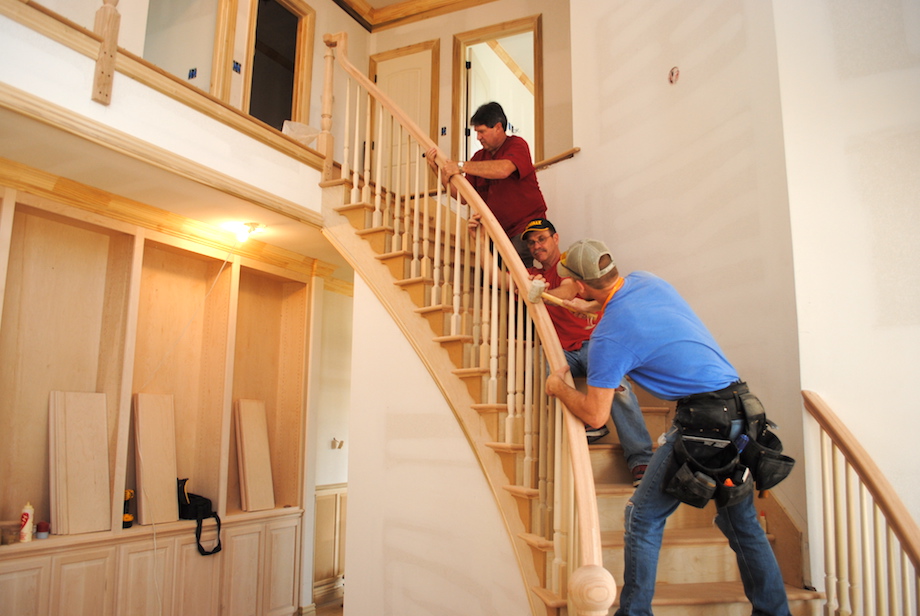
One man keeps the rail in place at the bottom while the other two work their way up the steps.
After the rail is installed, the last baluster at the top of the stair is coped and nailed into the bottom of the upeasing. The landing run is a lot easier, and once both pieces of railing are in place we make up the last joint and then final sand all the joints one more time.
 I am always excited to start a curved stair, but it’s even better to step back and look at the finished product. It’s an amazing feeling to look at a graceful curved stair and know that you had a part in building it. I am thankful for every one I have had the opportunity to build. Like a lot of things, it is a step-by-step process that isn’t that hard once you’ve seen it. My hope is that after reading this article there will be a lot of people who get to have that same feeling of pride saying, “I built that!”
Gary,
Thank you for taking the time during your build to document the process with such great illustrative photos.
A fascinating process that you clearly laid out made it easy to understand, it looks great!
Thanks,
Jon
A fascinating article, looking at it from a step-by-step approach make it seem much more manageable. However im sure it take quite some time to learn all those “steps”. How long does a staircase like this take you and your crew to build? They appear to be quite an investment in time and money for a home but truly are a centerpiece.
Thanks,
John G.
Building an onsite curved stair is one of the most challenging of all construction projects. This is a very helpful, step by step illustrated article that walks you through the whole process. Personally, I would have included how to miter the risers to the skirt board so that the brackets are not necessary. Perhaps the stair was designed to include the brackets. Also, it was not clear to me if the tread returns were straight or curved. Describing how to make the curved inside and outside tread returns and the cove molding that is installed beneath the returns would also be helpful.
Thank you for the article.
How many man hours went into this project?
I am a very visual type of person. Do you have a video that shows step by step the installation of the curve stairs? If so, how do I order one?
Alexei if my work were perfect they would be but I am pretty happy if they are with in a half inch. Since I do not drill much more than a inch into the rail I measure and cut Balusters for each step .
Hello,
what type of molding you use to cover the gap between the stair stringers and drywall (in the curve section). I have the same situation and donot know how to cover the gap with trim that match the stair stain color?
Thanks
Emad