


Part One: Framing
I can still remember the first time I worked on a job with a curved stairway. By the time I got there it was sheet rocked with temporary treads. Up to that point I had built several straight stairs and even one or two that hit a landing and changed directions, but this curved thing was a complete mystery. The guys who had worked there the whole time shared just enough to really get me interested but they weren’t giving up many of their secrets. I made up my mind that if they could do it so could I.
It took several years, and a lot of time asking questions and a few false steps, but I did get the chance to build a curved stairway for a friend. I didn’t make a lot of money, but the education I got was priceless. The number one thing that I learned is there isn’t that much difference between a curved stairway and a straight one. It is still all about rise and run and getting the layout right. I have built several freestanding curved stairs and a few that only have a curved wall at the outside radius, but the one we built for this article is supported on both sides. I’ll have to save building the unsupported stairs for another article.
(Note: Click any image to enlarge)
A curved stairway actually has two rise and run layouts—one at the inside or tight stringer, and a different layout at the outside stringer. The good news is for my simple method you only have to worry about the inside layout. The first thing I have to do to layout a stairway is figure out how many rises it will take to get from one floor to the next. It is always a good idea to talk to the local building inspector, but where I live 7 3/4 in. is the maximum rise allowed per step. I start by measuring the distance from one floor to the next, then divide by 7 3/4 (make sure you make allowances for the finished floor on both floors) to get the number of rises and then adjust the rise per step to be equal. Since the staircase starts with a rise up to the first tread and there is one more rise from the last tread up to the next floor, I always have one less tread than the number of rises. Everyone has different ways of working.
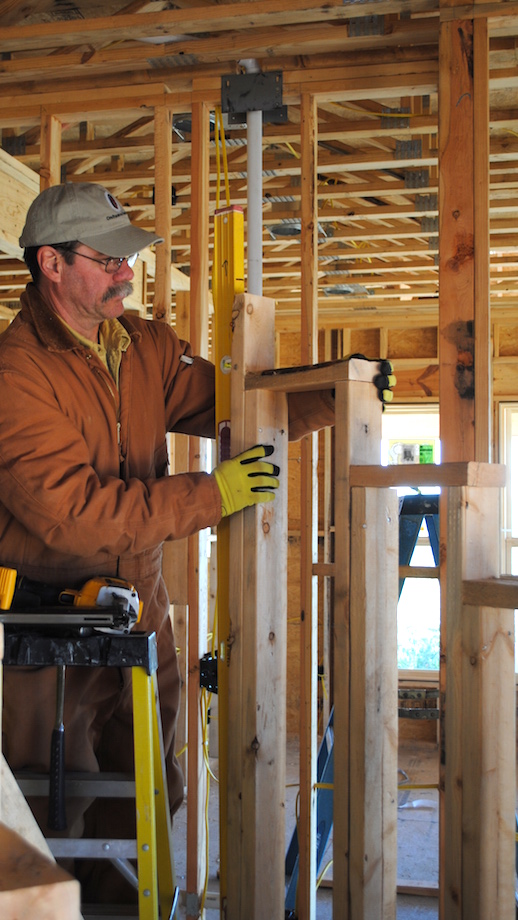
For me doing a vertical layout on a story pole helps me double check my math.
 |
 |
I actually layout the subfloor and finished floors along with the top and bottom of each tread to make sure I have the rise for each tread correct. On my jobs those are always one-inch thick wood custom made to match wood flooring in the house.
As soon as I am set on the number of treads my mind has to change gears to thinking horizontally. I need to know the size and location of each tread so I do a full-size layout on the floor exactly where the stairway will be built. My curved stairs are usually a little more the one quarter of a circle and it takes a little bit of trial and error to figure them out. I’m sure that there is a way to do that with a CAD program, but that’s just not the way my mind works. I have built stairs where the framing carpenters have already built the outside curved wall based on the plan before I got there, but that really shuts down my options. If the depth of floor truss grew (that increases the rise) or someone moved a door or made it bigger (that decreases the potential run), the wall on the plan may not work. I really recommend building your own walls or at least getting to the job early and doing your own layout.
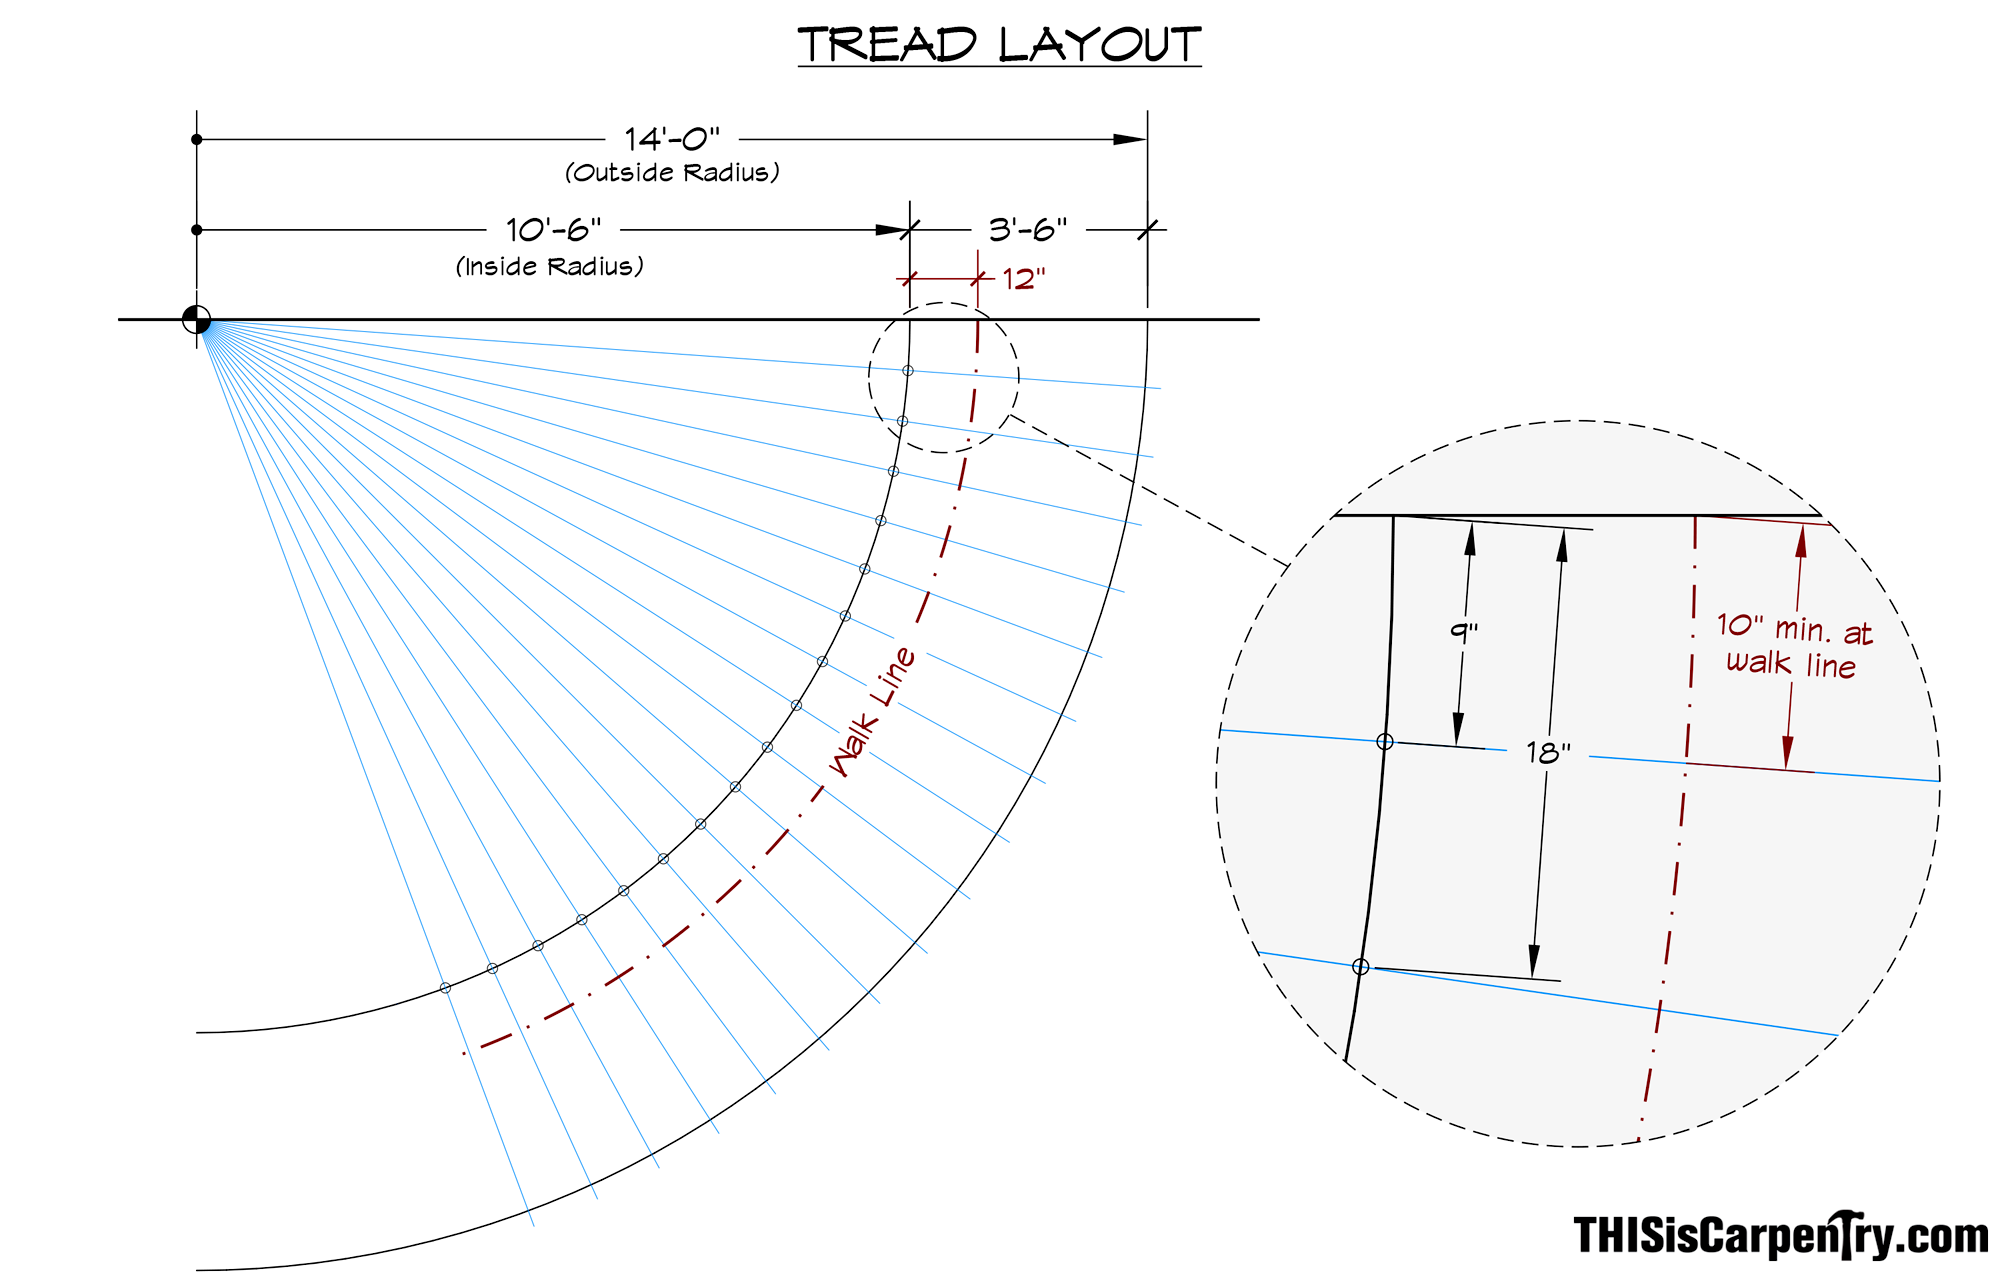
| The first thing I have to do is pop a long chalk line on the floor (usually about 14 ft.) directly below and parallel with the back edge of where the top tread has to end up on the second floor. The pivot point for the stairway will be along this line. Most curved stairs are 3 ft. 6 in. or 4 ft. wide. The stairway in this article was 3 ft. 6 in. I subtracted that from 14 ft. to get a radius for my inside wall of 10 ft. 6 in. | 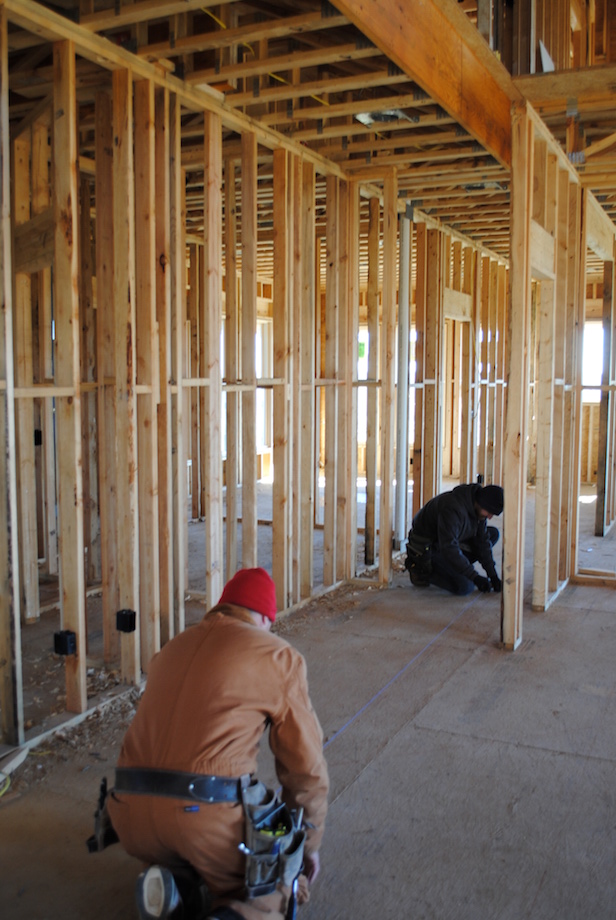 |
To find my pivot point, I start at the point directly below what will be the far back edge (at the outside curved wall) of the top step and measure back fourteen feet. That is just working from experience so you can see where the trial and error part comes in.
 |
 |
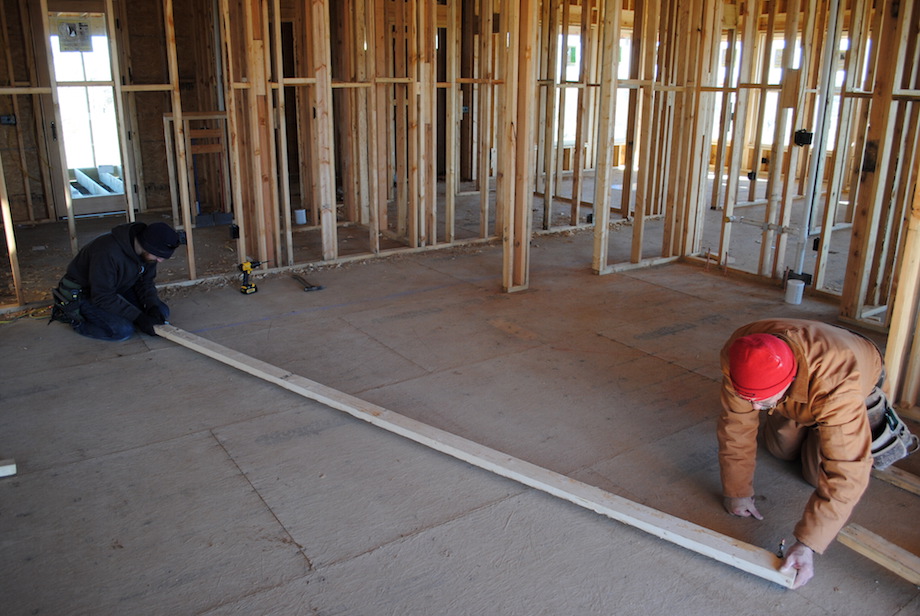
I use trammel points that clamp onto a 2X4 at 10 ft. 6 in. and I draw well over a quarter of a circle using the 14-ft. pivot point. That is the radius for the inside wall. I extend the points to 14 ft. and draw the outside radius. Now I am ready to do a trial layout for my tread size.
There are two places you have to meet a minimum size with a curved stairway. The minimum size where I work is 6 in. at the inside radius and 10 in. at the walk line, which is 12 in. in from the inside radius. These measurements don’t include any tread overhang, but I always think the best thing to do is call your local inspector and make sure you are on the same page with him.
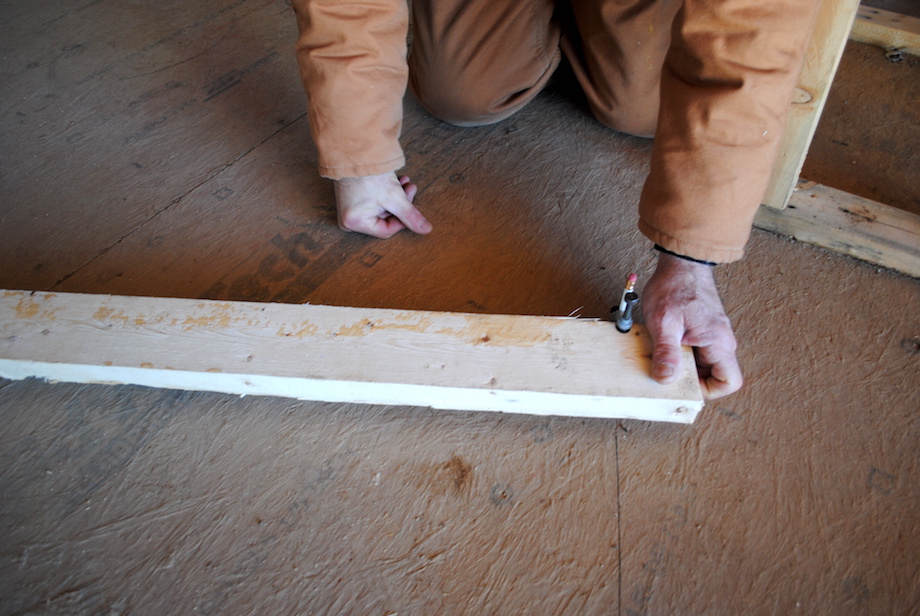
| This is the really simple part of my system. I start at the chalk line and make a mark at 9 and 18 in. (just based on experience) on the inside radius. Then I go back and drive a screw at my pivot point leaving just enough to hook my chalk line. | 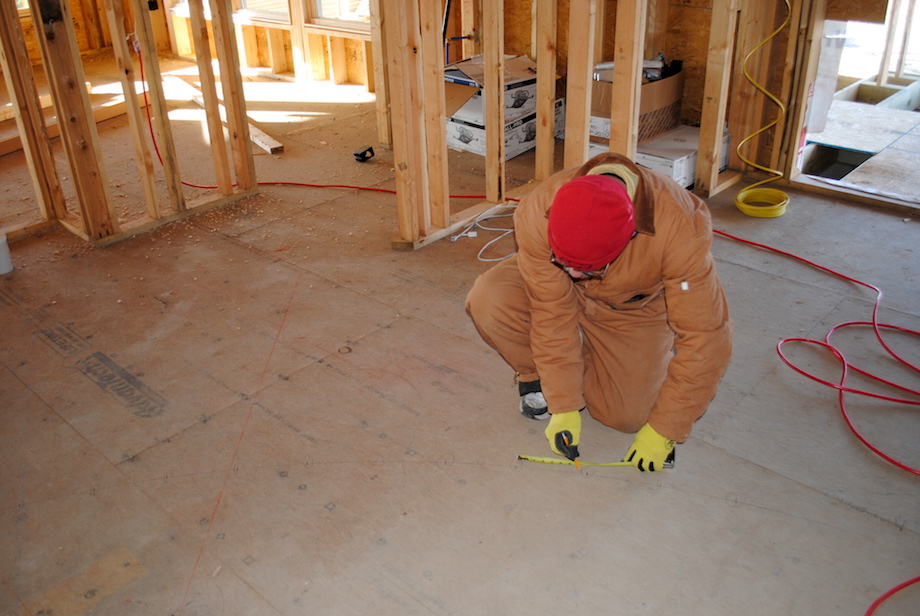 |
| I pull a line through the 9-in. mark all the way to the outside radius, then I pop a line and move to the 18-in. mark to pop another line. That gives me a tread layout. | 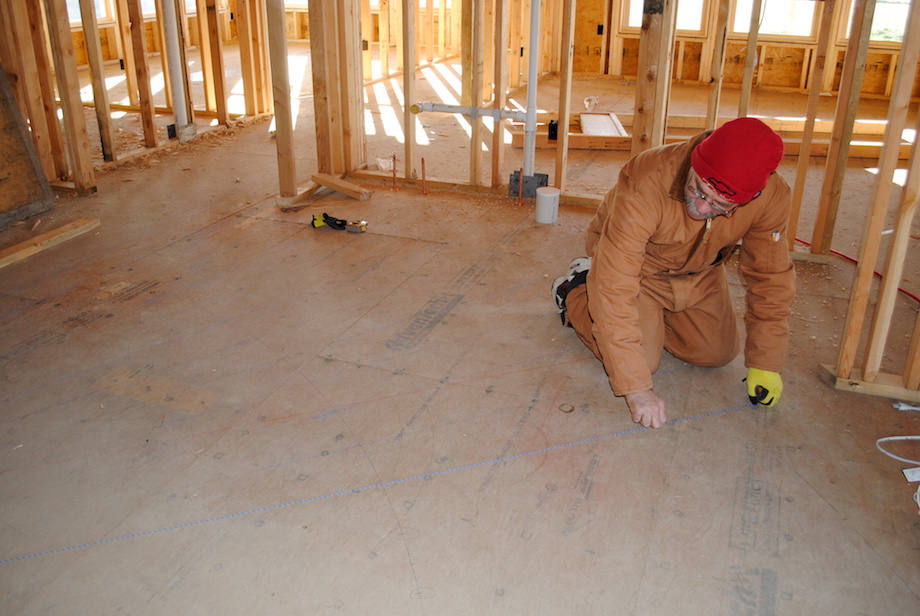 |
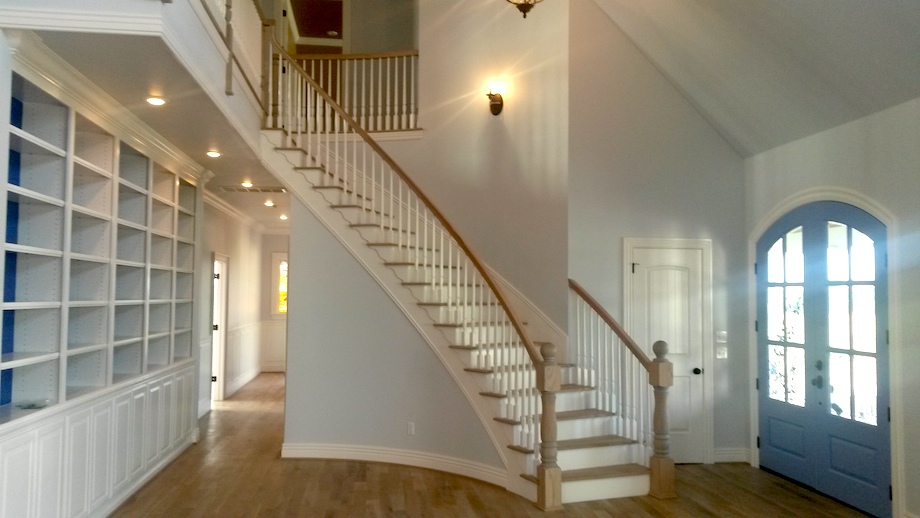
As long as it meets the width requirement at 12 in. in, I am ready to lay out the rest of my treads. If it doesn’t, I just have to make my marks along the inside wall line longer and pop another set of lines with a different color of chalk. We double checked to make sure 9 in, worked then made a mark every 9 in. along the inside radius, one for every tread. If space is really tight you can draw a radius 12 in, in from the inside (that is at the walk line), and then make marks every 10 in. to pop a chalk line through. That will give you the absolute minimum size tread that will meet code. After I made the last mark I popped another chalk line through the last mark to locate the start on my first step. This house had a double front door and the stairway came about halfway in the front of one door. But I had made sure it wasn’t the active door and there was room to swing it open with a couple of feet to spare. That much room usually feels pretty good to me. If you don’t like where the first stair starts, then the only options are to increase the rise per step to lose a tread or shrink the tread size. If you are already at the maximum rise and the minimum tread size, then the only other option is to change the wall radius.
When I am happy with the location of the first step I go back and pop a line through all the other marks all the way to the outside wall line. These lines actually represent the front of each riser. I like to number each tread at my inside wall line and I number the treads on my story pole too. It really helps me keep track of where I am when I start to combine the horizontal layout on the floor with my vertical layout on the story pole to build a curved wall. I learned a long time ago to build a curved inside wall with steps in it. That is a lot easier than laminating a stringer, building a wall under it, and then cutting steps in the stringer. The curved wall that I build actually becomes the form for my inside stringer. The steps in my curved wall give me the location to cut the stinger for each step.
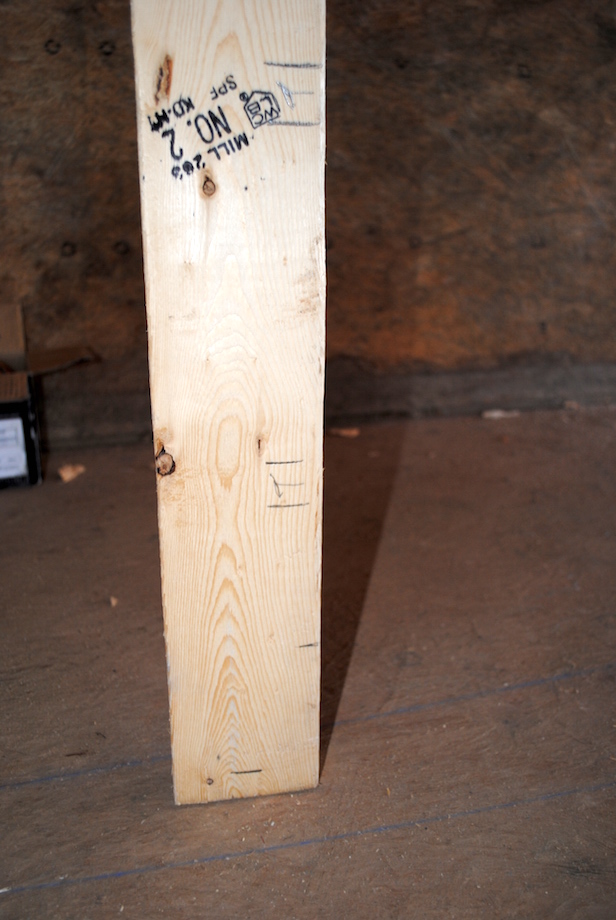
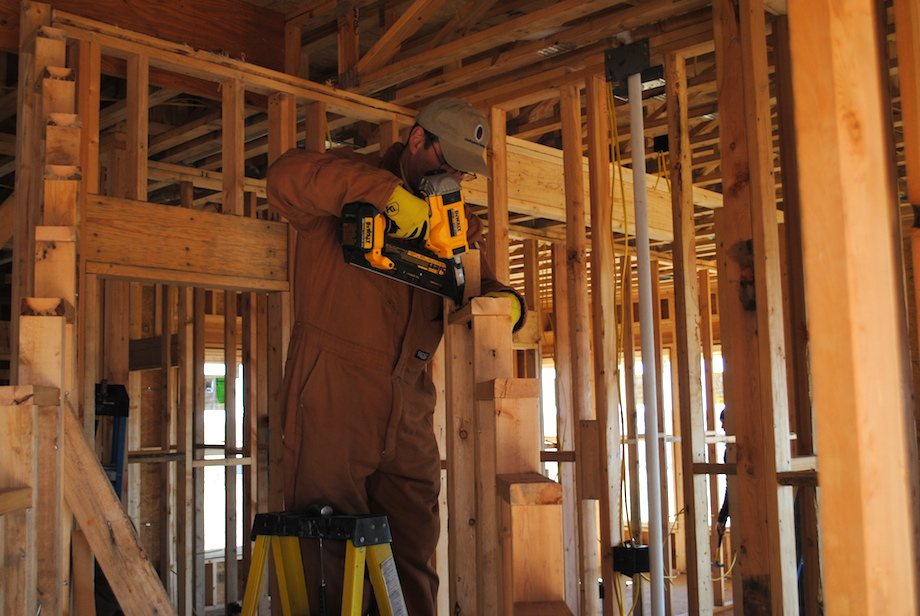
The bottom plate of my curved wall is actually a series of wedge shaped pieces of 2×4 that fit between the studs at the front edge of each step. For this stairway they were 7 1/2 in. long and cut on a 2-degree angle. It usually only takes a couple of cuts to find the angles and length I need, then I can cut enough wedge shaped pieces for the whole stairway. A miter saw on a good stand with a way to set a stop for repeat cuts really speeds up the whole process. It takes two studs at each tread, and it’s pretty easy to make a stud cut list from the story pole. The front stud (I am calling these the “A” studs) at each stair is the length to the bottom of that stair tread minus 1 1/2 in. The back stud is 3 in. shorter than the bottom of the tread (I will call these the “B” studs). I am always careful to save my straightest material to make the tall studs toward the top of the stairs.
The chalk lines on the floor mark the front edge of each riser. Since the riser has to run past the front stud at each stair I move the stud location one inch behind the chalk line to allow for a 3/4 plywood riser and a little room to shim. The first wedge piece gets nailed on the inner wall line 2 1/2 behind the chalk line (one inch for the riser and 1 1/2 for the stud), then the first stud (“A1”) nails into it. The lead stud for the second step (that would be “A2”) nails into the back of the block, then the 3-in. shorter back stud (“B1”) nails to the face of the “A2” stud.
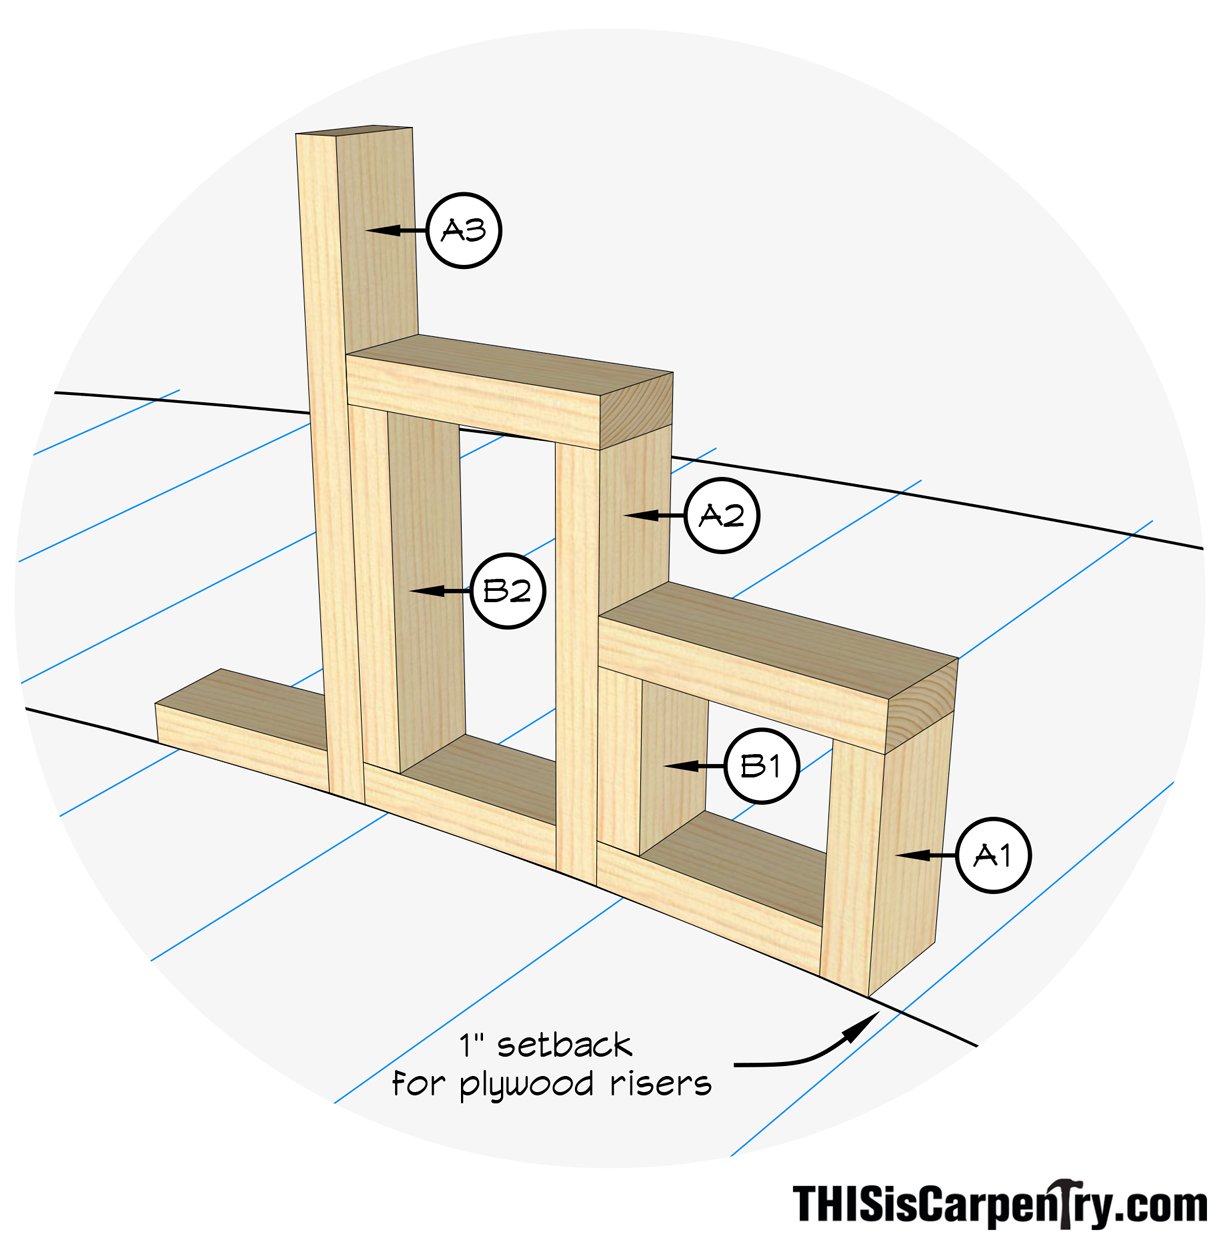
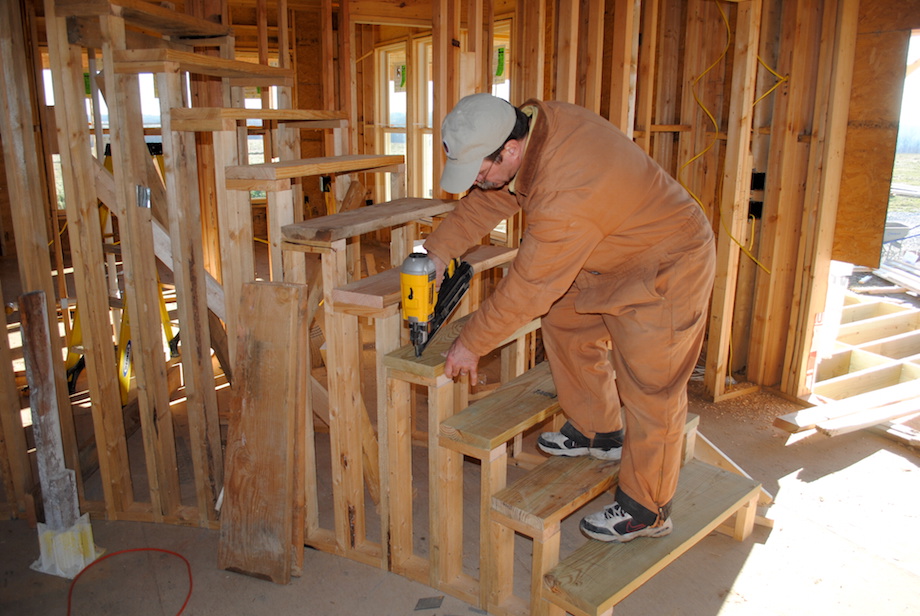
| The last thing I do at each step is cut another wedge shaped piece of 2×4 that is 1 1/2 in. longer than the one on the floor, and I nail it over the top of the A1 and B1 studs. It forms the top of the wall and is actually what my finished tread will sit on. I just keep repeating the process for each step/section of my curved wall. | 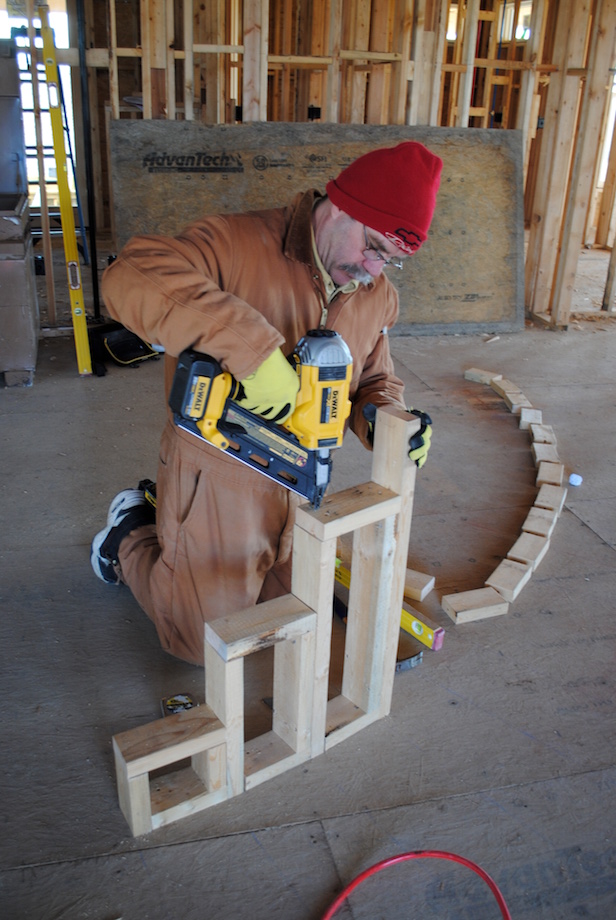 |
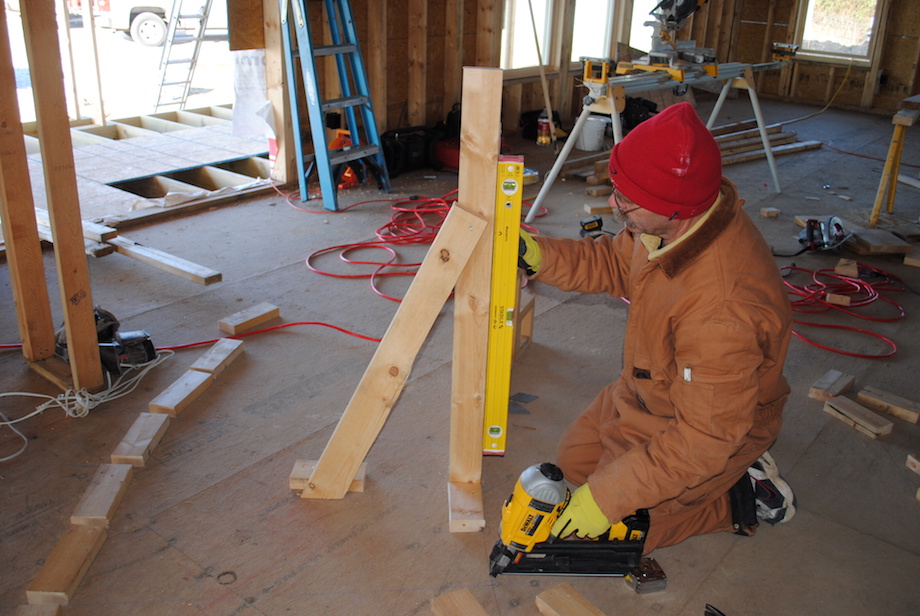
About every 3-4 steps I add a temporary diagonal brace to keep the wall plumb. Later on I will add blocking for drywall on the bottom side of the stairs, which connects the inside and outside wall so I can get rid of the braces.
On some stairways the entire outside wall is complete and I just have to laminate a curved skirt board or stringer for the treads to die into.
| If the wall is already sheet rocked, I glue and nail the layers straight to the drywall. | 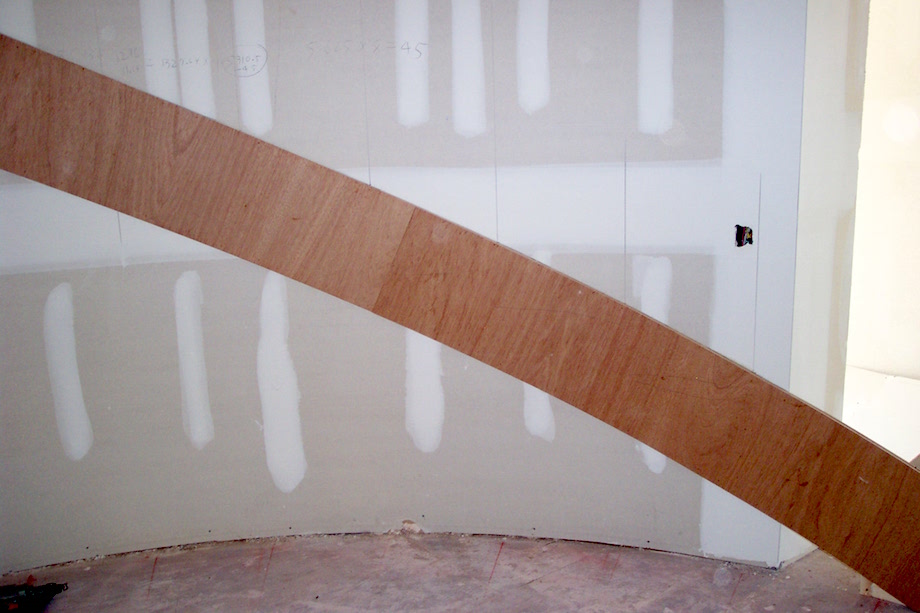 |
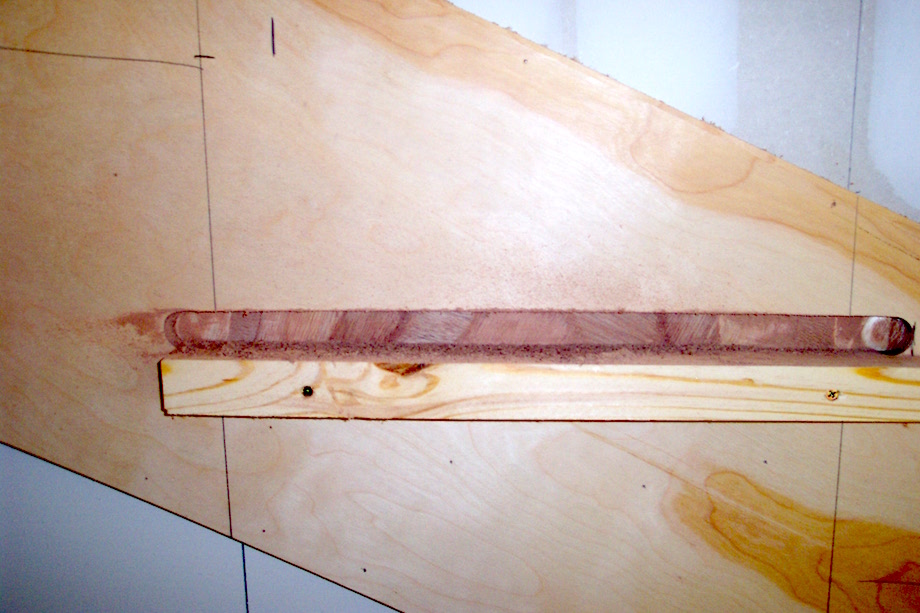
| I plow pockets into the skirt board with a router to receive the stair treads… | 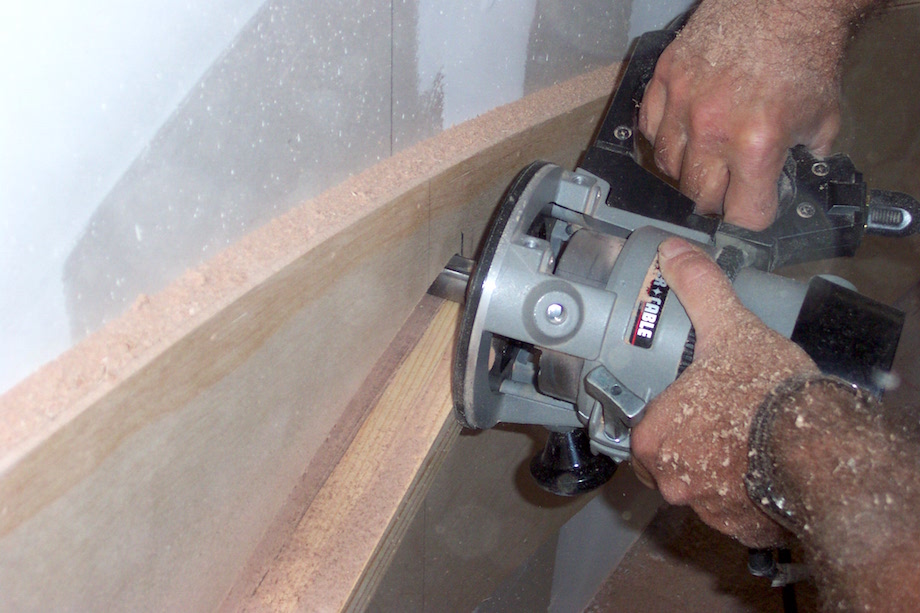 |
…and I glue on a cleat to support the tread:
 |
 |
Other times I get there first and just keep building my curved wall with the steps in it inside the 2-story curved wall.
| A third option is to laminate an extra thick (to allow for the sheetrock) stinger right to the 2-story curved wall studs and let the sheet rocker work to me. | 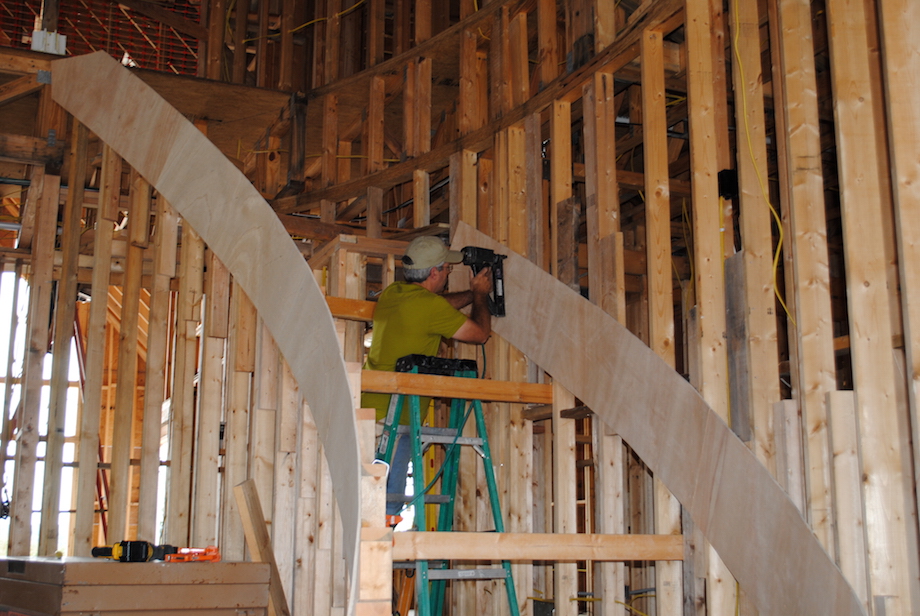 |
The first four steps on this stairway were open on both sides so I started building a curved wall at the outside radius. All the stud lengths were the same at each step (same amount of rise at this layout) but the wedge shaped pieces were longer (the run increases at the outside radius).
| I actually built the wall for the first four steps to the outside of the outer radius. That makes the first four steps about 4 1/2 in. wider. | 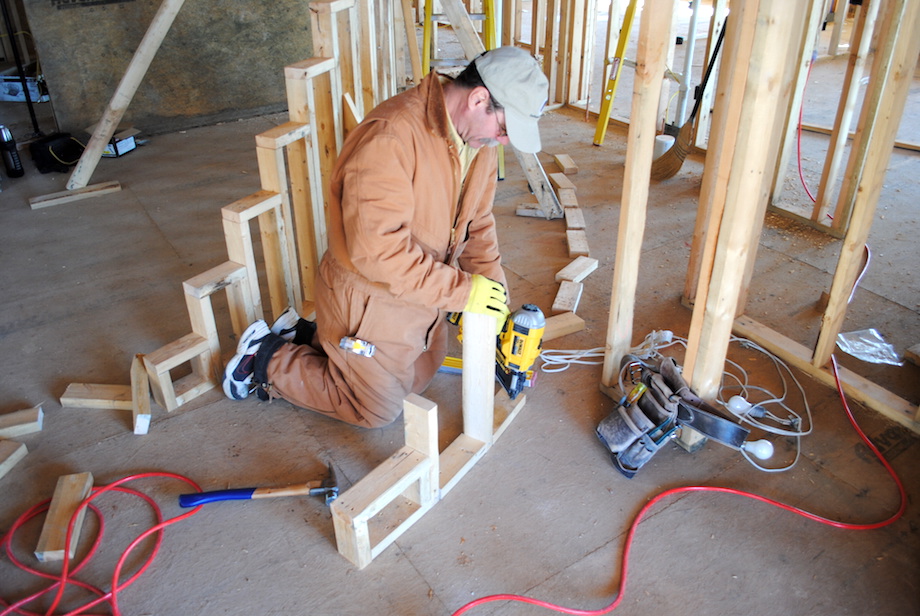 |
That extra width let me move the centerline of the handrail over just enough to die into the wall.
 |
 |
Since I beat the drywall guys on this job we just moved to the inside of the radius line and kept building our wall with steps in it after the first four steps.
We added short joists between the walls for a drywall ceiling under the stairs after both curved walls were complete.
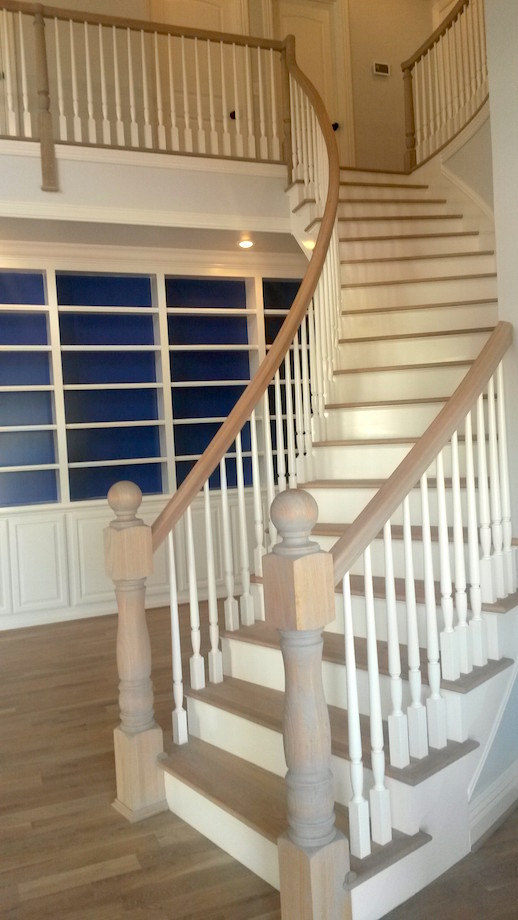
The last step in the framing part of our curved stair job was to nail down temporary treads to walk on and put up a temporary rail for safety.
I couldn’t wait for the sheet rock work to be done because I really enjoy the second part of a stair project like this one. Part two of this article covers laminating skirt boards, building custom pie shaped stair treads, bending a curved stair rail, cutting, fitting and installing handrail/balusters, and final trim details. That might sound like a lot to take in but it is just a step-by-step process. I am sure that, just like me, once you see it you will realize there is no mystery to it—just some hard work that really pays off.
Check out Jed Dixon’s article for more information on story poles for stair layout.
Really helpful article, thank you..
Nice work! Thanks for sharing your experience with us.
Very nice, hope one day to try it
Gary, as always your methods are so practical and straight forward. I really appreciate how you take a complicated process and break it down into easy to understand segments. I’m really looking forward to the next article.
Gary I have been framing for several years and have done a lot of radius work including some radius stairways however I have yet to do a free standing stairway I have tried to find a source for the math that shows how to layout the inside and outside stringers based on the circumference of the segmented arch any help would be greatly appreciated looking forward to next article thanks
Don’t know if this helps but your math would be plus or minus the thickness of the material you are using to make each consecutive layer of the bent laminated Beam
Can’t wait for part two
Thanks for a great article. My learning experience has been very similar to yours. I tried to find a mentor when I first got into curved work but ended up figuring it out myself, just like you did. Your methods and thought process are uncannily similar to mine but then I guess it’s like I keep telling my guys. “It’s really just geometry.” The one thing you didn’t mention is how much more fun it is to do curved stairways than straight ones.
First! Thank-you for sharing your methods!
We undertook this project 22 years ago in our home, the difference being the curve is opposite to your example here.
One thing that we differ with is the studding supporting the stairs. We created curved plates in-shop out of 2×10 and where you have a1+b1, a2+b2 etc. we used a single stud to carry b1+a2, b2+a3, etc. The cap pieces are screwed in from behind and the front of the cap sits on the lower stud. These studs sit atop the curved plate to prevent sagging of the subfloor where there may be pressure from the studding sitting on end by itself. We used 1 inch birch plywood to create the tread base and 3/4 inch to make the risers.
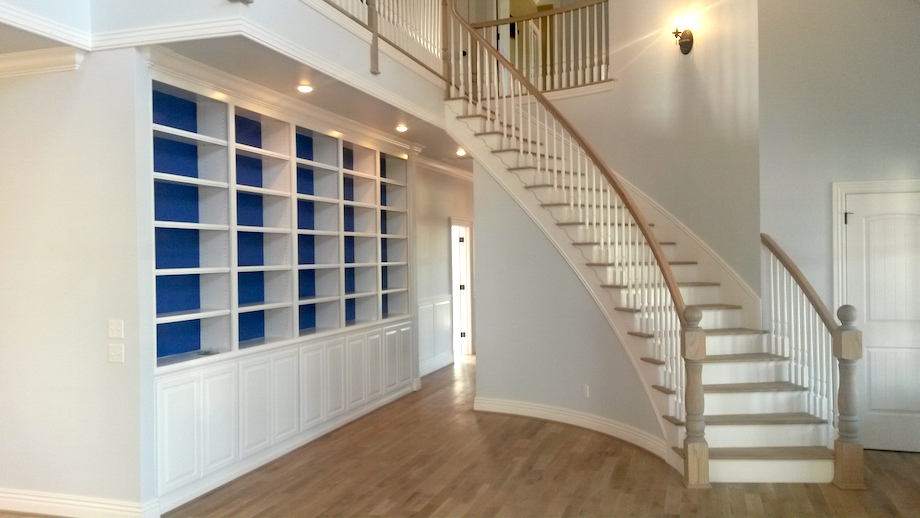
Gary – I appreciate seeing your methods align with those of other craftsmen. A curved staircase is truly a work of craftsmanship and art! (I also like that built in book case near the stairs!!)
Hi Steve, I love the picture you provided above. I’m planning to remodel a staircase based on this picture. Do you happen to have a picture of the finished staircase?
Thanks!
great article,thanks for shareing,awesome work.
Great piece and great documentation. You talk about measuring the inside radius. You type 6″ in the text, but on the illustration you show 9″ vs. the 10″ walk line. I have to believe this is a typo, unless I am missing it completely. Am I all wet on this?
Bob,
According to most codes, 6 inches is the MINIMUM tread depth at any point within the clear width of the stair. The code also requires that the tread depth be a minimum of 10 inches at the walk line. You must meet BOTH minimum dimensions. Given the geometry of the staircase in this article, using 6 in. at the inside radius would not meet the 10 in. minimum at the walk line. The dimension at the inside radius had to be increased to meet the 10 inch walk line minimum.
A great resource on stair building code is the Stair Manufactures Association’s Visual Interpretation of the STAIR BUILDING CODE (2009 IRC). Tread depth is covered on page 7. Updated information for the 2012 IRC code is also available for purchase on their website.
http://www.stairways.org/SMA-Books/Stair-Code-2009-Visual-Interpretation
Todd
Does anyone know if part 2 was published? I looked everywhere…
Great article. One thing I wasn’t clear on was the bottom plate. What part was cut on a 2-degree angle?
The ends of the 2 x . I believe
This is shown as part one. When can we expect to see the next part?
Chris
Hi Chris,
We plan to publish the second part at the beginning of 2017! Stay tuned…!
Regards,
Tristan Katz, Managing Editor
Thanks for the information. Nine months (+/-) production time is long. Can’t wait to read it.
Looking forward to part two. I hope it’s not too much longer in coming.
When are you going to publish part two?
Such a great article! The language is so clear and easy to understand. I’m really looking forward to part two.
Thank you to Gary Striegler for writing this, and to Gary and Tristan Katz for publishing it!
Mr. Striegler,
I am working on building an unsupported staircase for my schools musical, Legally Blonde, this year. I was wondering if you would be able to explain how to properly support the staircase in this instance.
Thank You
I love this stuff. Thanks for doing what you do!
I have a straight stair case from the second floor to the first floor. The bottom two steps are carved in pie shaped treads with square corners by the wall. They are not the same size. How do I mark the
Radius so I can put a trim piece on the tread to accept my laminate wood which is 48 inches long. The treads are 52-521/2 inches wide.
A trim piece of 1 x4 would allow me to hide the edges of the laminate and would fit under the ballistic.
Thanks for the great article. Curves can most definitely be tricky with woodwork of any kind
It’s a shame, but we (as a whole) treat the knowledge that we gain like we do that one hunting or fishing spot, or the patterns of the fish and herds. This is the reason we all seem to be losing knowledge as the old timers leave us.
Thanks for the great articles! I adjust your methods a bit to fit my project, but it was a great help for inspiration & layout.
Rich Dunlap, Columbus, OH
Thanks for the great articles! I adjusted your methods a bit to fit my project, but it was a great help for inspiration & layout.
Rich Dunlap, Columbus, OH
This was a very helpful article thank you so so much, I was so confused but after reading this I have a clearer picture! :D
Is there anyway you can show us how to build floating curve staircase?
Hi! Thank you for this article. How would you convert an existing L shaped staircase into a curved staircase? Is that something easy to do?
Thanks to the author for sharing such a great post. The article was very well written and providing ideas about curved stairs: no mystery, just simple math. It can be really great for people like me who are looking for grabbing more knowledge about it. One must check this Grandglass.co.nz it gives us more info on this topic.
Hi, I will building a custom home and I want curved stairs case
Because I really love my question is basamento stairs need be curved too or I can do main floor curved and basamento normal? Thank you