


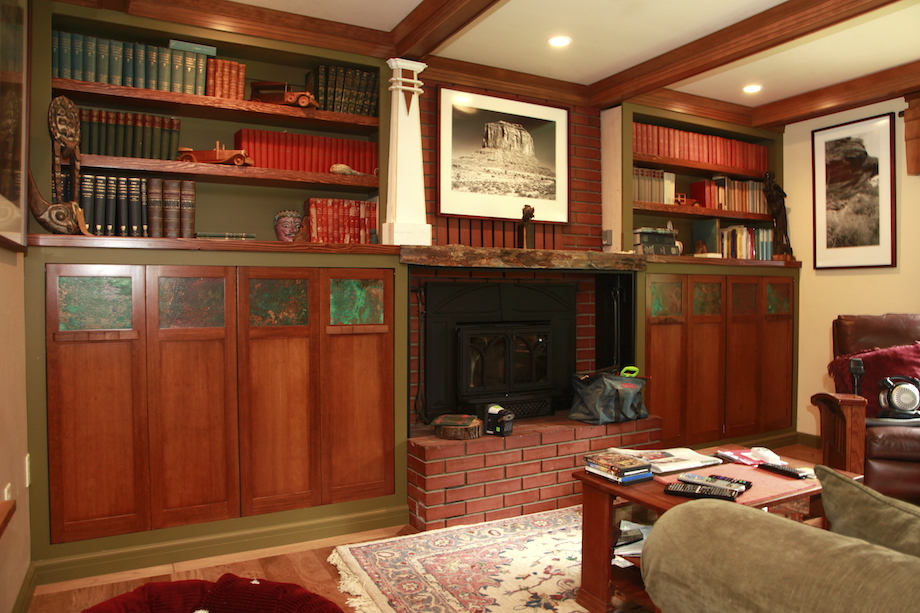
In “My Living Room Wall: Part 1,” I documented the design concepts, the firewood box, and the stone mantel-shelf; now we’re onto the cabinets and shelves.
Installing the tops and trim, the face frames and doors, as well as the tapered columns, took a lot of thought and a lot of time. Other than baseboard molding, I didn’t want to install any scribe molding or trim on top of the face frames, so the wood tops had to go in first. After calling around to a few local lumber mills, I found two 8/4 x 14-in. pieces of old growth Douglas fir, one 16-ft. long, one 14-ft. long. I bought them both: one advantage—besides world-class steelhead fishing—to living in Southern Oregon. From those two boards, I managed to cut both the cabinet tops and all the upper shelves in my living room. But there wasn’t room for even the slightest mistake.
The Cabinet TopsGluing together scraps of 1/4-in. plywood with 2P 10, I made templates for both cabinet tops. |
 (Note: Click any image to enlarge) |
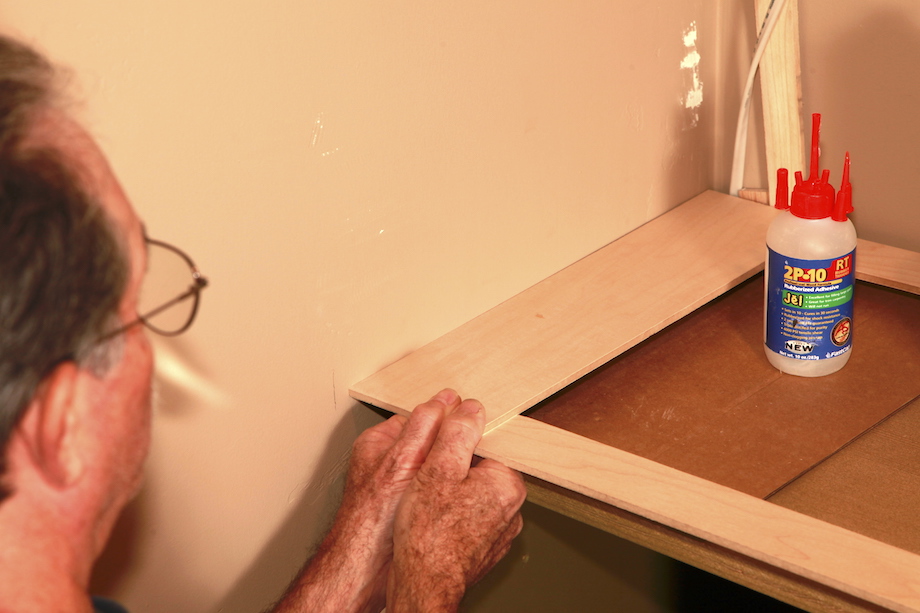
| Using a combination of plywood scraps, shims, and hotel card keys, I elevated the templates until they were nearly flush with the stone. | 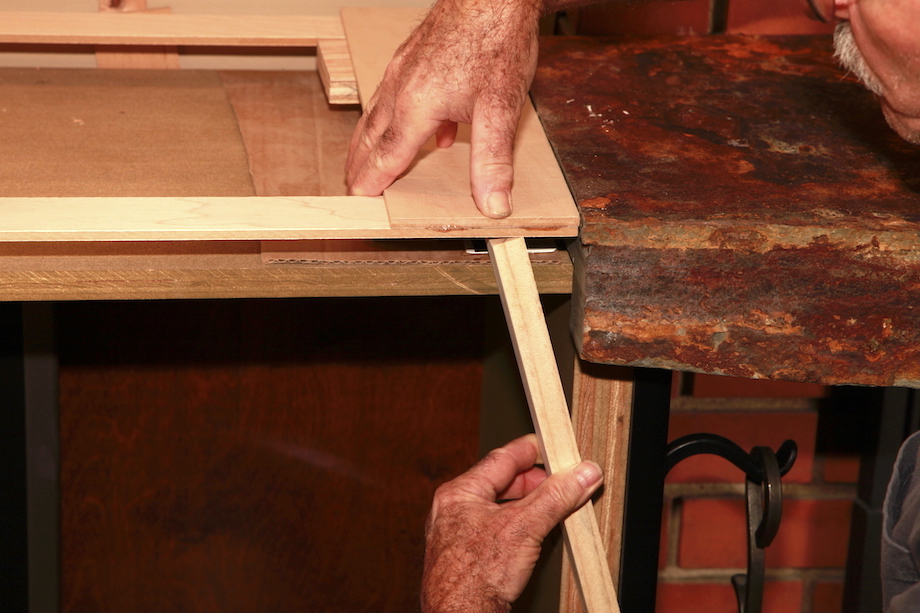 |
| I ripped a short length of 1 1/2-in. pine to position the templates so that they’d be 3/4-in. proud of the final face frames. | 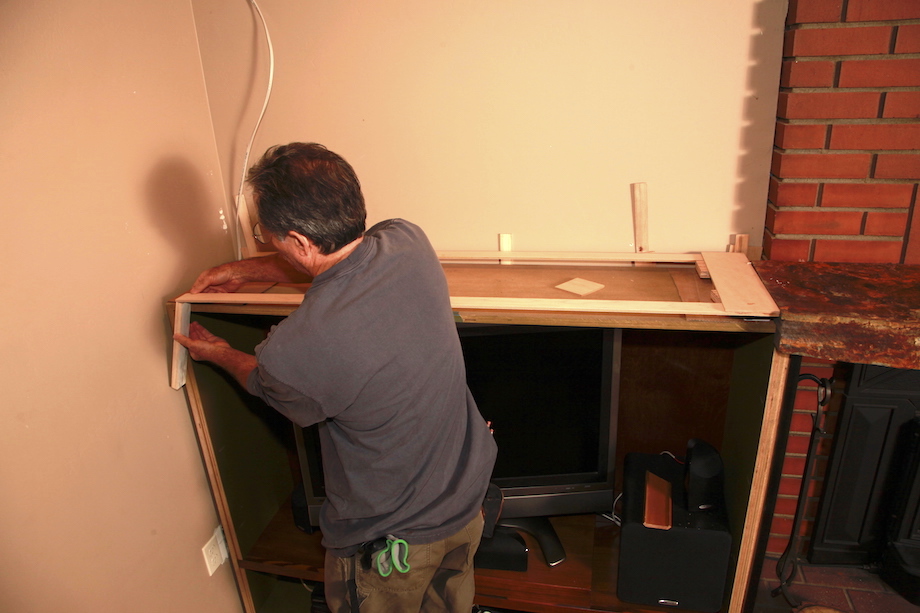 |
| I started by scribing each template to the stone. | 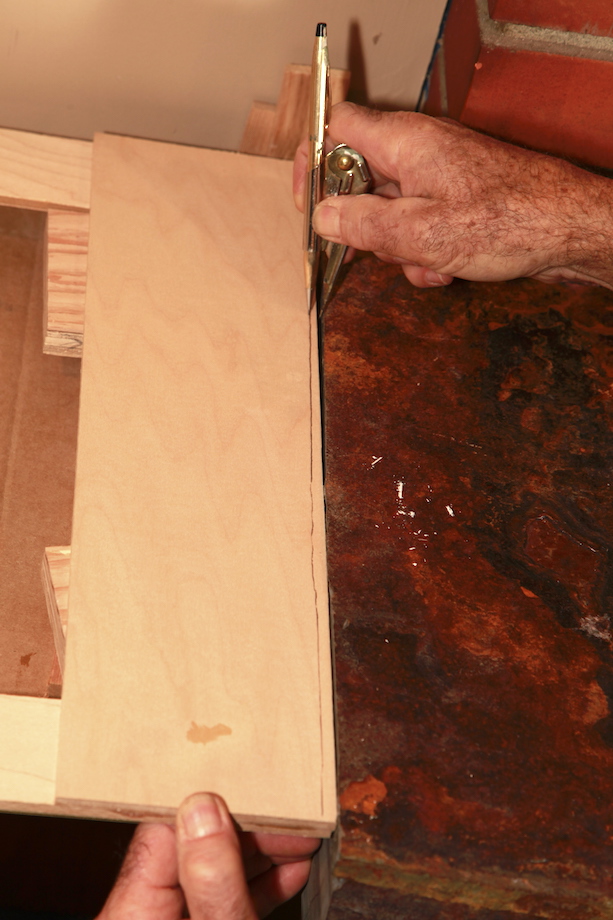 |
| A grinder was the best tool for the job—the scribe lines were so irregular. | 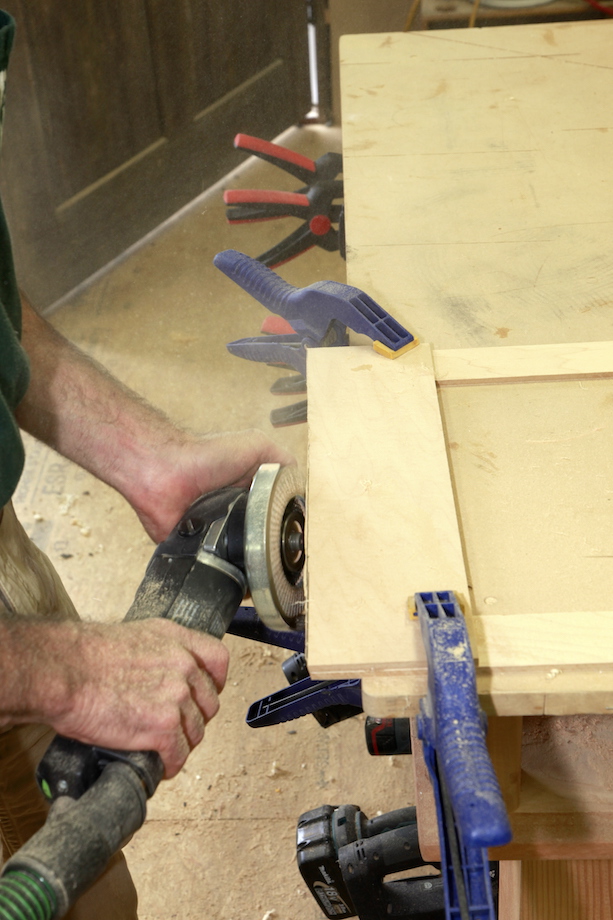 |
Once the templates fit tight to the stone, I scribed and fit the two wall ends, which was much easier than the stone.
The walls were out of square, but only the front half of each top would be visible—the upper cases would cover the back. Still, I scribed and cut each wall end before gluing it to the template—right in place, so that the templates would be exactly the length of each shelf.
| To be sure the templates didn’t break, sag, or deflect, I glued in an extra support before removing each one. | 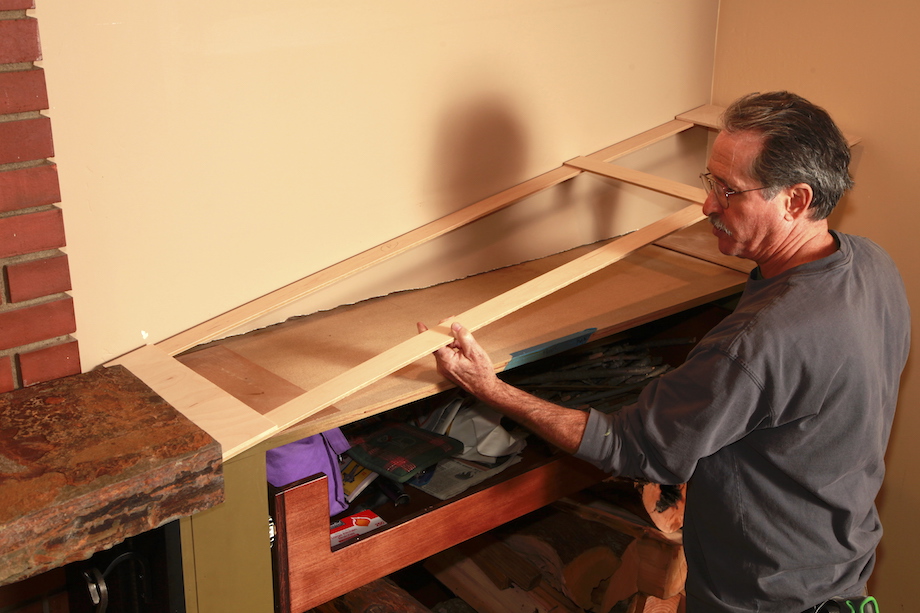 |
 |
Because I used a grinder to cut the scribe lines at the stone, I had to watch the angle of my pencil carefully. After checking the grain pattern I picked the best side and edge for each piece of fir and laid them both on my worktable in the exact position they’d be installed. |
| The cuts at each wall were easy with a short guide rail and track saw. | 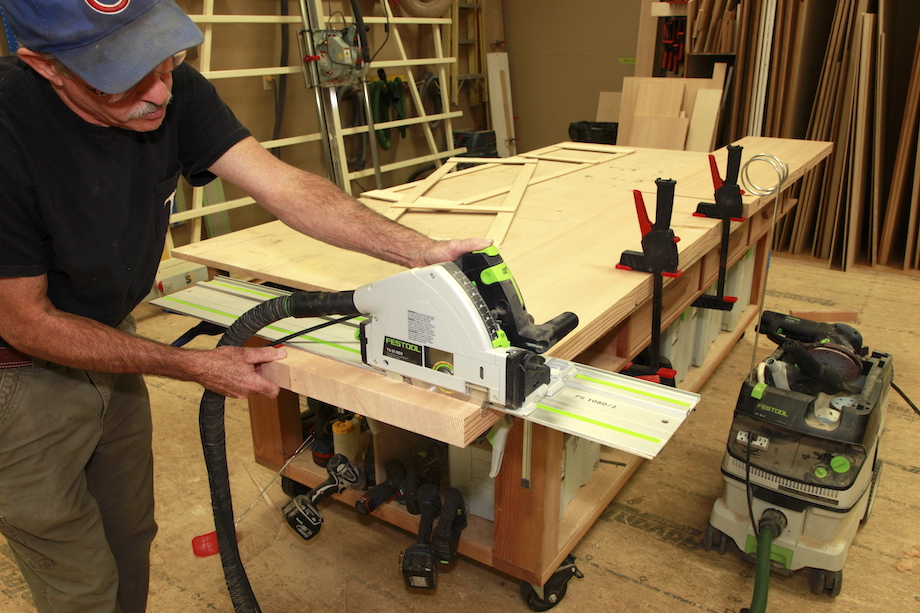 |
 |
I used the grinder for the scribes at the stone, leaving the front edge square and undercutting most of each scribe line. |
| With both tops cut, I tipped them one at a time into place, knowing they’d be a little long. | 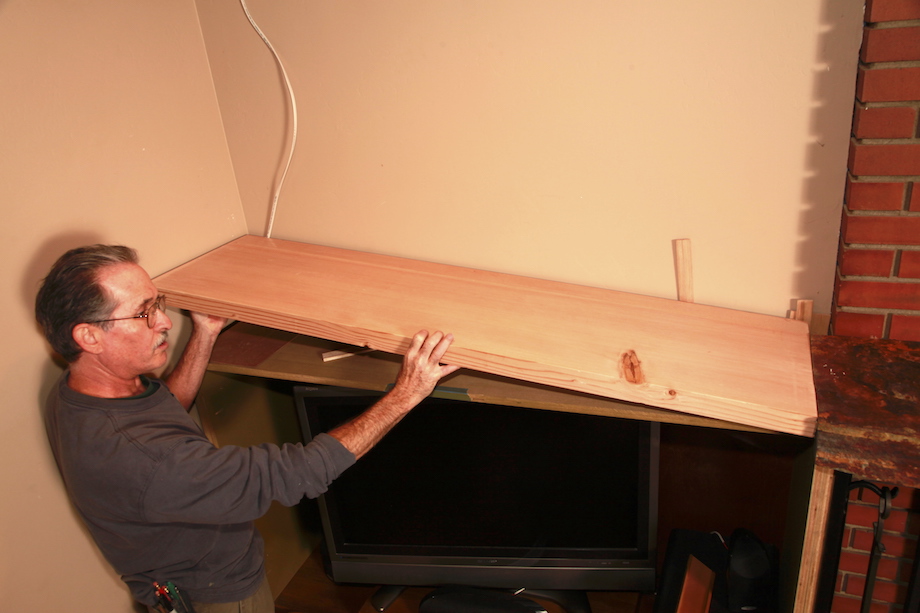 |
| The extra length left me enough wood on the front edge to scribe an accurate vertical line to the stone. | 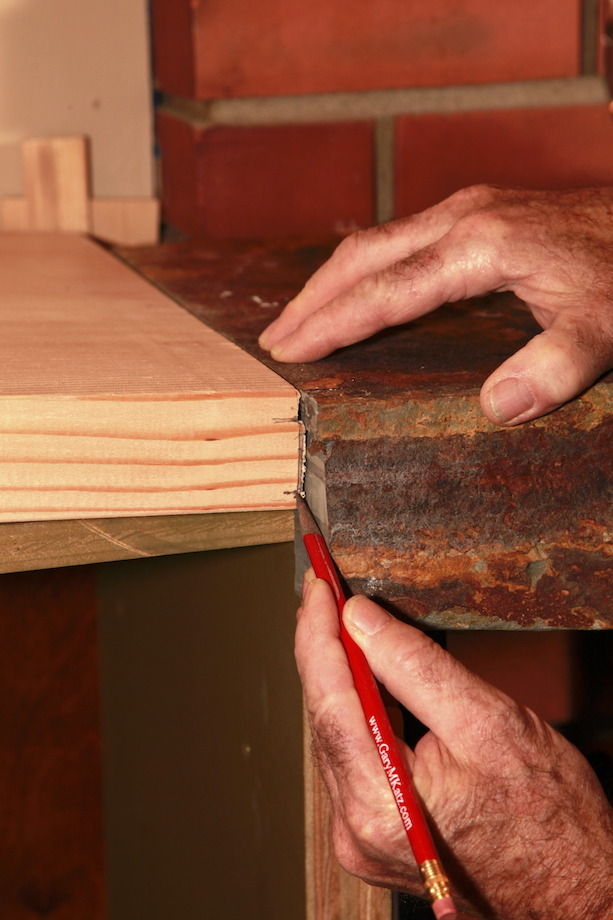 |
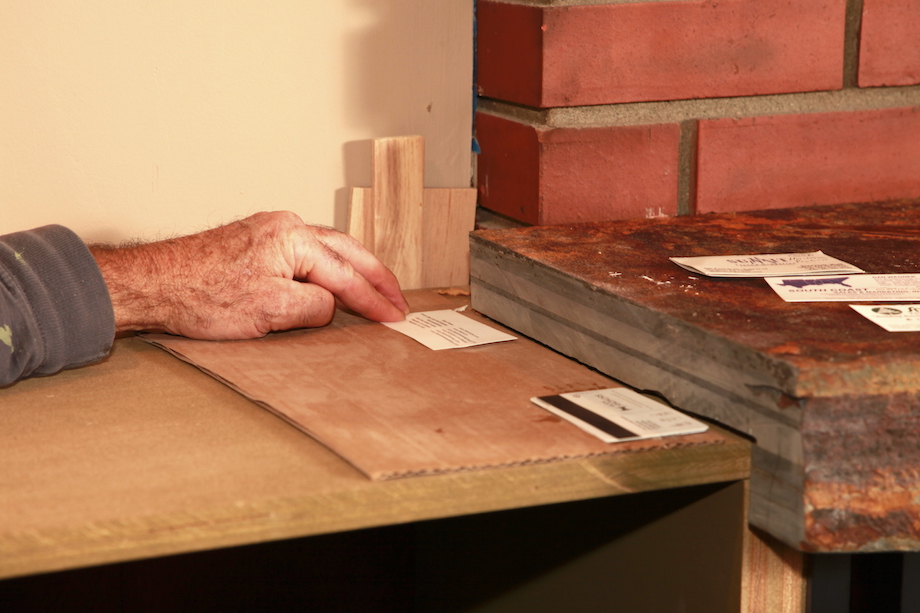 |
Once the tops fit snug, I started shimming, using 1/4-in. plywood, hotel card keys, and business cards, too. After traveling to more than 200 Katz Roadshows over the last fourteen years, I have a lot of hotel card keys. |
I wanted the finished tops to flush out perfectly with the stone.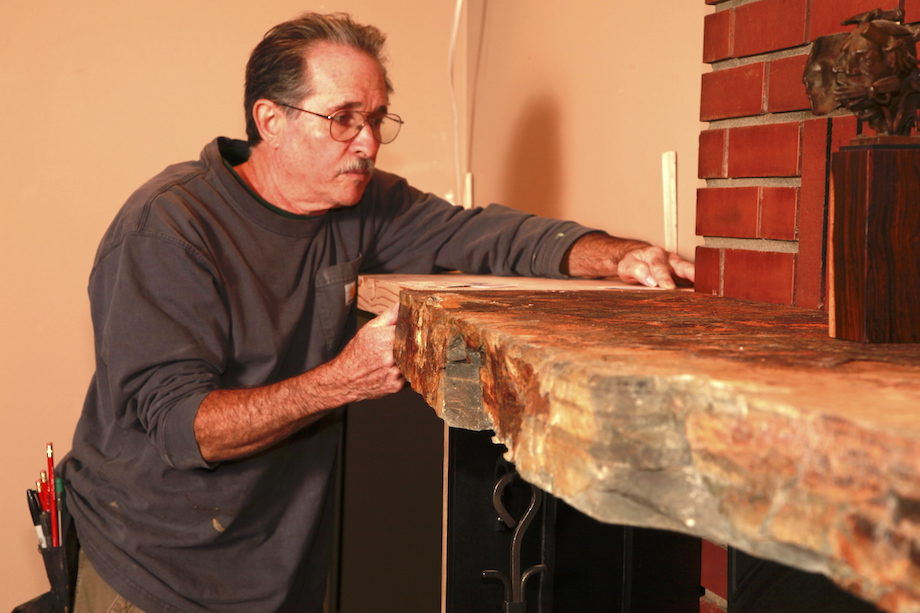
The stone wasn’t perfectly flat, but it was pretty dang close.
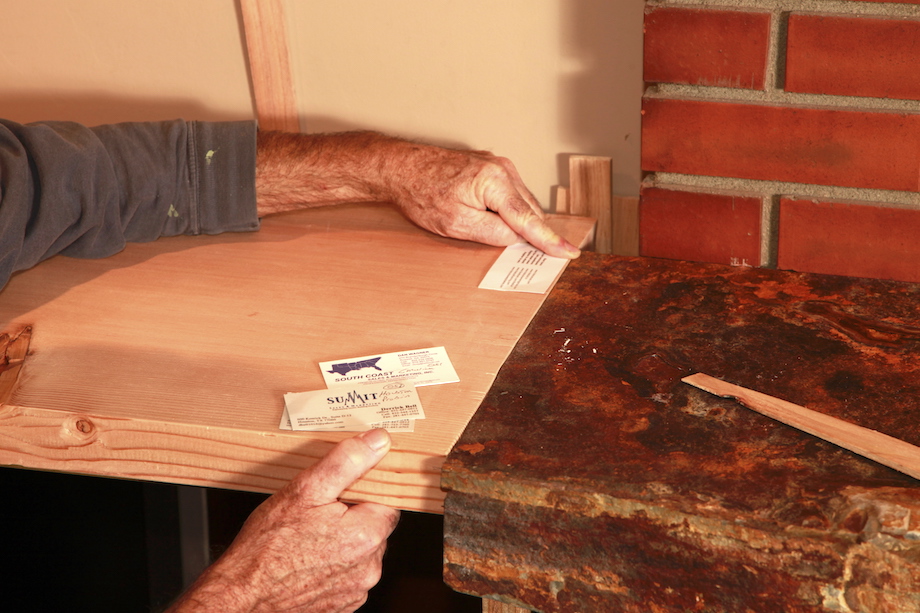 |
In the end, I was using business cards as feeler gauges to determine if I needed to add one more under the wood tops. |
Upper Shelves & Face Frames
I didn’t want to apply any spray finishes inside my home, so I prefinished the tops, installed them with screws driven from underneath, and then built the upper cases. I used the same pocket-hole joinery for the upper boxes. For the upper shelves, rather than using flimsy adjustable shelf pins, I cut mortises for dominoes, which was a lot easier than you might think.
I clamped scrap plywood to my worktable, capturing all four sides.

Using a long T-square, I drew layout lines for each row of mortises, then temporarily screwed down a straightedge.
| I moved the straightedge for each row of mortises. The whole process, including the setup, took much less time than you’d think—maybe two hours. But it was time well spent: I’d never have to worry about loading up all the 1 3/4-in. thick shelves with large books. | 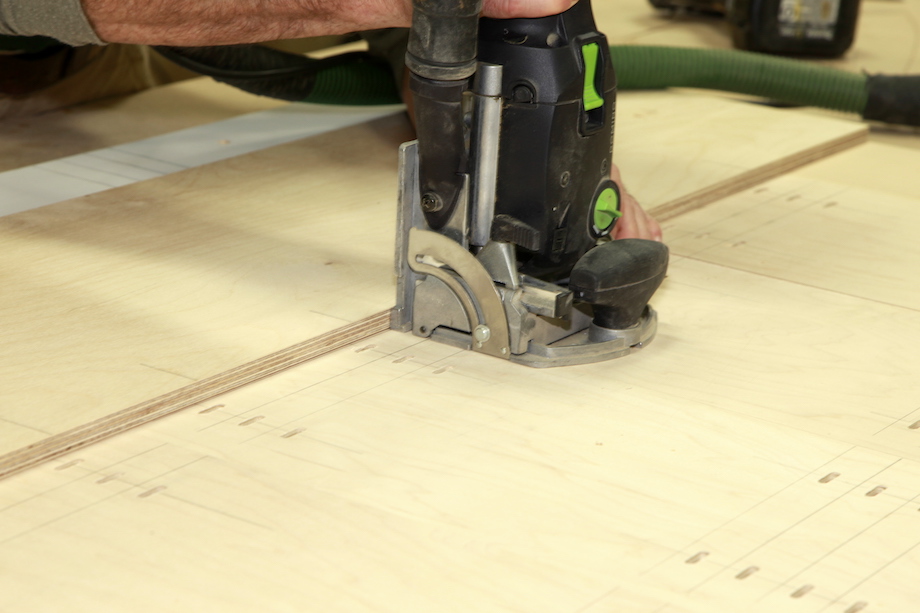 |
With both cases installed, I was ready for face frames. Because the tapered columns on the mantelshelf would cover the ends of both upper cabinets against the brick fireplace, I didn’t have to worry about the O.D. (outside dimension) of those frames. But I had to be sure the stiles were wide enough to capture the side of each tapered column. I also needed to have enough width on the stiles to scribe the outer edges to each wall, so I made the stiles on the upper cabinets 3 1/2-in. wide, figuring I’d scribe off about 1/2 in. at each wall, and I’d have an extra 1/2 in. at the fireplace. Because I added 1/2 in. to the stiles at each wall, I also added an extra 1/2 in. to the overall width of the face frames, leaving me plenty of wiggle room for scribing. Better safe than sorry.
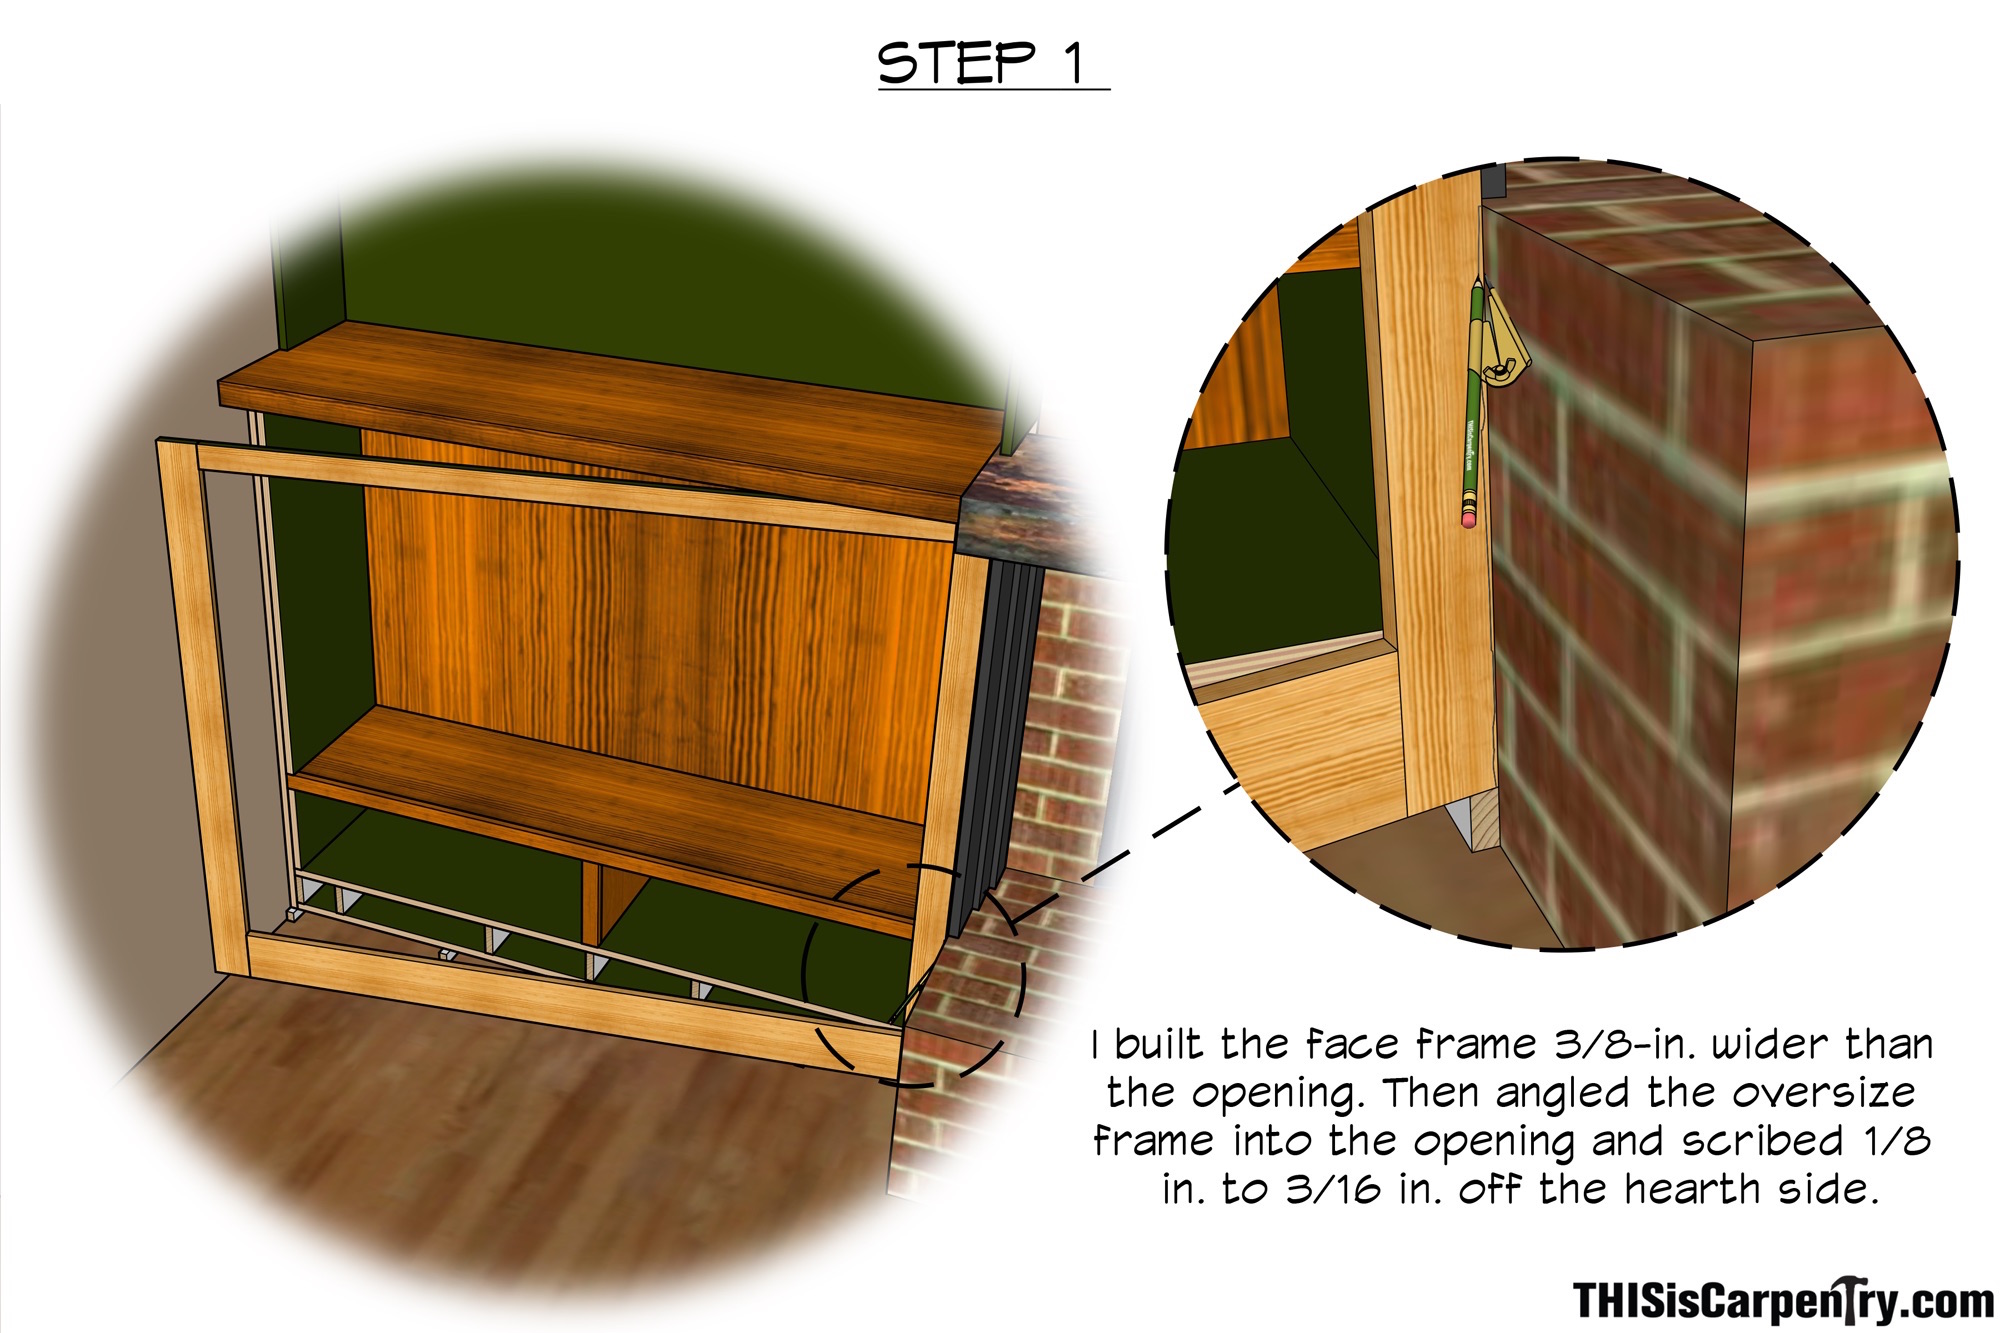
On the lower cabinets, I made the stiles 3 in. at the fireplace—knowing I had to scribe those stiles to the brick hearth; I made the stiles at the wall 3 3/8-in. wide and added 3/8 in. to the O.D. of the frame, so I’d have enough extra material on both stiles for scribing.
The upper frames were easy to scribe and fit—the side at the fireplace was open, so I simply held each frame against the wall, made sure the inside of the frame was parallel with the inside of the case, then scribed and cut the stiles against each wall.
The frames on the bottom cases were a little tougher. The frames were 3/8 in. too wide, allowing extra room for scribing, so I started by angling each frame in toward the brick hearth, then marked and cut to that scribe line. No, the brick wasn’t that far off, it was pretty straight—I exaggerated the scribe line in this drawing so it would be easier to see in step two.
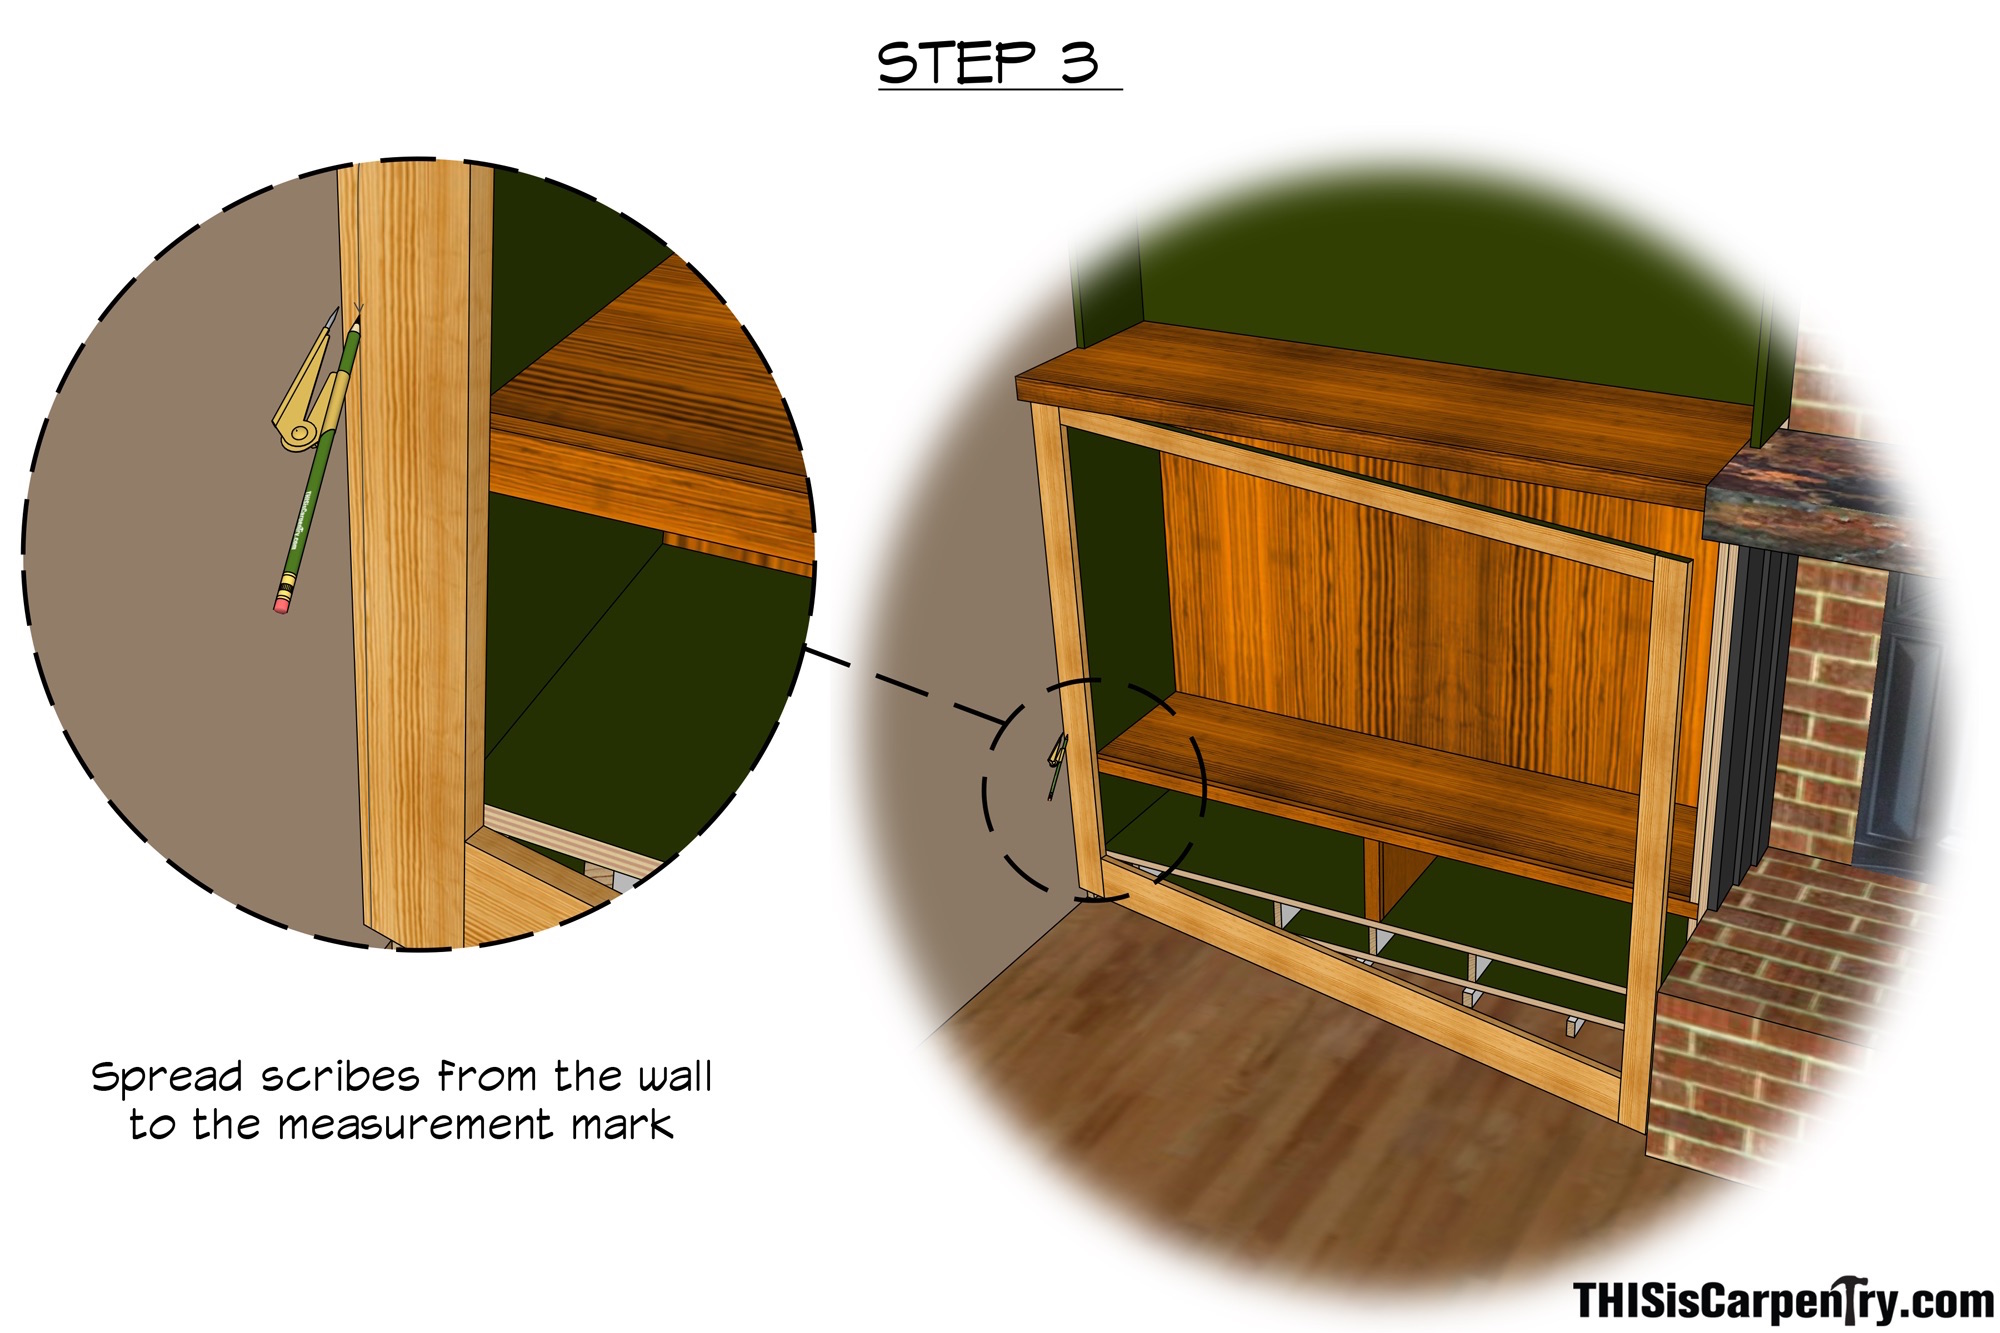
Next I measured the exact width of what would be the finished frame—measuring from the very top of the hearth, on a level line to the wall. I then marked that measurement on the face frame, hooking my tape measure on the cut scribe line.

The last step was to angle the frame back into the opening against the wall. I spread my scribes to that measurement mark and scribed the shape of the wall onto the frame.
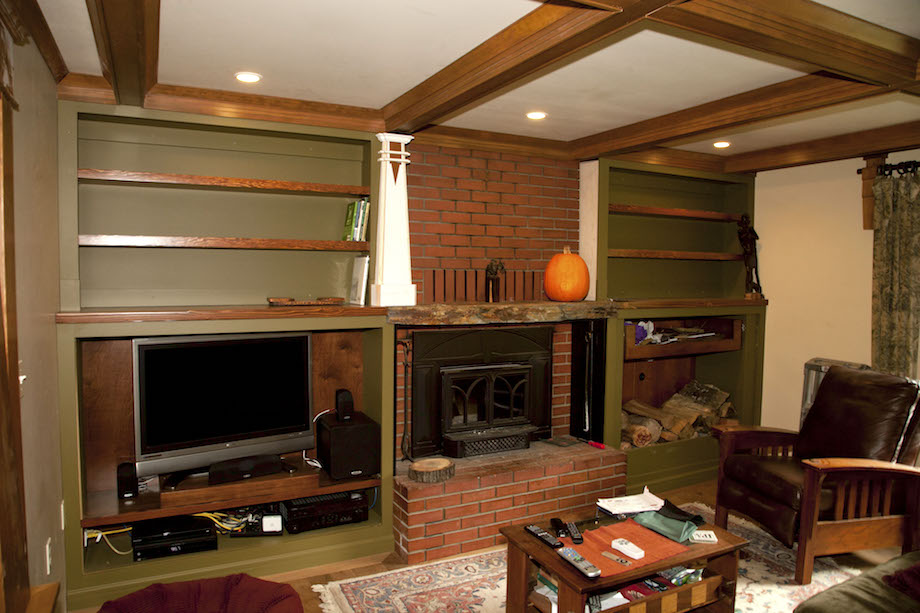
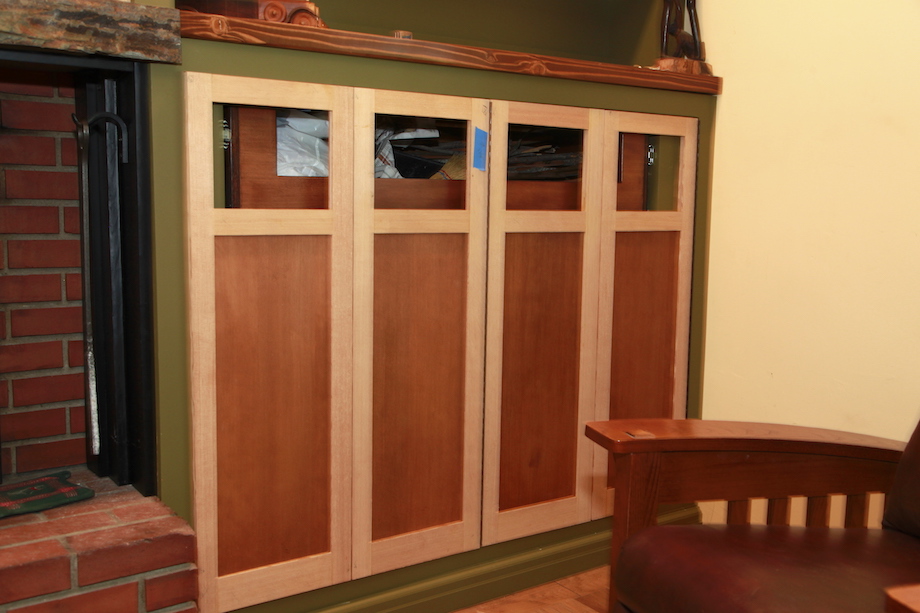
I used a jig saw to cut the scribe lines at the hearth, and a track saw to make the cuts along the wall. Just as I did with the cases and the shelves, I pre-finished the face frames and installed them with pocket screws run from inside the cases, then tied the coffered ceiling into the cabinets. In this progress photograph, taken around Thanksgiving (notice the pumpkin), you can see the mockup I made for the tapered columns. But I had miles to go before I could work on those!
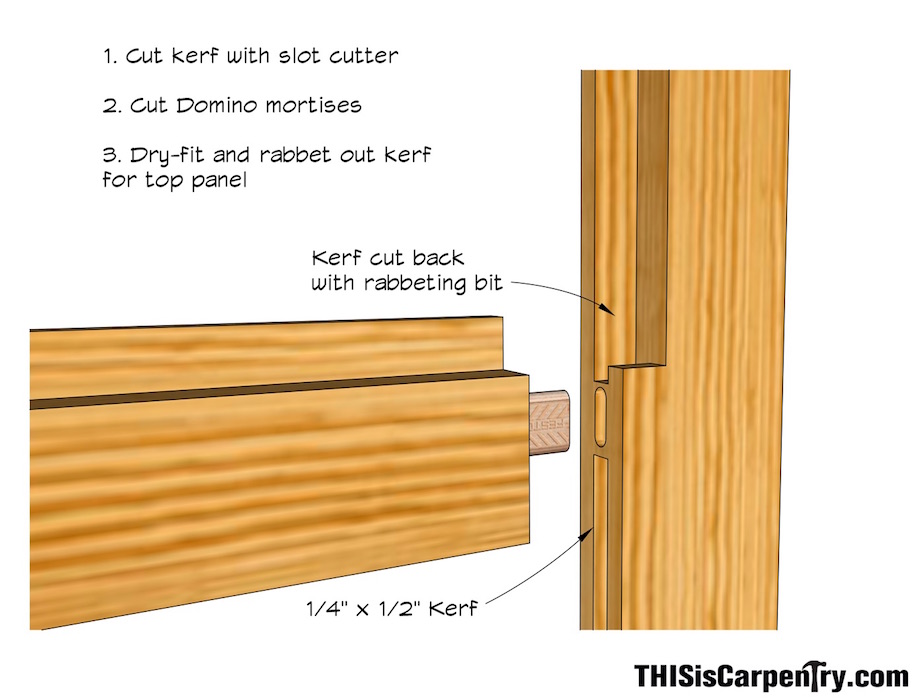
The DoorsI wanted to use some type of copper panel in the top of each cabinet door, and figured I’d install that panel after the doors were built and pre-finished (of course, I had no clue how I’d distress or finish the copper). So I cut a 1/4-in. slot in all the doors—both stiles and rails, to accept a 1/4-in. v.g. Douglas fir panel. |
 |
I dry-fit the doors, clamped them together, then used a rabbeting bit to rout ‘off’ the back edge of the 1/4-in. slot in the upper panels, which would enable me to install the upper panels after the doors were finished and installed.
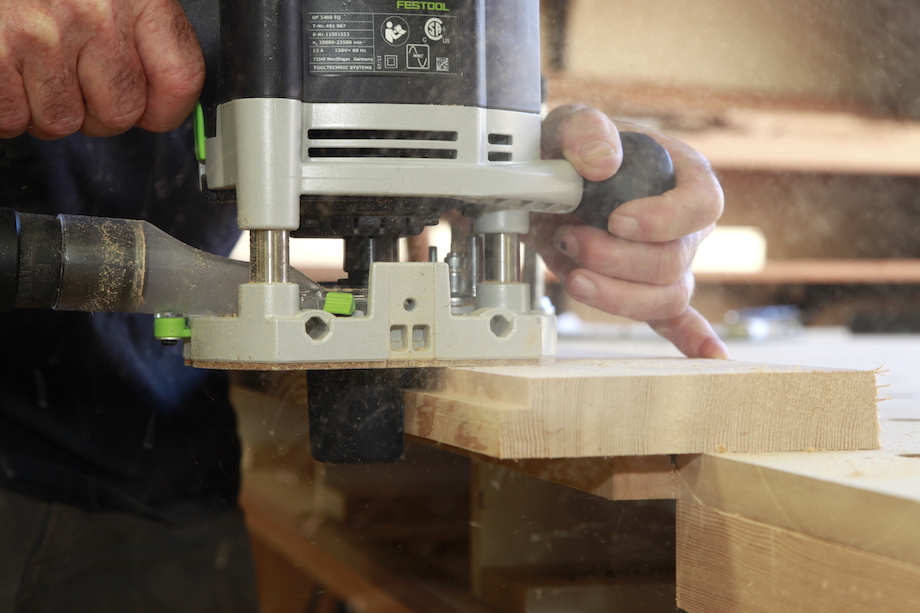
I used Domino tenons to secure the stiles and rails. I learned the hard way that the Domino mortise had to be cut after cutting the 1/4-in. slot, otherwise the bearing guide on the slot cutter could fall into the Domino mortises. I tried my best to stop the 1/4-in. slot cutter at each rail, which wasn’t so tough at the bottom and top rails, but at the mid-rails, sometimes the Domino mortise was cut right through the slot. Fortunately that didn’t matter—the 5m x 30m Domino tenons penetrated deeper than the slot, and the mortises were wider, too, so the tenons still fit snug.
While we were finishing the upper shelves, we stained and finished the panels for the cabinet doors before assembling the doors. I’m still experimenting with the best procedure for finishing doors, a way to avoid getting glue on the thin veneer of the panels, and a way to avoid stain build-up in the corners. Plus, every time I spray pre-cat water borne varnish on Douglas fir plywood veneer, it seems to outgas air bubbles or something, which is easy to fix, just a little sanding before the last two coats of finish. But that sanding is much easier to do if the panels aren’t installed!
You may have caught this detail early on, but I had to hinge both sets of doors toward the walls—none of them could hinge toward the fireplace, otherwise, when opened, they’d be too close to the fireplace, and the doors on the television side would block the TV. Yes, I should have designed the cases for fold-away doors, but having hung a lot of full-size multi-fold doors, I figured I could accomplish the task, and if the doors sagged a little, so what—it’s my own home.
But I used piano hinges to eliminate as much sagging as possible. Installed without a mortise, piano hinges leave a tremendous gap between the doors on the back side of the hinge. So I cut a shallow rabbet in both doors where the hinge barrels pointed inside the case. I didn’t rabbet the doors where the hinges pointed into the room.
I bought my first jointer shortly before making these doors. 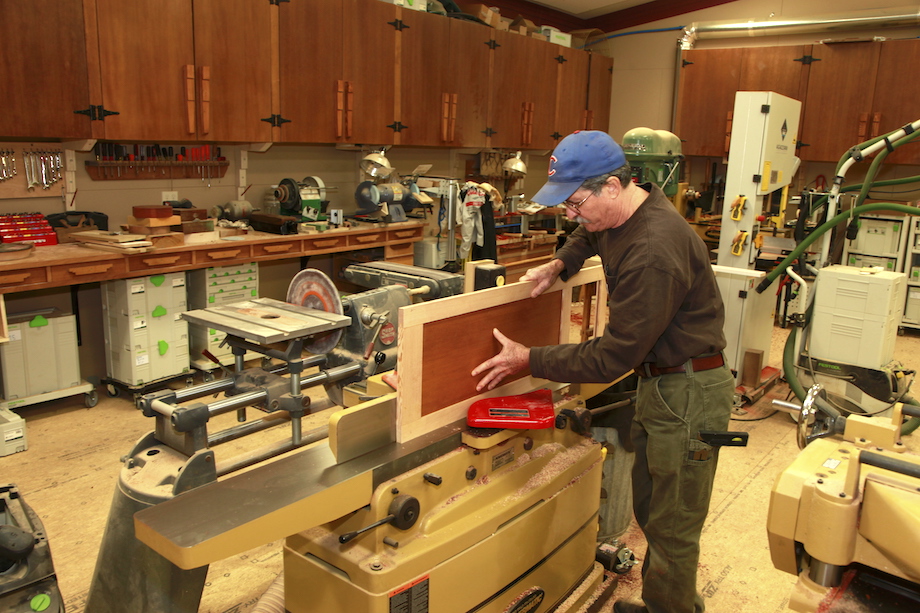
I’m not sure how for so many years I managed without a jointer; it’s certainly one of the most important tools in my shop. Once they were assembled, I measured the I.D. of the face frames AGAIN, subtracted 1/8 in. for each hinge and for the gap at the ‘strike’ or ‘lock’ stile, then jointed all the doors down to the proper dimension.
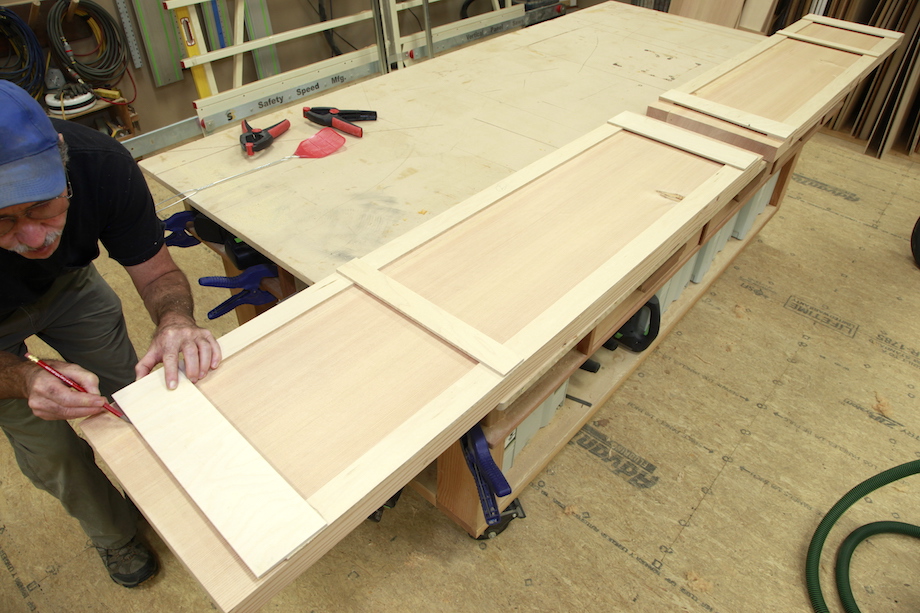
| I set the fence on my jointer to cut a 5/8-in. wide rabbet, and lifted the planer so the shoulder was only 1/16 in. deep. Yes, I leaned each set of doors against the wall and marked every door that needed a rabbet, and I marked the correct edge for the rabbet, too. Avoiding stupid mistakes is my greatest challenge. | 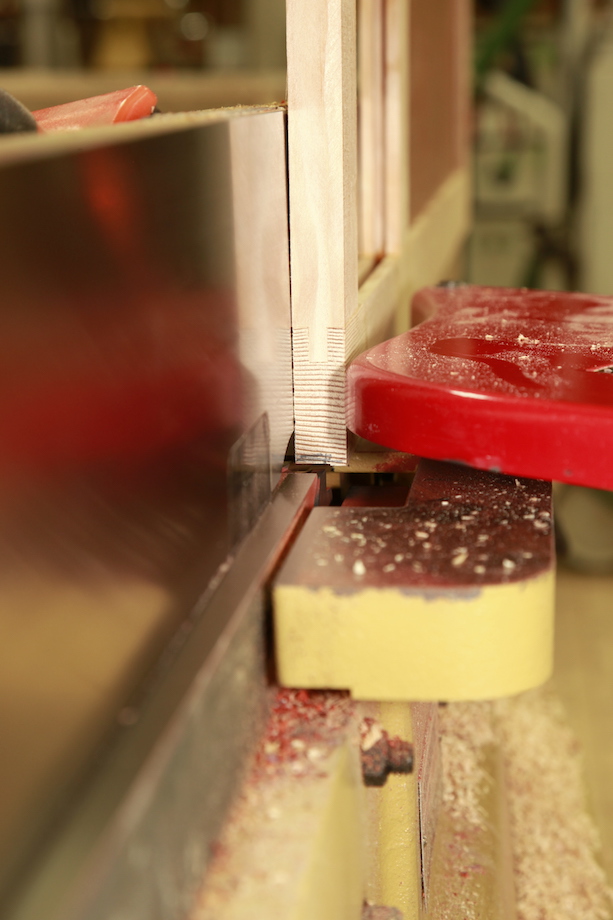 |
| Rabbeting for the hinges also made it very easy to position the hinges, without worrying about them slipping. | 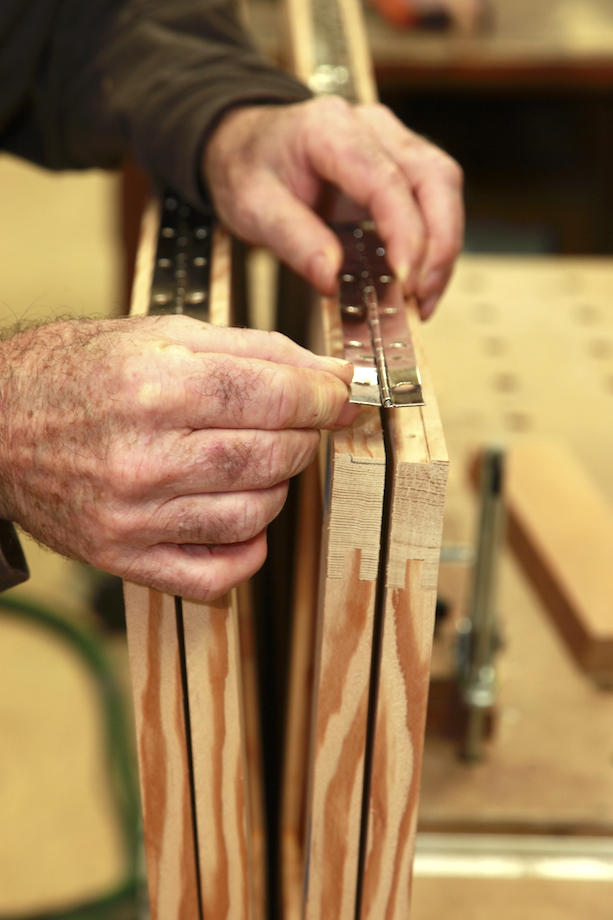 |
| I used my crown coping jig to hold the doors plumb while I pre-drilled for each screw with a Vix bit, and drove in fasteners. I adjusted the opening on the crown jig each time I added another door to the set. |  |
I knew the doors wouldn’t fit perfectly the first time I hung them, but they were pretty close. Those piano hinges always spread doors apart a lot more than you think they will. All together, the set of doors was almost 3/8 in. wider than the opening, and the set of doors wasn’t perfectly square to the opening either. Instead of trying to scribe corrections on each door, I eyeballed the overall fit and jumped in.
| But I didn’t rush things: I removed all the piano hinge screws and cut the first door from 0 at the bottom to 1/8 in. at the top, which I figured would square the doors to the frame. Then I used the jointer to take 1/16 in. off every door and hung them once more. I still had to take another 1/16 in. off the leading door. |  |
The Copper
While pre-finishing the cabinet doors, I started experimenting with patinas on copper. I found several sources online, typically a few that were on the ridiculous side. One included instructions for peeing on the copper.
I found another more reasonable method: mix one table spoon of salt, one table spoon of baking soda, and one ounce of household ammonia bleach with a quart of water.
| No matter what method you use to apply a patina to copper, you have to start by cleaning the copper very well, and sanding it lightly. All instructions I read said to sand in one direction, but I used a random orbit sander and 400 paper. | 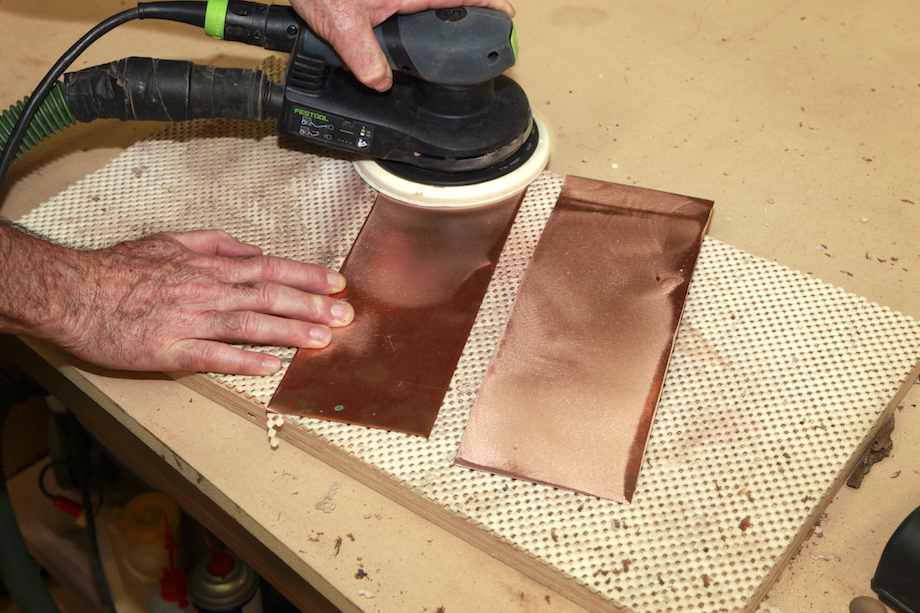 |
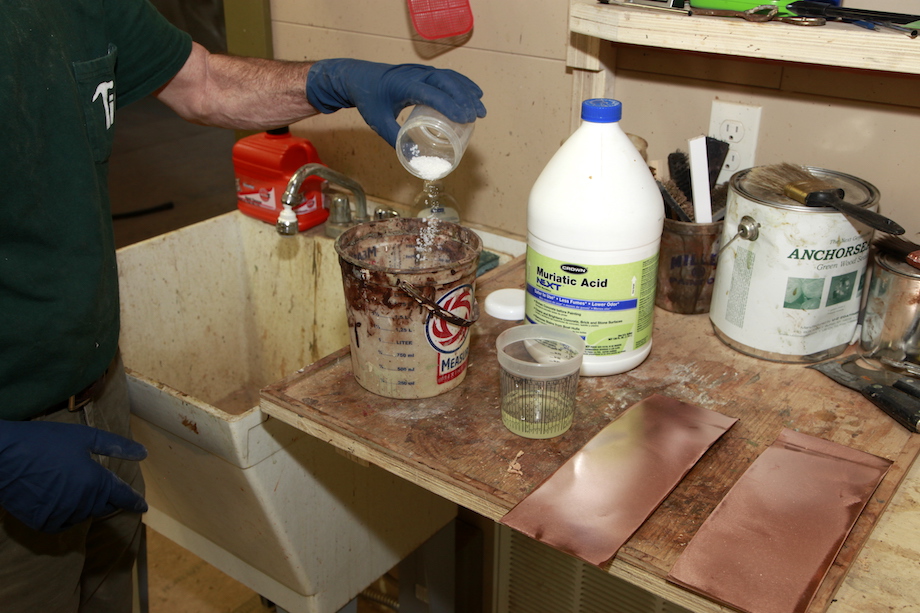
In the end, I chose an acid solution, which was very similar the baking soda and ammonia solution. I started with one quart of water and added some salt. Probably a lot more than tablespoon.
 |
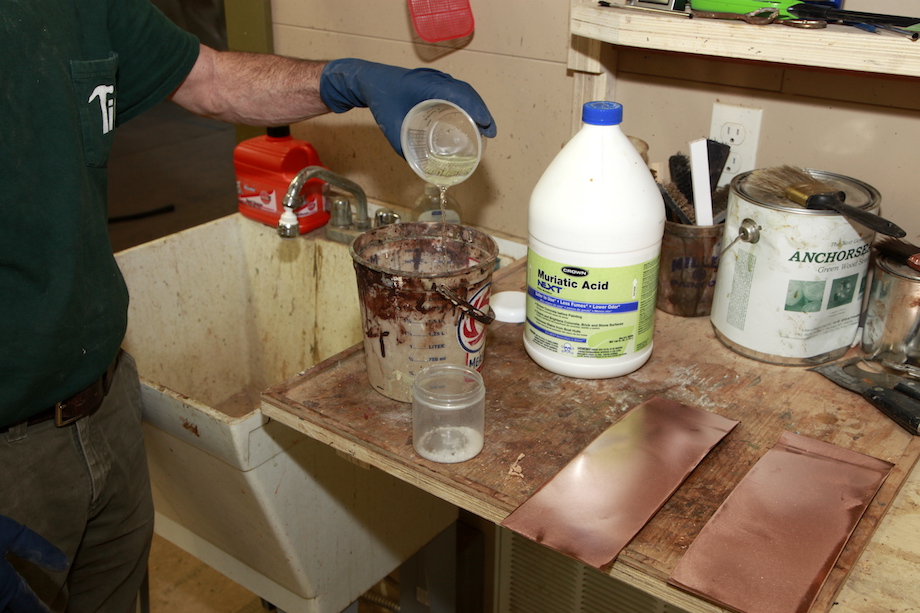 |
Next I poured in muriatic acid. The instructions said to add 1 oz. of acid. I poured in a little bit more.
| I also read that covering the copper in a layer of wood shavings, soaked in the acid solution, produced a more textured patina. I had plenty of sawdust and shavings, so I scattered a bed in the bottom of a hard plastic tub, stirred up the acid solution really well, then doused the copper and the sawdust. | 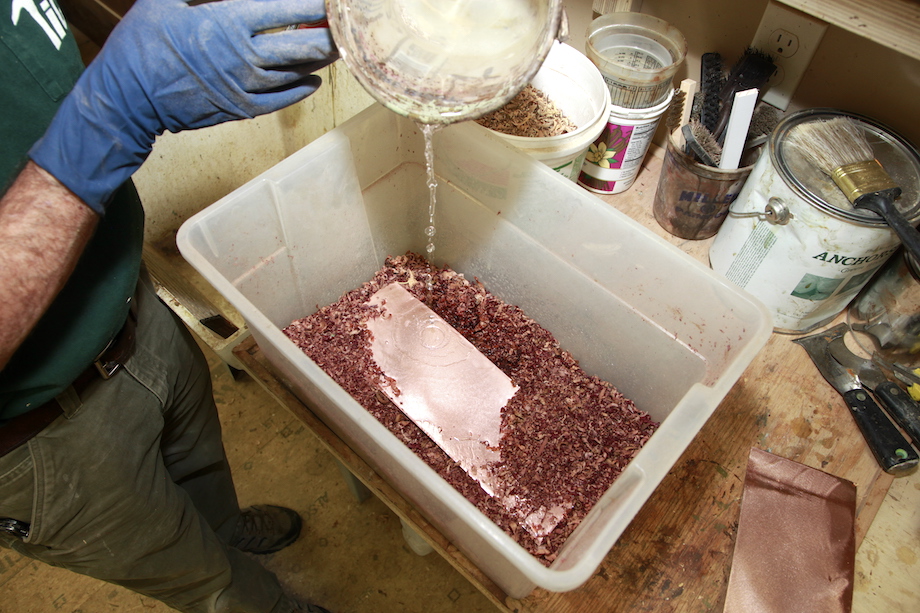 |
| I added a second layer of copper and scattered more sawdust on top, then sprinkled more of the acid solution until the sawdust was good and wet. | 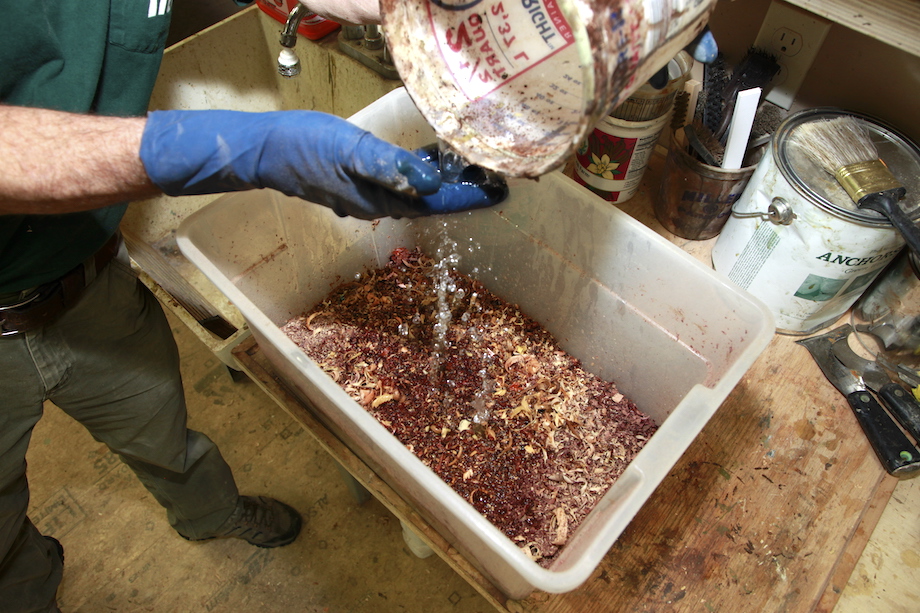 |
| I waited three days, then took the lid off the tub and allowed the whole mess to dry. That’s an important step. You have to let the sawdust dry out completely. If you don’t, the patina isn’t nearly as thick. I wasn’t happy with this result, so I went through the whole process a second time. Then I was happy. | 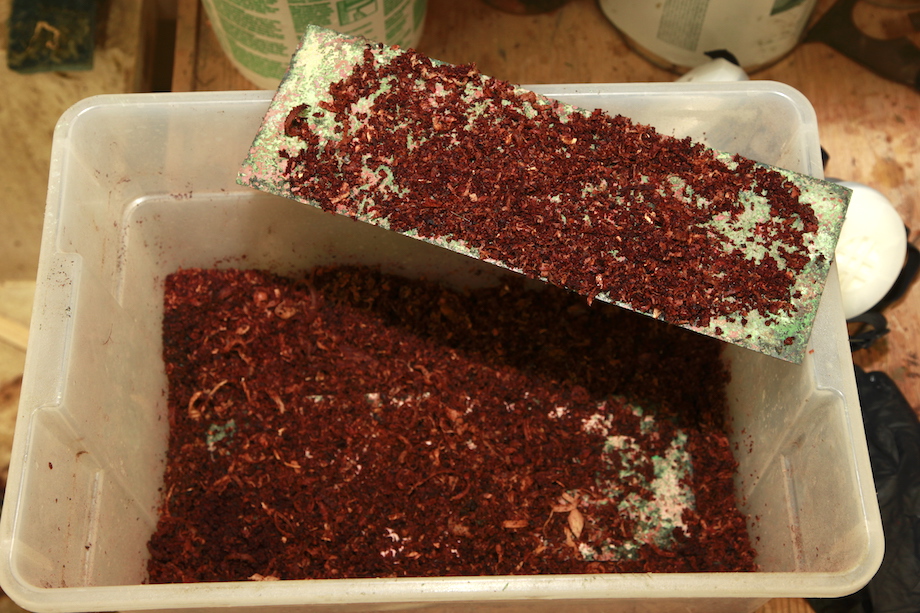 |
I wanted to seal the patina so that it wouldn’t flake off. On my first attempt, I sprayed the panels directly with pre-cat varnish. That didn’t work. The patina separated perfectly from the copper and came off in micro-thin sheets. The next time, I brushed three coats of Zinsser shellac on the copper before spraying the panels with varnish. That worked perfectly!
Each panel is uniquely colored and textured, so after finishing the panels, I removed the doors—again, lined up each set in my shop, then tried to pick a pleasing arrangement of panels.
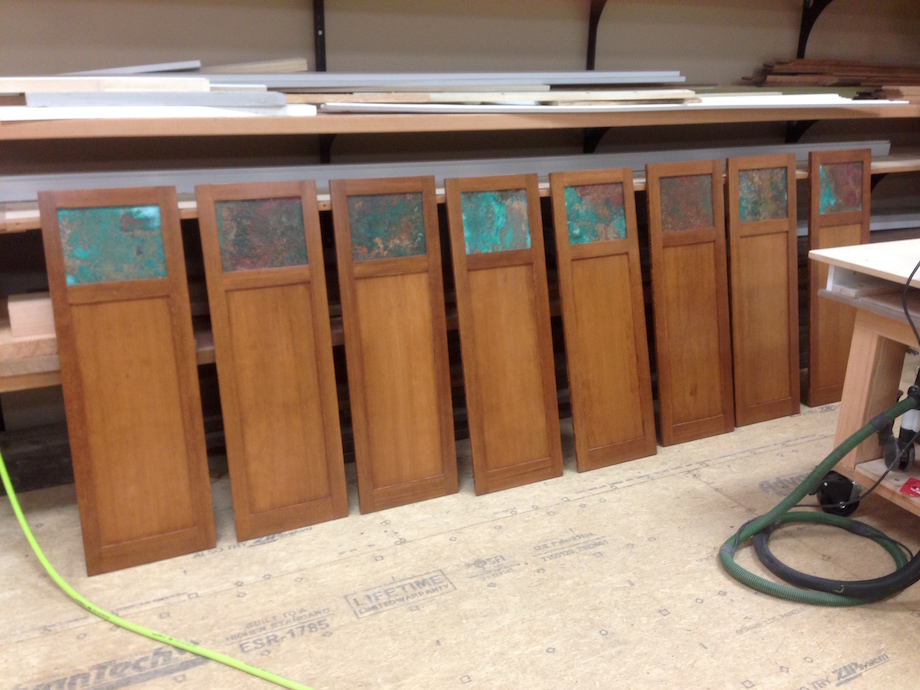
The panels were cut from a partial roll of 20-oz. copper I bought from a gutter company, which was pretty thick stuff.
| My brake could barely cut through it. But it wasn’t stiff enough for the panels, so I backed up each copper panel with a 1/4-in. plywood insert, and secured that insert with short brads, pressing the copper flat. The doors may not fit perfectly—the gaps are a little off, but they’re close enough for my house, and besides, very few eyes are drawn to those margins. | 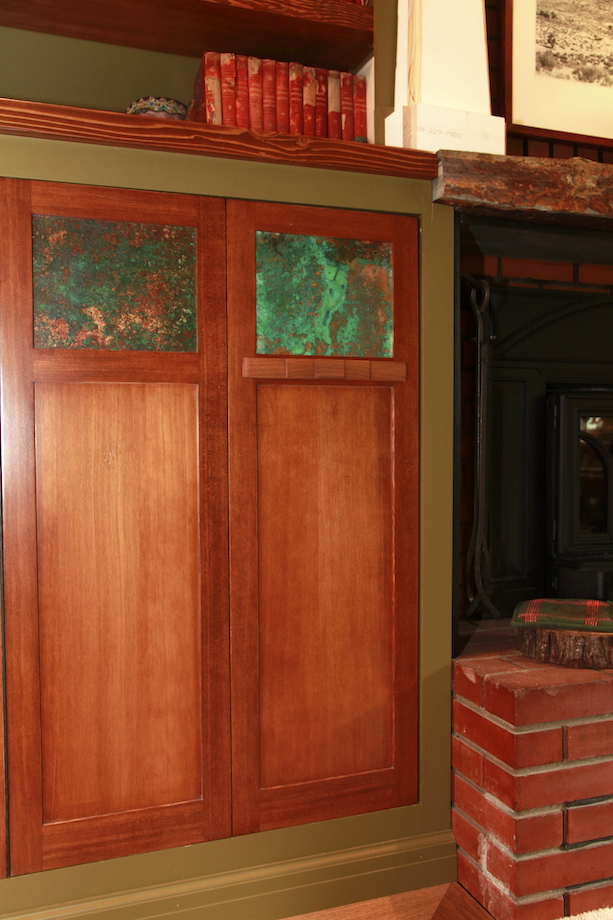 |
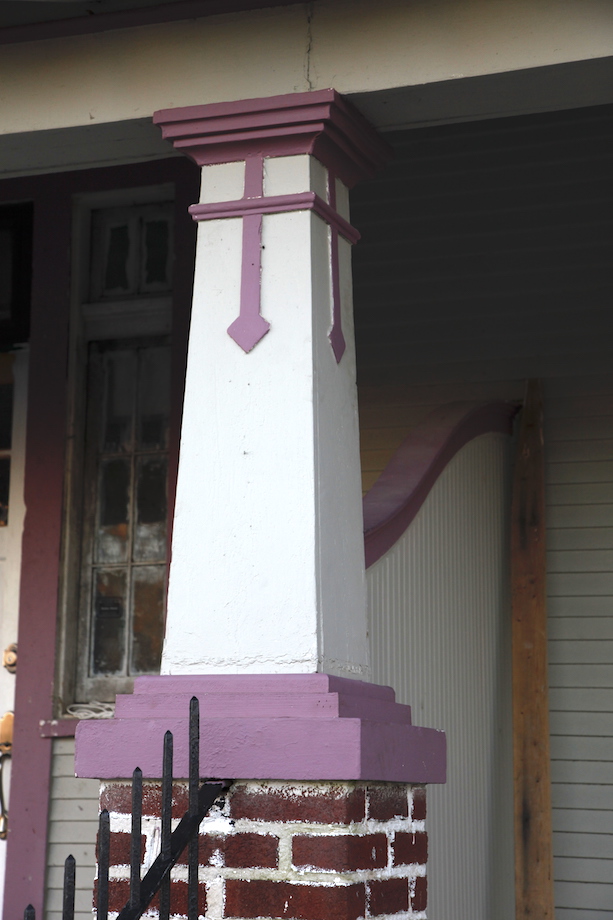
Tapered ColumnsAs I mentioned earlier, Todd and I went around and around with the design of the tapered columns. I’d always been attracted to tapered columns that included collar moldings and Celtic designs, like this one in New Orleans. |
 |
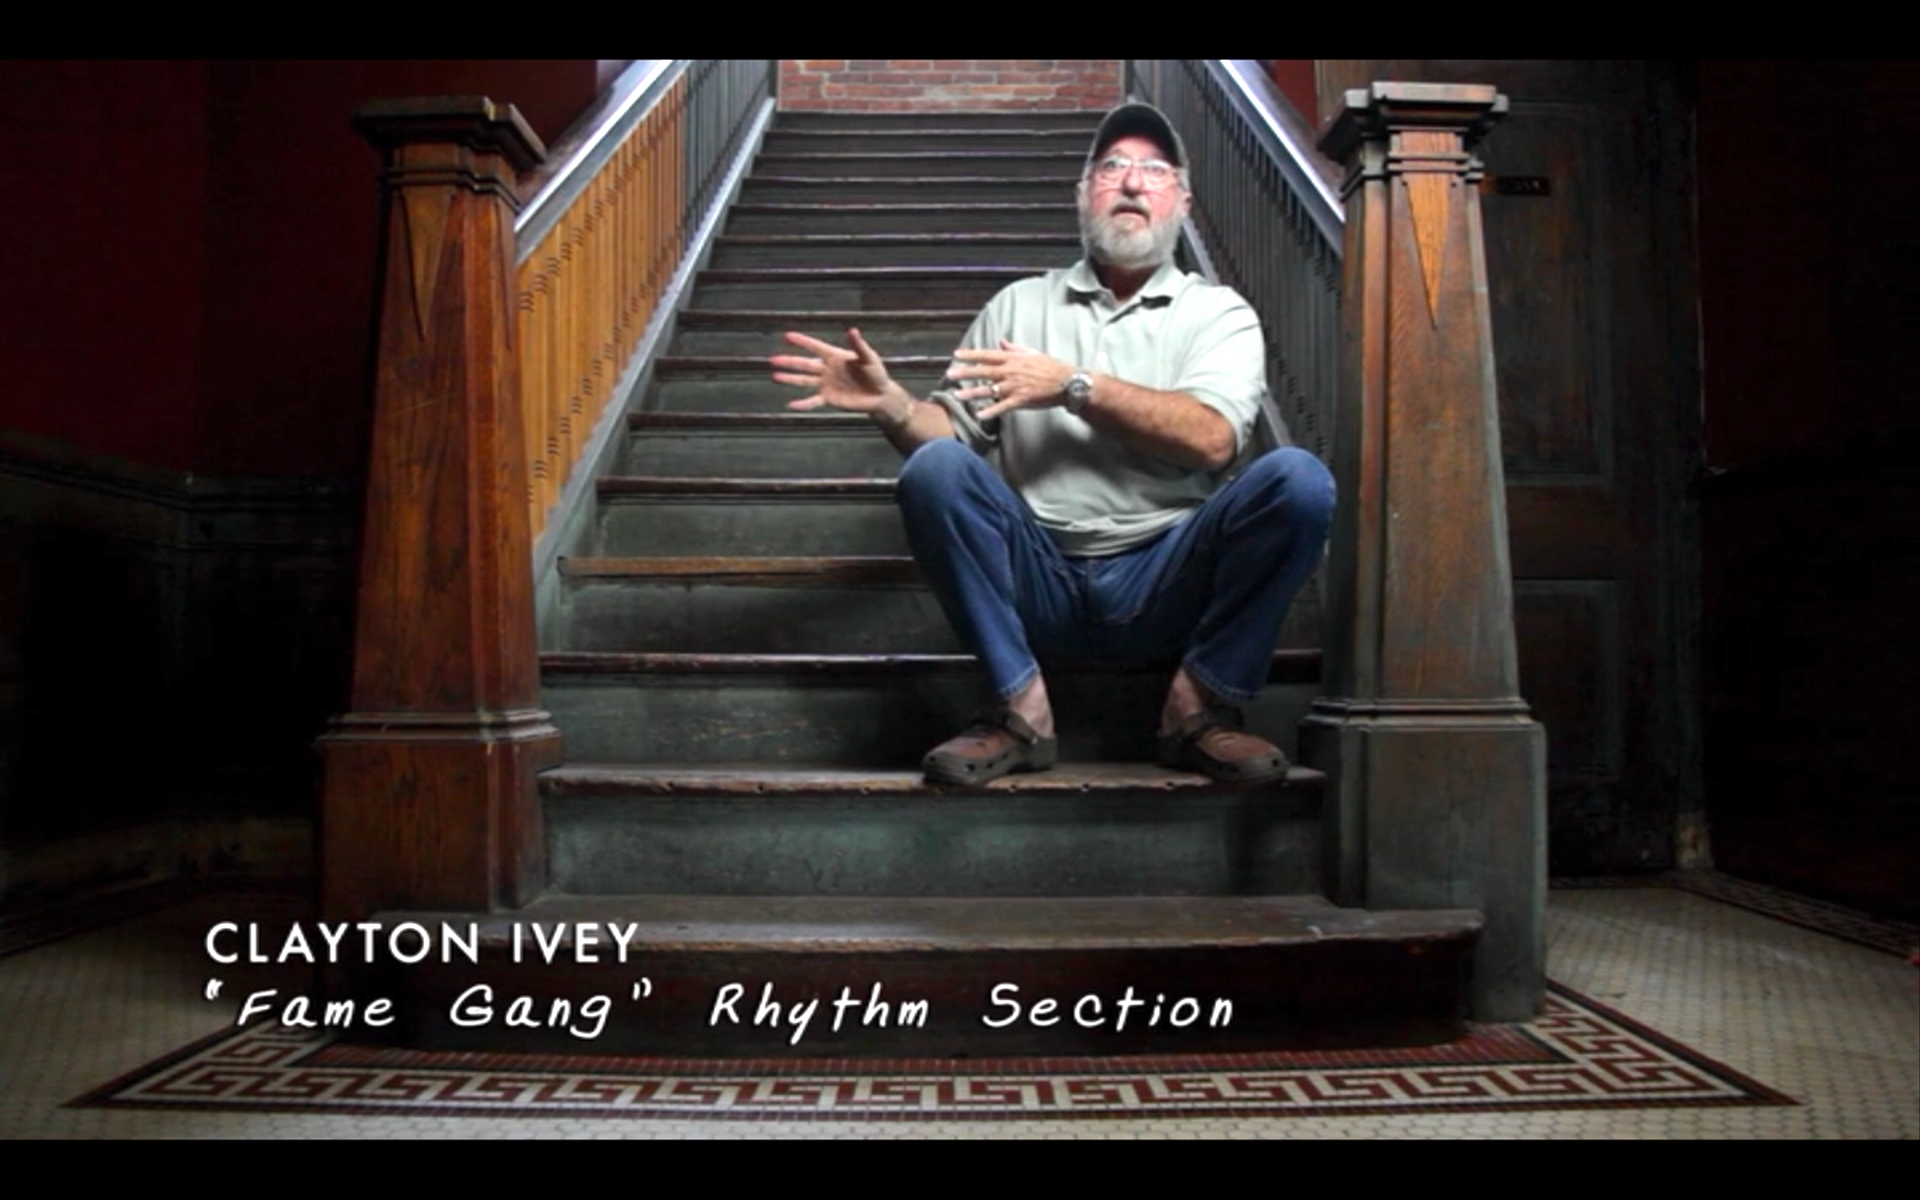
Then, one night in a hotel room, while watching the documentary Muscle Shoals on my laptop, I saw the column of my dreams—tapered newel posts with stepped edges, matching plinths, and the coolest acute-angle pendents I’d ever seen, set off with two lines of half-round molding.
With the copper panels finished, I installed the doors—again, then quickly mocked up one of the tapered columns. My living room sat like that for about a year—that much time passed before I had an opportunity, or the courage, to tackle those columns.
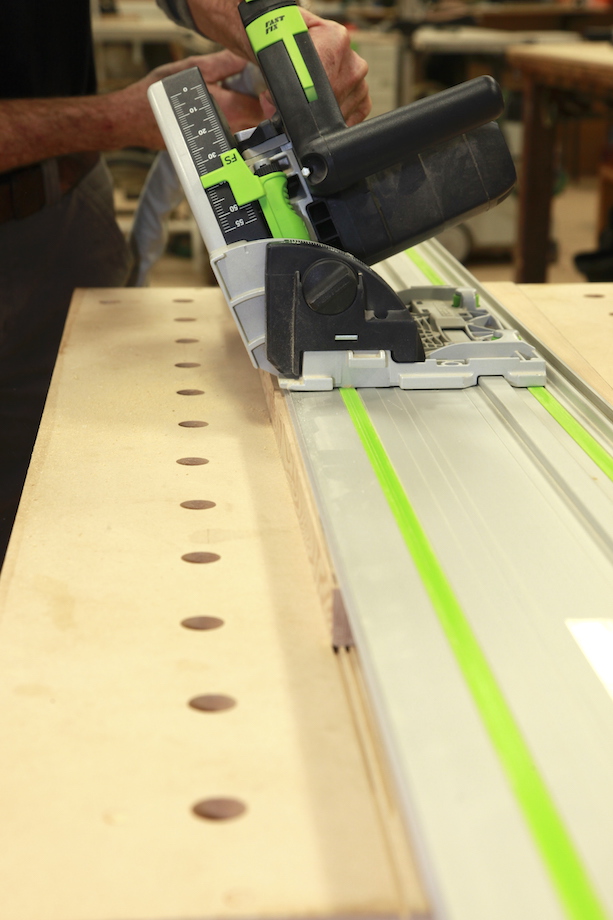
| The pine mock-up helped me figure out exactly how wide to make the sides, which I’d need to scribe into the brick and into the face frames. Once I had those dimensions, I cut the 7/8-in. thick panels with a track saw. | 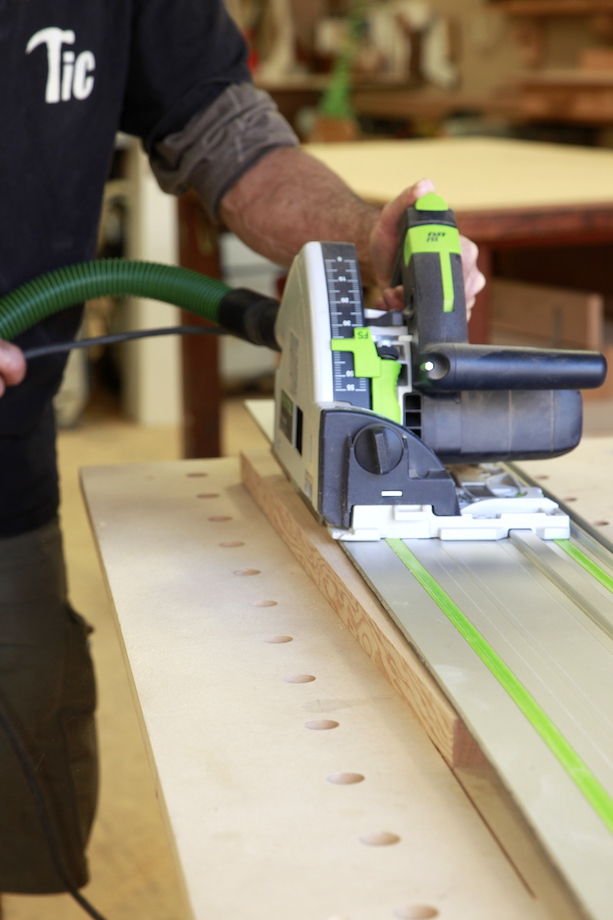 |
 |
I cut a 3/8-in. x 3/8 in. rabbet in both back edges of the face panel, which made it much easier to position the sides and maintain a perfect 1/2-in. x 1/2-in. step at each corner. |
| The rabbets also provided a good way to temporarily assemble and secure the pieces for each column. | 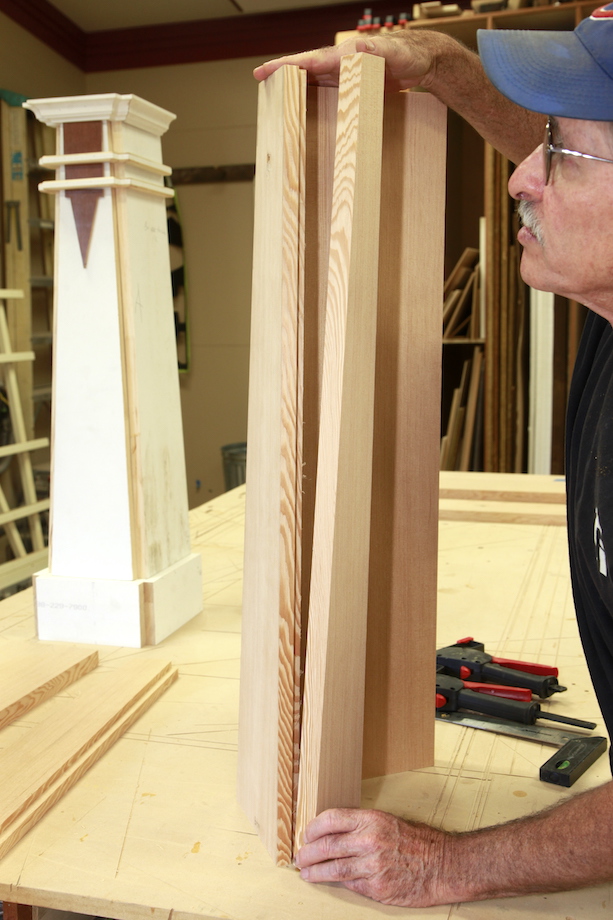 |
| I didn’t want to fasten the pieces together until they had been scribed and cut, so I clamped them together. | 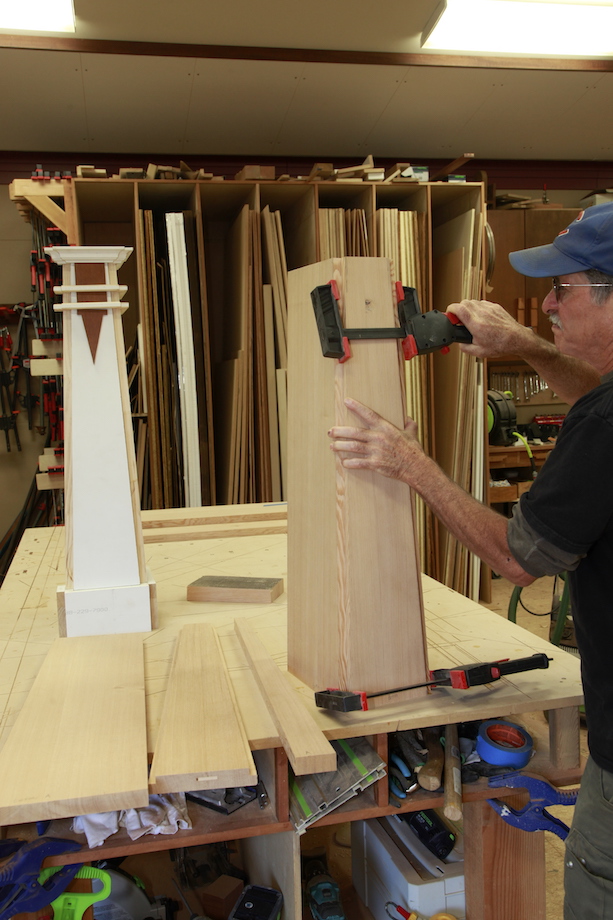 |
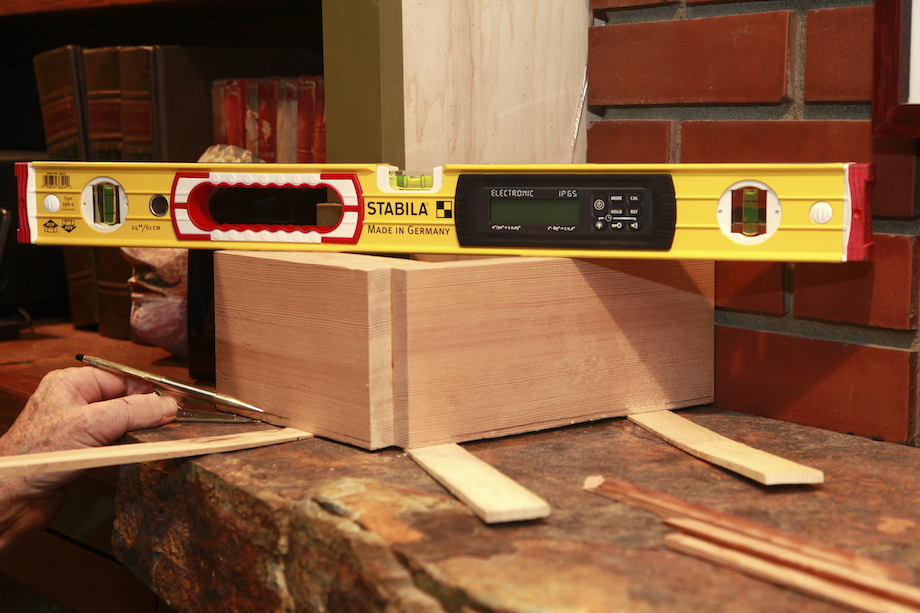 |
First I scribed the plinth to the stone, making sure it sat perfectly level before I ran my scribes around the bottom. |
| Then I stacked the column on top of the plinth and scribed the back of both sides to the brick. | 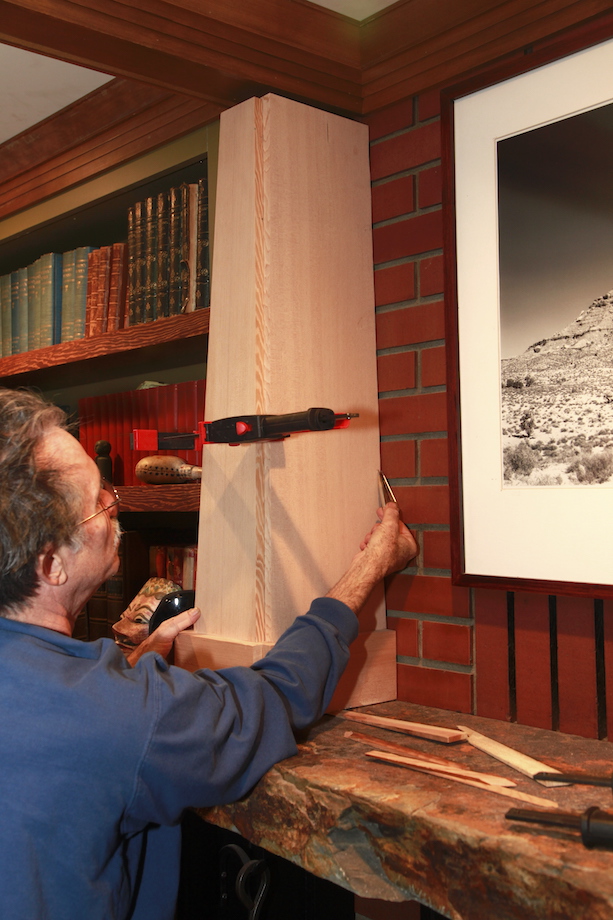 |
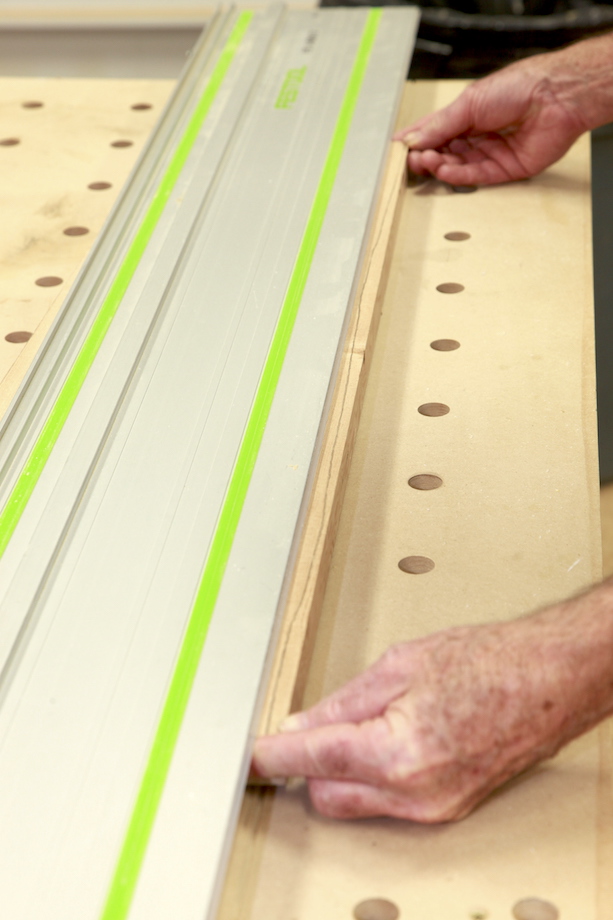
Cutting the scribe line that abutted the face frame was easy—it was perfectly straight, but the scribe on the brick wasn’t. I positioned the panel under my track, so that I could remove as much waste as possible with the saw.
 |
 |
I set the saw somewhere near a 20-degree bevel, so it would be easy to plane to the scribe line, and so the panels would fit even tighter to the brick.
| Then I planed to the scribe line, holding the planer upside down so I could see the cutter and bring it right to the scribe line by tilting the planer a little more or a little less as I made the cut. | 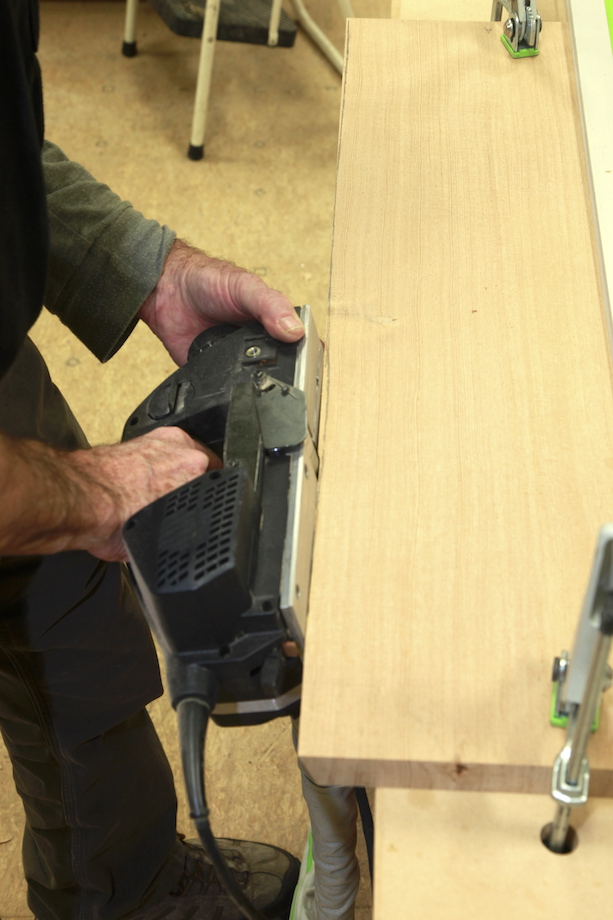 |
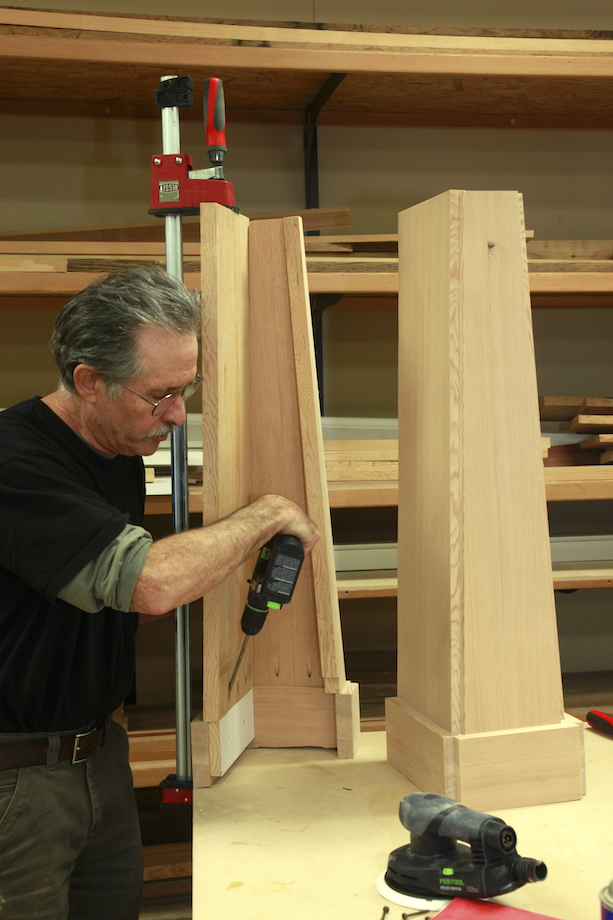 |
After all the pieces were cut, I assembled the columns, gluing and clamping the tapered panels together along the 3/8-in rabbets. I used pocket screws to secure the panels to the plinth. |
| I made all the plinth cap moldings with a bevel on the back to match the pitch of the tapered column. To make the compound miters easier, I taped up a pitch block to my miter saw. | 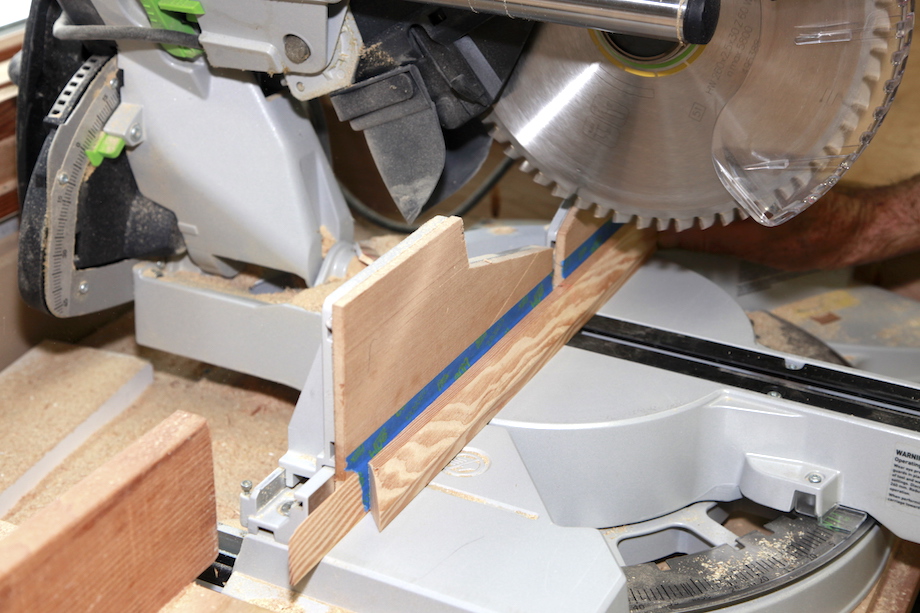 |
Cutting all those pieces required more patience than any other part of the whole project. Fortunately, corners formed by the rabbets were exactly 1/2 in. x 1/2 in., but each of the other pieces had to be cut and marked, then cut again, and sometimes again, and a few times thrown away and cut again!

The end result was definitely worth it. Every time I load firewood in the cabinet—from outside the house, I’m thankful for investing so much effort in the design and the installation.
And every time I look at that wall, I’m thankful, too, for all the years I’ve spent learning the craft, and more than anything, all the years I’ve invested in learning patience.
Gary, Nicely Done! Was wondering how you were going to age the copper. You’ve given me a few ideas on a couple of projects that have been delayed. Stay Warm. thanks
Wow – the patina on the copper. Just. so. envious.
Ben,
Yeah…the copper is pretty cool. But then, so are your windows! I wish readers could see those!!! :):) (I just couldn’t resist! You’re such an easy target.)
Gary
Nice job! Did the mantle stone come with the house ? Wish I had shop space…
Bill,
No, I bought the slab of stone from a local landscape/stone supplier. They brought it in from Montana. I kind of liked that source, too. But if you’re asking, then you must have missed Part 1 of this article! Poor you!!!
http://www.thisiscarpentry.com/2016/10/14/my-living-room-wall-part-1/
Gary
Superb. Thank you for the article. I learned a lot about copper distressing!
Awesome craftsmanship, beautiful results!
Two small chemistry corrections: “I found another more reasonable method: mix one table spoon of salt, one table spoon of baking soda, and one ounce of household ammonia bleach with a quart of water.”
You probably meant to type “chlorine bleach,” not “ammonia bleach.” Indeed, mixing ammonia and bleach creates mustard gas, a deadly poison!
“In the end, I chose an acid solution, which was very similar the baking soda and ammonia solution.”
Baking soda and bleach are both bases (vs acids), so the result will probably be somewhat different between the two. But the patina you got looks great!
Dave,
You are so right! I meant to simply say BLEACH, NOT Ammonia! And I think it’s the salt more than anything :)
Gary
I can’t tell you how much I love those columns! They are stunning!!
Great article as always Gary. You style is infectious as I’m stuck on my kitchen’s final Greene & Greene inspired design and this article will help. Especially the tapered columns. I really appreciate the detail you go into with assembly and install because I either learn a new trick or reaffirm that I’m doing it correctly.
A pleasing and well balanced design, well executed, good job Gary.
In particular, I was interested in your scribing techniques.
I use the hot glued batten pattern often (for lack of a better term), not only for horizontal surfaces but vertical as well
I was wondering if you had though of using it to fit the lower doors. Although I’ve used the same technique you did to fit doors that go in-between vertical surfaces I’ve never felt that confident measuring the starting width of a scribe. I don’t believe using a pattern is more time intensive although there is an additional step at the beginning. After you build the door (for instance) oversized and trace the scribe from the pattern, trimming to line is done in shop conditions, taking advantage of shop machinery. There is always a little final fitting in the field but it’s minimal if the batten pattern was executed properly.
Anyway since you used it for the top I was interested to know why you decided to scribe the over sized door directly.
Thanks for all your efforts educating and training the next generation of finish carpenters!
Paul,
Funny you should ask that because I never once thought of doing the doors that way! I guess I just looked at them as doors and did the same thing I’ve been doing with doors for too many years–I don’t know any other way to approach them. So for me, standing up the doors and scribing them is the easiest thing imaginable. And I did the same thing with the shelves that I’ve been doing with shelving for years…I don’t know any other way to approach counter tops or shelves, either. I think it’s a combination of getting old and still having a limited variety of approaches. Life is like that, huh? Not just for carpenters!! :)
Gary
Great work. The copper sets it off.
Beautiful job as usual Gary !
What did you use to hold doors closed and is there a stop inside to keep them aligned. Also what did you use to hide/fill the pocket holes inside the cases. Great article and thank you for sharing.
Bruce B
Bruce,
The doors are pretty heavy, and since they all hang off the one stile, they sag a little. In fact, I have to lift them just a little tiny bit when I shut them, so there’s no need to hold them closed with catches or magnets. However, I do need to install something to hold them open! The walls in my house are NOT plumb, especially to the right side of my firewood cabinet. I scribed the stiles to fit, but I did NOT hold a level on them when I scribed them, so I didn’t scribe them for plumb. If I had, the reveal on that stile would have tapered nearly 1/2 in. in that short distance! So I’m thinking of a magnet in the leading edge, or something, to help hold them open.
As for the pocket holes, the stiles are so wide, the television so big, the firewood cabinet nearly always full… you don’t see inside the cabinets at all! :)
Gary
Awesome work!!
This is for anybody who wants more products/info on the copper patinas. I have used this company http://surfinchemical.com/ to patina steel for some previous projects at a past employer. It is a bit more expensive but if you have a lot of metal to patina; they might be beneficial. You don’t necessarily have to use their top coat, any lacquer type spray (both water and oil base) will do. Obviously use oil if the area will receive lots of traffic or the metal will be touched a lot.
Gary,
The entire project is stunning! I am awed by your craftsmanship and attention to detail. I have had the privilege of attending three of your roadshows and have learned something every time. Thank you for sharing this with us.
Stunning design and meticulous execution. I love the proportions. I appreciate how you always seem to find a way to simply explain the complex and showing clever applications for re-using rudimentary landfill. Card keys for shims. Brilliant!
Gosh…Thank you Robby, coming from you that means a LOT to me!
Gary