


I’m fortunate not to be a packrat. I know many people who are. My father would never throw away anything! Which is probably one reason I’m so averse to saving stuff. I’ve even thrown away a few things I had to buy again! But there is one thing I’ve always had a problem with—books. My entire life, I’ve collected books. In fact, I still have most of my favorite first reads from when I was a kid.

(Click any image to enlarge)
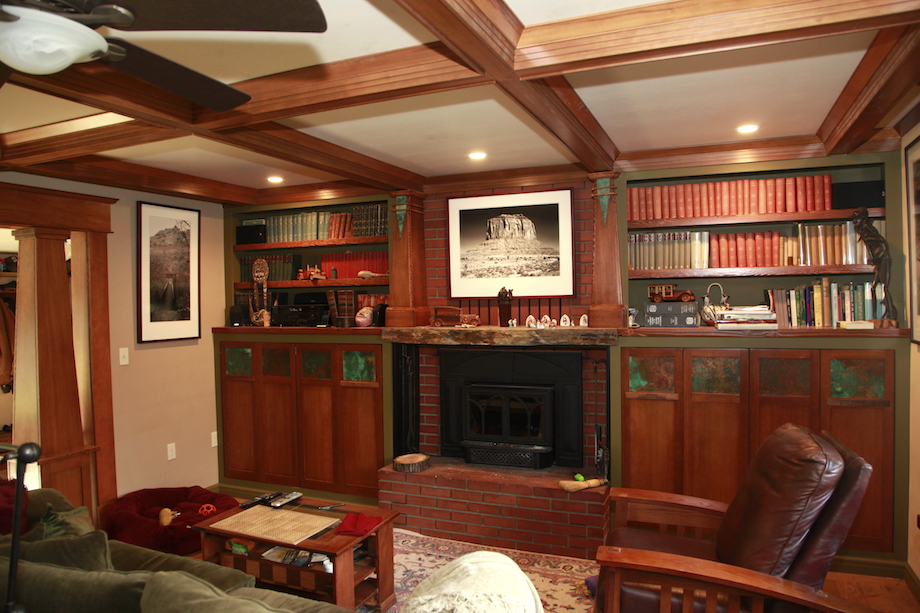
When I moved from Los Angeles to southern Oregon a few years ago, I culled my book collection and gave hundreds of books—probably thirty boxes—to the local library. But that still left over forty boxes that I packed in a rental truck, faithfully and carefully storing them in the pole barn at my new home. I promised myself I wouldn’t open even one of those boxes until I’d built enough shelves to unpack them all.

It took one whole year to build the shelves in the living room, flanking the fireplace. It took another six months to build the living room credenza cases—and that’s another story. But four years after moving, I finally finished enough shelves and unpacked all my books. At that moment, my new house instantly became a home.
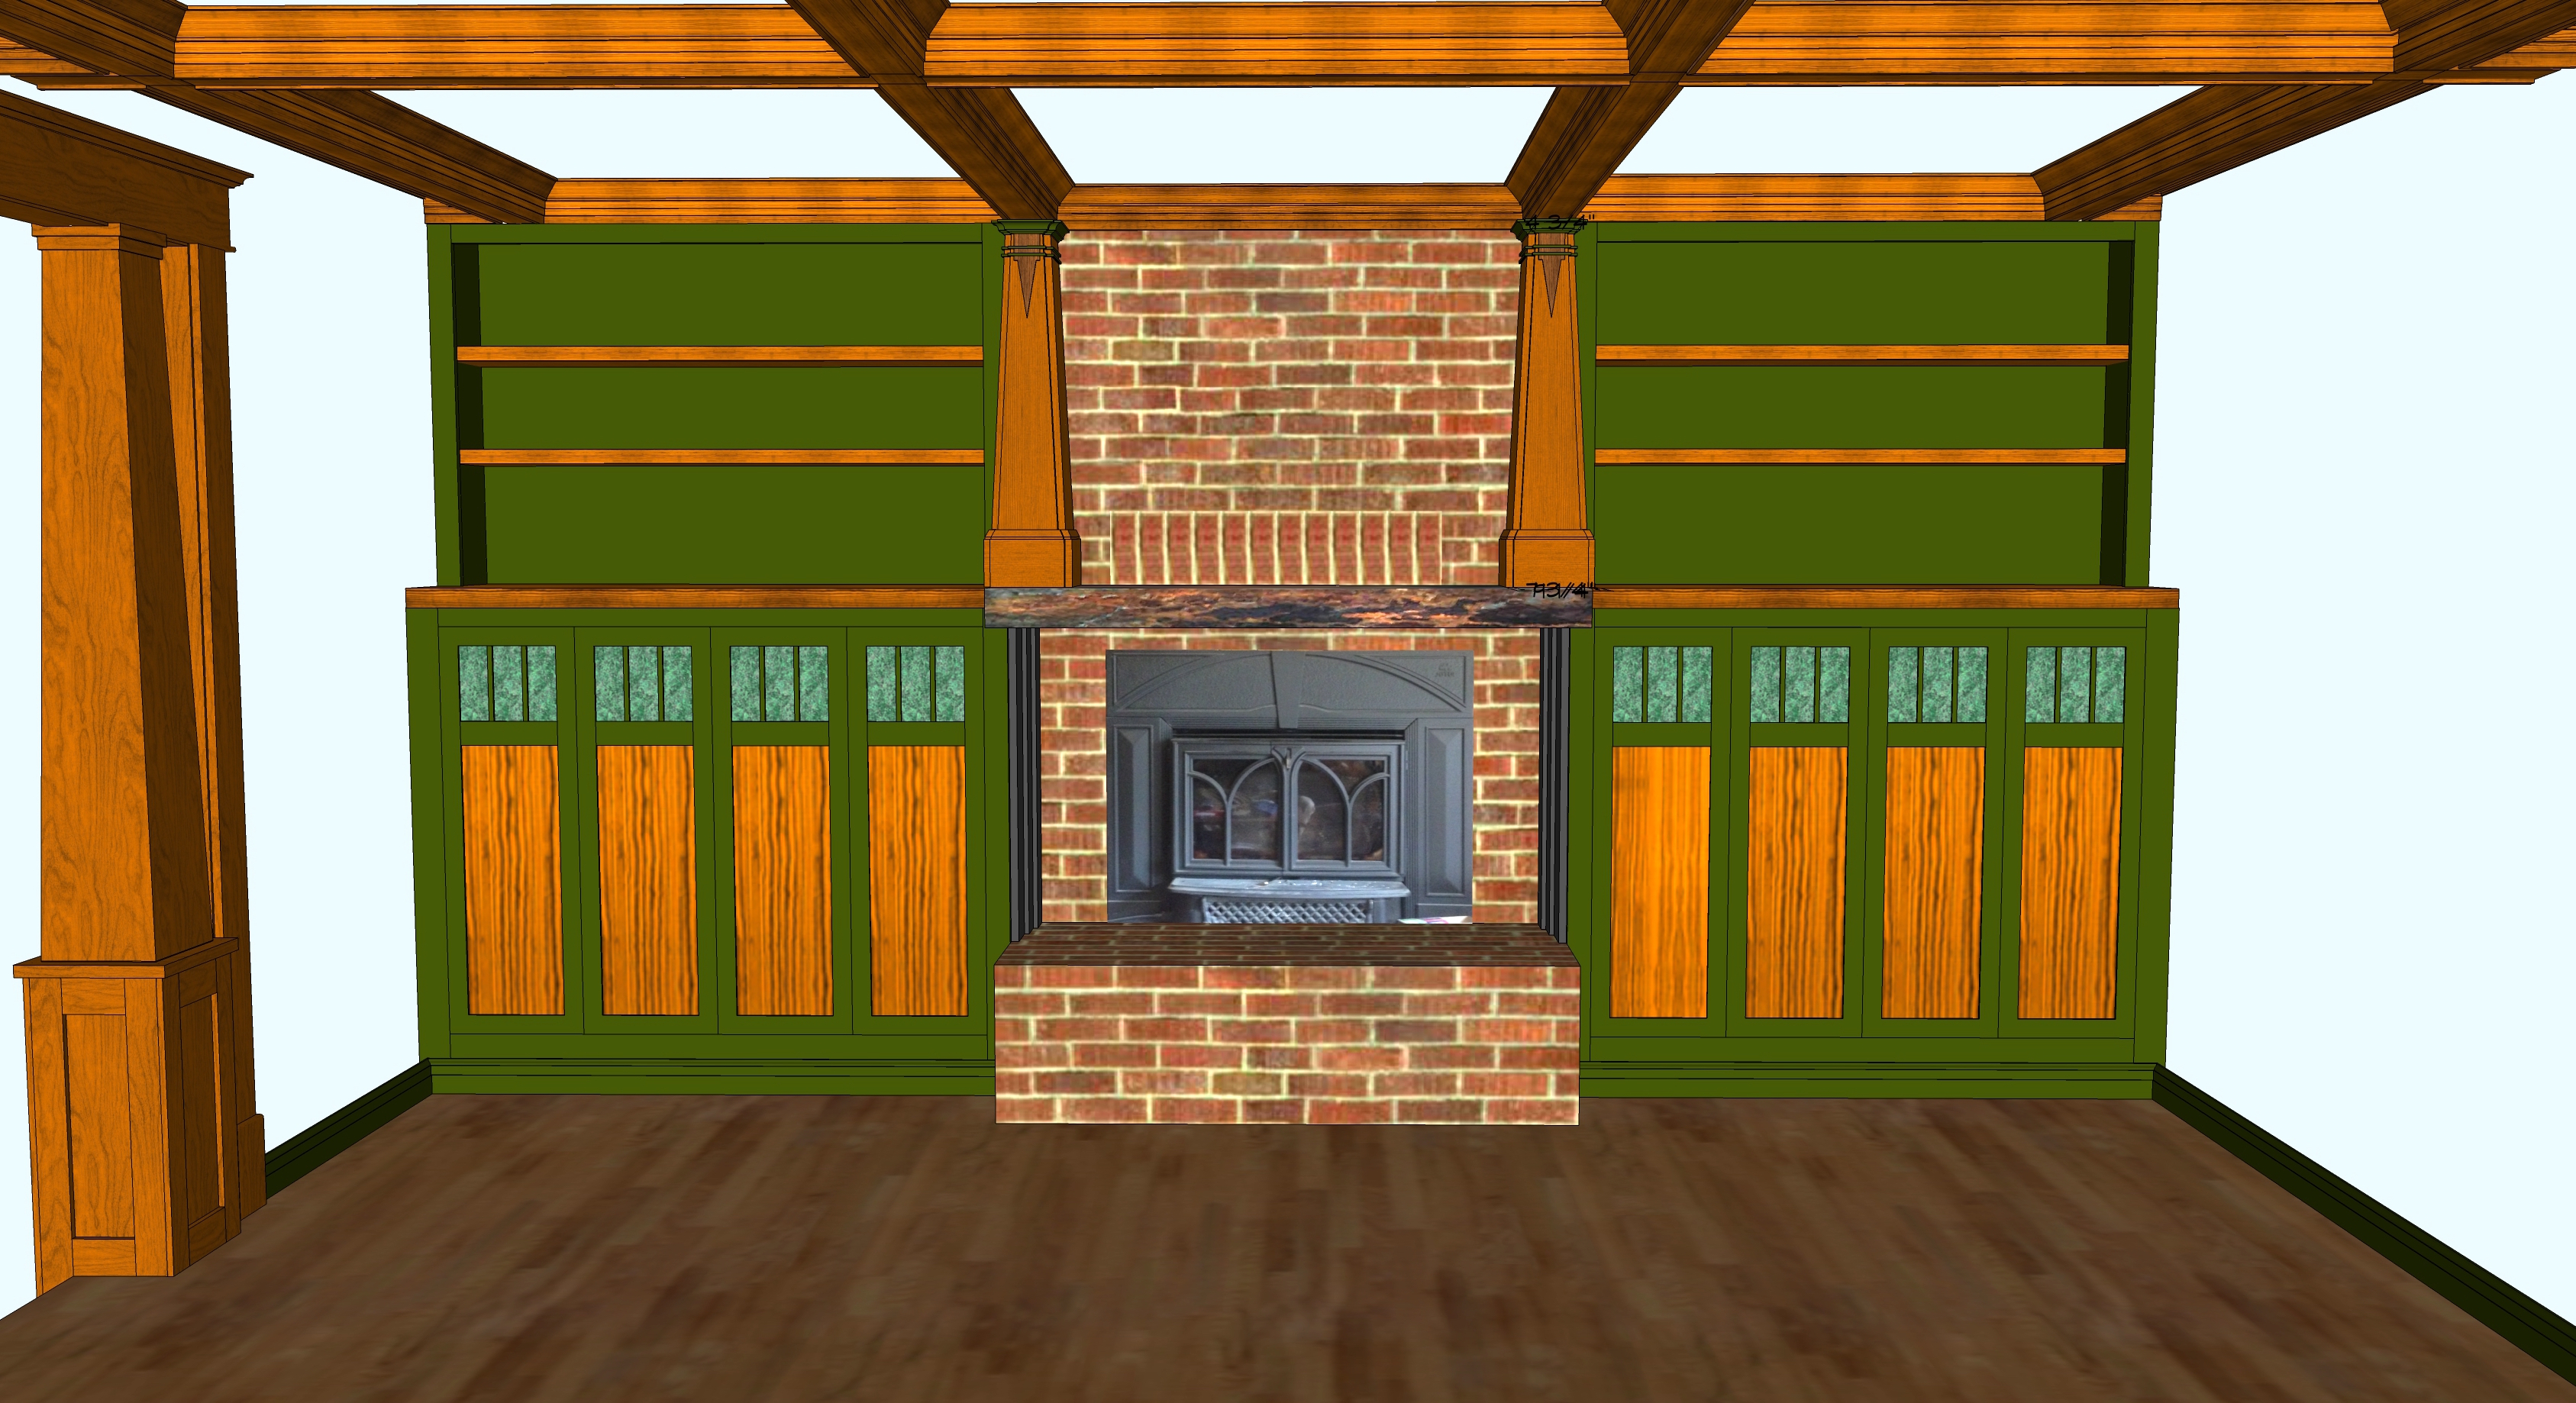
The Design
One of the reasons it took a whole year to complete one wall of shelves was because I travel a lot, and my job requires a lot of desk time, too, but it also took a year because I wanted so much. Todd Murdock and I spent at least six months designing the entire wall.
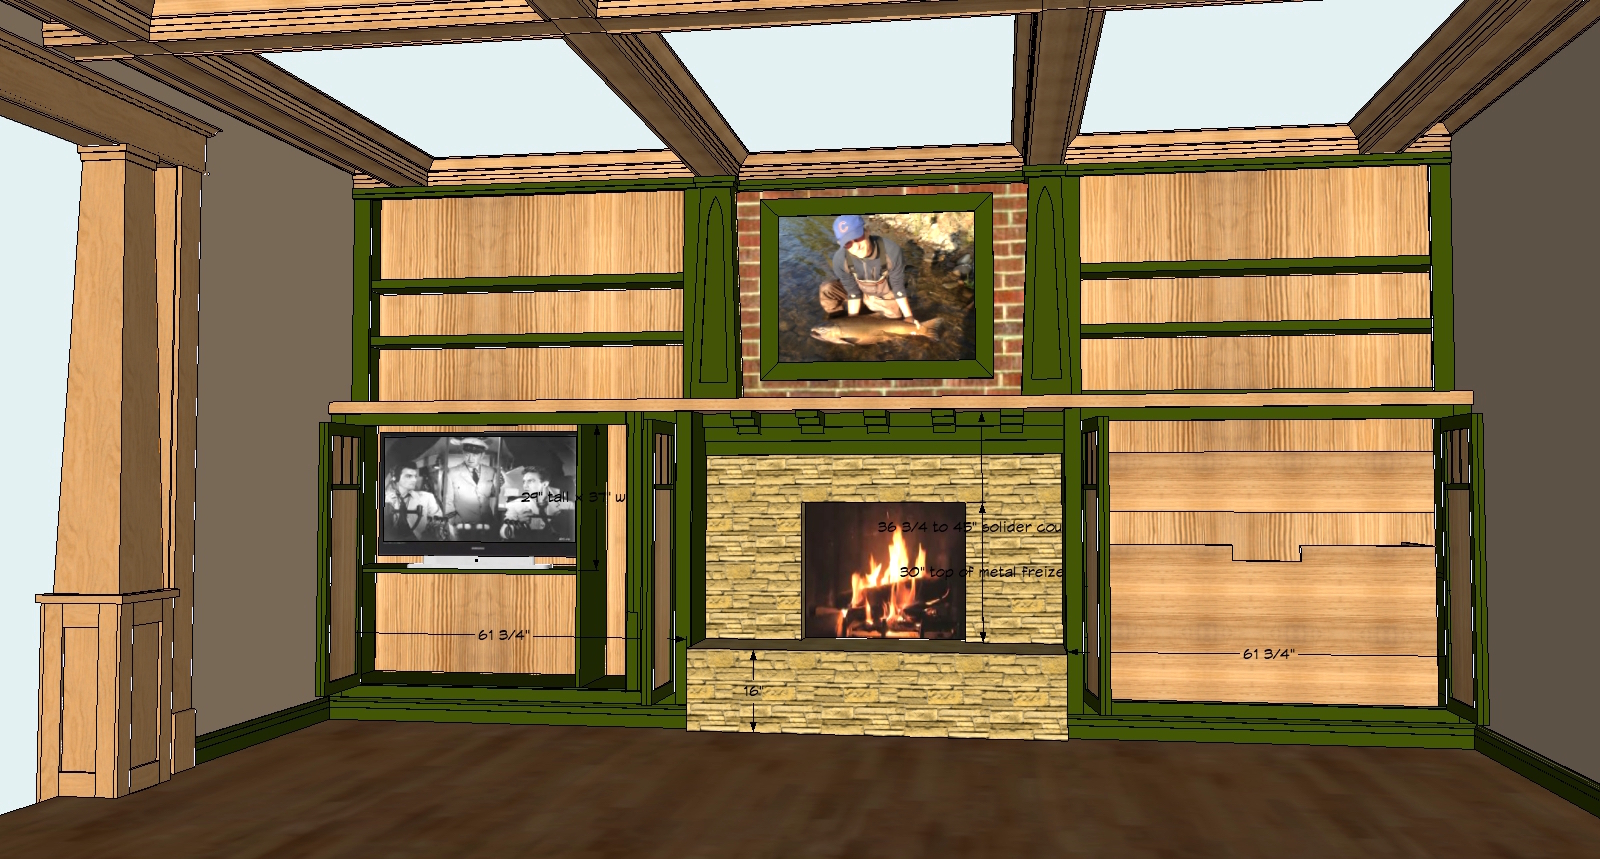
After the second year of heating my home with firewood, I decided I’d had enough of carrying armloads of wood through the front door and into the living room—two cords in all. Cleaning the floors took nearly as long as carrying in the wood. And in December and January, I could never store enough in the living room to last more than a day or two. I wanted a large firewood box, with exterior doors, so I could load the firewood from outside. I also wanted to hide the television set, behind doors. So I figured I might as well hide the firewood for six months, too! But I also needed bookshelves…a lot of them.
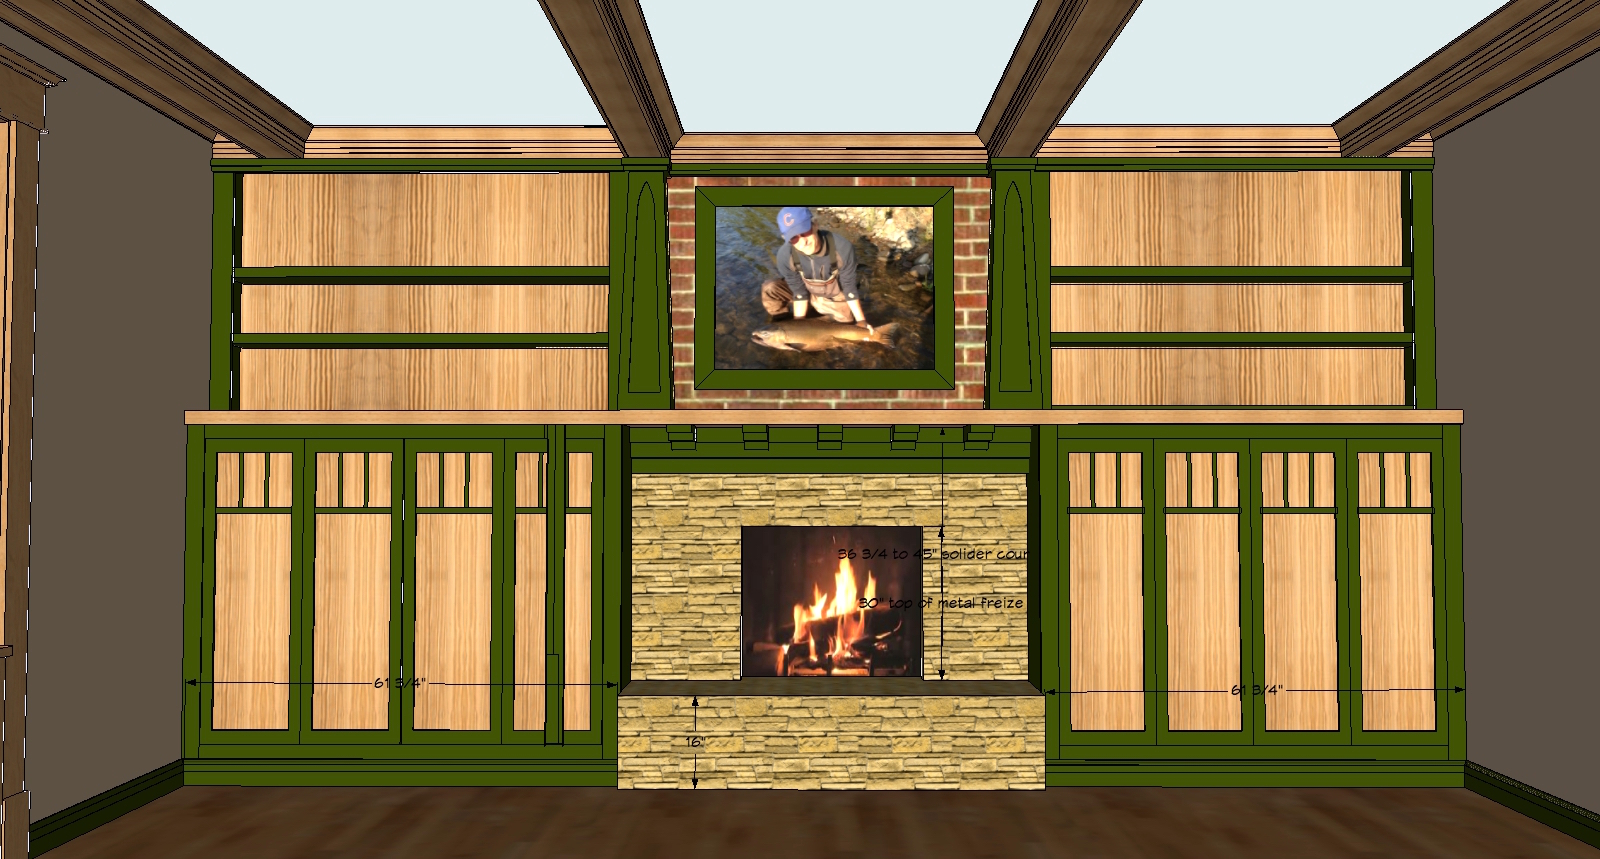
Our first design incorporated all the essentials. Todd thought we should tear off the brick on the fireplace or add a stone veneer; I nix-nayed that mess. But we did get the television into the cabinet to the left of the fireplace, and we included a firewood bin on the right side, with shelves above, and a pair of tapered pilasters. And through it all, Todd did a masterful job of correcting my designs and my drawings.
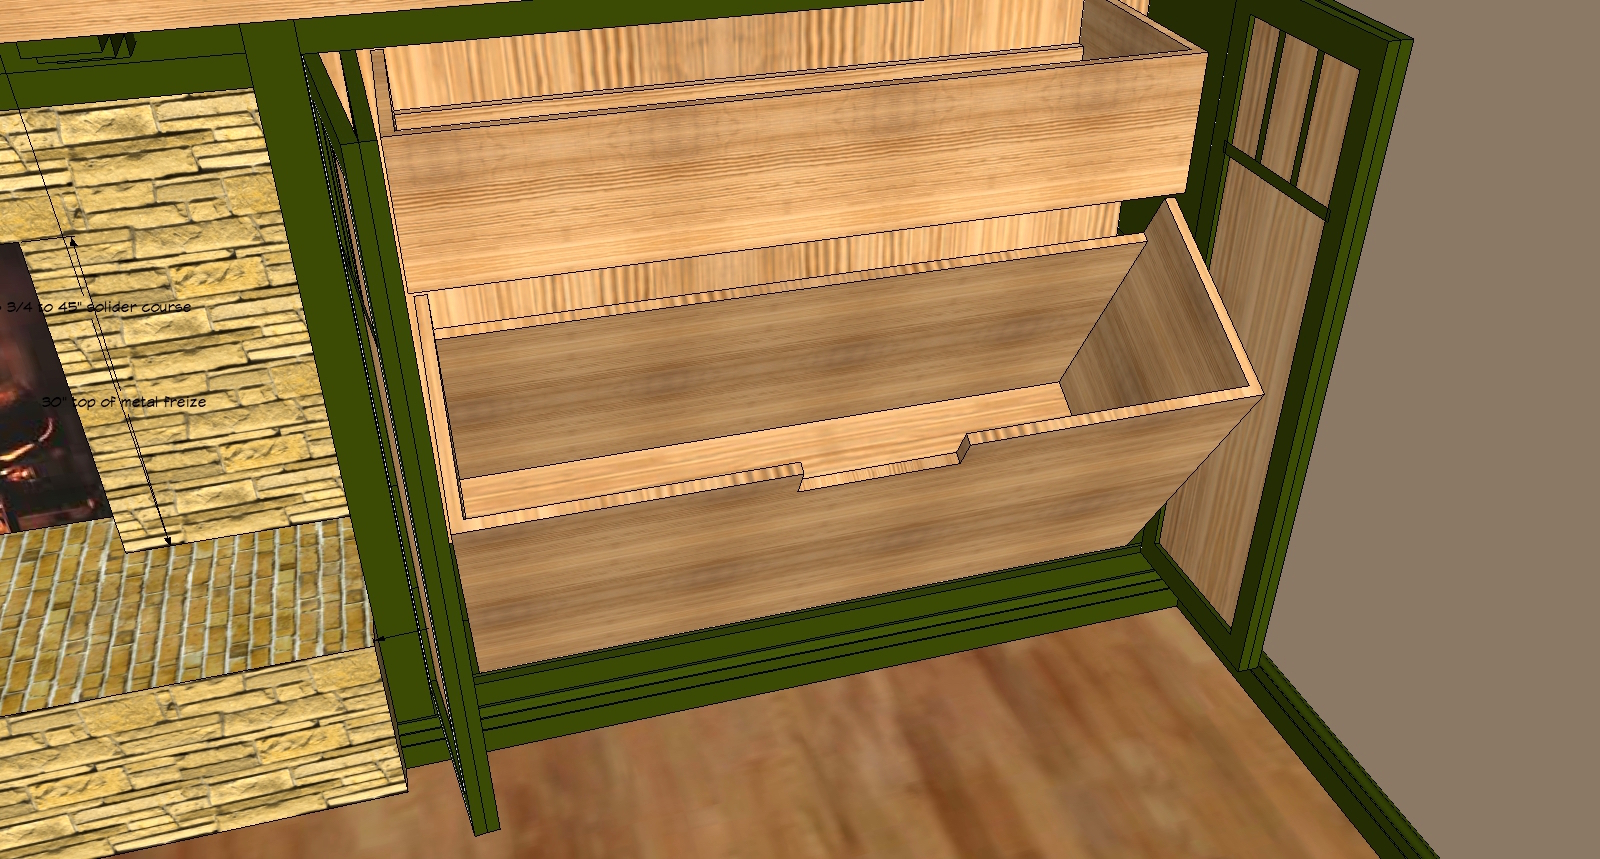
We went through a lot of changes over the course of the six months we spent on those drawings. The cool tilt-out wood bin, which took so long to draw, was dumped. Who needs a tilt-out wood bin? That would make it even harder to load and unload the firewood!
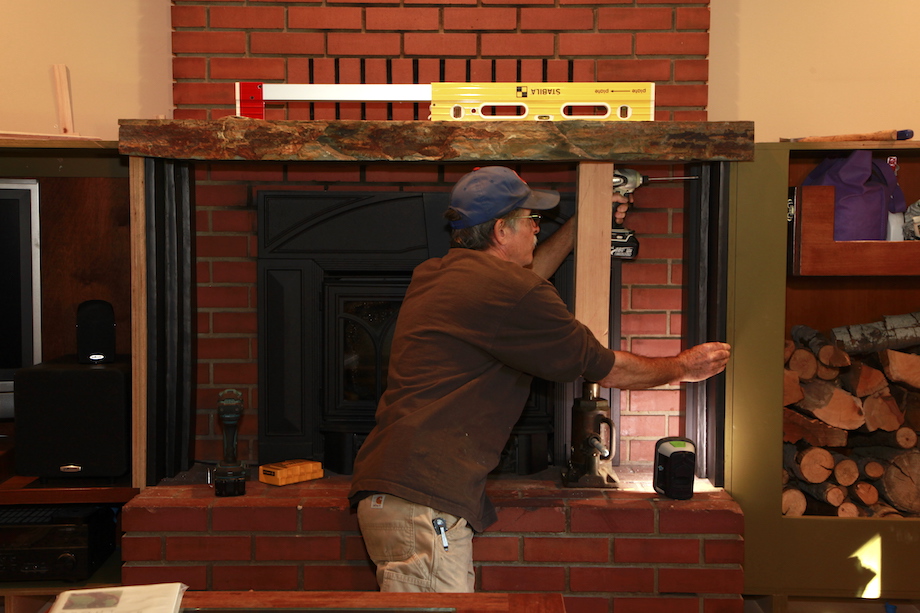
We started out with a neat looking Craftsman-style mantelshelf, supported by a series of corbels or modillion blocks. But when my wood stove installer took one look at that, he said I’d burn the house down if I put a wood mantel over the stove, and he was worried about how close the cabinets were to the stove, too. Checking on the stove specifications, I soon realized he was right. I went with a stone mantelshelf, and supported it with three-step steel jambs we welded in my shop. And eventually we settled on the right design for the tapered pilasters, too (see Part Two of this story, coming soon!).
The Firewood Box
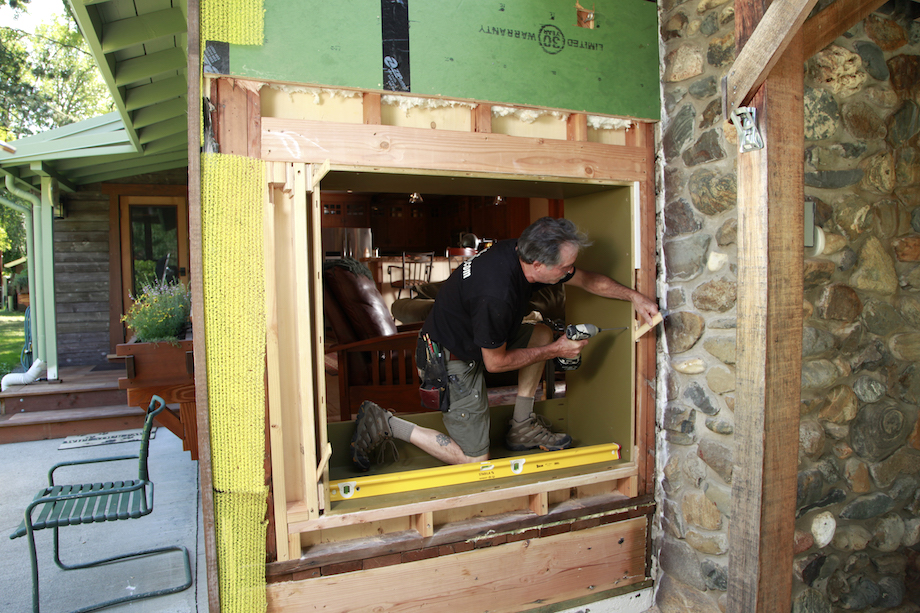
| The first step was cutting a BIG hole in the exterior wall of the living room. All that takes is a good reciprocating saw and a little courage. SketchUp drawings were instrumental in pinpointing the size and location of the opening. Once the hole was cut, the header, trimmers, and sill installed, it was shop time. | 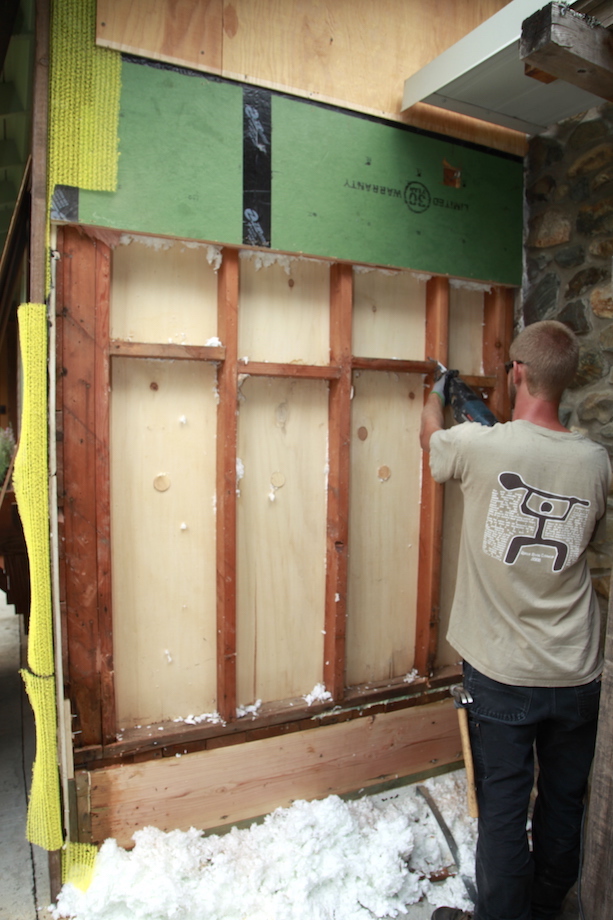 |
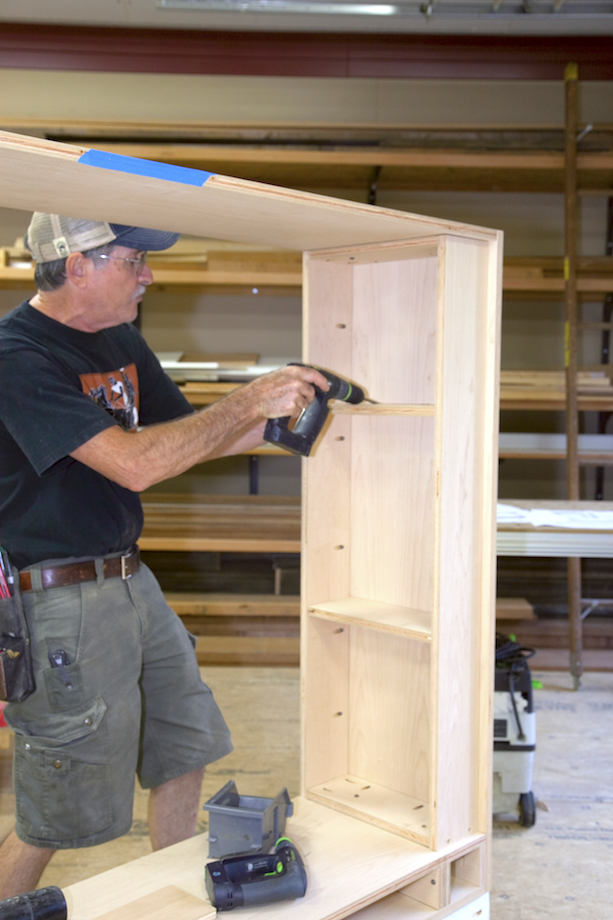
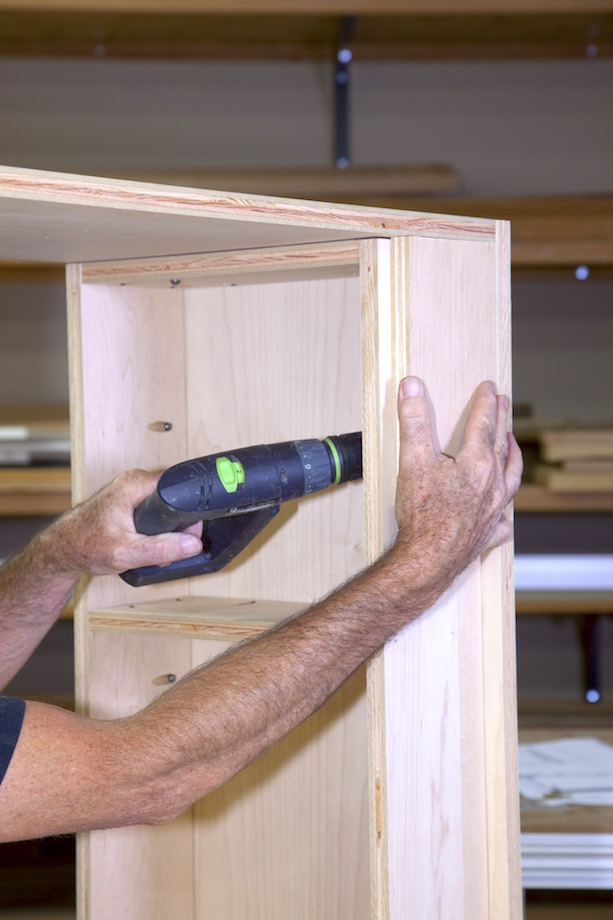
I built the two cases with simple pocket-hole joinery—since none of the fasteners would be visible.
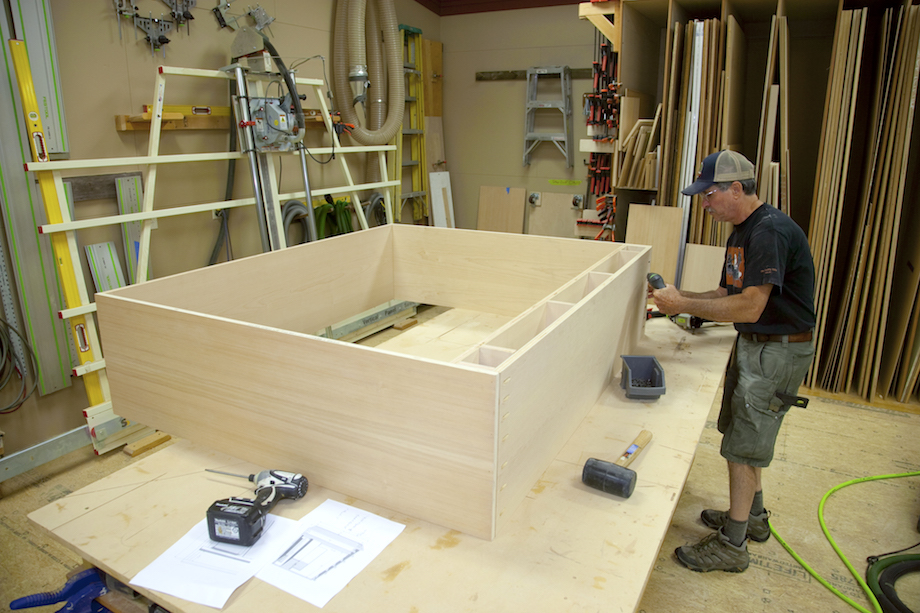 |
Because the floor of the living room, across the fireplace wall, was almost a full inch out of level, I knew from the beginning that it would be best to build egg-crate toe-kick bases for both cases, so it would be easier to shim and install the two cases perfectly level. |
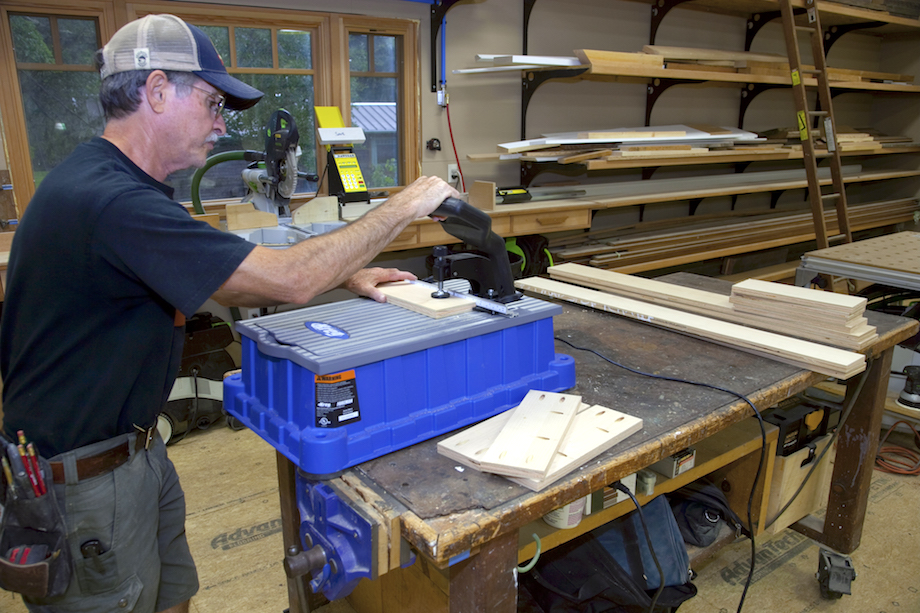 I cut all the pieces to the dimensions provided by the SketchUp drawings. Mike Sloggatt once told me that you can always trust math—calculators don’t make mistakes. Mike also warned me that the only time math doesn’t work is when the carpenter makes a mistake. But with SketchUp, it’s nearly impossible to make a mistake. If you’re careful to draw everything to precise measurements (a lesson I continue to learn from Todd), then you can depend on the drawings to provide accurate dimensions.
I knew I couldn’t fold the bi-fold doors in both directions—if I left them open (how else could I watch television!), they’d be too close to the fireplace. So I knew from the start that the doors would have to all fold to the walls. How I’d do that I had no idea. Yes, there are limits to what SketchUp can do for you! But I allowed enough space on the firewood box by building out each side.
| I built out the hearth-side of the firewood box so there would be room for a face frame and a landing area for the bi-fold doors. | 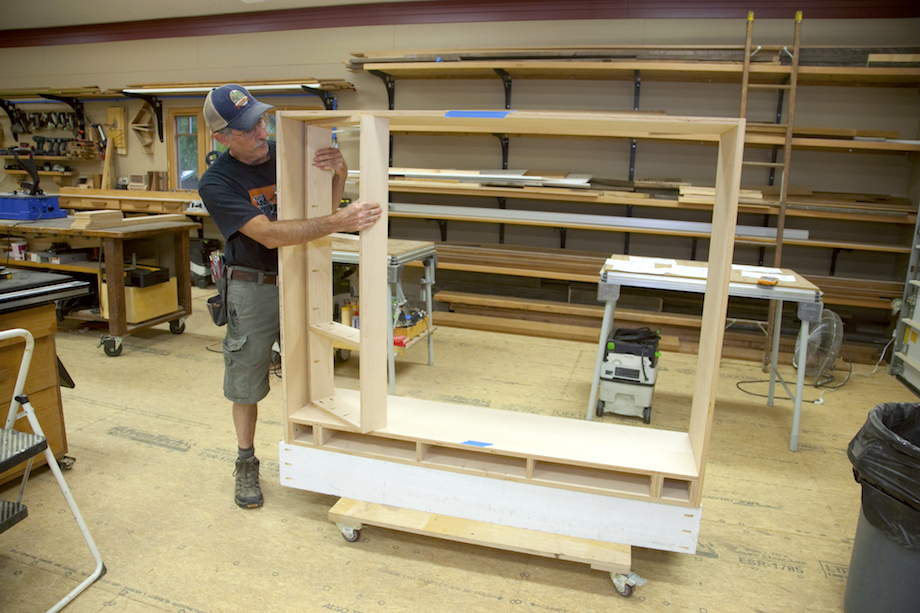 |
 |
I built out the wall side of the case even more, so there would be enough room for the doors to rest folded up, without interfering with the opening for the tinder drawer above the firewood box. |
I used a 3/4-in. spacer block to make sure both build-outs stepped back from the front edge of the case, allowing enough room for the doors to lie flat on each side of the cases.
 |
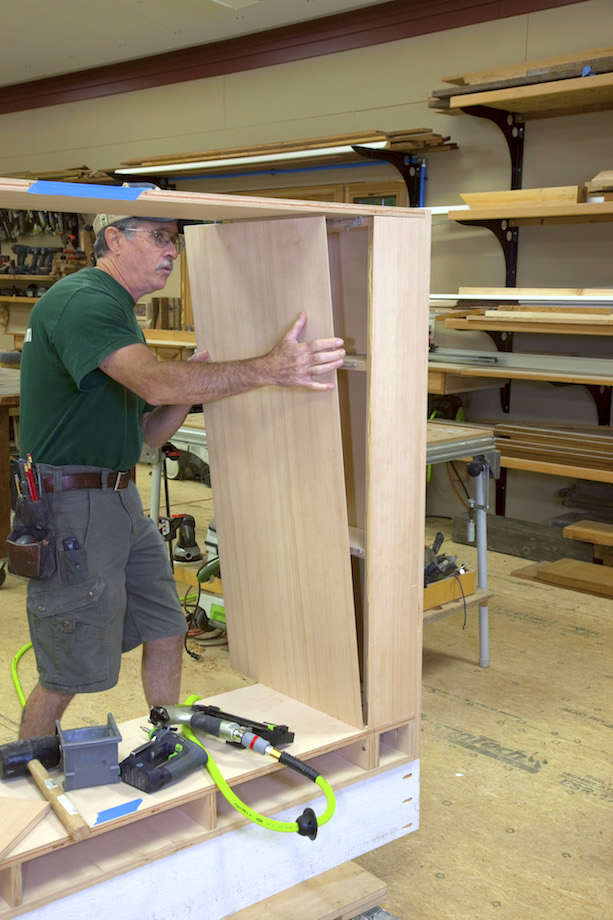 |
With the doors open, the build-outs were visible, so they had to be skinned with 1/4-in. VG fir plywood.
| Being a thoughtful and caring carpenter, I mitered the outside corners. | 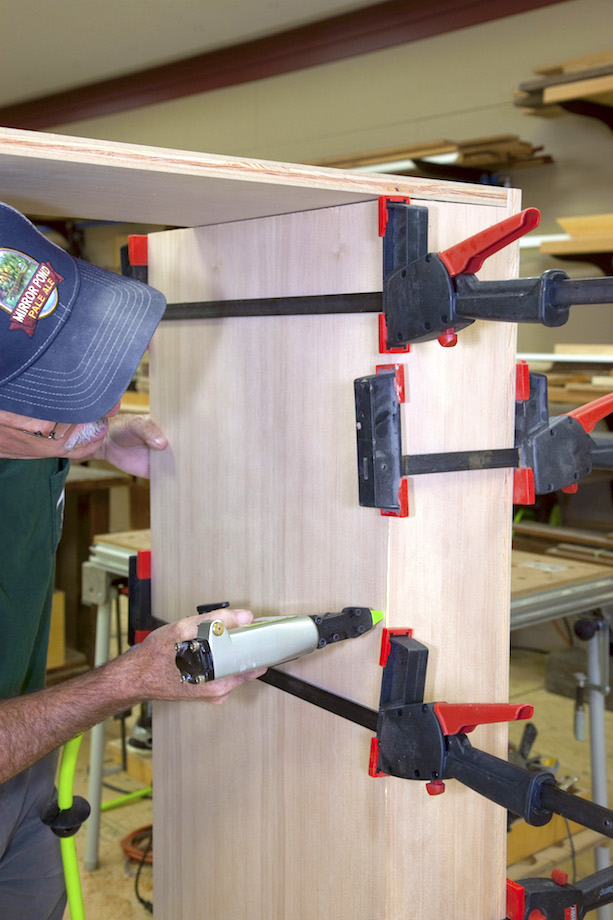 |
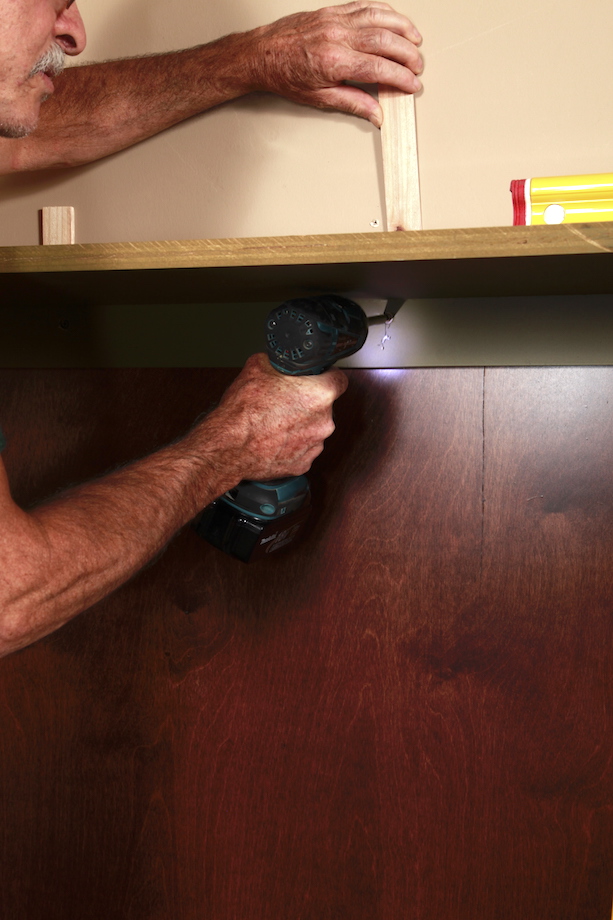
| To prevent the television shelf from sagging, and to beef-up the appearance, I doubled up the plywood shelf, then banded the edge with Douglas fir. | 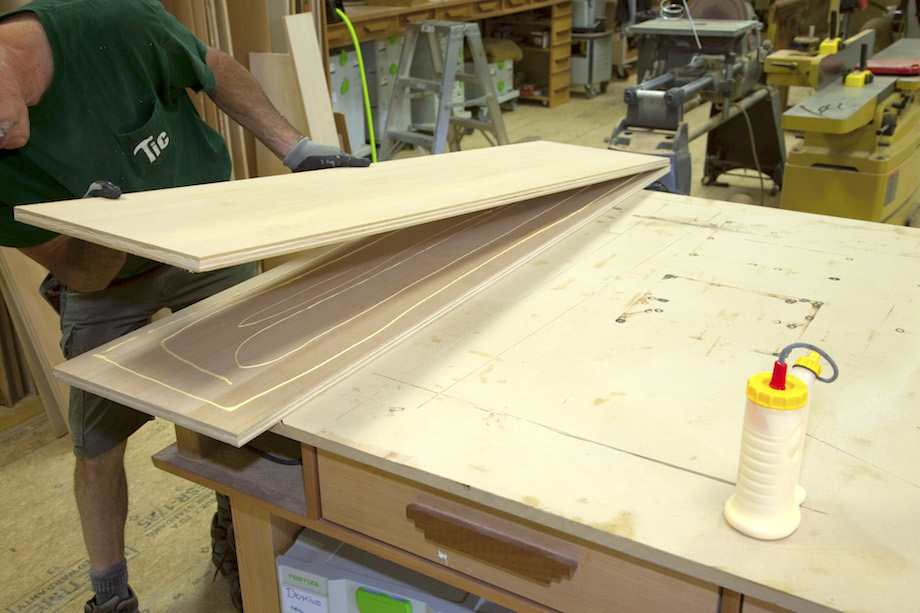 |
The most challenging part of remodeling my home has been remodeling my home. I mean, I don’t have a lot of experience with most of the projects I’ve tackled. I spent nearly 25 years specializing in finish work, not cabinetry: I installed miles of moldings, thousands of doors and locks, uncountable boxes of hardware—from overhead closers to panic bars, but I rarely built a cabinet. Fortunately, I didn’t fasten the supports for the television shelf permanently—I was afraid that one day I might get a new TV—stranger things have happened.
| So I face-screwed all the lower supports for the shelf, and used only two fasteners to secure the shelf itself, covering the fasteners with false side panels. I’m really glad I did that. A few weeks after installing the television, I decided to lower that shelf by two inches! | 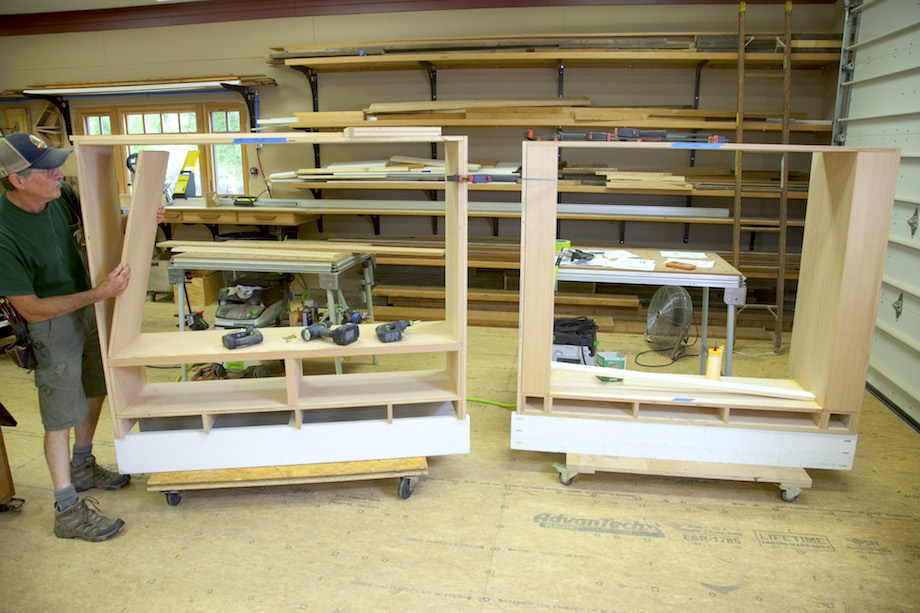 |
 |
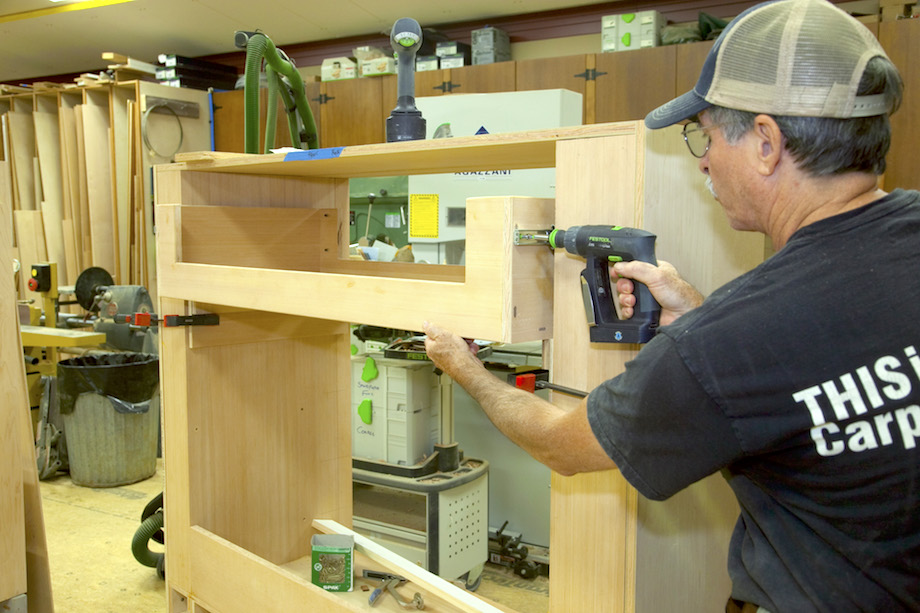
Drawers are definitely not my specialty, either. But this one wasn’t much of a challenge. I wanted it to span the entire width of the cabinet, and I wanted it to hold a lot of stuff—newspaper, lots of kindling, a dust pan and hand-broom. So I built it from 3/4-in. plywood. |
| I used 3/4-in. plywood for the bottom, too, which made it much easier to fasten the whole drawer together with pocket screws. | 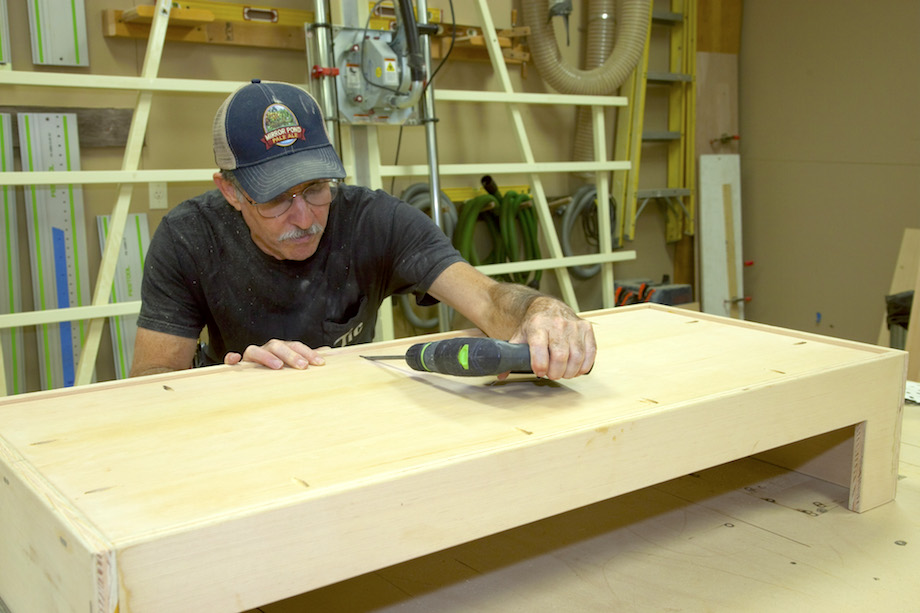 |
| My limited experience with drawer slides has taught me that they’re really sensitive. So I used spacer blocks to install the slide members on the case and the drawer. First I struck a line on the case at the bottom of the drawer, and then I clamped a temporary block along that line. | 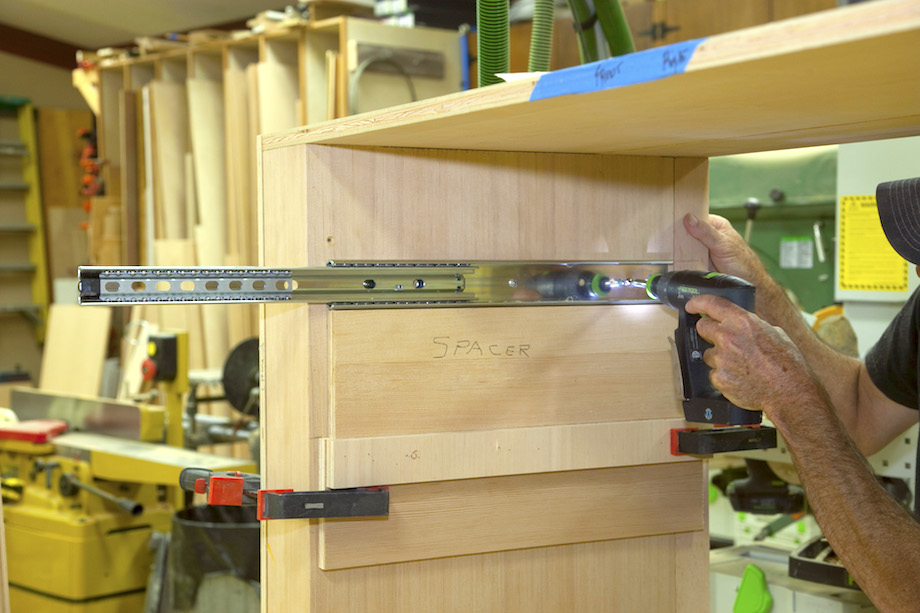 |
 |
I used those temporary blocks to support the drawer box while I secured the drawer members of the slides, too, then removed the blocks. |
After pre-finishing everything in my shop, I installed the firewood box first because that was the high-point of the floor! Yeah, I have learned a few things…usually the hard way.
I knew I’d be loading up the firewood box with a lot of weight, so I put extra attention into supporting it with the framed sill and the toe-kick, and I shimmed it tight to the trimmers, too.
 |
The only way I could figure to compensate for the wavy walls and oddball framing on my home was to install jamb extensions on the outside of the case, so I allowed for those in the overall depth. I planned to build a pair of insulated exterior doors for that opening, and I knew the frame had to be perfectly square and perfectly flush with the exterior wall. Those extensions saved my bacon. I attached them temporarily with Dominoes, which came in very handy. |
| I scribed each extension to the irregular walls. I trimmed the extensions on my table saw, then glued and pocket-screwed them permanently to the back of the case. | 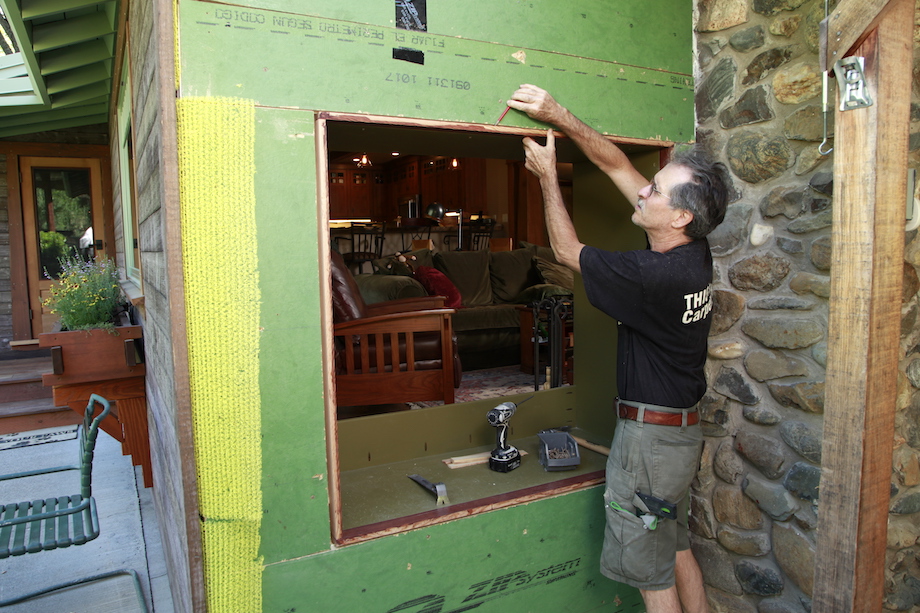 |
| I knew it would be a while before I got around to building the exterior doors, so I boarded up the back of the opening with plywood and moved on to setting the toe-kick for the opposite cabinet. | 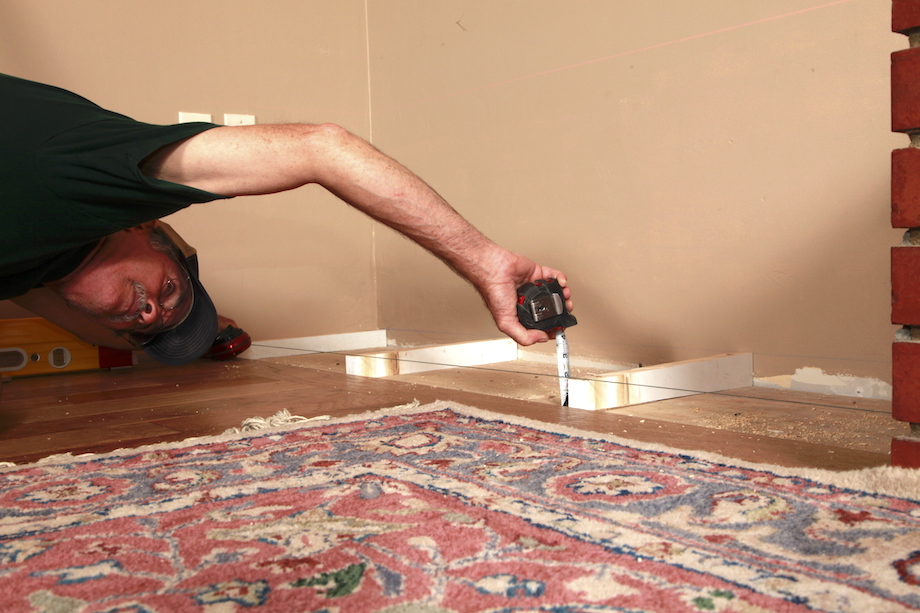 |
 |
With the first cabinet set at the highpoint of the floor, I simply shot a laser line across the wall, established a line at the top of the second box, then measured down to the toekick and cut individual shims to lift the cabinet to the exact height. |
| Even with a few extra paws helping me, setting the cabinet was easy. There was plenty of room on the left side because I planned to make the facefame a little wide and scribe it to the wall. | 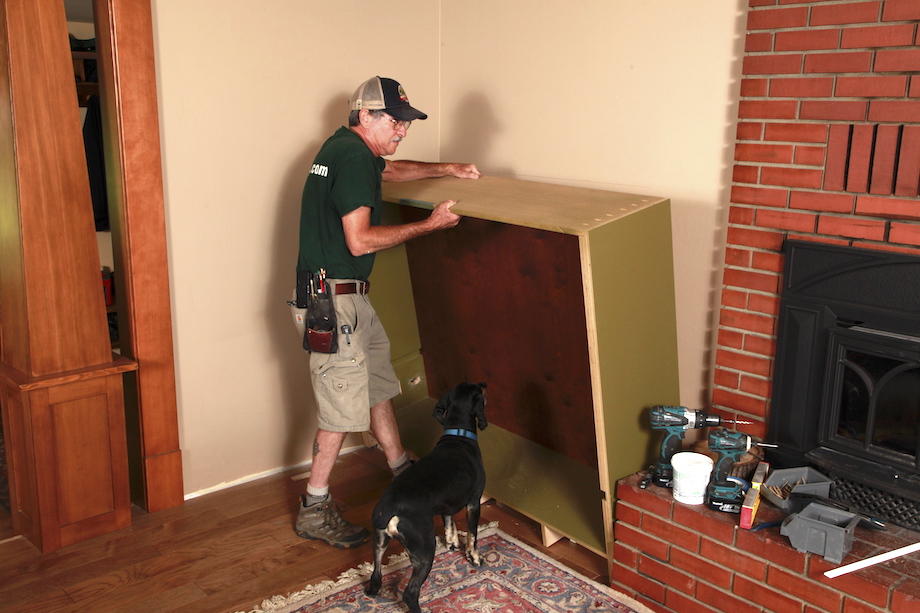 |
 |
Like I said, the walls were badly out of square and wavy, too, so I shimmed the back of the cabinet with whatever it took, knowing the top would cover all that mess. |
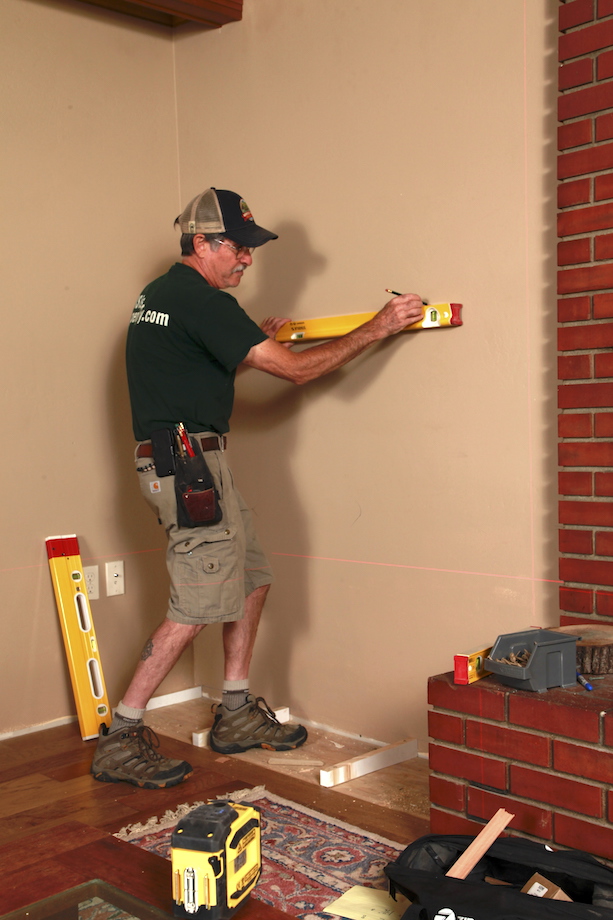
| I trust lasers a lot, but they don’t tell you everything, and besides, I really like getting my eye on a bubble vial, especially to check that the cabinet is plumb. | 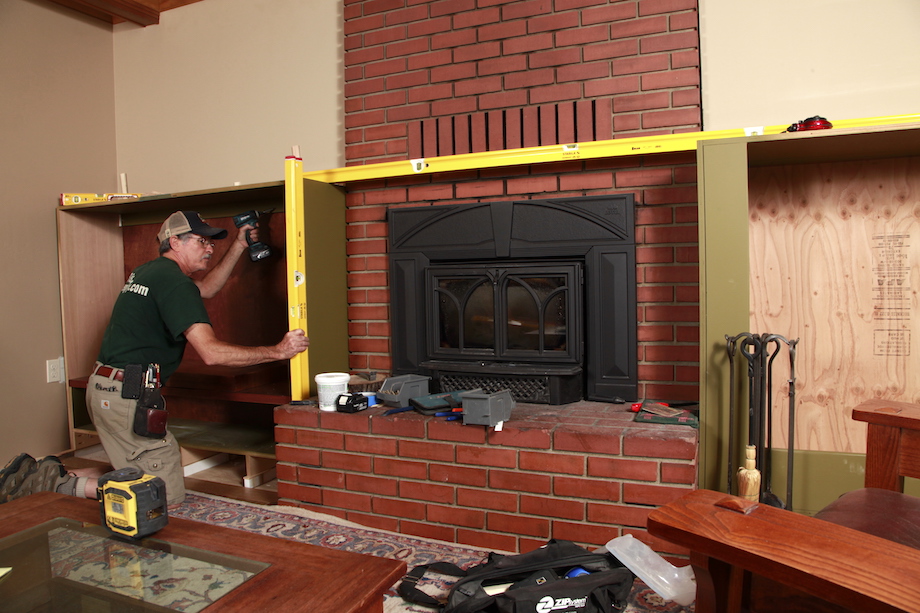 |
A Stone Mantelshelf
I called around town to find a piece of flat stone for the mantelshelf. One of the local stone yards said they had a truck in Montana and could pick something up for me without any shipping costs, as long as I wasn’t too picky about color. They said they had a chainsaw that could cut the slab to size, too. I wasn’t concerned much about the color, but the chainsaw worried me a lot.
When the stone came in, about a week later, I was extremely surprised. The sedimentary slab was four inches thick, rust colored, and nearly flat on the top. The bottom was light grey, the color of concrete, and also pretty flat. But the top was scaled with thin mottled layers, far more beautiful than I’d imagined, so much so that I couldn’t trust them to cut it with a chainsaw. I had them fork the slab onto my trailer and took it home—as is.
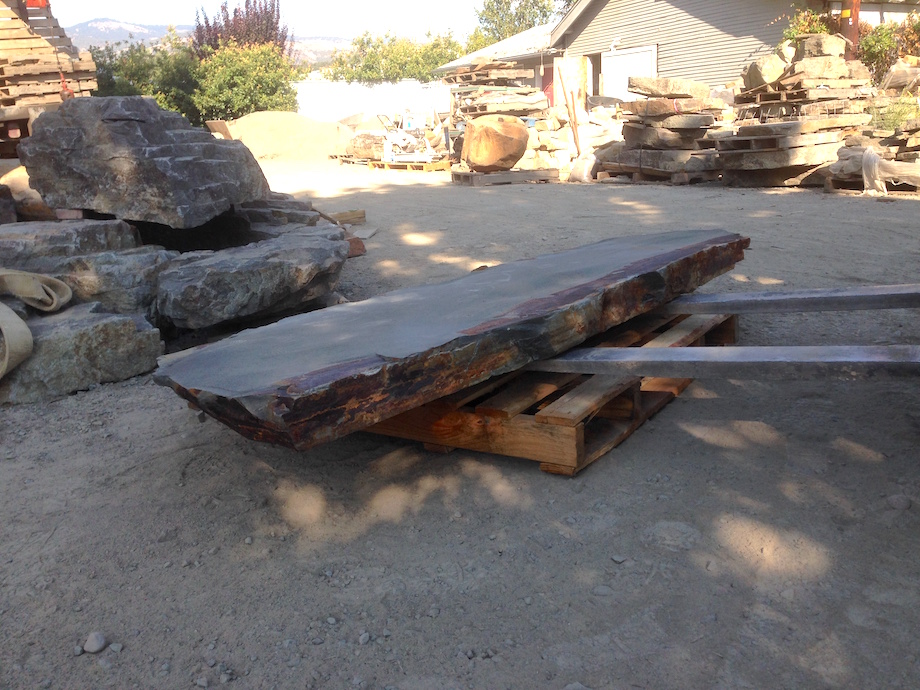
I tried to get a local marble countertop company to cut the stone for me, but no dice—they probably figured it wasn’t worth the hassle for the small fee they’d charge, and besides, I was getting impatient and figured, “how hard could it be?”
| I’d cut my share of concrete, which had to be harder than sedimentary stone, so I went out and bought an 8-in. diamond blade for my Bigfoot saw. I was right. It wasn’t hard at all. My circular saw went all the way through it, though it took about six passes. |  |
| One of the reasons I didn’t trust a chainsaw for the job was because I wanted stopped-rabbets on both ends of the stone. With stopped-rabbets, I could lower the top of the stone so that it was flush with the Douglas fir cabinet tops, and still keep the cuts hidden by allowing the full thickness of the stone on the front edge to wrap over the cabinets. Definitely a job for finish carpenters, not a chainsaw! | 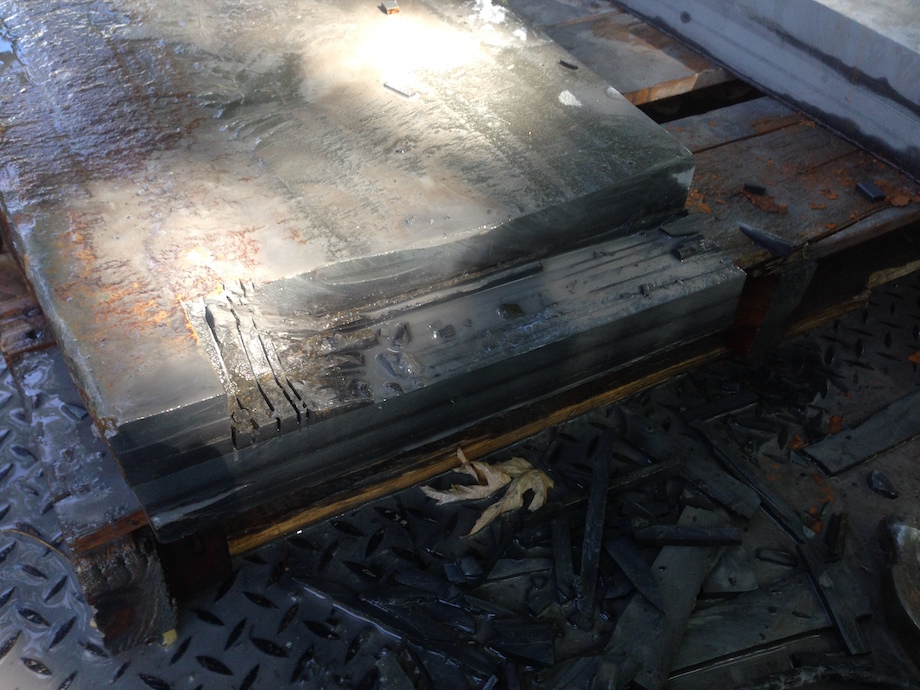 |
It took two big guys to carry that slab into my house—and I wasn’t one of them. I think it weighed about 300 lbs.
| Once it was in place, bearing on temporary 2×6’s placed on the concrete hearth, I went to work with a hydraulic jack. Rabbeting stone is definitely not a fine art for me, and I knew I’d have to modify the corners of the cabinets in order to level out the mantelshelf. | 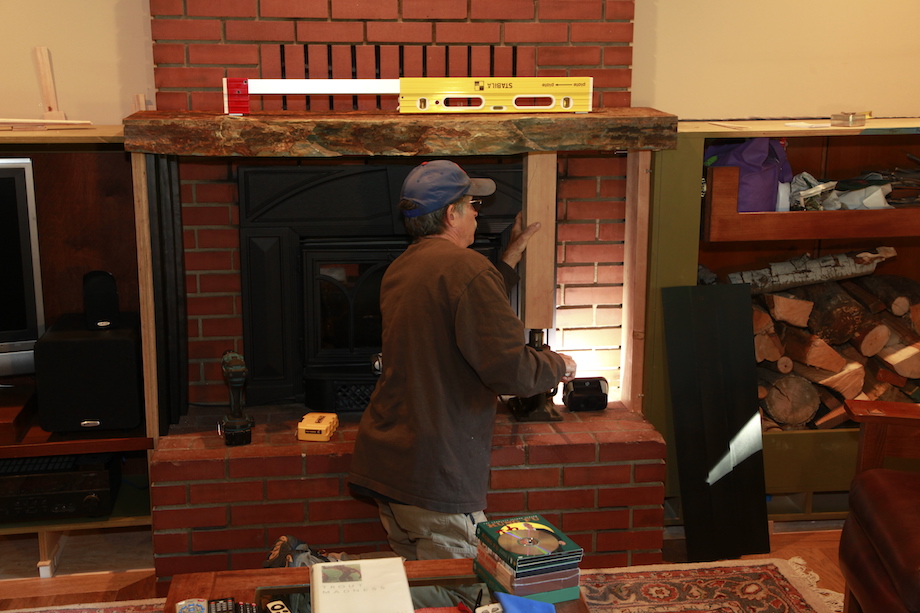 |
| I didn’t bother trying to make a perfectly clean blind rabbet in the stone. After all, chiseling off the corners of wood cabinets is a lot easier. | 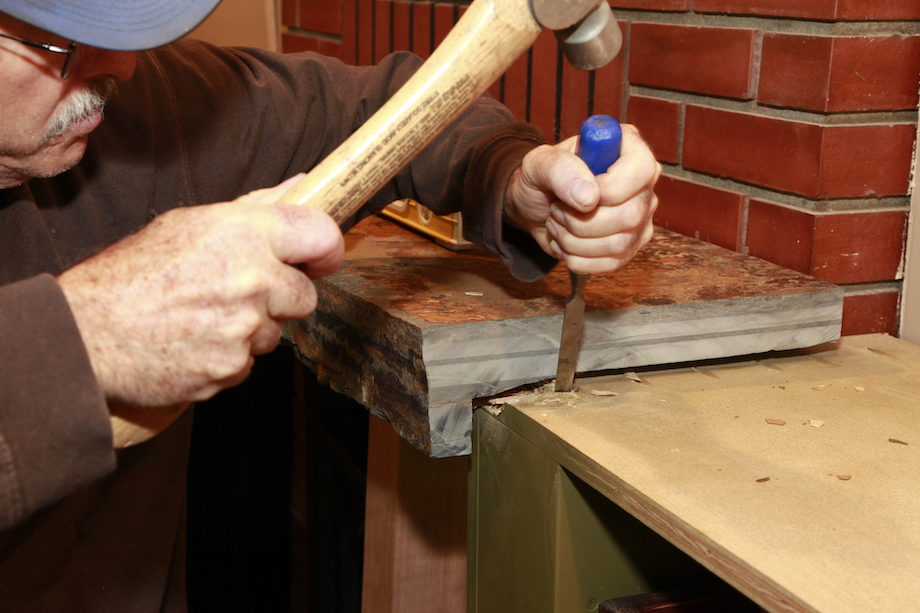 |
Steel Jambs
When I moved up to Oregon, I knew I’d need help, someone full-time to help with carpentry jobs around the house, to help with maintaining and improving the property, to help me shoot videos and photographs, build sets for shows, handle shipping and receiving. So I called the local community college—they had a construction training program, and I hired their best student.
Devin couldn’t have be more perfect for the multi-layered job I had in mind—one that I knew would also be changing and evolving. Devin also came with talents and experience that I definitely lacked! He is an award-winning welder, having competed in Skills USA. He’s an award-winning Four-H member.
| And his father is a mechanic—Devin has helped me overhaul a couple of old John Deere Tractors, and he’s teaching me how to weld, too. But he did all the work on the steel jambs. | 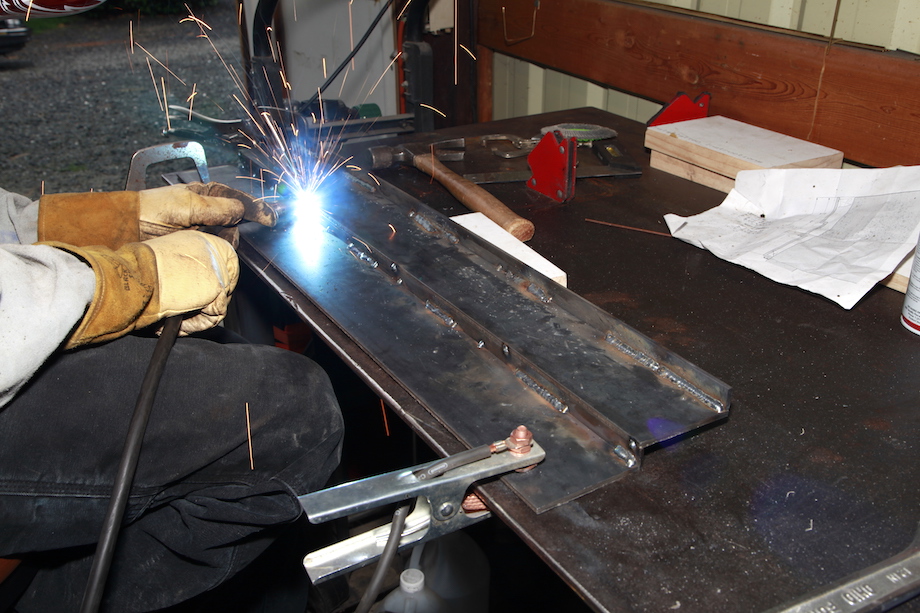 |
 |
After welding up the three-step plates—we tacked the front plates fearing we might have to make adjustments in the depth, Devin raised the stone 1/4 in., then drew a scribe line across the steel with a white crayon. |
| Sure, dialing in that scribe took several trips up to my shop, but Devin didn’t waste one of them. Each time he also sprayed on a coat of primer and a few coats of stove black paint, too. | 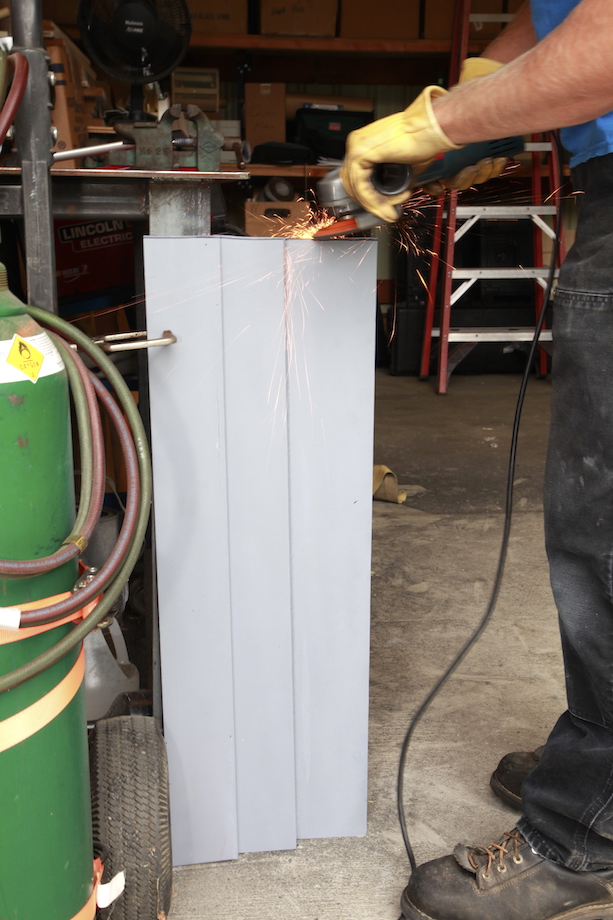 |
 |
Once the fit was tight, I fastened the jambs to the cabinets using round head screws, which we also painted black. |
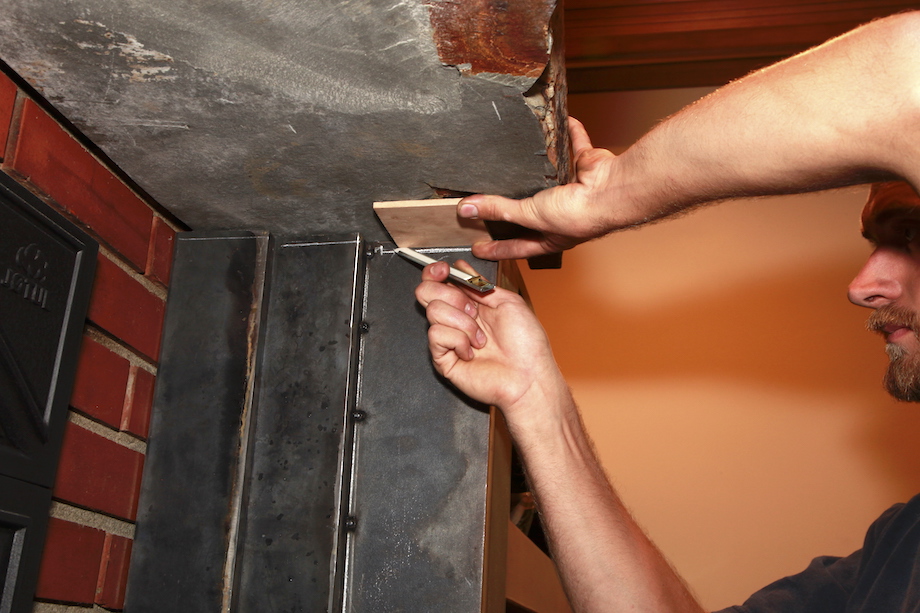
| I know you all want to see just how close those scribes were, between the stone and the steel, so here you go. Now get your head out from under there! No one has any business sticking their head under my mantelshelf! | 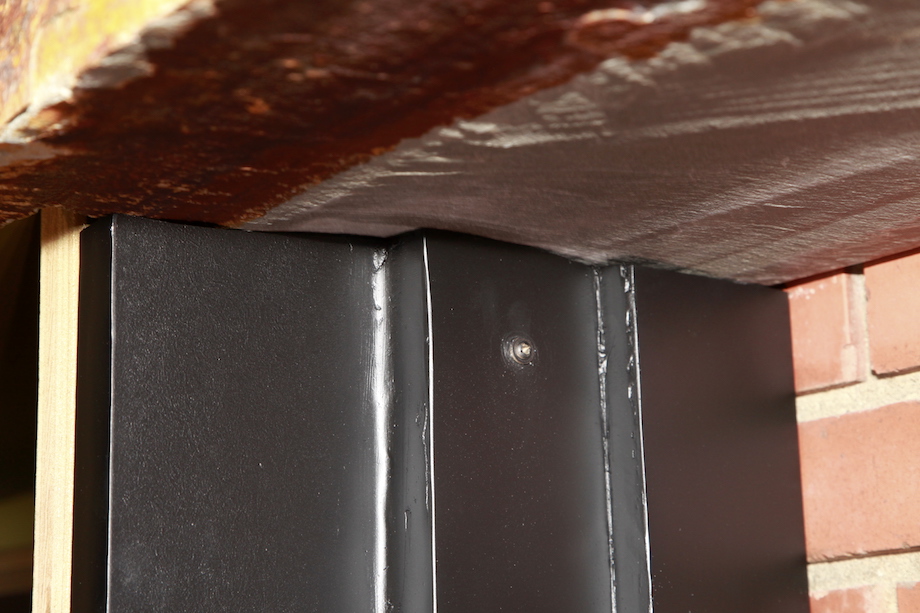 |
| While Devin was at it, he welded up hooks for the fireplace tools, one on each side of the stove. | 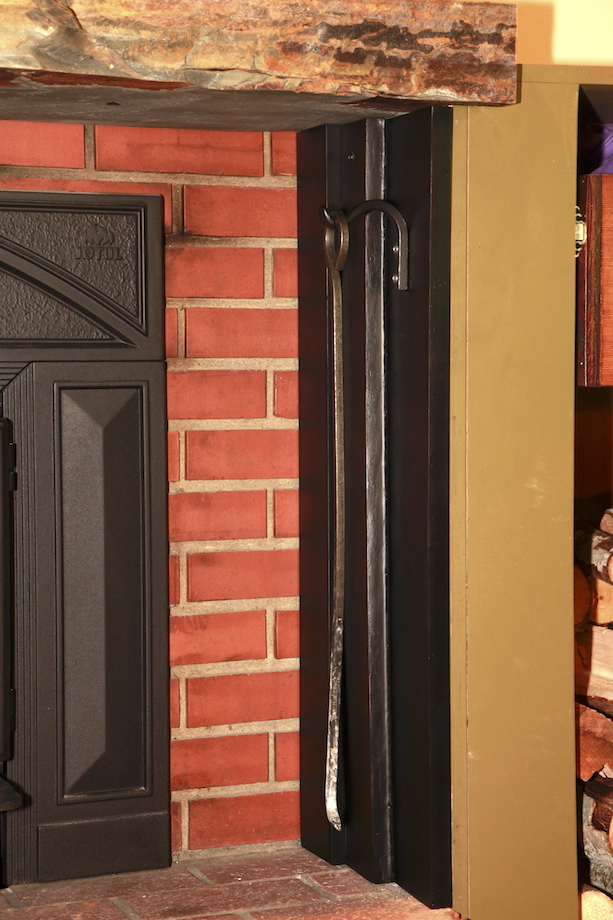 |
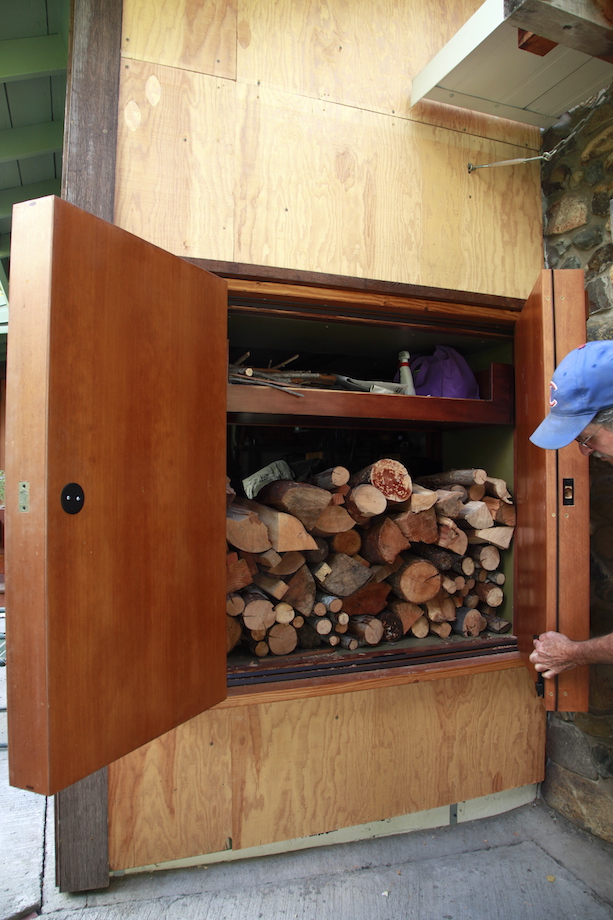
Homemade Insulated Doors
We finished installing the stone and the steel jambs in late September, just in time for the start of firewood season. But I still had to install the insulated doors on the back of the firewood box, before the weather really turned cold.
There have been a few jobs I’ve attempted at my new place without consulting Todd Murdock. I figured I had enough experience with doors to handle this one. But really, I should have talked it over with someone before I cut wood. I wish I’d sent the drawings to my brother! In a heartbeat, he would have recognized how dumb the whole idea was. But I didn’t. Instead of just cutting down a couple of insulated fiberglass doors (boy, that would have been easy!), I got it in my head that this huge opening needed a pair of custom, foam-insulated doors.
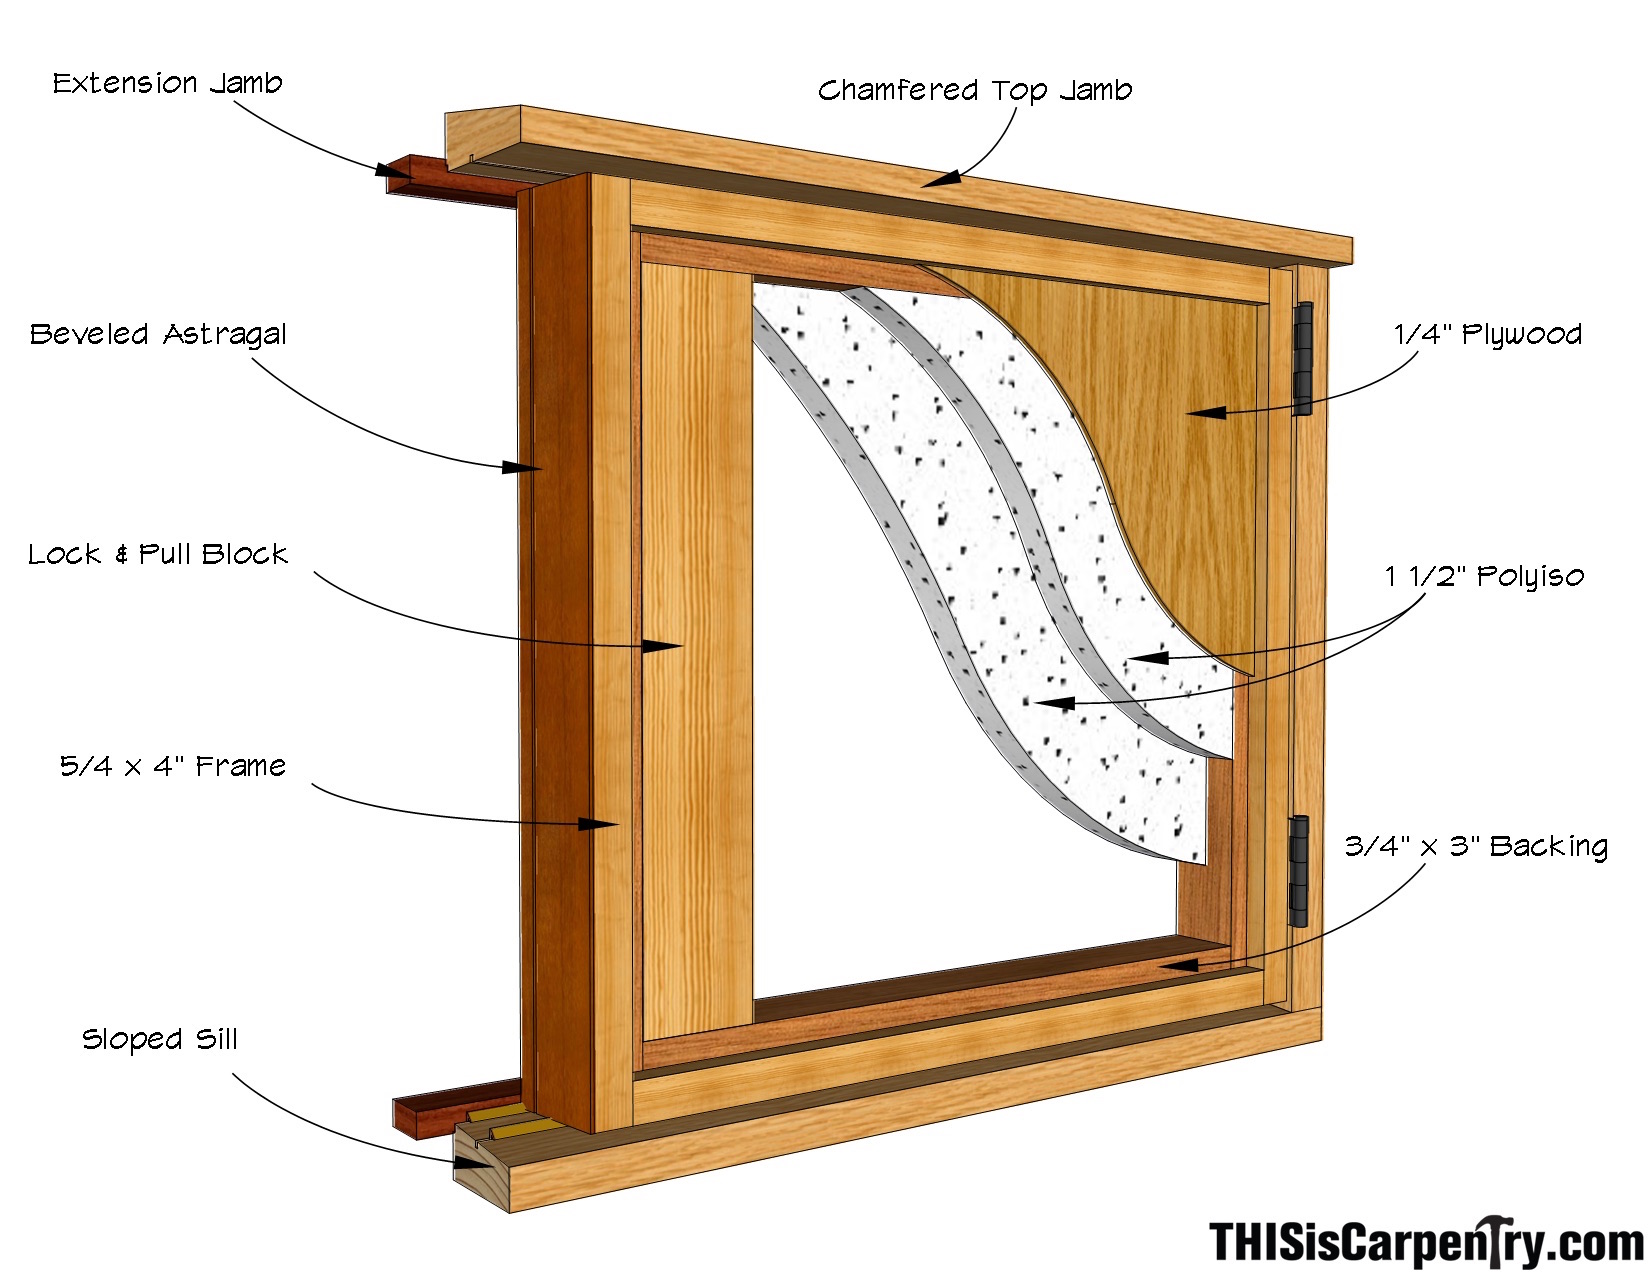
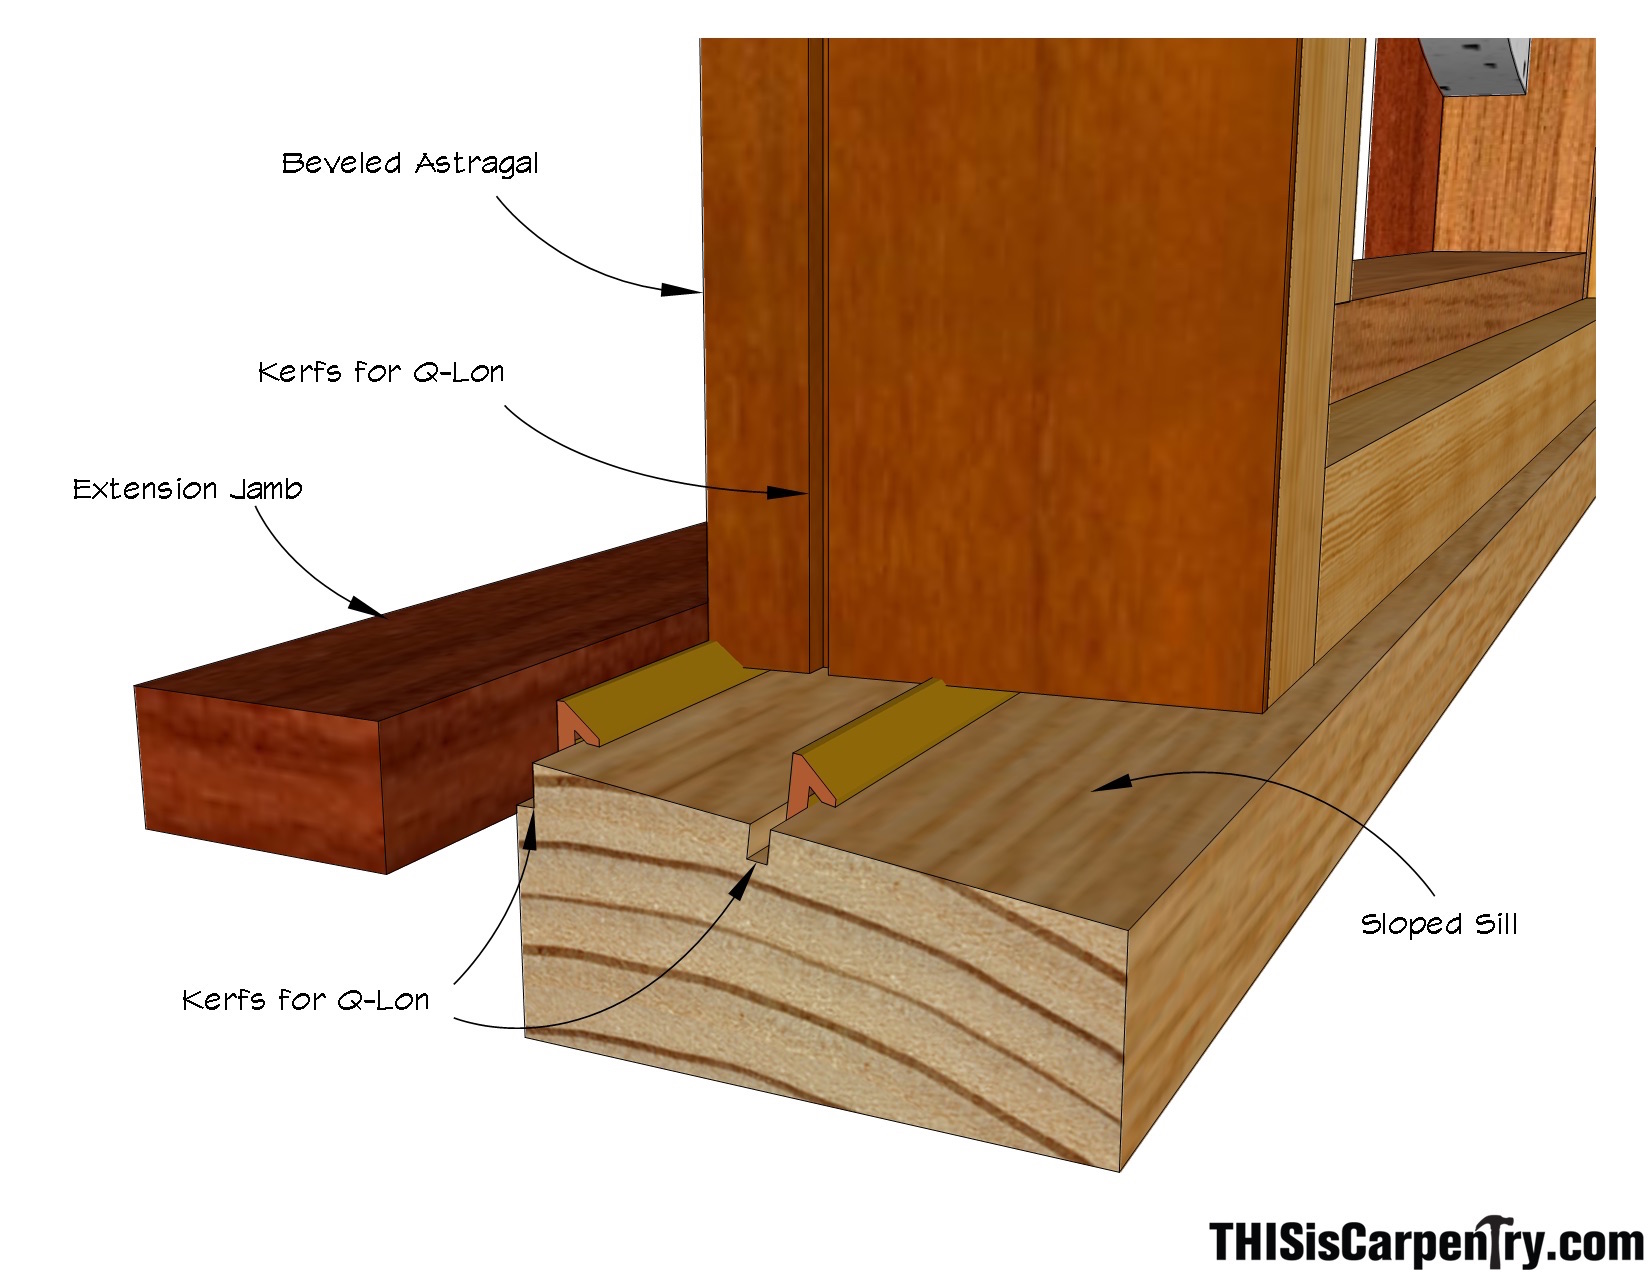
I started by building the frame, so that it would fit perfectly around the jamb extensions. Then I chamfered the head jamb and made it two inches deeper than the opening. One of these days I’m going to make a copper flashing for the top of that jamb. I also rabbeted the back of the frame—really just a shallow kerf, so once the frame kissed up against the jamb extensions, I’d have a spot to insert Q-lon-type weatherstripping. I pitched the bottom sill about 10 degrees, so any water that got in the front edge would drain out. And I kerfed the sill, too, so I could install two strips of weatherstripping. I wasn’t worried about water getting behind the second line of weatherstripping, and I didn’t want to hassle with installing some kind of shoe on the bottom of the doors—but maybe that’s what I should have done! Todd would have caught that design flaw for sure.
I made the doors after installing the frame, reducing the size of the doors by 3/16 in. all the way around, figuring I’d rather live with slightly bigger gaps than have to plane down those 4 1/2–in. wide doors. I made a chamfered astragal, with kerfs for two pieces of Q-lon. Wind-blown air and rain would never get between those doors.
The doors are insulated with two layers of 1 1/2-in. polyisocyanurate—twice the R-rating of any manufactured door and probably totally unnecessary. But what the heck. I installed lock blocks in both doors, for hardware and door pulls, and skinned the inside with 1/4-in. Douglas fir plywood. I skinned the outside too, but that’s temporary. When I finally finish the front of the house, I’ll install siding inside those door frames.
Mounting the deadbolt required some seriously long screws. I installed a temporary 3/4-in. wood block behind the deadbolt, which will be removed when the siding is installed. But the siding can’t be installed until we install the siding on that wall of the house, so all the boards will align. But that’s another story.
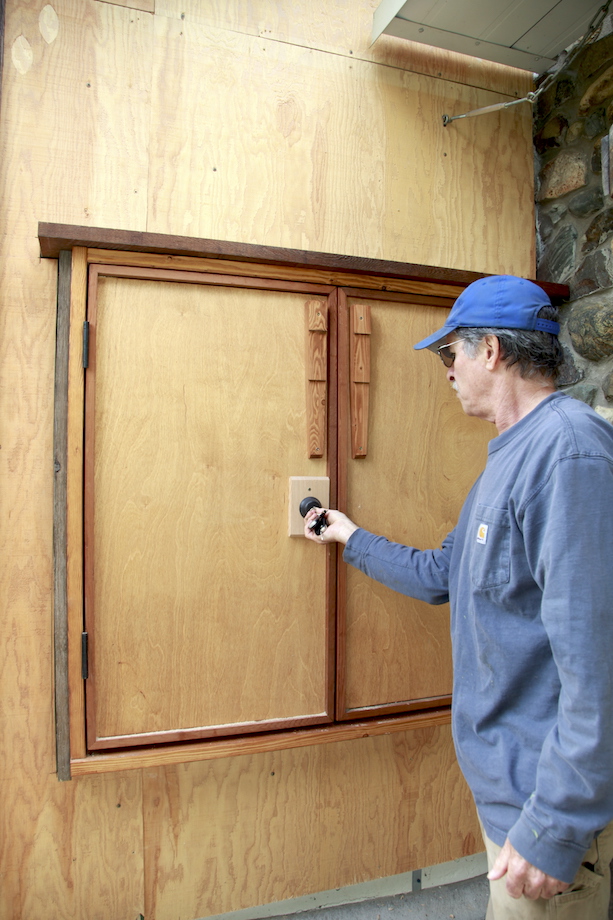
I installed a surface bolt on the inside of the inactive door, which makes it very easy to open both doors. Now I can wheel a cart-full of firewood right up to that pair of doors and load the firewood box in minutes, without ever traipsing through the house with muddy boots! And once it’s filled, the wood in that box lasts me four or five days in the dead of winter.
Great looking project. If anyone could design and carry out this project it would be you. Will be interested to see after you have lived with this for a season if you would have done anything differently. Have attended several of your shows in Philadelphia, until I retired a few years ago. Always very informative and fast paced. Glad to see that you’re still hard at it.
Wow. I mean WOW! Gary, this is the best article I’ve read in a long time. I really liked how many different skills were necessary to pull off this project – including welding! I wish I could have been there to lend you a hand – it looks like you were really having fun.
Your articles are absolutely rich, easy to read and well written. We can notice the care, the attention, the affection, both in the art and the text.
Long live Gary Katz, one of the most patient, sympathetic woodworking guys out there!!!
You are a true artist!!!
Great article Gary, can’t wait for part two
You continue to CRUSH IT, Gary. Real nice work and design.
‘Limited experience with cabinetry’ please stop with yourself. Your worst day of cabinetry makes most of us red faced.