


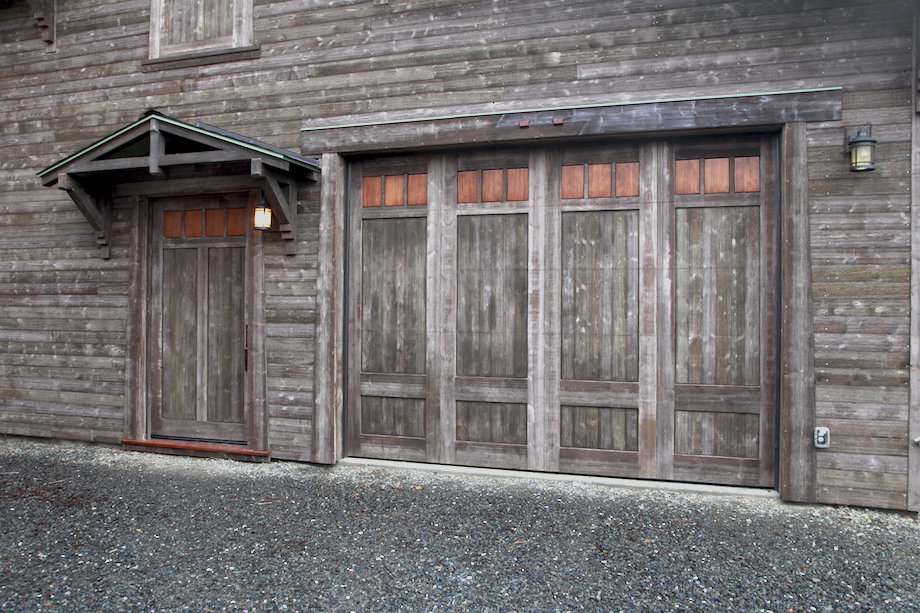
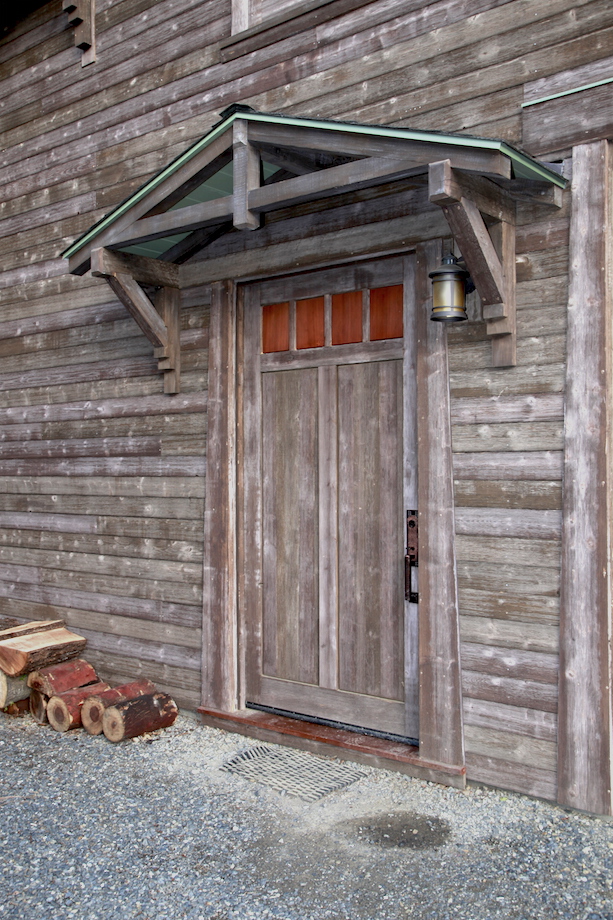
I wanted a BIG entry door for my new shop—at least 4/0 x 8/0—so I wouldn’t have to fight carrying materials into the shop. Sure, I installed a 12-ft. wide custom roll-up right next to the entry door, but I open that ‘garage door’ rarely, especially in January, February, August, and September, and barring a big order of sheet goods, I open the roll-up door just to take finished projects out of the shop. But the main door I’d be opening every day, all day long, and I knew I would never find the door of my dreams on a shelf at a store. So I built the door and the jamb myself, as one big pre-hung unit.
(Note: Click any image to enlarge)
Rather than working with solid 12/4 stock for stiles and rails, so that I’d end up with a 2 1/2-in. thick door, I chose to laminate the stiles and rails for the door from 5/4 pre-finished rough-sawn beetle-kill pine—the same material I used for the trim and siding on the shop and house. And I didn’t start by laminating the stiles and rails—the way all woodworkers have been taught. I didn’t have the machinery for that, let alone the lumber, let alone the patience or the know-how!
| Instead, I built two 5/4-in. thick doors—using pocket-hole joinery on the backside of the doors, and then I glued them both together with PL Premium Advanced. Don’t laugh. It worked. | 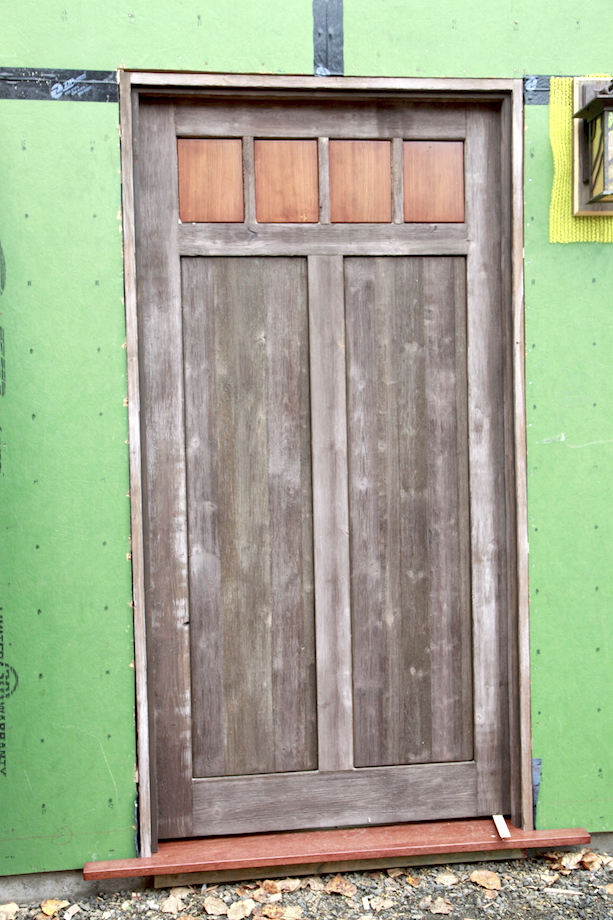 |
The panels
I started by laying out the door on a story pole, then I cut vg Douglas fir for the upper panels.
| I rabbeted the interior edge of all the stiles and rails and cut all the panels with a small Shaker Style raised panel bit… | 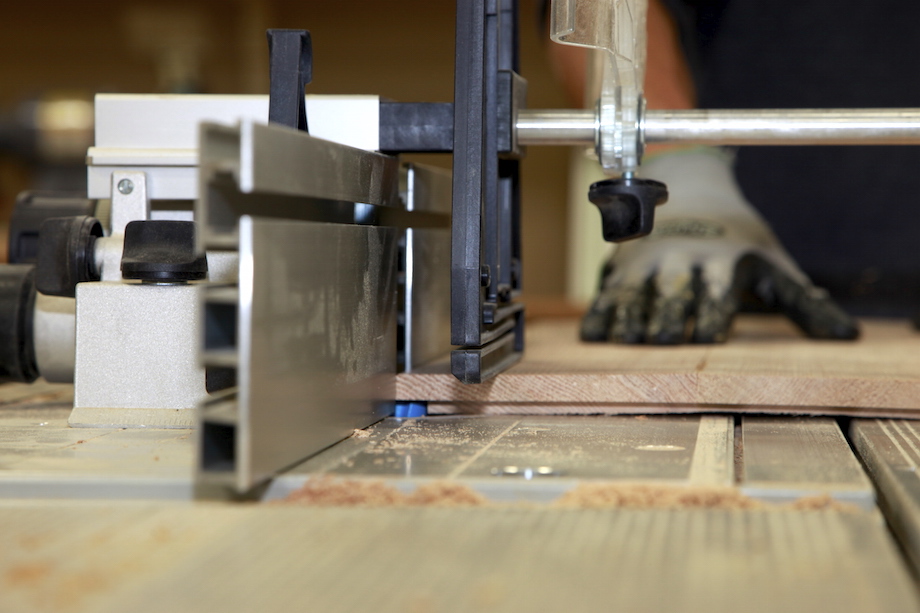 |
| and then I prefinished them with several coats of pre-cat varnish, which gave them a little shine and made them resemble glass panels. | 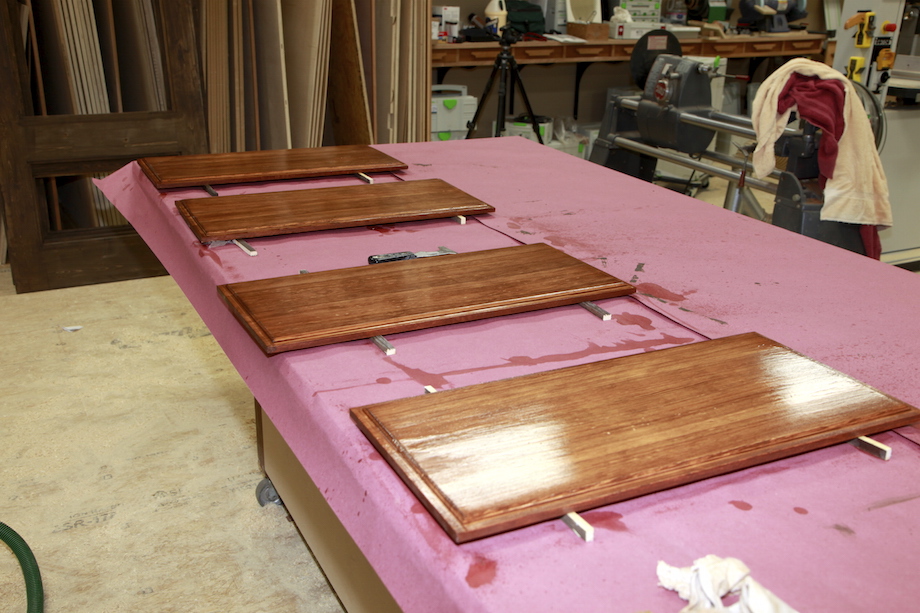 |
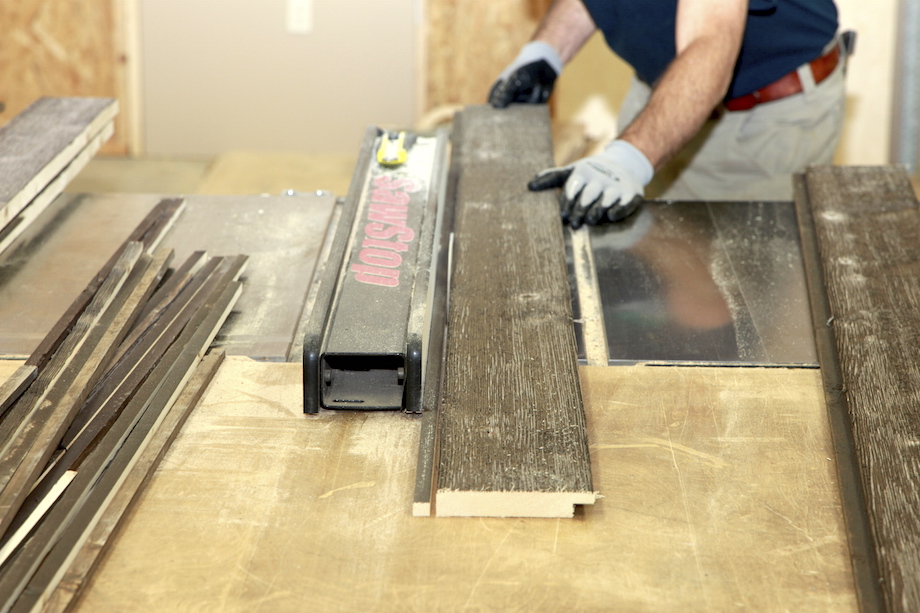 |
Next, I ripped and glued up the four rough-sawn pine panels—two for each door. |
| I took that material from ship-lap siding and ripped off the rabbets and resized the boards so that they’d be approximately the same width in each panel, then I used a story pole to layout mortises for Dominos. | 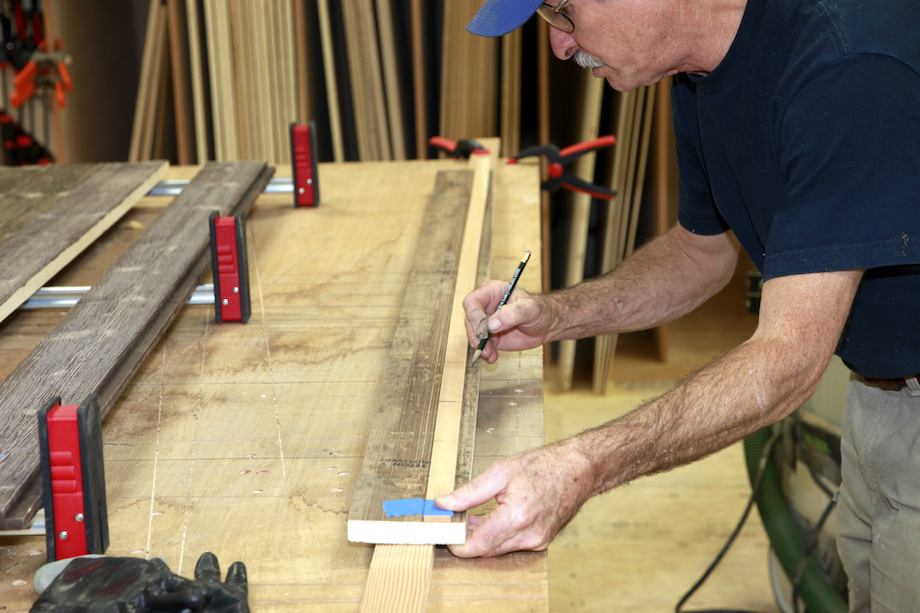 |
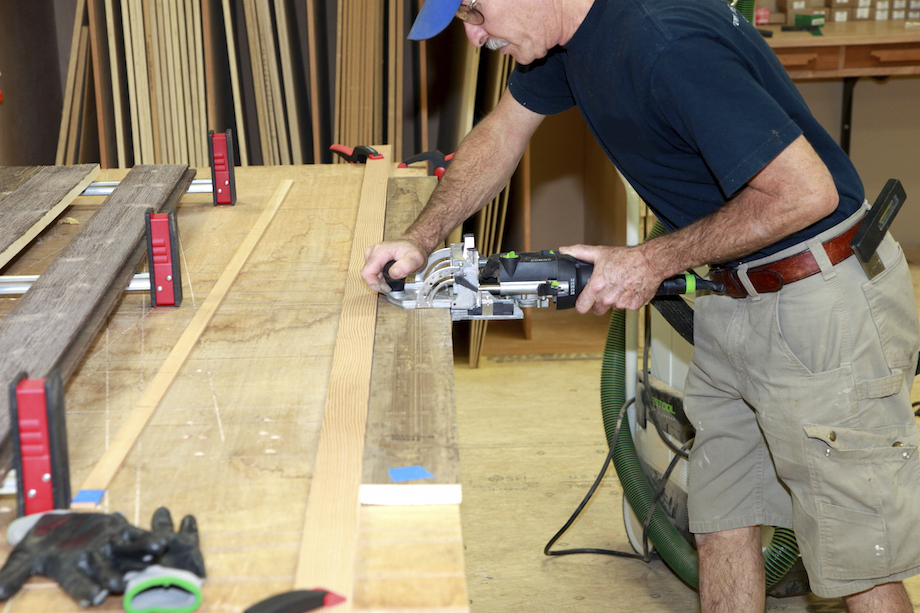 |
I used 5x30m tenons and cut the mortises one-step wider than necessary, so there was plenty of wiggle room when it came time for glue-up and assembly. |
| I didn’t want the panels to separate, and I had plenty of dominos on hand, so I reinforced the joints a lot more than necessary. | 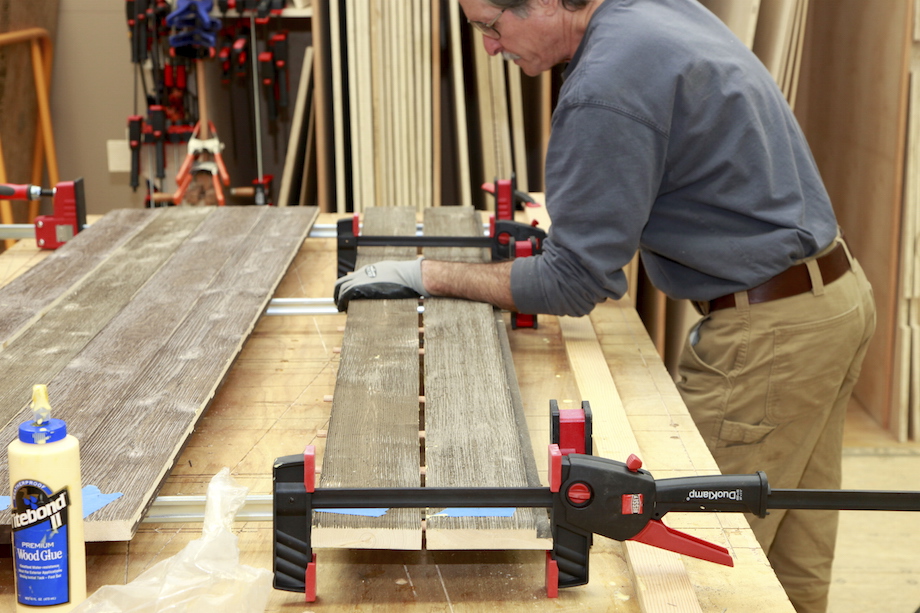 |
| The panels were barely 3/4 in. thick, so I used a lot of clamps to keep them flat during the glue-up. | 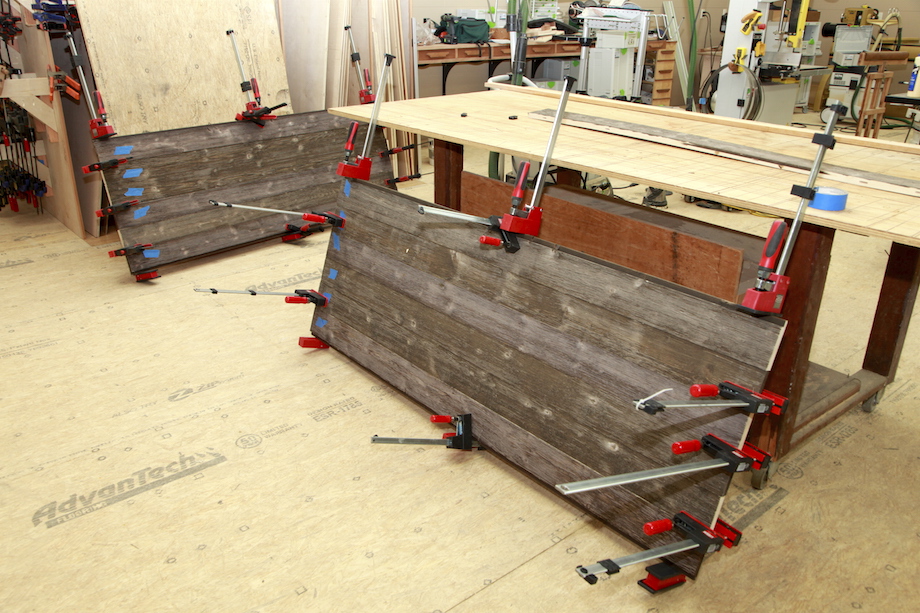 |
Stile and rail joinery
With all the panels drying, I cut the stiles and rails and used 12x100m dominoes for all those butt joint connections. The Domino XL is a door-making machine—I can cut mortises and assemble the stiles and rails for a door in less than 30 minutes, something I never could have done before. The XL has three registration pins, so you can pick which ones you want to use, and two different width settings, which—along with different domino sizes, provides plenty of options for any door size.
| For some of the mortises—whenever there wasn’t an edge to hook an index pin on—I used the center mark on top of the XL to align the cutter with the mortise location. The center marks are easy to see through the plastic guide. | 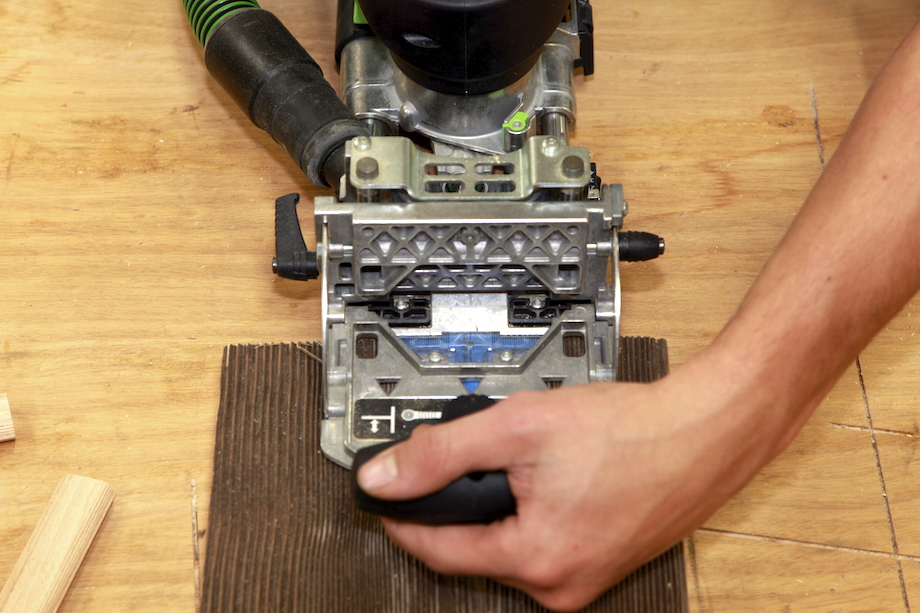 |
| But whenever possible, I prefer to use the index pins. They’re extremely accurate and difficult to screw up. Plus, you can check that the pin is located correctly by looking down through the delta-port in the top of the XL. | 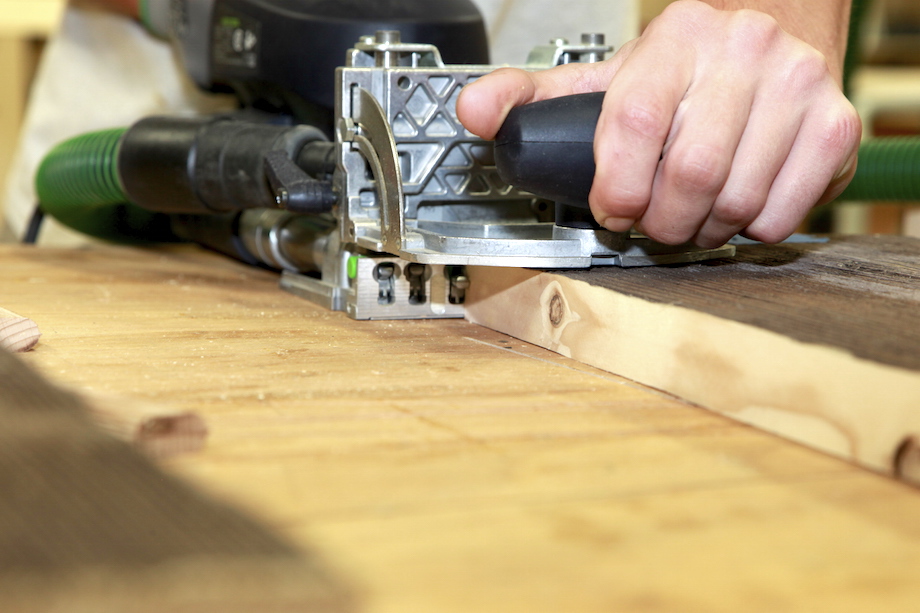 |
 |
I cut all of the mortises for the stile-and-rail frames tight; there was no wiggle room during installation. But careful layout and precise machining made the job very, very easy. |
| With a little convincing, the frames came together quickly, tight and clean. | 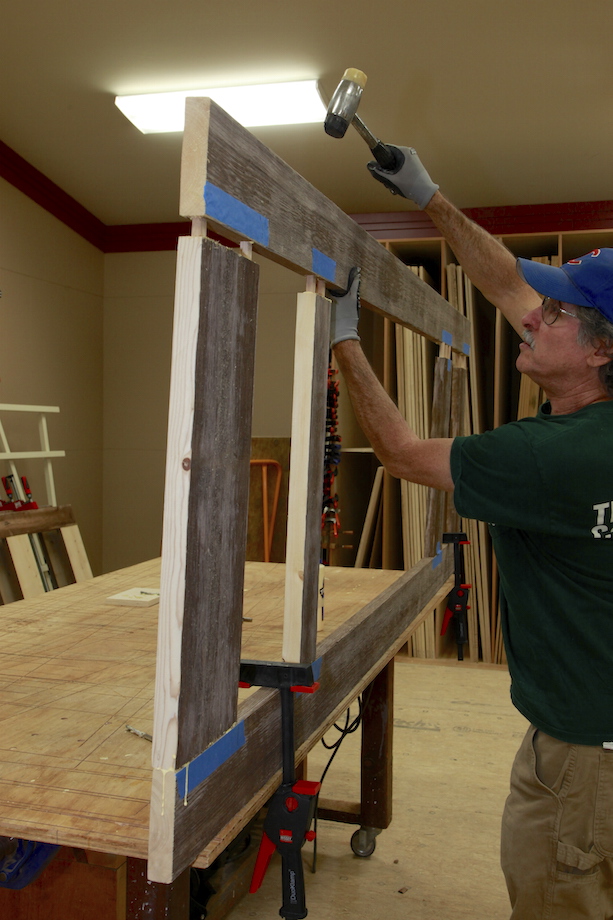 |
I used pocket screws to secure the muntin bars between the upper panels.

Once the glue dried, I rabbeted the inside of all the stiles and rails with a 3/8 x 3/8-in. rabbeting bit, so that the matching rabbet left on the sides of the panels—cut by the Shaker Style raised panel bit—would seat in the stiles and rails.
| Then I secured the top panels with only two pocket hole screws—one at the top, and one at the bottom. | 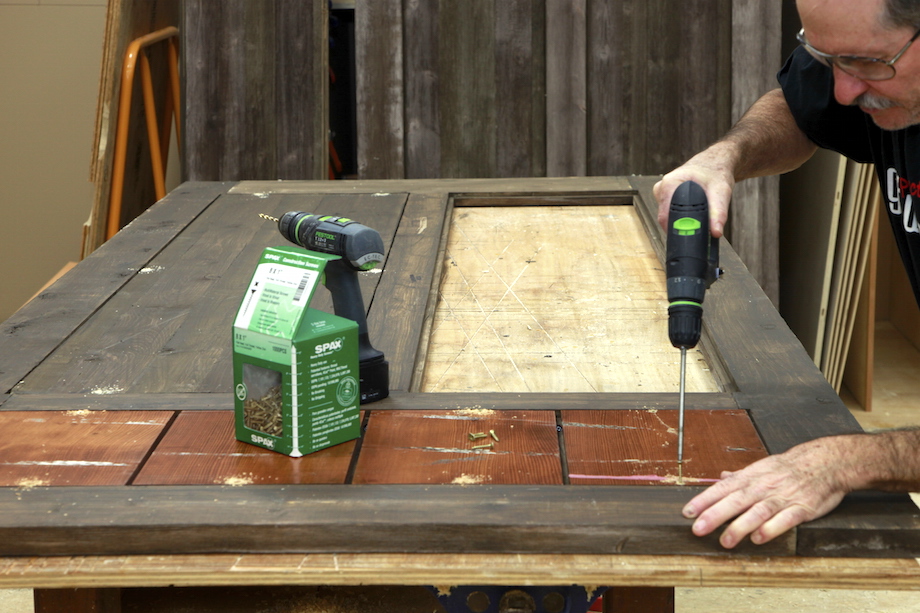 |
| Next I installed the lower pine panels, using a minimal number of pocket screws, too—just something to hold them in place until the two halves of the door were glued up. | 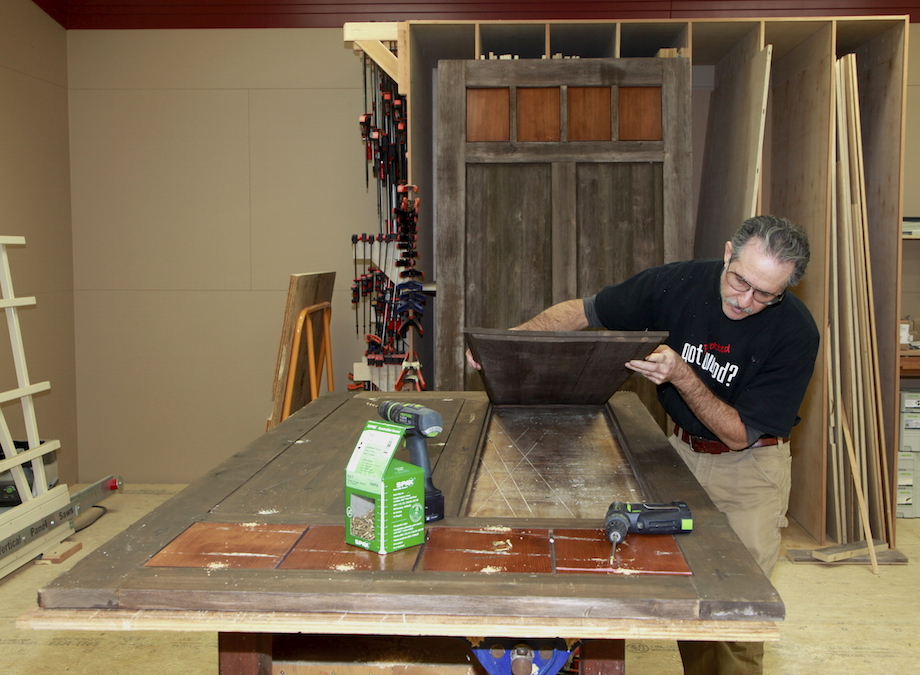 |
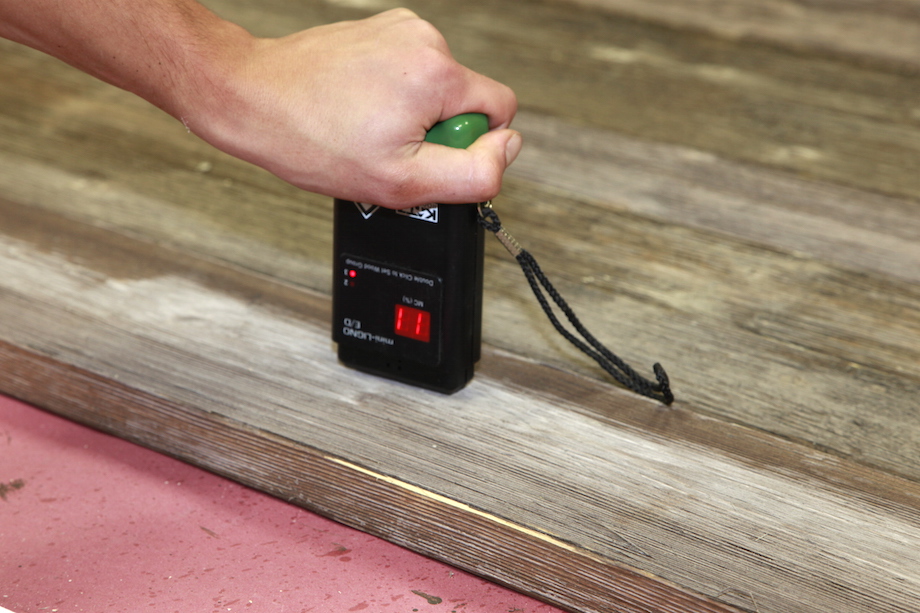
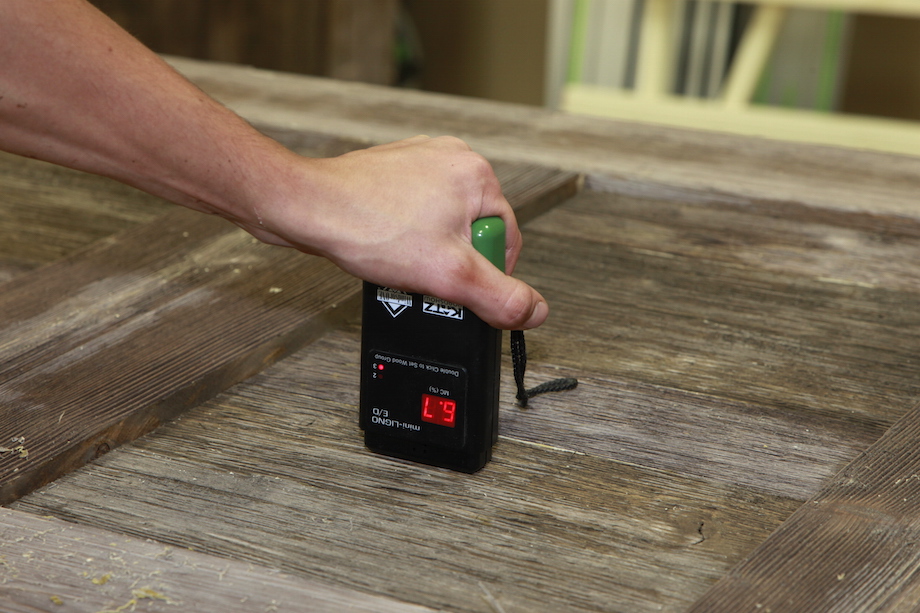
I didn’t glue the panels into the stile and rails. I checked the moisture content of the material carefully before cutting even one piece. The moisture content of the 5/4 stiles was close to 12%, but the panels were pretty dry—around 7%. Still, I worried about excessive shrinkage, especially on the inside of the door because I’m a real wuss—I get cold easily! I heat my shop with firewood and sometimes it’s really cooking in there, which probably drives the moisture content well below 7% , and I didn’t want those wide panels to shrink and crack.
 |
 |
Modern materials
Laminating two door halves into a single door isn’t a common door construction technique—you won’t find it in any millwork catalogue from the early 20th century, and you probably won’t even find it in a contemporary magazine article, probably because the only reason I think the technique works is because of modern adhesives. I’ve never seen PL Premium Advanced adhesive fail on a well-prepared joint. And I used a LOT Of adhesive to glue the two halves together!
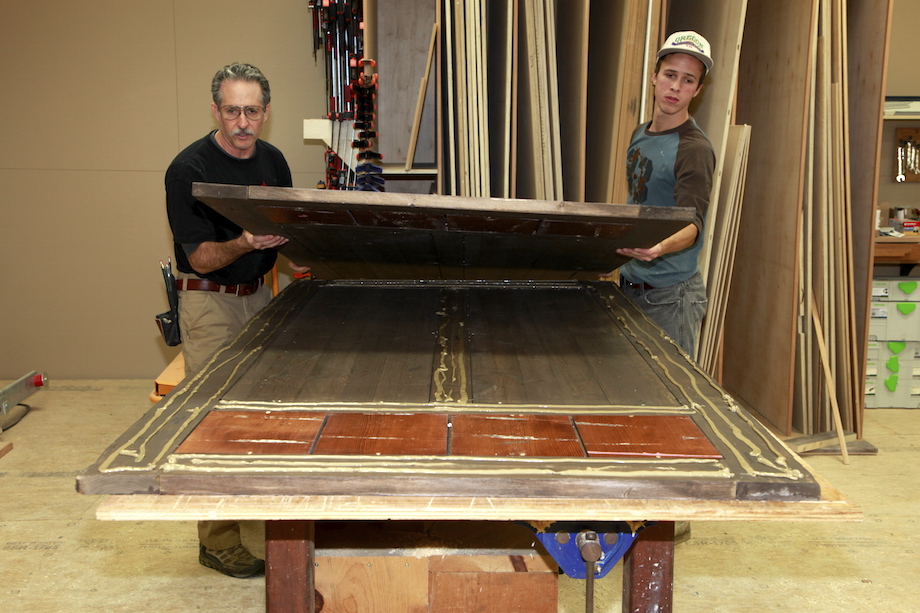
To make sure the door stayed relatively flat, I clamped it right to my work bench. I had no expectations of a perfectly flat door—it’s always been my job to hang doors so they look flat when I’m done, which I knew would be even easier on this jamb because the door stops were not rabbeted into the jamb legs but applied after the door was hung.

The door frame
I’ve always enjoyed building solid door frames with notched hardwood sills—whether for single doors, for pairs, or for mulled units with sidelights. Whenever you use a solid sill in a door frame, the built-up jamb is almost indestructible—it won’t wiggle around much and is easy to install. The trick is not being confused by the details.
The width of the sill must be equal to the thickness of the wall (width of the jambs), plus the thickness of the exterior casing or brickmold, plus enough for a good reveal between the brickmold and the leading edge of the sill—so add a little extra, like 1 in.! You can always rip the front nose of the sill down later, if you think it’s too wide.
I’d start by cutting the sill too long, too…especially if I’m not sure how wide the casing or brickmold might be (trust me, it’s easier to cut the ears or horns off a little later than it is to add on to them later!). The only known dimension might be the width of the door, so start with that, then add for casing on both sides of the jamb. I added 12 in. for the casing, which I thought would be plenty. Of course, when it came time to cut the trim, we all decided the tapered butt end should be even wider, so I had to glue extension blocks on to the horns. But let’s forget that part. Just cut the rough sill long, then run it through a surface planer so that there’s a 5-degree slope right up to where the door will sit—leave that area, in this case 2 1/2 in., flat.
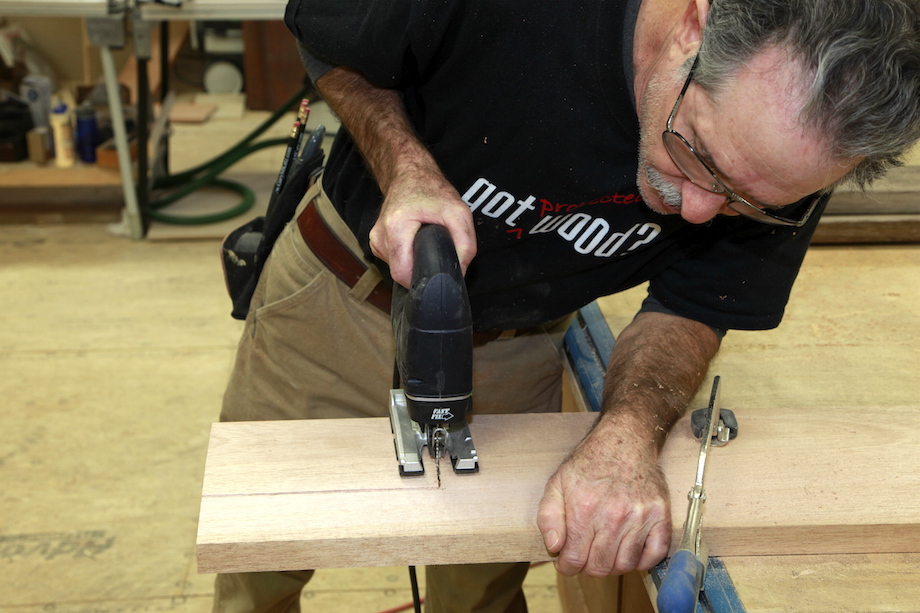
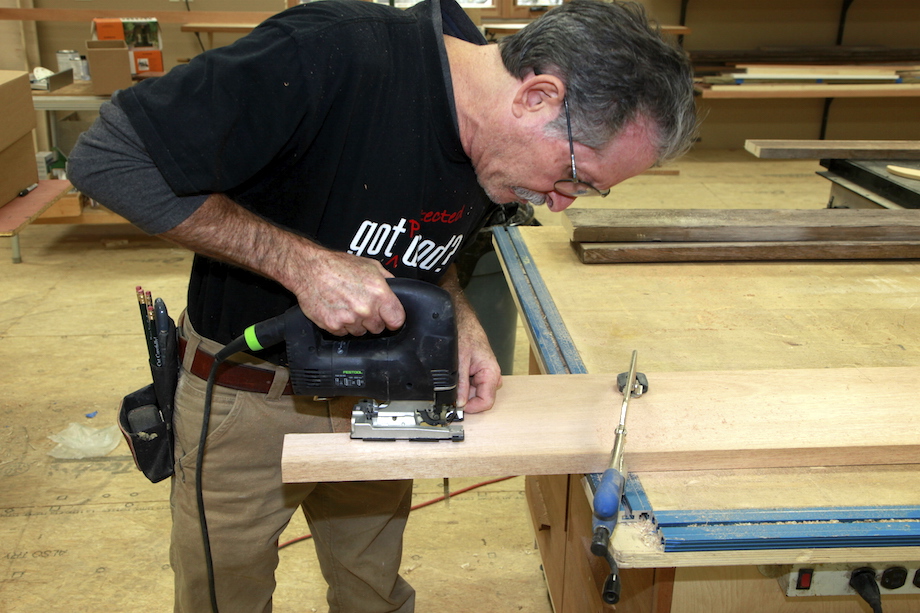
Next, layout and notch the sill.
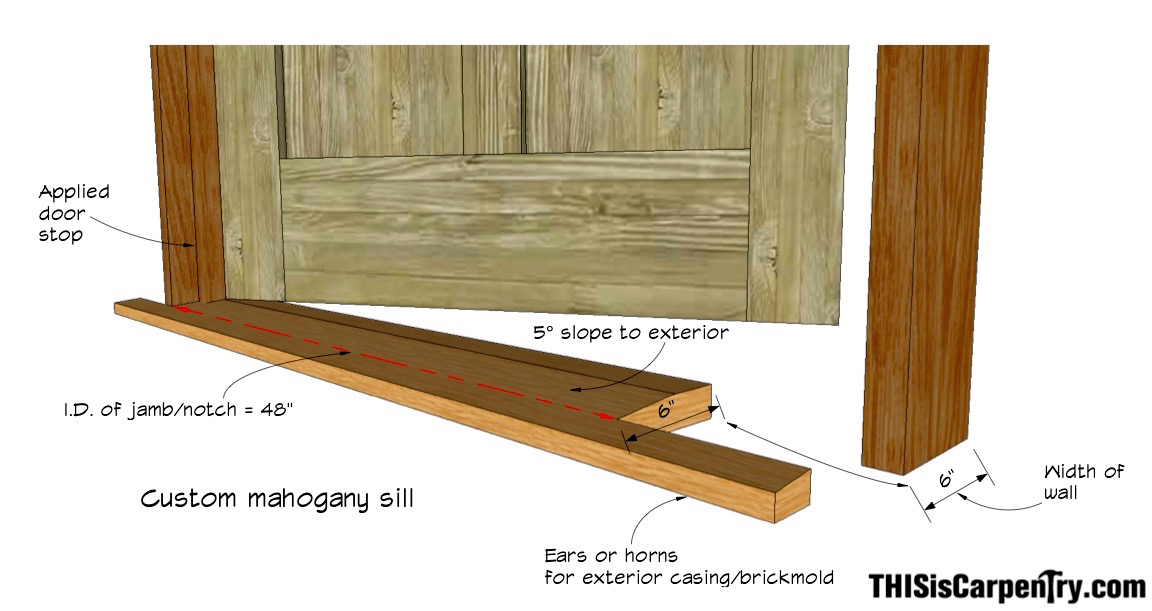
The depth of the notches is exactly the width of the jamb legs. And the measurement, from shoulder to shoulder, is exactly the width of the jamb’s I.D., which in this case is also the exact length of the head jamb (because jamb legs are not rabbeted!). That makes all the arithmetic very easy, which is important for me—I make a lot of stupid mistakes. Cutting the notches is the easy part.
 |
 |
| Be sure to pre-finish the sill before assembling the frame—that way you can protect the sill with multiple coats of finish—which is critical: that’s a thick piece of hardwood, it’s going to be installed very close to the ground, in a hostile environment. | 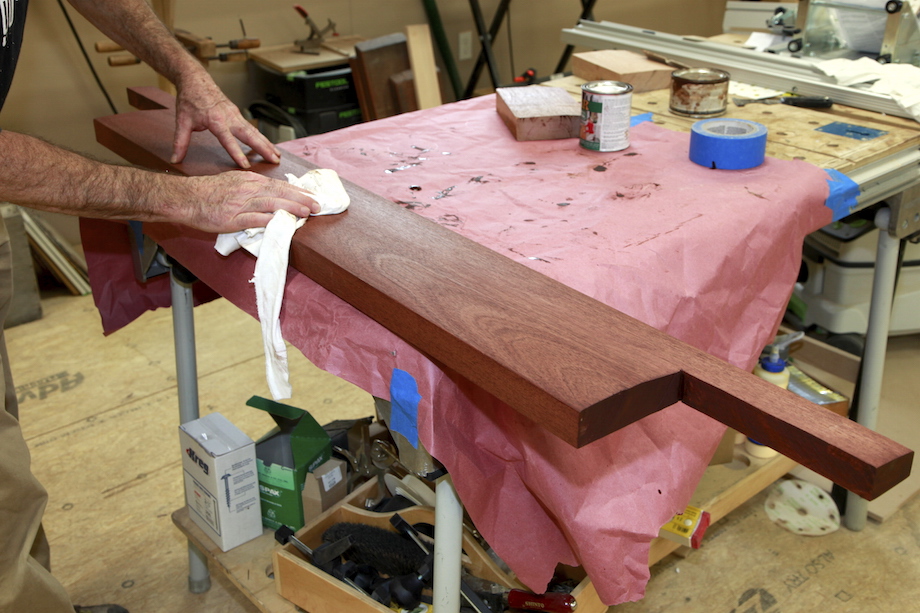 |
| If all the parts are cut properly, assembling the frame is easy—another reason I like solid-wood sill frames. Simply clamp the jamb legs right to the notches in the sill and drive screws through the legs into the sill. | 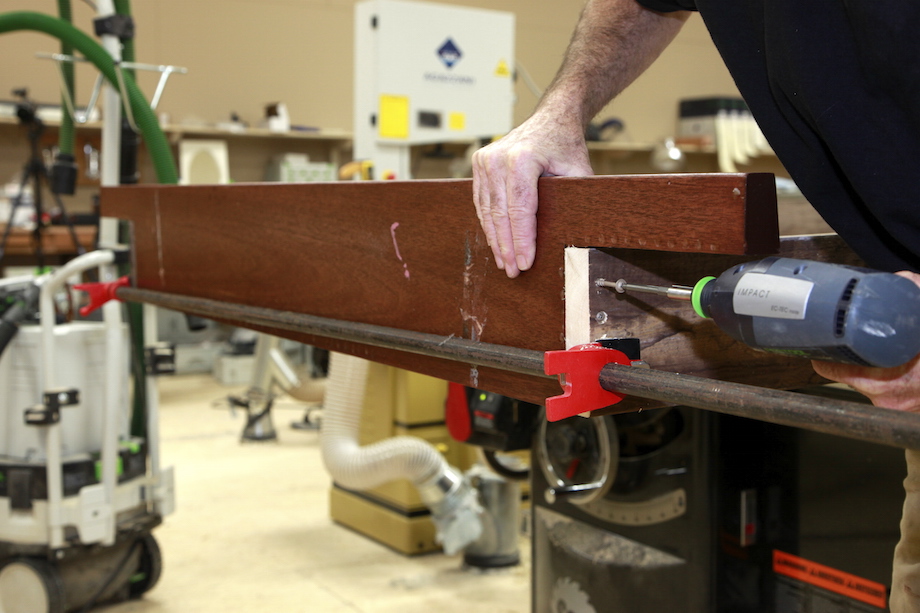 |
| Do the same thing at the head jamb. | 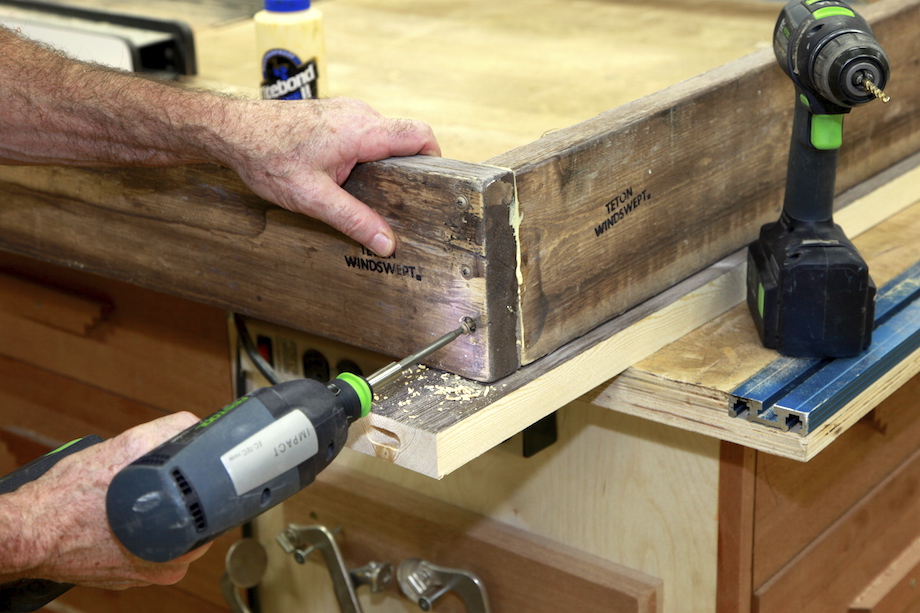 |
Be sure to read this article for tips on installing the pre-hung unit.
Just Excellent. The glue up will guarantee it will never warp.
well done
Love the exterior appearance. Any chance you would share a photo of the entire building? Thanks.
Here’s a couple photos.
Second one…
What did you use for weatherstripping, between the door and Jamb as well as between the Jamb and Framing?
I built the jamb using flat 3/4″ stock. I made the door stop separately–the jamb is NOT rabbeted. I milled the door stop down to 1/2″ and I ran an 1/8″ ‘kerf’ rabbet about 3/8″ deep on the back side of the stop, facing the door. Once I screwed the stop to the jamb (no, I didn’t use nails–it’s a heavy heavy door and I knew we’d be closing it with full sheet of plywood or a sixteen foot board), I pressed Q-lon kerf-in weatherstripping into that kerf behind the stop. The bottom of the door has a standard L-shaped sweep.
Gary
Thanks for the article Gary. The technic is unusual, it will be an interesting test to see just how long the laminating holds up, but you’re right about modern glues. I like the patina of the pine. Have you written an article about it? I would be very interested to know more, in particular how you got that beautiful grey color.
Paul,
The material is all from Teton West, called Windswept. It’s the siding I used on the shop and house–looks just like barnwood, stained with Olympic: 3/4″ t&g, pre-distressed and pre-finished in two stain colors, which we mixed while installing the siding, and I mixed the board colors on that door, too.
The doors is about 3 years old, no cracks, no warms, no twists. And it doesn’t shrink or swell at all. Period. Now the western cedar screen door I built for that opening last summer….it swells and shrinks a LOT! :)
Gary
Thanks for the info Gary,,, when I was a pup carpenter on Cape Cod we put up miles and miles of cedar shingles and shiplap siding and never put any finish on it. After 10 years of so it took on the beautiful grey color cedar, which is similar to your pine. Another comment if you can take a moment, the king post on the entry roof truss looks like it interrupts the bottom cord. Was that intentional? When I build that kind of truss I try to use a dovetail half-lap at that joint. The the bottom cord appears to run thru and visible, the King Post seems interrupted. Know that you do a lot of research on these details is there something here I’m missing?
Thanks again
I’m a big fan
Paul J
Las Vegas NV
Paul,
Yes, the king post and cord meet with a lap joint. I ran the face of the post through because I thought it looked better being continuous, rather than looking like the bottom was an applied pendent. I don’t know if there’s a right or wrong way to do that…maybe I did it wrong. Won’t be the only thing I’ve done wrong in my life. For some people, the whole technique I used for building that door is wrong. But it sure looks mighty fine to me. And I built the whole door in one day. :)
Gary
By gluing up two 5/4 doors you wind up with a true 2″ width door. Why not just plane down the 12/4 stock to achieve the true 2″ ?
Who wants a 2″ door? I can buy one of those locally. I’ve got a 2 1/2″ door. 4 ft. wide. 8 ft. tall. Feels like a vault door when you close it.
With our modern tools and glues it’s good to see someone go outside the box and do a new technique.
Keeping an open mind an do something different that’s what makes woodworking interesting.
Wait…as Jerry pointed out, I’m not really a woodworker. In fact, I didn’t turn a bowl until a couple years ago (as a finish carpenter, I always thought you had to be over sixty before you could turn bowls). So I’ll have to say, that’s what keeps CARPENTRY interesting. :)
beautiful doors! so thankful for all your articles! You have helped me greatly in my carpentry journey!
“… pocket-hole joinery on the backside … glued … together with PL …. Don’t laugh. It worked.”
LOL. Sorry. couldn’t help it. Definitely a carpenter’s approach to woodworking. Hope it works for you.
Jerry,
Most definitely a carpenters approach to woodworking. And it works great. I’m sure there’s a lot of woodworkers who could do a much better job, but there’s wasn’t one around when I needed to swing a door on my shop. I had to settle on a lowly carpenter. And yeah, it works great for me. Three years and not a sign of a crack or warp.
Gary
Gary, I loved Tyler’s pics of those doors. Great to understand how you put them together. Having disassembled and replaced many older doors, seeing how your mahogany threshold was fabricated and attached matches many of those old solid ‘vault’ doors and frames here in the historic homes of New England. That door will be as durable as the young finish carpenter who built it.
Young, huh? Thank you!
Gary
Great article as always.
I’ve never seen the Templaco jig in action. It seems pretty straight forward. I may have to invest in one before my next door project. I still get a bit of a panic attack every time I open the Porter Cable case. I just don’t use it that often.
The Bosch adjustable template is much easier and more friendly to use. Keep your eye open for one. Then get rid of that PC template!
Gary
Nice door, and the more I see of your shop the more shop envy. I don’t remember that little tidbit about 5° on narrow doors, something more to remember.
I did not notice any hearing protection when you were routing, for shame for shame. If you had proper in ear protection great.
Thanks for another great article
Gary,
Are those conventional flat panel garage doors that you overlaid the wood on? I’m assuming that you did the overlay work….?
I’m in the process of building a Garage/Apt above and I’m planning to overlay siding/wood on the garage door panels. Can you elaborate on the process and/or products you used on your doors?
Appreciatively
Oh, shame on you! You’re not supposed to look so closely at the other stuff in the photos! :)
Yes, those are insulated metal rollup panels. Yes. I made the ‘doors’ for panels exactly the same way I made the entry door, but only one layer. I glued and screwed them to the panels. I’m about to finish that article and will publish it very soon. Should have put both of them up at the same time! :)
Gary
Was wondering what did you end up for over all weight on your 4 x 8 door assembly. Was it manageable to install by one person?
Also you mentioned polyurethane, was wondering if you have used the spar urethane varnish’s for their UV protection?
Thanks
Mike,
No! I couldn’t pick that door up by myself. It took two of us to stand it up in the opening, but then it’s pretty easy to hang any door on the jamb–no matter how big or heavy they are, IF YOU TIP THEM INTO THE OPENING: You have to position the door so that it’s perpendicular to the opening, leaning against the hinge jamb. Slide the door so the head of the door is under the jamb then tip the door back, tilting it up so that the top hinge comes close to the hinge mortise. You may have to tap the bottom of the door back out form under the jamb a little, in order to align the top hinge with the hinge mortise, but once you do, you can drive in one hinge screw. Just make it snug, not torqued down. Then you can use your foot to press on the bottom of the door and start standing it up straight. Yes, all the weight of the door will be hanging on that one screw, and the door may settle down a little. That’s okay. Drive a screw through the middle hinge(s), and one through the bottom hinge, then put a prybar under the door, step on the prybar and lift the door a little so the hinges are aligned with the mortises, and then drive home all the screws. Easy. Even with a 12′ door, one guy can swing it alone…if he can pick it up and get it in the opening! :)
I used a conversion varnish made by Target. I spray their interior finish a lot, and I’ve sprayed the exterior finish many times, too. All the panels in the door and roll-up door are holding up very very nicely.
Gary
What’s the Templaco jig that was mentioned? I didn’t see that in use in the article.
Donald,
The Templaco jig is in the video, around 10:12.
Gary
Interesting technique Gary, not something which would have occurred to me but as you said it has held up for 3 years already.
Here is one I did using an older and more stodgy approach. I’m not worried about glue failure since I didn’t use any :)
Nice door, Keith!
I guess that is the difference between a finish carpenter and a woodworker!
Gary
You’re too modest Gary. I’ve seen some of your other work!
Hah hah. Better to be modest and humble than the opposite. There’s enough of that, especially on the internet, just like there’s enough anger and hostility.
Gary
“I’m fearful when I see people substituting fear for reason.” Klaatu
Gary
Place looks awesome ! I built 4 9’x4′ x 2.5″ mahogany doors for a project in beverlyhills last year and always wondered if I did it right ? Thanks for your artical . Finally I know I did it right . It ain’t easy being a dumb finish carpenter ?
Especially with the glue squeeze out, why wouldn’t you use your track saw to trim and bevel the strike side of the door at the same time as you trimmed the top of the door. Would have saved even pulling the planer out, and done a gorgeous and faster job.
I don’t think so. It wouldn’t have left as smooth an edge as a planer. But it’s a great technique if you’re not accustomed to using a planer.
Gary
Gary,
This is fantastic and extremely helpful. Thanks to this article and another video you helped with , I was able to confidently handle a large door building contract. I really appreciate your work and am inspired to refine my craft to a higher level.
Brice
Nice article. I enjoy this website.
Did you ever go over what kind of heat, water, electric is in the shop. Would be interesting to know.
Steve the Contractor in NC
Coming soon. I’m a little behind on publishing video’s I shot, some that date back three years!
Gary
Gary at a road show from years ago it was mentioned that there’s a rule of 3/5 or for every 5′ of door height extend the porch roof out 3′ from the edges of the door. Could you confirm or expand on that. Maybe I completely misunderstood the 3/5 rule
Thanks in advance of your reply :-)
Steve,
I’m not familiar with that rule. I’m not very knowledgable about roofs and roof design. All I know is that houses with minimal overhangs take a beating from sun and rain, while houses with deep overhangs protect siding, windows, and doors, and provide more shade in hot climates. :)
Gary
Hi Gary,
I have enjoyed your many articles and now your videos for years!
I sure wished I’d seen your “how to hang a pre-hung door” 30 years ago…finally my doors will reveal correctly from top to bottom…who would have known NOT to shim behind hinges until
the gaps are equal….looks like you did.
The 52 year old apprentice Thanks You!
Tastes differ of cause.
But to me that finish of the door and the walls looks quite odd.
Why not a classic siding finish like that on many American homes?
What is special about making your workshop look like a shack?