


A tool-free glue that’s fast and dependable
Years ago, FastCap introduced a revolutionary fast-acting glue that sets in about 10-15 sec. and is virtually unbreakable. Most of you are probably already familiar with 2p-10. In case you’re not… (Stay tuned for a brief overview of the NEW 2P-10 at the end of this article!)
I cut miters on the ends of several pieces of baseboard about 4 in. long and no one’s been able to break one yet, at least not without stomping them on the floor.
| Fastcap’s 2P-10 is a two-part adhesive that’s really easy to use. |  |
|
The adhesive comes in a squeeze bottle and the activator is in an aerosal can (it’s available in a squeeze bottle, too). Glued miter returns are done in about 15 seconds with no visible glue line. |
2P-10 comes in a medium viscosity for melamine and smooth surfaces, or thick for raw wood-to-wood. There’s also a gel for heavier applications.
| But be very careful about what you glue with this stuff—AND WATCH YOUR FINGERS! Do not get this glue on your pencil and then put the pencil behind your ear. There is a slight learning curve when using this glue, and if you aren’t careful you can become part of your work. A debonder is available and probably a good investment. | |
2P-10 is a CA type adhesive, but has acidic stabilizers added to compensate for the highly acidic nature of wood. Those stabilizers are not typically found in CA glues.
|
And as for the typical type of white residue left behind by other CA adhesives, I’ve seen no evidence of it with 2P-10. I’ve used this stuff on MDF and various woods. |
I’ve noticed no outgassing, and though the product seems a little pricey, I’m able to use the same 8-oz. bottle for months and it’ll still be half full. What I’ve saved in time far outweighs the cost of the glue.
In fact, I haven’t touched a miter clamp since I started using this glue. I apply the glue to one side of the joint and spray the activator directly onto the glue. At first I sprayed the activator on the opposing piece as per the manufacturer’s instructions, but I found applying the activator to the glue REALLY sped things up. (Yes, I’m obsessive about time….) I’ve been able to narrow down the open time to about 5-8 sec.
I do mostly stain-grade work and this glue has been remarkable for every application. It even works when immediately applied to joints that have just been stained. At my miter table I keep a stain pot and brush so as soon as I make a cut I stain it with the brush, wipe off the stain with a rag and immediately glue the joint. I haven’t experienced any joint failure, ever. But part of the learning curve is getting the parts aligned quickly and holding them together tightly, while simultaneously “rolling” your fingers a little to prevent accidental flesh-to-wood adhesion. And in my work there’s plenty of opportunity for that—especially when I’m gluing up 22 1/2-degree wall returns, which I’m able to nip in only 15 seconds.
The glue completely cures in 30 seconds when you apply the activator. If you need a little more open time, don’t use the activator. As for shelf life, I’ve had the product for about 3 months, and it’s stored in my trailer (which reaches about 120-130 degrees during the day!). I’ve seen no change in the glue. The manufacturer claims that 2P-10 has been tested in a 5-year environmental chamber with extreme temperatures, hot and cold, with no adverse effects.
You can get the glue from most hardware stores, and you can purchase the Adhesive Kit from Amazon for about $33.00. You should order the 10-oz. bottle of 2P-10 and a 12-oz. bottle of Activator, or you can purchase a SoloKIT which contains a can of Activator and a 2-oz. bottle of glue if you want to give it a try first. But take my word for it, this is the good stuff, guys! No more clamps, pin nailing, glue squeeze out or mess.
(This article originally appeared on GaryMKatz.com)
PRODUCT UPDATE!
FastCap has recently improved 2P-10, and THAT is news!
| Paul Akers has added a new 2P-10 formula called 2P-10 Rubber Toughened (notice the RT on the bottle of Jel!). | 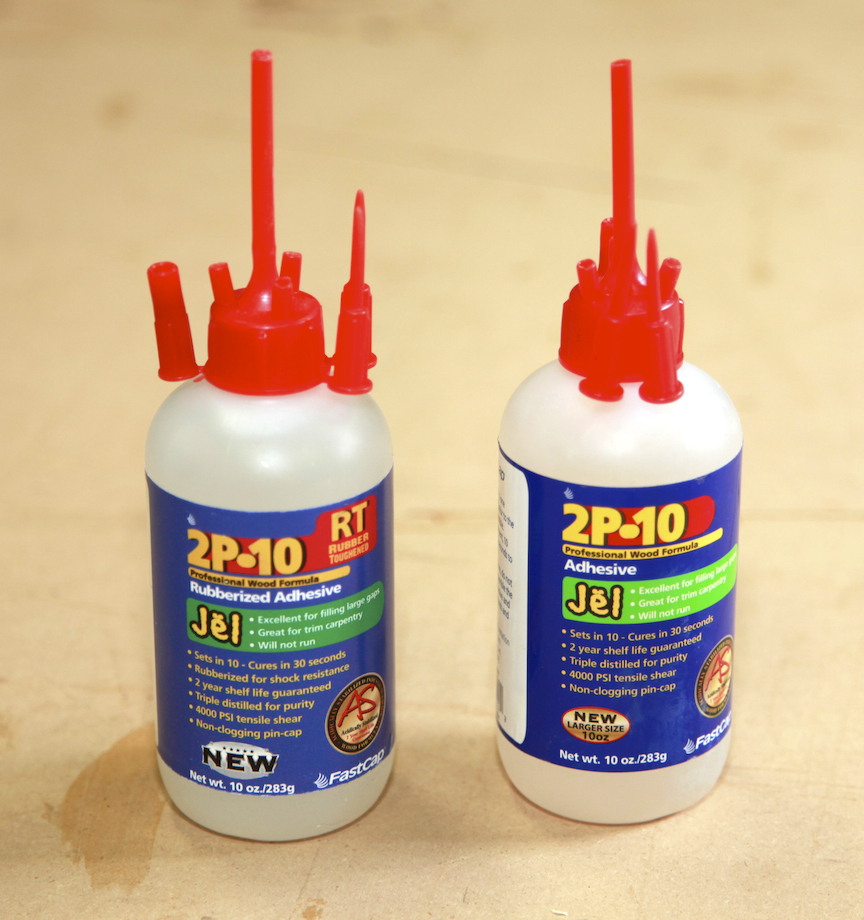 |
The new RT glue is 20% stronger and far more elastic, so the glue joints won’t be quite so crystalline and will absorb shock much better.
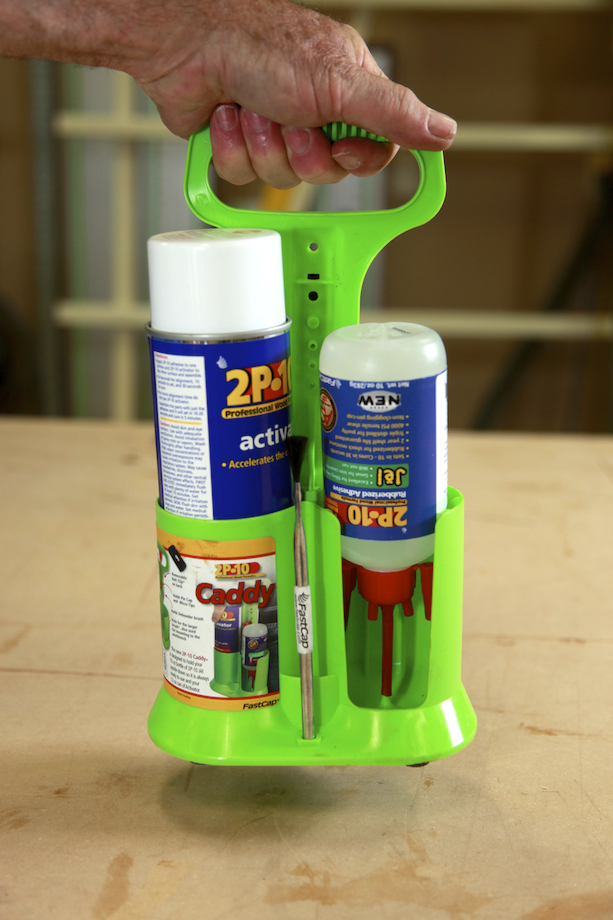 |
And don’t miss the new 2P-10 Glue Caddy. It holds a bottle of glue and a can of activator. |
The Glue Caddy may seem like a funny accessory, but it works!
| The Glue Caddy not only holds your glue inverted, so you don’t have to shake the bottle, but there’s a stopper in the base of the Caddy, so the tip is never clogged. | 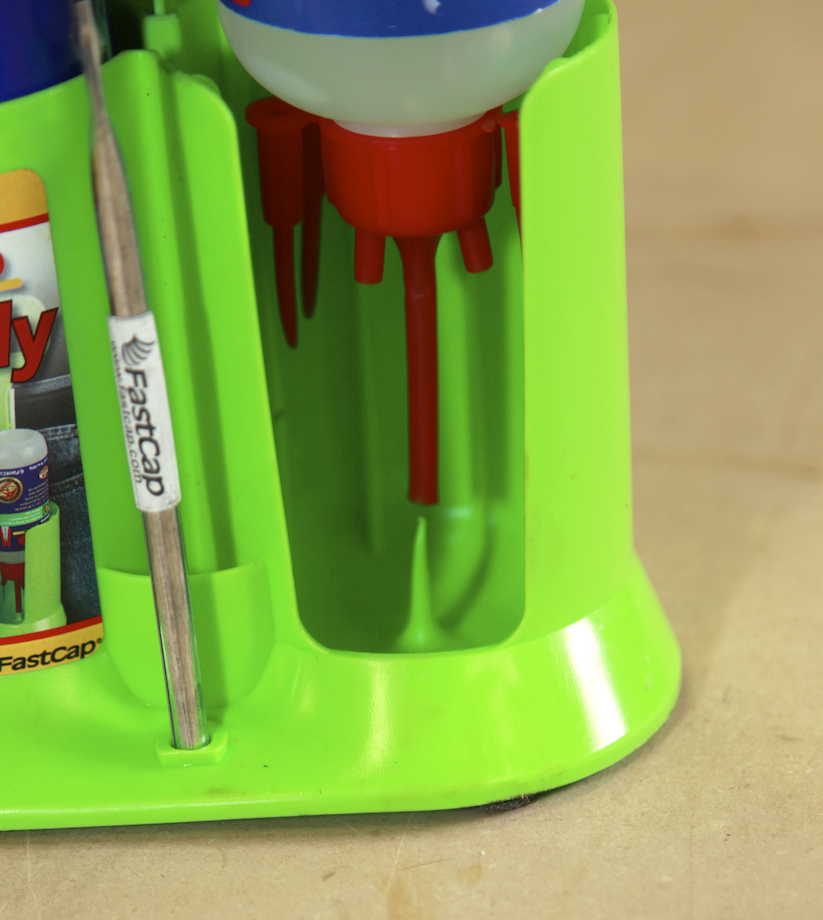 |
I use this to glue real bugs to my hooks to fish with, works great for tons of things….b
I just finished installing baseboards in a 3,300 sf home with radius corner drywall using premade rounded corner pieces for the 90 degree outside corners and cut these down for the outside 45 degree corners. This job would have been uneconomical with out this Fastcap glue. The thick version worked so well at filling gaps that light sanding and priming was all that was necessary on most three piece corners – no painters putty necessary. Lucky for me I discovered my wife’s finger nail polish remover does a great job getting the 2P-10 off my fingers at the end of the day! I’ll never do another base of crown job without this glue.
Most of us pros have been using 2P-10 for years, but if you haven’t tried it, the kit — and then an hour or so playing around with scraps — is what I’d recommend:
Four different thicknesses of glue, from jell to thin, activator, and debonder. And yes! to debonder! Save yourself some embarrassment and pain!
Although if you glue BOTH hands to the work, your co-workers will make sure that you end up thoroughly embarrassed, and just might decide to take a coffee break before going out to the truck to get the debonder!
If you do lots of different work, the 2-oz bottles last a LONG time, too. And even on big crown jobs, most of your joints will be inside corners, and long-wall scarfs. I’m too conservative to use 2P-10 on scarfs, I’ll waste a nozzle for my System Three 5-minute-epoxy gun, and push the joint to perfection with up to 5 3rd Hands. Those are the trickiest joints, especially with pre-stained stock.
Anybody use 2P-10 on those? If so, you’re a better man/woman than I!
Wonder if the RT is good bandage material? The pharmacy-grade stuff is way expensive, and hard to find.
I use the 2P10 for scarf joints all the time. I just recently had a job in an apartment doing crown and base and the material had to be cut down to 11 feet with 5 feet remaining to fit in the elevator. I then glued up lengths of moulding and cut to size. Much easier to make flawless joints on the saw bench…
Yeah, I can see that if you’re putting the same piece of trim back together. It fits perfectly. But splicing two different 16’ers, cupped in opposite directions from each other, is a different thing. And since I usually work solo, I tend to put ’em up 16′ at a time.
Great article. I hope its ok to add my experience handling and storing this product.
I was told if 1 drop of moisture gets in the bottle the entire bottle will go hard. This usually occurs in high humidity on hot days. This seems to account for the short life of my first kit.
I store mine in the refrigerator and when taking it to the jobsite I put it in an insulated lunch sack with 2 of those re-usable freezer ice packs. Going on 3 years with the same kit this way.
I us 2P10 for Scarf joints all the time too. I use it as the nails as Gary demonstrated in a video several years back, as the “staples”. I still like to use my carpenters glue on the joint
It’s been a few years since I’ve used 2P-10. The last five I’ve been relying on the white gorilla polyurethane adhesive. Naturally, miter clamps are employed to secure set. From reading FastCap information ( excellent web site ), I’m ready to give it their 2P-10 another whirl.
Mike Rigby
Thanks Gary for making this online forum happen !
I’ve used 2P-10 for years and love it. I recently used it on some scarf joints on some prefinished base. I just chose my pieces carefully and they glued up nicely. I assembled it long and then cut the extended piece to size and installed. Worked like a charm!
I love p2- 10, it is pricy, so I use it sparingly. I don’t like to assemble joinery in place, I typically assemble crown and casings on a workbench with yellow glue. I prefer for yellow glue to set for 48 hours prior installing trim, like casing. It is actually very productive to measure all the casings for the home, cut them all at the same time, and then after all the parts have been cut, assemble them on a work bench. While the glue sets I go off and take on other tasks. But when I don’t have the time for yellow glue to cure, I biscuit the joinery, apply yellow glue on the miter and then put p2- 10 in the biscuit cut, I spray the activator on the biscuit itself and join the parts. In 10 seconds I have a joint that can withstand some serious flexing and I have the added security of having yellow glue in the joint. A bonus is that the p2- 10 will not bleed out of the miter and get on my hands.
Interesting combo approach. I’ll file it away for future reference. I have used plastic saw-toothed biscuits in the same way, and a little 2P-10 would add strength/insurance.
I also use biscuits, yellow glue, and Clam Clamps, but at $50 a pop, my collection of Clam Clamps is pretty light.
I love p2- 10, it is pricy, so I use it sparingly. I don’t like to assemble joinery in place, I typically assemble crown and casings on a workbench with yellow glue. I prefer for yellow glue to set for 48 hours prior installing trim, like casing. It is actually very productive to measure all the casings for the home, cut them all at the same time, and then after all the parts have been cut, assemble them on a work bench. While the glue sets I go off and take on other tasks. But when I don’t have the time for yellow glue to cure, I biscuit the joinery, apply yellow glue on the miter and then put p2- 10 in the biscuit cut, I spray the activator on the biscuit itself and join the parts. In 10 seconds I have a joint that can withstand some serious flexing and I have the added security of having yellow glue in the joint. A bonus is that the p2- 10 will not bleed out of the miter and get on my hands.
Placing the 2p- 10 in the biscuit cut is actually better than placing it on the miter. First off you will use less 2p- 10, so you are saving some money. But more importantly is that you remove the possibility of having a dry joint, where the wood grain sucks up the glue. The biscuit cut with the biscuit in place has space in it for air. If you use the gel glue, it does not osse out of the miter, it just fills the voids in the biscuit cut, and since 2p- 10 is also a gap filler, the voids in the biscuit cut allow you to have more 2p- 10 in the joint, and it’s not a thin layer of glue, like you would have on the miter in compression with the clam clamp.
I only have 3 pairs of clam clamps, but with the 2p- 10 in the biscuit cut I can assure you that you can remove the clamp in 20 seconds and the joint will not slip, even with a wet miter of yellow glue. At that point with the clamps off the casing you can remove it off the work table and carry it to where it needs to be installed. So I really don’t need more clamps I just need more glue. But I generally would wait 30 min prior to installing the casing so the yellow glue has a chance to dry a little, and I am always cautious, so I wait until I need my clamps prior to removing them.
Sounds good, Mike. Next time around, I’ll make a few test joints with some scrap, and see what it takes to break ’em.
Where is the best online retailer to get this stuff? I can’t find the RT or the Caddy on Amazon. Any help would be much appreciated.
Thanks,
Contact Fastcap: http://www.fastcap.com. They’ll get whatever you want out to you very quickly.
Gary
Gearing up for doing the millwork in a huge 27,000 sqft residential home that will have a whole lot of pre-finished walnut millwork throughout. Was planning on preassembling as much as possible using biscuits and the clam clamps. But after seeing this article and product I’m wondering 2p-10 glue alone would be a better way to go? Sure it would be faster but do you think it would be as durable as a biscuit and yellow glue? I do like Mike’s system of incorporating yellow glue, biscuits and the 2p-10 glue in the biscuit joint, but that seems like a lot of steps and considering how much pre-assembly I will be doing on this big project it seems like I could lose some time/money with that method, considering I already bid the job with biscuits and yellow glue.
Jason,
I don’t think 2P 10 is the right way to go for all those miter joints. You’ll be better off with yellow glue. And how big is the casing? If it’s pre-finished, you or the painters will have to use color putty or something in the holes left by the Clam Clamps. If the casing isn’t huge, you might try Collins’ Spring Clamps?
Gary
Gary,
The casings are 3- 1/2″ wide with an added profiled backband that I was planning on pre-attaching to casings before I cut, to save on time. And yes all trim is pre- finished walnut and the painters are filling nail holes. I do have the Collins clamps but wanted miters to be clamped as tight as possible to ensure long lasting tight joints with no callbacks so I thought the clam clamps would be a better choice in this appilication. Also planned on pre-assembling all the scarf joints on the ground and then installing pre-assembled pieces to the drywall. Do you think the 2P 10 would be strong enough for that type of application or should I biscuit it with yellow glue? Or I was also considering using Invis Mx 2 system by Lamello but looks like it could get expensive.
Also was wondering what your thoughts would be on applying construction adhesive to the backside of the moldings where it touched the drywall and cross nailing the moldings with a 21 gauge nailer, since all the studs are22 gauge metal. I am a little afraid to nail into the metal studs with even a 16 gauge nail because of the chance of the nail hitting the thicker part of the metal stud and curling back thriughthe face of the trim and ruining the pre-finished walnut. Do you think this method would hold trim tight enough to the drywall? Thanks for your feedback it is so helpful!
Jason,
You can’t use 2P 10 with Clam Clamps or even spring clamps. It dries too fast and these isn’t enough wiggle-room time to align your miters perfectly and then get the clamps on…there often isn’t even time to align the miters perfectly.
Yes, I’d definitely use construction adhesive if you’re installing trim on metal-stud walls. We usually use short 2″ 15ga nails to secure the molding to the wall/studs. They do not curl. You do have to shoot them perpendicular to the wall–they can glance off the studs and fail to penetrate. So no angle-nailing. The 21ga nails will be perfect for securing the molding to the jambs.
I wouldn’t use the 2P-10 for the scarf joints either–not enough time to assemble the joints perfectly. I’d use yellow glue for everything.
I’m not a big fan of pre-assembling and attaching the backband to the casing. I know a lot of guys who do it that way, and I always wonder if it’s really faster. All the heads are exactly the same size, so cutting them and attaching them later is easy. The legs can be cut a little long and trim off at each doorway–hold them upside down, with the long point of the miter hitting the floor, scribe a line across the top of the head, then cut off the excess from the butt joint on the bottom. Then nail them on with the 21ga gun–mostly to the back of the casing. Then the painters won’t have to worry about filling marks from Clam Clamps! ;)
Gary
Gary,
Thank you! You and all of your resources have been such a great help to me! Thank you for what you do, and for sharing your experiences!
I agree that attaching you backbands after casings is better in regard to concealing clam clamps and also is a lot safer so as not to cut through a nail and send flying through the room, but I do still believe that it is a little faster to pre attach backbands at least it is for me at this point.
Have you ever used the Invis mx 2 system by Lamello? It looks like it could be a good resource for a lot of trim carpentry applications but have never used it
Cheers!
No, I’ve never used it. Have you? If you have, how about a review/article telling us about it?
Gary
I was making some small display cases using melamine covered flooring. I was trying to stick strips of brass along the edge on the outside and I could get nothing to get it to stick. I tried everything, gorilla glue, urethane glues, some new melamine glue – all of these claimed to bond metal to timber, but none of them worked. Then I heard about 2P-10 and I said I would give it a go.
I found that it worked very well. It’s good, fast and effective. It’s also good for filling gaps and it cleans off fairly easily.
Re: Walnut (hardwood) casing miters –
Collins ‘Edge-Pocket’ (pocket screw) + Titebond = done. Shoot nails.
http://www.collinstool.com/base.php?page=edge_pocket.htm
Here’s my situation. I’ve made tons of cabinet doors in my time, but never had to make mitered cabinet doors. Bar clamps, which i have plenty, and many of the other manual clamps sold on the market seem to have many difficulties. My plan was to use festool dominos at the corners and then use 2p10 as the adhesive to hold the miters tightly until setting. This would avoid the lengthy and cumbersome wood glue and clamp method. An alternative would be to use wood glue for the dominos and mortises and the majority of the joint, then use the 2p10 at the outer most edges until the yellow glue dries. any thoughts or suggestions?
Gary, how much pressure is needed for yellow glue to actually work (scientifically speaking)? New to a lot of this and particularly thought the clam clamps great given my vague understanding of yellow glue. But guys mentioning using biscuits and the fastcap glue ALONGSIDE of yellow glue — it doesn’t seem to provide enough pressure for the wood to bond correctly. Thoughts?
Also, I have been watching a guy from Fort Worth using CA glue on primarily MDF crown which seemed to work well for him. What do you know about the use of yellow glue on materials like that? Or is an adhesive like 2P-10 better? I have always thought that nailing trim and that the fastener holding the material until the glue dries was weird approach using yellow glue.
PS: Strictly in regards to material bond. Not personal preference or speed as that depends more on the installer.
I am installing a Resinart flexible baseboard on a curved wall in my home.
The product recommends I use a polyurethane construction adhesive. Is 2P10 a polyuethane construction adhesive? And will thin work just as well as thick? I will also be nailing the flex board.
Do you ship to canada