


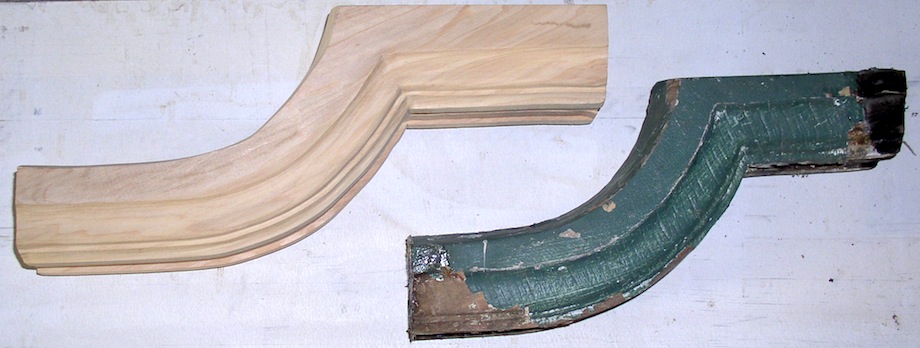
If you’re routing a curved surface, or if you have to follow a curved template and you’re using a router bit with no guide bearing, then you need to use an overhead pin router. I had to make some curved gooseneck rails for an old house; several of the existing rails had rotted away. The goosenecks would have to match the profile of the rail—they all needed to be routed, and I didn’t own an overhead pin router. But I had read about using a pin above the router table to do what an overhead pin router does.
(Note: Click any image to enlarge)
| A friend of mine has a fancy overhead pin router. He refers to my setup as an “underhead pin router”—mine does everything his does except plunge into a workpiece. | 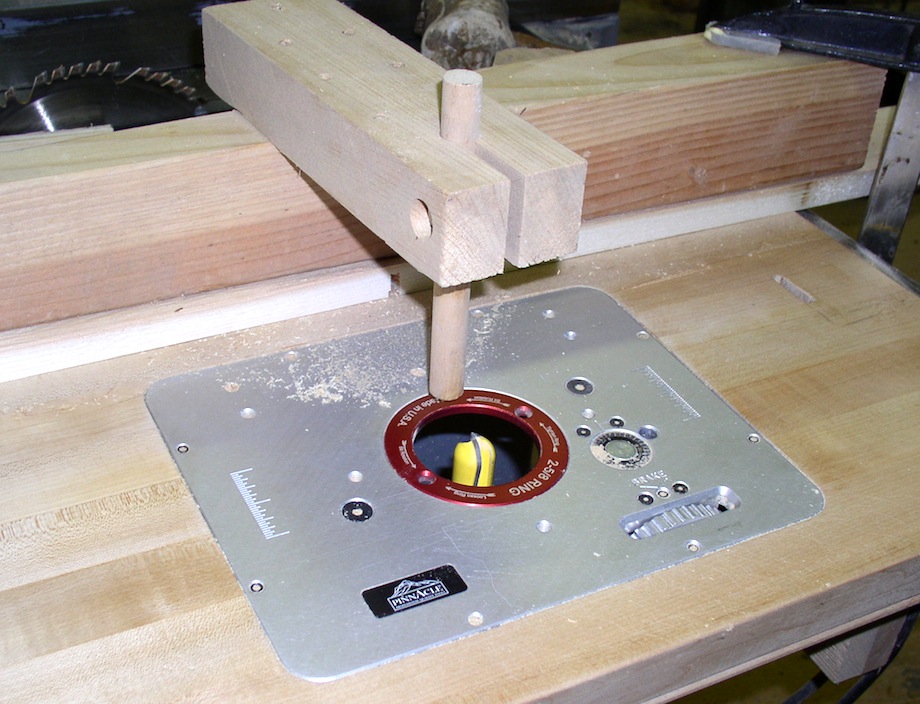 |
 |
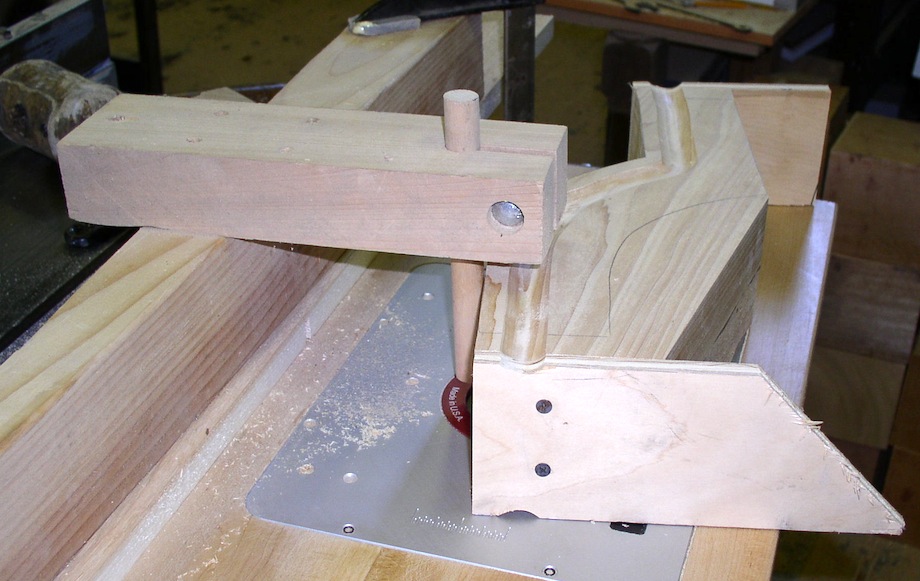
Using some plywood, I made a template of the contour I was duplicating. This template would set the pin position and the router bit height for the successive cuts. |
| I cut the curved edge of the goosenecks on the bandsaw, and I screwed pieces of plywood to the ends to help keep the piece square to the table. I also used the plywood pieces as handles and they helped to prevent tearout. | 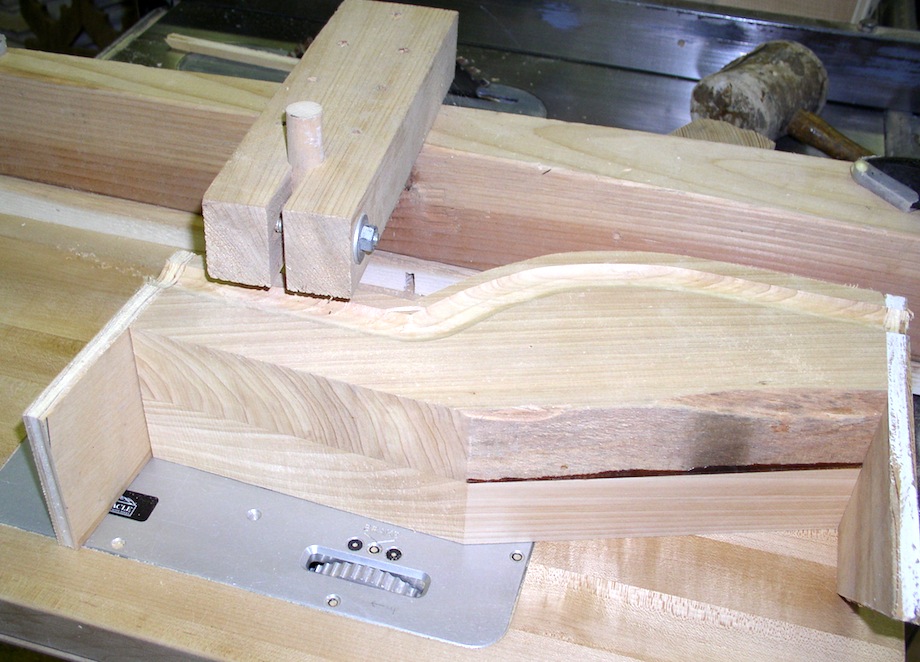 |
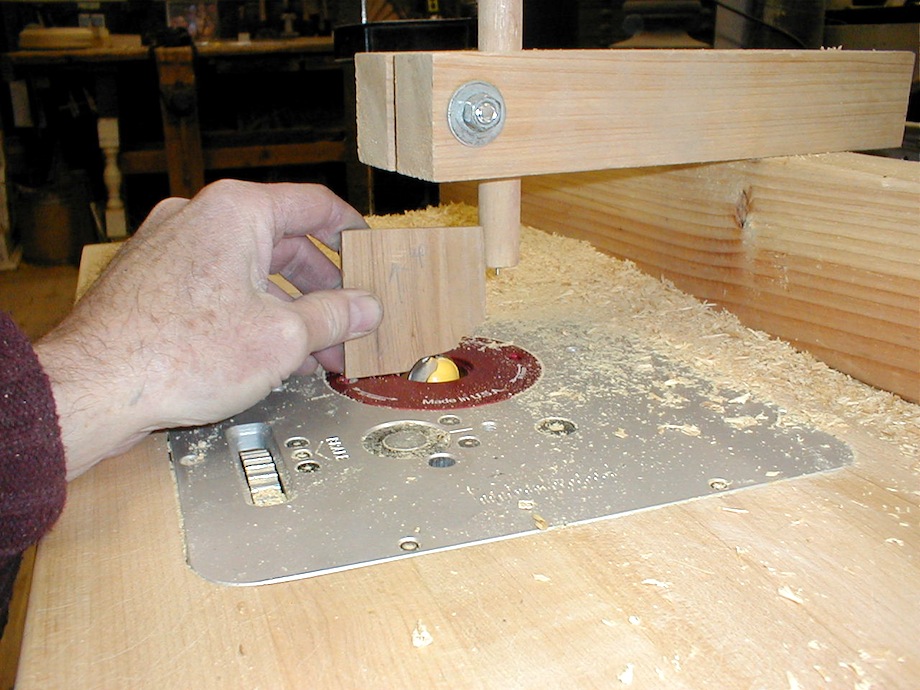
I made several successive approximations and then carved and sanded the profile to finish it off. I was careful when starting the cut—the router could rebel by kicking the work back.
The finished product matched the gooseneck I was duplicating.
Coincidentally, I read a TiC article some time ago about making stair rail volutes. The author said that he used a die grinder to help carve away some of the excess material. The die grinder turned out to be the perfect tool to carve my goosenecks after doing the successive approximations on the router table!
WOW! That is simply beautiful. Great job.
Not to be confused. You made that look easy. Props.
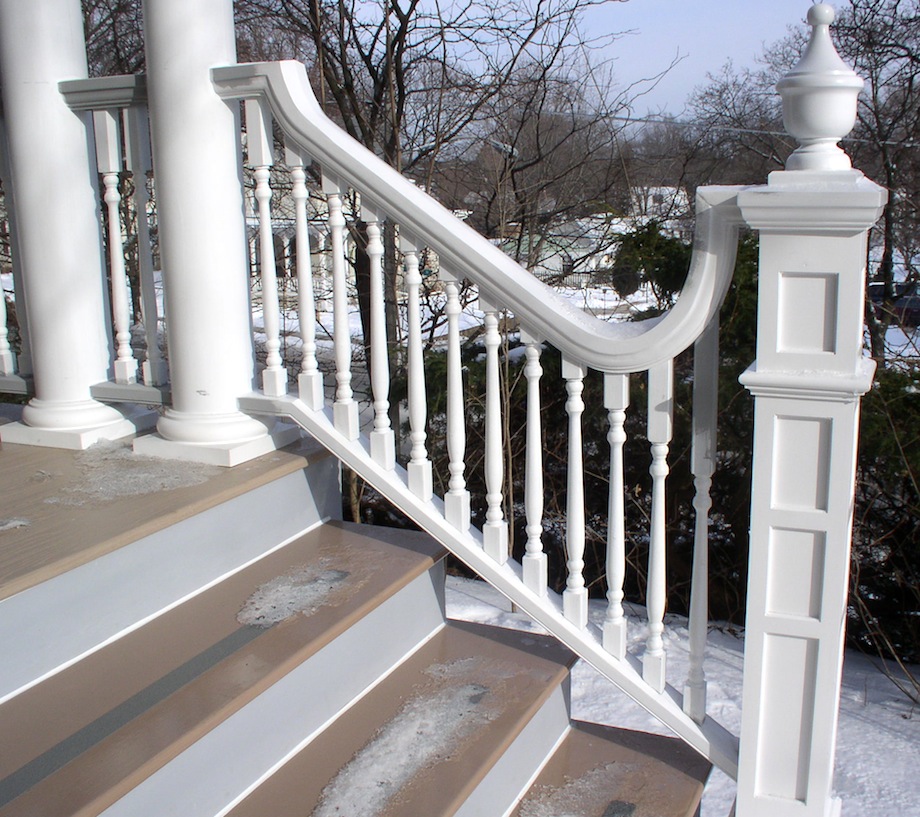
Thanks!!! The long gooseneck next to the newel was quite a challenge to lay out. I’m a retired math teacher so I loved the mathematics of it. I drew it full scale on a piece of plywood and then cut that out as my template.
Sweet!
I love to see creative thinking like this! It’s low tech, making a piece of equipment you already have do even more. Excellent work on the railing. Regarding the use of a die grinder, sometimes a steady hand and a simple tool do as well some very expensive equipment. Thanks for sharing.
I have cleaned up several goosenecks with carving tools in the past before I discovered the die grinder. The die grinder is nice for taking away a lot of wood in a hurry.
Beautiful, graceful, elegant…there aren’t enough adjectives. They just don’t build things like they used to. Very creative and simple solution, not to say it didn’t require some skill, to what would have cost quite a bit more with an over setup. Congratulations!
Interesting principle, simple and useful. Thanks for sharing.
Al Constan
Beautiful work Dan. What type of wood did you use? How do you think it will stand up to the harsh weather?
Gary
It is two pieces of cypress glued togtheer with Titebond waterproof glue. Cypress has great rot resistance but it will still rot. The homeowner really has to stay on top of the caulking and painting. I did not make the newel post. It was made of pvc to withstand the weather.
End grain is always the vulnerable spot on railings and balusters. If not properly primed the components will rot quickly even if the rest of the railing is properly painted. I am very tempted to try and submerge end grain into primer to really give it a chance to penetrate. Always prime your cuts! Great work!
I have found that Smith’s Clear Penetrating Epoxy Sealer™ (CPES™) is a great product for sealing exterior woodwork (stain or paint grade) that will see direct exposure. It seems to penetrate and perform better than any paint primer. However, proper curing time s will slow down top coat finishing; so you will want to allow for that in your project planning
As the British would say “Brilliant”!
Your friend should be jealous. Your whole approach to solving the problem was great. Jig with a variable pin size, template for the cut, and the end pieces for stabilizing your workpiece while cutting. Safe, accurate, and you got the job done quickly, well done indeed.
One question, how did you steady your hand for the die grinding part?
Warren
I just hang on tightly.
That ridiculous upeasing is a great way to stop somebody from falling down the icy treads you caulked to the risers db.
I don’t understand what you are saying. The design of the rail going down the steps was taken from an old drawing left by the architect. Is there a problem with the caulk between the tread and the riser? I only made the gooseneck and rails, I did not install anything. The risers, stringers and treads are all treated. Caulking is mostly for getting rid of the black line. What does “db” mean?
The looped railing is goofy looking and very unusual but Victorian embellishments were often goofy Thumbs-up for faithful restoration.
“DB” (Design/Build) Critical comment on the misplaced calking bead. Tread/riser connections should be tight with 2% exterior, tread slope.
The set-up you’ve made for yourself makes this an “inverted pin router”. These machines have been around for a long time.
http://vintagemachinery.org/photoindex/detail.aspx?id=4590
Pin routers are very versatile machines and the inverted variety are usually safer to operate.
Thumbs-up on the mitered goose neck (without the miter).
InternetSlang.com
http://www.internetslang.com/DB-meaning-definition.asp
I was assuming some professional remark or reference…