


A revolutionary approach to a commonly used tool
Every carpenter has his favorite tool—the one he’ll turn the truck around to get because he left it at home. A lot of craftsmen have some kind of antique tool they really don’t use, but think it’s cool to have. (Some of us bought that collectable new!) Just go on eBay and do a search for “collectable carpenters tools.” There are tools online that don’t list a function, because the seller has no idea what it was used for! There are thousands of tools that have come and gone. Some were gadgets that some clever carpenter thought he could retire on; some were replaced with modern technology. My personal test of a tool’s worthiness is whether I would replace it if I lost it or broke it.
I have quite a few that fit that category and quite a few that don’t. It amazes me how often a new gadget comes out that will “revolutionize” the way we approach a task. When in reality, if the inventor knew the basics of how to correctly approach the job, their gadget is really just a workaround for a skill he is lacking and yet he thinks every other carpenter in the world has the same problem!
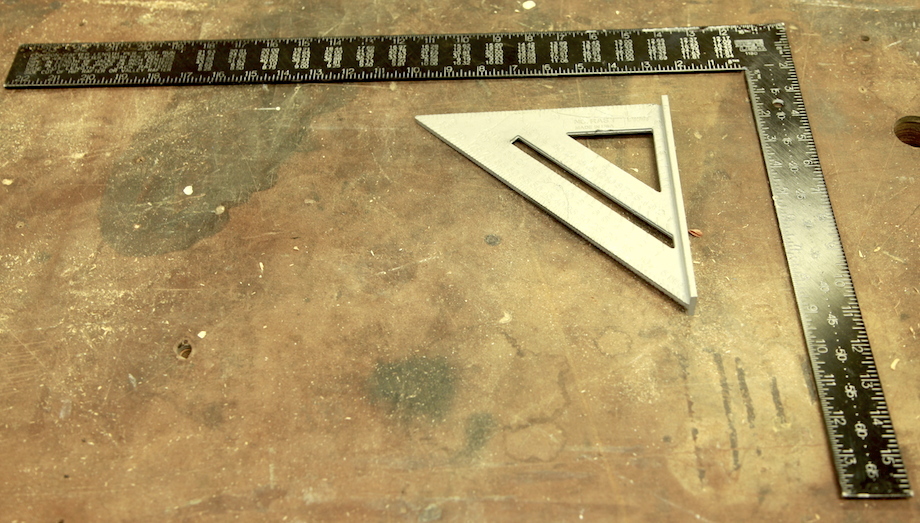
| One tool that just about every carpenter does own is a framing square or a variation of it. The technology behind it goes back to ancient history—the Egyptians had wooden squares to layout the pyramids. |
 (Note: Click any image to enlarge) |
As the industrial age approached they began to use metal to fabricate the square. The durability of metal and its ability to retain shape unaffected by seasonal humidity changes made a much better square. Markings on squares were made by the craftsmen to indicate common units of measurement they had run across in building—these were often inscribed by the worker himself. As the usefulness of the square developed, more markings were placed on the square.
Early markings on the square were likely the result of some smart carpenter figuring out that some kind of repeatable relationship existed, so he scratched the marks on his square for future reference. From that time, framing squares really evolved. Jeremiah Howard manufactured the first production framing square with a fairly comprehensive rafter table in 1881. It had pitch scales and common roof pitches, but no hip or valley information. A more comprehensive update was done by Moses Nichols in 1901, and has remained pretty much the same since then. Ironically, the 2-in. body width and the 1 1/2-in. tongue was originally made to layout the most common mortise and tenon joints in framing. Though carpenters today don’t use that type of joinery in modern production framing, framing squares are still useful for laying out the width of 2x material.
Fast forward to the modern square. Oddly enough, some of the useful markings are disappearing. I’ve seen modern plastic materials replace metal in some cases. To me this is a step backwards. The removal of the scales just shows that many of today’s carpenters don’t use them or understand them, partly due to the popularity of Truss framing and the modern construction calculator.
That brings me to the Chappell Square.
The Chappell Square is made of stainless steel, and its precision and quality resemble an heirloom piece you will want to hand down to your sons and daughters. And you will own it long enough to hand it down! I’ve thrown out dozens of rusty steel squares that guys left outside, or just oxidized over time which made the markings unreadable. That won’t happen to this square. And for the cost of the stainless, you’ll think twice about letting a helper drag it out of your sight.
Most of available framing squares will have markings for common hip rafters and various angles. The values are given per foot of run of the rafter. Any calculations first must be changed into feet and then into inches since the results are given in inches, which means you have to convert run dimensions from feet to inches, and fractions to decimal values. It’s pretty common to make mistakes if you don’t have a good solid method that you use every time.
| The Chappell Square takes a different approach. It determines the length of a rafter by using a unit run ratio. | 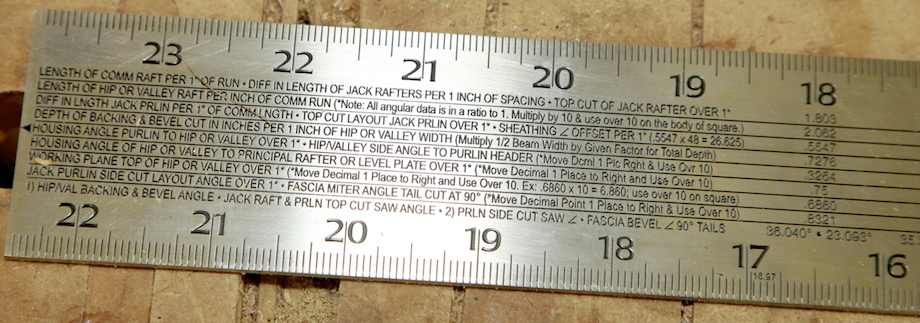 |
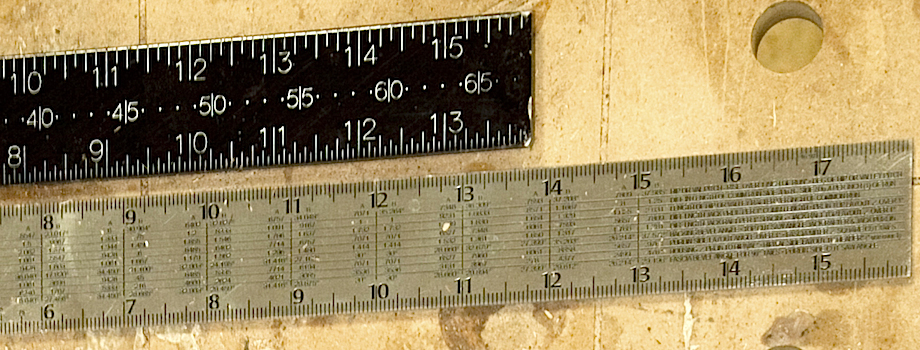
For instance, for a rafter that has a roof pitch of 12/12, the square reads 1.414 instead of 16.97 in. Take any unit of run for your rafter for this pitch and multiply it by 1.414 to get your rafter length.
For example:
12″ run x 1.414 = 16.99″
1 foot run x 1.414 = = 1.414 feet
10 meter run x1.414 – 14.4142 meters
By using ratios instead of linear results, the Chappell Square becomes a universal calculator for any type of measurement we want to use. That’s the biggest change in framing square production in more than 100 years! Because of the use of modern pocket calculators, the math functions are a lot easier to handle.
Here’s an example of a practical layout to illustrate: I have a 12 foot 6 1/2-in. run for a 5/12-pitch. What is my rafter length? Looking at the Chappell Square, I can see that the value for a common rafter is 1.0833. Using inches as my common measurement, that would be:
144+6+.5 = 150.5″ and 150.5 x 1.0833 =163.0366″
.03″ = approx. 1/32″
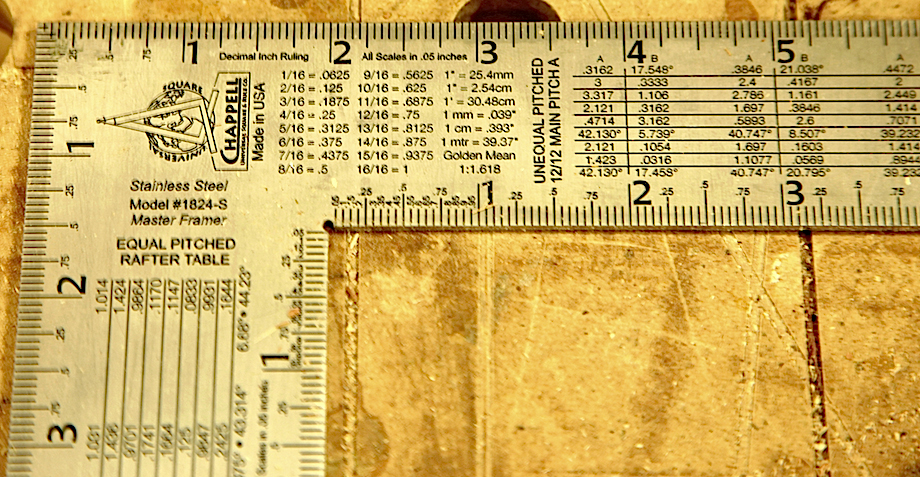 |
There is a small conversion scale on the front side of the tongue that gives me decimal values of the fractions. |
.0625 = 1/16″ – .03 is approx. half of that, which is close enough for framing.
I personally use a construction calculator to do most of my math. I just find it faster and easier. But the question I always get is what if you forget your calculator, or the battery dies? The battery on my Chappell Square will never die because there isn’t one! I also find there is one big advantage to using the Chappell Square instead of my construction calculator: The Chappell Square forces me to understand the geometry and the math of what I am trying to find. That is a valuable asset when it comes to working complex framing jobs. Once you begin to use the Chappell Square in conjunction with your calculator, you will begin to assemble geometry visually in your mind—a giant leap forward and one of the weakest areas for most carpenters! Some carpenters that use a construction calculator only understand the basics of what it can do. A carpenter who learns how and where to use a construction calculator will really cut down on his framing and layout time. Plus, some calculations are very cumbersome, and I need to write out my calculations longhand, along with drawings, just to figure them out. Having many of the references on the Chappell Square is a shortcut to a solution that otherwise could take hours of head scratching and calculation.
The square does require a decent knowledge of roof layout skills to use, but there are very advanced functions that will cut down layout time dramatically. There are irregular pitch scales, hip drop per inch of width scales for various pitches, layout angles, hip and valley bevel angles—everything needed to layout and cut very complex roofs.
While I normally default to the calculator for a lot of computations, I have been finding myself using the Chappell Square as a shortcut. For example, for a sheathing cut on a hip roof, I calculate the offset of the top cut to lay over my hip or valley rafter. The Chappell Square has a scale for sheathing offset that is very simple to use, and you can approach it two ways—by laying out the angle on your sheathing piece directly with the square, or by calculating the offset using the scale under the pitch.
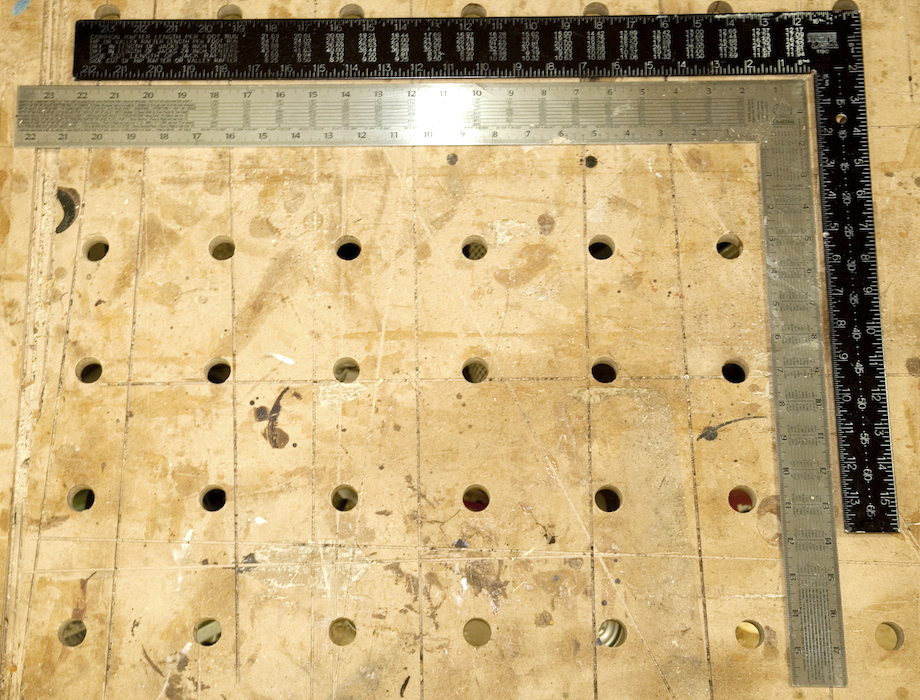
Another benefit of the square is the extra 2 in. on the tongue. This is useful for a few reasons, primarily because layout of 16″ o.c. is a lot easier since there is exactly 16″ from the inside line of the body. I find it useful for steep pitch roof layout above 16. While that is not a deal breaker to me, the extra 2 in. adds a little more versatility.
Chappell does make a smaller version, called the “Traveler,” with a 12-in. tongue and an 18-in. body. I really thought I would like that one for my travel kit, especially when I do Katz Roadshow events. After using it for a while, I have defaulted back to the larger square—it has a tongue of 18-in. and a body of 24-in., and I find it easier to work with.
While the production framing square might be getting simpler, containing less layout information, the Chappell Square brings back the opportunity to understand the more complex geometry of our craft. If you are not already adept in roof framing, start slow, understand the concepts and you will find it rewarding. I doubt it will replace my construction calculator, but in the short time I have owned it, I have understood some of the more complex aspects of my work with a little more clarity. And used in conjunction with my calculator, it is an incredibly handy reference guide built into a tool I already use a lot.
In speaking to hundreds of carpenters all over the country, I have come to the conclusion that it really doesn’t matter what method you use to layout and cut your roof framing, as long as the results are good. I have seen carpenters layout rafters with strings and levels, square scales and calculators, snapping full-size patterns on a floor, stepping off with a square, roof framers bibles—they all work. There are methods in the hands of a knowledgeable framer that are much faster than the others. Based on my experience, using the Chappell Square with a trig or construction calculator is by far the easiest method to get good results in the shortest time frame.
The Chappell Square is a good investment—you’ll have it for a lifetime, and during its lifetime, you might learn a few things.
Regardless of new products and technology, the bottom line for an aspiring carpenter is always the same, so do yourself a favor: pay attention in Math class. Believe me, it will be the most valuable tool in your career. I certainly wish I had paid attention in Math! There is nothing cooler on the jobsite than to see a young carpenter cut a compound rafter joint, slip it into place and nail it the first time. It makes some of us old timers wish we were young again.
You may have noticed that old steel squares are thicker at the heel, while modern ones are stamped out of uniform sheet. I’ve only heard one credible explanation (almost a guess, really) from a guy in customer service at Stanley Works.
Back in the old days, when squares were made by blacksmiths, there was no sheet steel- two strips were “blacksmith” or “forge” welded together at the heel, which produced a double layer lump there, not conducive to good layout. So the next step was to work the lump smoothly out into the tongue & body, followed by cutting & filing to produce a square.
The story guesses that carpenters noticed the tapered thickness and thought that was part of what made a good square, so when manufacturers tried to use plain sheet, their squares were rejected as cheap substitutes & they had to roll the steel thicker in the middle.
Anyone have a better story?
I had heard it was to allow the center punch truing method of tweaking the angle , the thicker area was more likely to not deform in the other plane when punched. It all adds more beef to the most crucial part of the square.
I second your version, Duane. I am not sure where I learned this; probably from an old timer when I was much younger.
A tapered square IS a mark of quality. A tapered square, the extra beef in the heel will resist bending caused by a bump or a drop and the thinner ends toward the ends of the body and tongue reduce the weight to protect against damage from inertia. It also changes the tempering of the total. The thinner areas temper most fully, out at the ends to resist deformations, at the same time the quench affects the thicker heel less and allows a square that can be hammer or punch set trued to 90 degrees.
I count myself lucky,,, for I own and use a hand forged, 24X18, tapered, 200 year old bit of a machinists art. Individual dies were used to stamp the numbers into the face,,, there is just the tiniest variation of depth of set and angle,,, it was all done by hand and eye. The heel is nearly 1/4 inch, the ends, 1/16. All the tables you could ever want and scales down to 100th of an inch and it is not on a shelf, it is in use.
Great article Mike, on the use of the Chappell Framing Square with a calculator. The chappell Framing Square is like a reference book, but printed on the square. Especially the Hexagon and Octagon rafter tables.
After using Chappell Framing Squares for the last two years they could remove all of the rafter tables on the squares and it would still be the best framing square to own. The quality and weight of the Chappell framing square make the rest of the framing squares seem subpar, including the stainless steel Shinwa.
My favorite Chappell framing square is their 3″x4″ square for transferring perpendicular lines for layout. The perfect framing square would be a stainless steel framing square from the Chappells with 1/16″ printed on both sides of the framing square.
Sim
Thanks very much for the resource of this information. The Chappell website provides a 52 page pdf that I’m glad I now have to refer to for information. These days I don’t do much in the way of roofing, but I’ve kept the information of this from college and with what I know will just have to refresh.
Thanks again.
Drago
Once again,you ve published an article worth reading. Very interesting. Where do you find the time to write these articles . Thank you. By the way, you mentioned the term ” young carpenters”, have you met any young men who want to be carpenters? If so, send them to the Chicago area. Thx
This article nails it! I have owned my squares for a couple years now and any person who handles one of them becomes addicted! Upon completing two weeks of timber framing at Fox Maple and utilizing my squares with their methodology I could never imagine being without them. Many thanks for a superior product! As you see by the other posts these squares are the new standard for anyone looking for a quality product.
I have a moses nicholls square from my father GEORGE H. BECKMAN a blacksmith from Lowell, Indiana deceased.pat.#672,455 april 23 1901. It has a hole in the heel of the blade & tongue to twist and separate into 2 straightedges . When was the last date of manufacture ?
The chapell framing square how does it differ/ compare
To the Fredrickson metric framing square ?
Not sure if you have heard about it , it comes with a book explaining it’s use. From what I have gathered it works on a 250mm base unit run fro common rafters. This person mentioned below is the only person I found who sells them now. I got mine at the Brotherhood of carpenters and Jointers local 27. http://www.armsonsales.com/frederickson/
Just wondering how you would compare them in ease of use quality material and acuretcy
Thank you
Having learned the trade at a technical school 50 years ago I tend to like using the correct technical terms. When it comes to the building of roofs there are two terms that are often used incorrectly, slope and pitch.
The slope of a roof is the rise compared to the run. The pitch is the rise compared to the span.
Tom
The world is a different place.
Language & terminology change
50 years ago you dialed a phone-
My phone # started with 2 letters. FR
Gay meant happy
Carpenters ordered lumber in board feet
They sharpened & set their saws.
I know some of us like the old way – but we need to communicate in a way that people understand – I don’t use my yankee screwdriver anymore- but the young carpenters get a kick out of seeing it.
As I near retirement- I’ll let the next generation choose the terms.
Seems from the confines of my locked down community- its a different world my friend!
Great article. I too wish I had paid more attention math class. I teach woodworking to middle school students and in some instances they struggle with math because they cannot relate to some of the concepts taught. I incorporate as much math as possible in my curriculum that will get them excited about building the mathematical applications therein. My hope is that one day that some of my students will be that young carpenter able to use math to cut and place complicated framing components with precision Thanks again.
Nice article, thanks for the information on the origins of mass-produced framing squares. If one would like to learn trigonometry, I would suggest learning the unit circle to easily understand the trig ideas. The Chappel square has these ratios printed on the square– a novel idea. The ratio of the 12/12 is indeed 1.414 or the square root of 2, or in thinking of a unit circle with a radius of 1 with the center at the origin. One can see that the horizontal axis is cosine and the vertical axis is sine and from that one can define sine, cosine, tangent, ratios, degrees of angle, in a manner that is easily remembered because of its simplicity. That is why the cosine of zero is one.