



This article was originally published in 2005 by the Journal of Light Construction.
Maybe I visit the Gamble House too often. Maybe not often enough. But that’s where I got the idea for this mantelpiece. Several JLC LIVE attendees asked about getting plans for the mantel. I hope this article is more helpful.
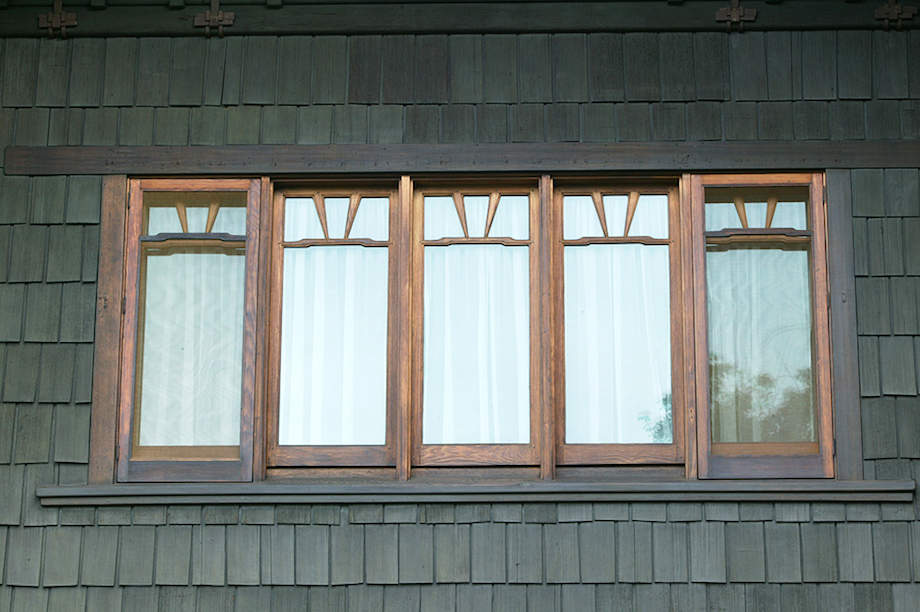
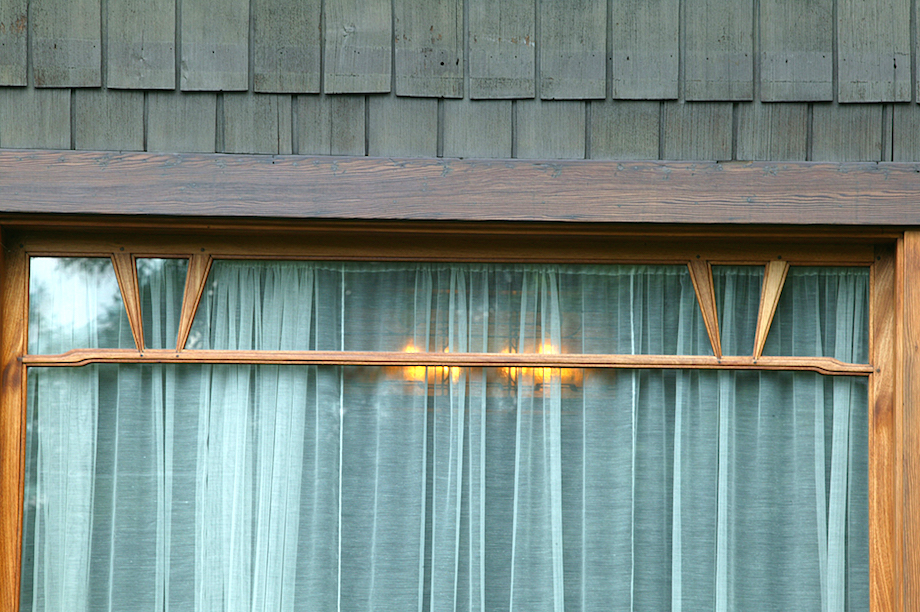
The ‘cloud lift’ pattern, seen in the muntin bars of these windows, is one unifying pattern found in the woodwork throughout the Gamble House.
(Note: Click any image to enlarge)
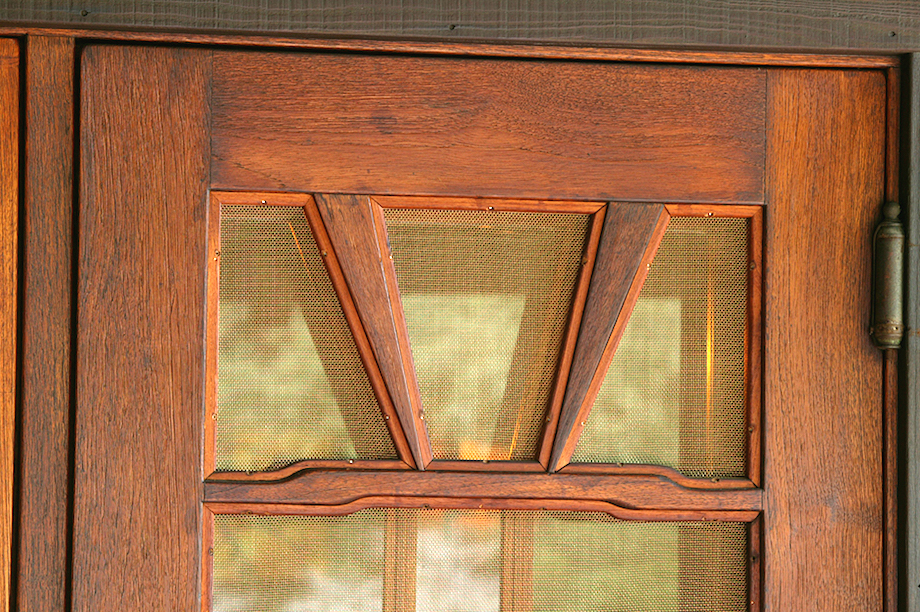
The vertical bars, as Brent Hull explained to me on a visit to the home, are meant to resemble sun rays.
 |
 |
The same cloud lift pattern is repeated in the upper panel door stiles flanking the mantelpiece in the boy’s room.
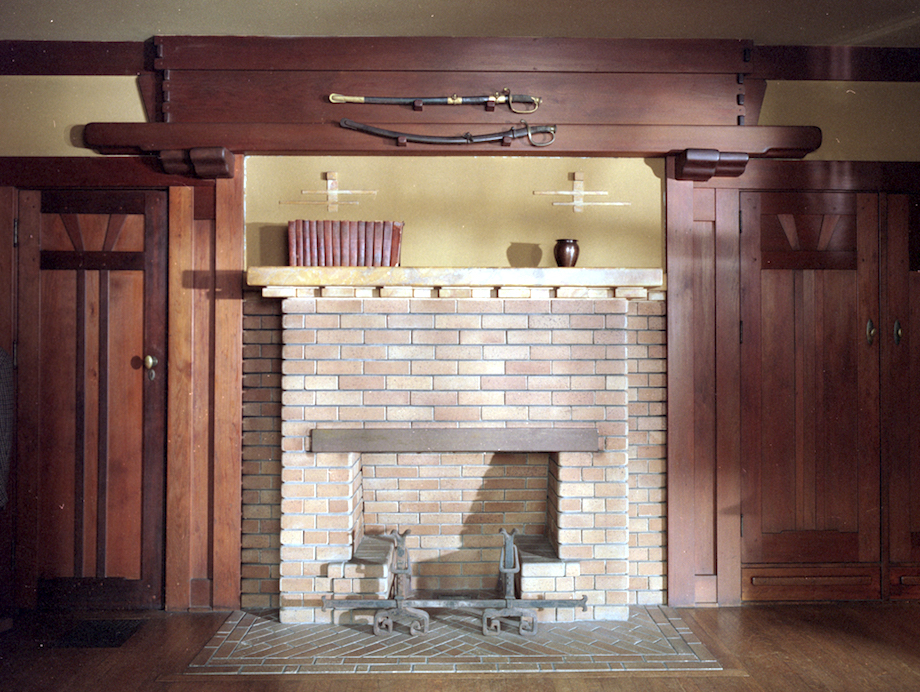
Emphasized joinery is another unifying thread that knits the house together. Emphasized joinery is found in many Craftsman-style homes, but it is rarely this emphatic.
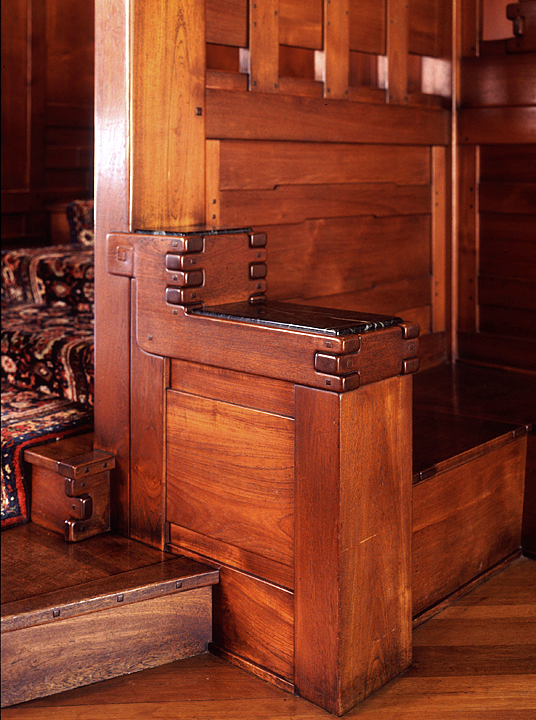 |
Notice how the finger joints in the kneewall are rounded over and ‘eased’ dramatically, drawing attention to or ’emphasizing’ the joinery. |
“The whole design is organic,” Brent Hull says of the Gamble House, “from the oak tree pictured in the leaded glass entryway to the trusses in the parlor mantelpiece.” I couldn’t agree more. The home reminds me of an oak tree with softened edges, a muscular horizontal structure, and the heavy limbs of rafters stretching skyward.
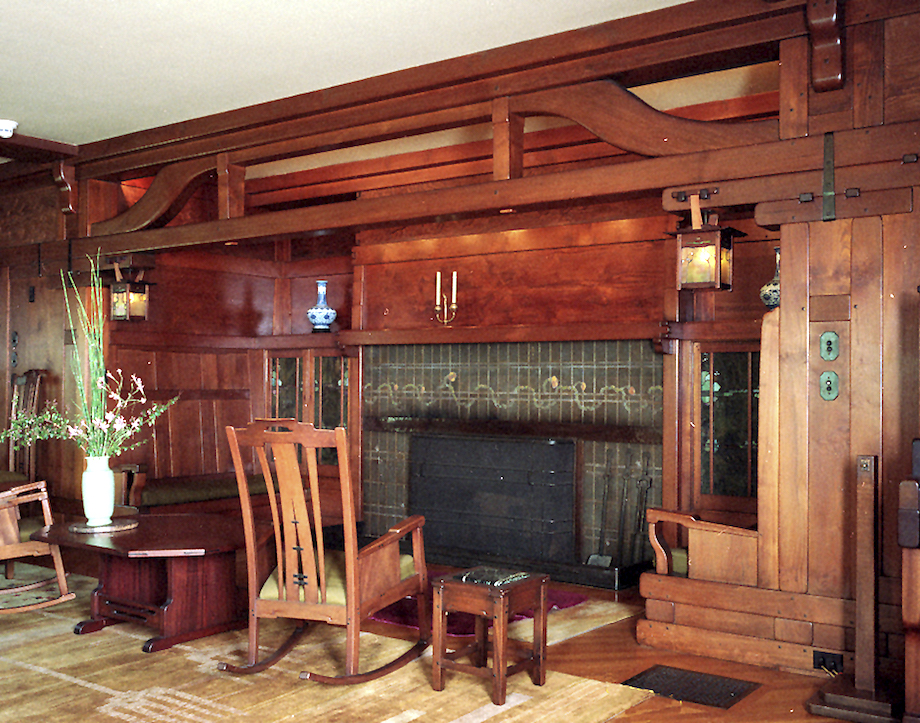
I tried to capture a few of the same elements in the design of this mantelpiece, while keeping within the framework of classical architecture.
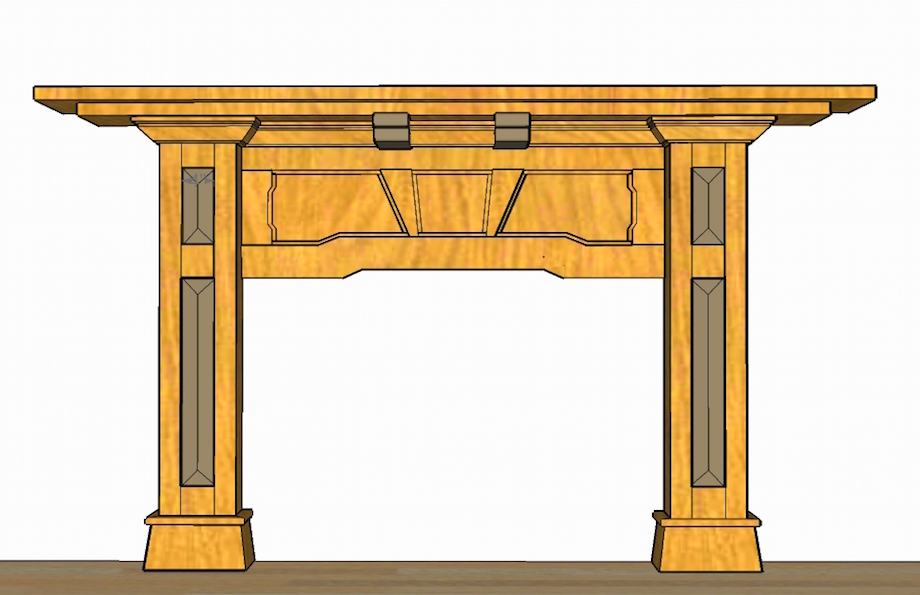 I doubled the projection of the mantelshelf beyond the pilasters, stressing the horizontal lines, and I kept the pilasters wide and muscular, which necessitated increasing the proportional size of the frieze. I incorporated the cloud lift pattern in the bottom rail of the frieze, along with the sun rays.
Brent suggested I cut the cloud lift into the stiles, too. The chamfered panels add a Gothic influence. Gothic ornamentation was common in Arts and Crafts homes—Inglenooks (distinctly Gothic) were frequently used around parlor mantelpieces from the Victorian period to the Prairie style.
SketchUp made it easy for me to draw the mantelpiece to scale, and in three dimensions. The program also provided exact measurements for construction.
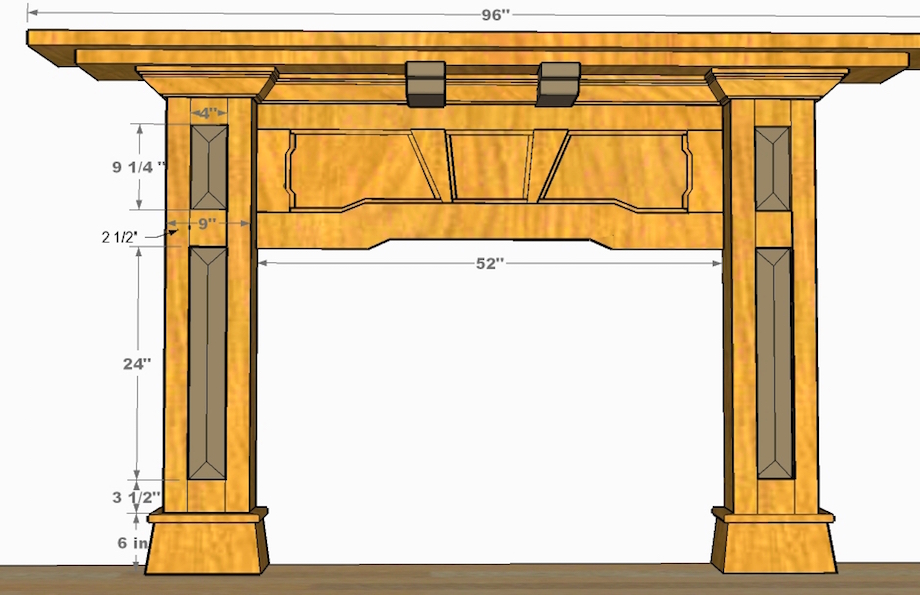
I printed the drawings and pinned them to the wall in my shop. I remember how hesitant I was to spend so much money on a drawing program, even though Joe Wood told me twice that I’d save that money and more on my first project, just by making fewer mistakes, let alone the material I’d save. The third time Joe repeated that line, I listened. Thanks Joe!
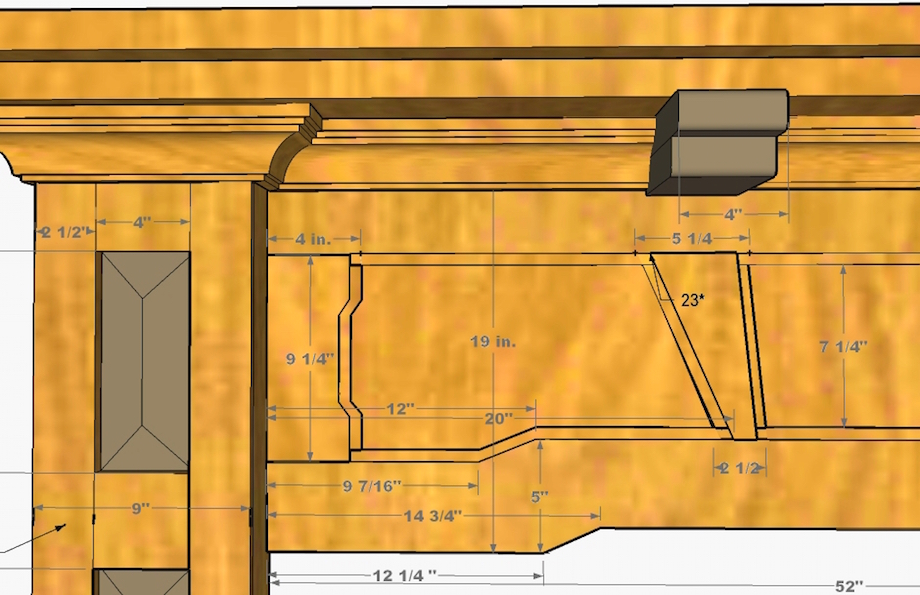
The crown molding had me puzzled. I drew it several ways, using different profiles, but nothing seemed right. I didn’t want an S-profile, or a cove at the bottom, or an ogee at the top.
| It seemed to me that the crown had to have multiple square-edged steps at the top, and a single deep cove. I’d seen people cut crown on a table saw before, mostly in books, and figured it was time I gave it a try. | 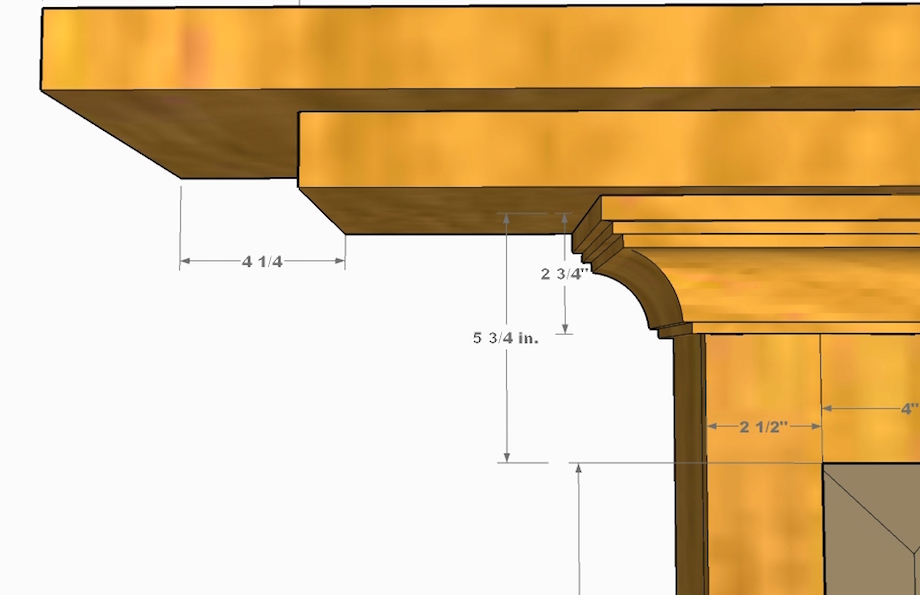 |
The first step was straightening out the mahogany.
| At the time I wrote this article I didn’t have a planer in my shop, so I used a sled with a couple toggle clamps. I took all the stock off my truck and ran it through the table saw immediately, so I’d have clean straight boards to work with. | 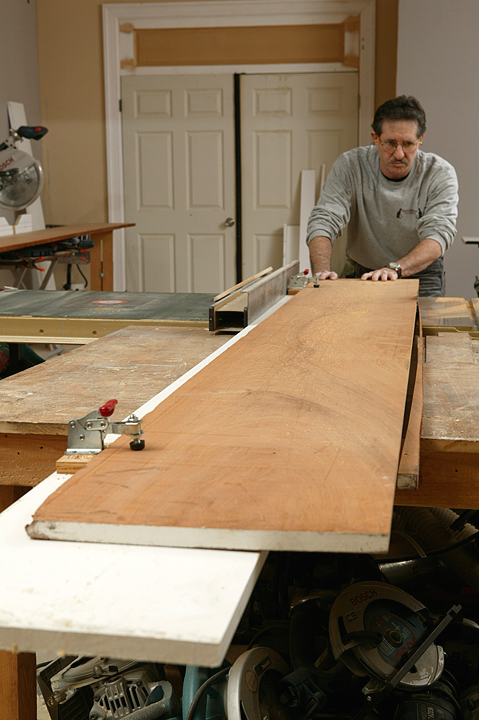 |
Layout was the most time-consuming part of the job, though I’d done the hard work during the drawing stage.
| I knew I’d be building this mantelpiece several times during the year, at JLC LIVE shows, so I made sure the angles on the cloud lift and on the sun rays were standard and consistent—22 1/2 degrees, 15 degrees, and 5 degrees. | 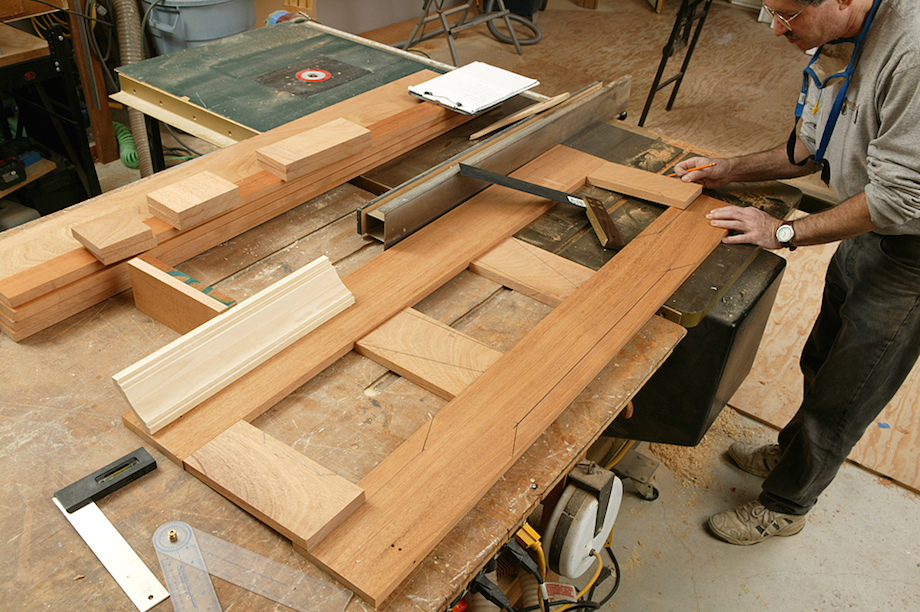 |
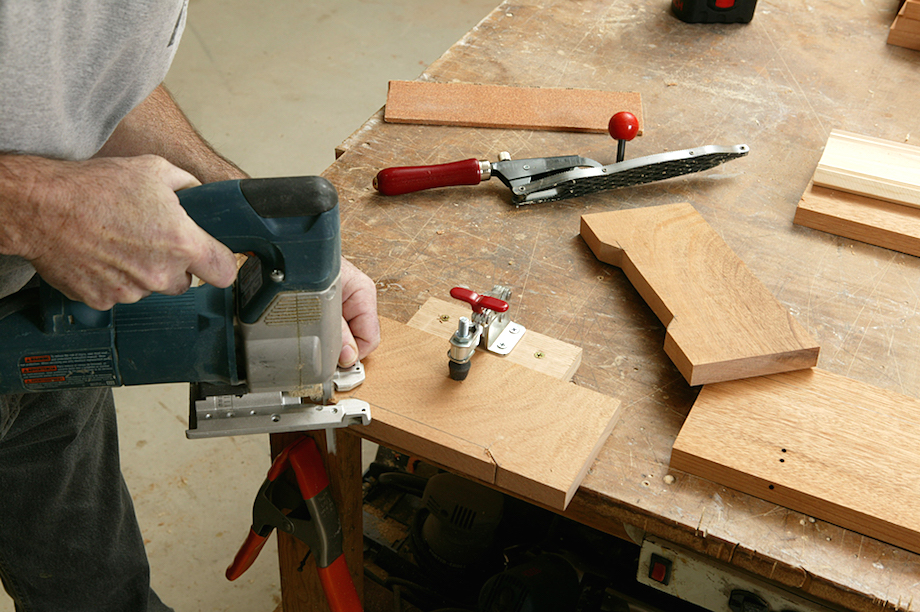
I cut the cloud-lift patterns with a jig saw, then straightened and cleaned the cuts with a Shinto saw rasp (a gift from Jed Dixon).
 |
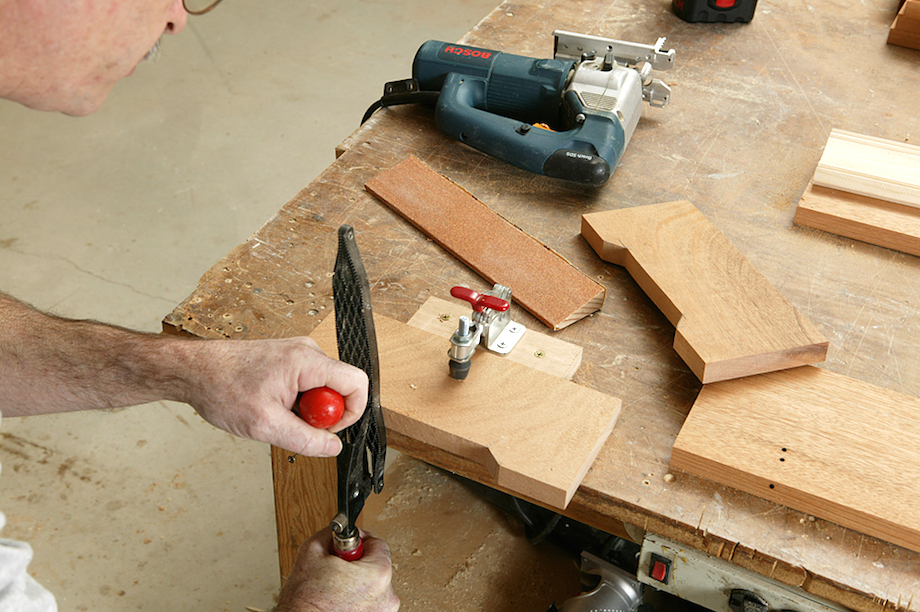 |
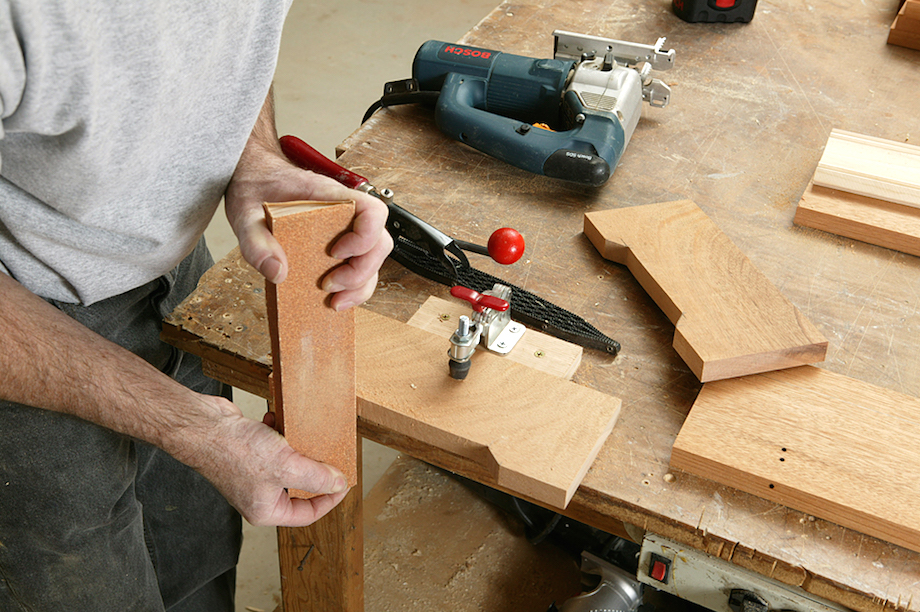
A few licks with a shop-made sanding block, ripped at a severe bevel, kept the lines sharp. For the sun rays, I screwed a toggle clamp to a scrap board, which I also clamped to the saw, so I wouldn’t be tempted to cut the small pieces while holding them with my hand.
 |
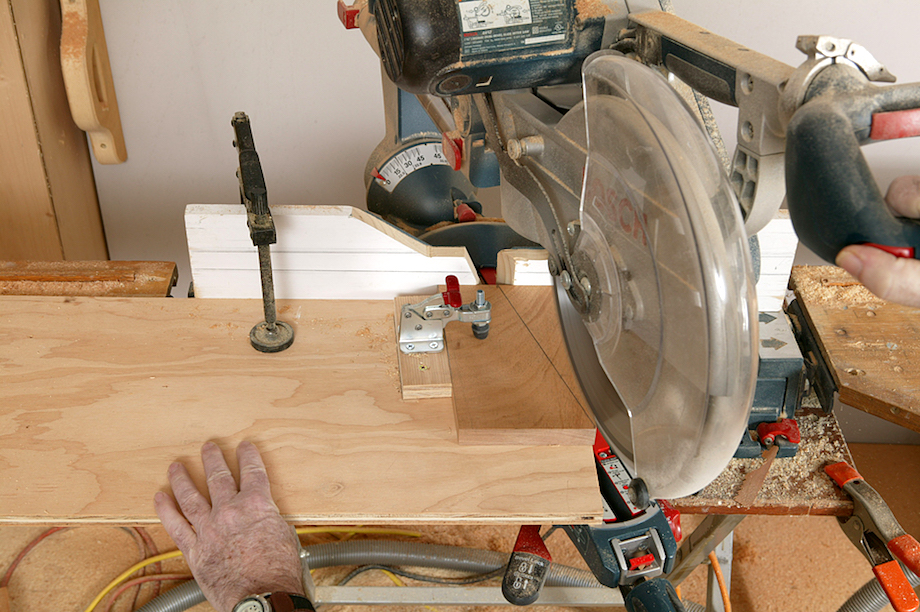 |
| Toggle clamps are handy on the work bench, too—attached to 3/4-in. plywood feet, you can screw them down anywhere, then clamp a workpiece in place with one hand. I used pocket holes to assemble all the parts, so I wouldn’t have to wait for glue to dry. | 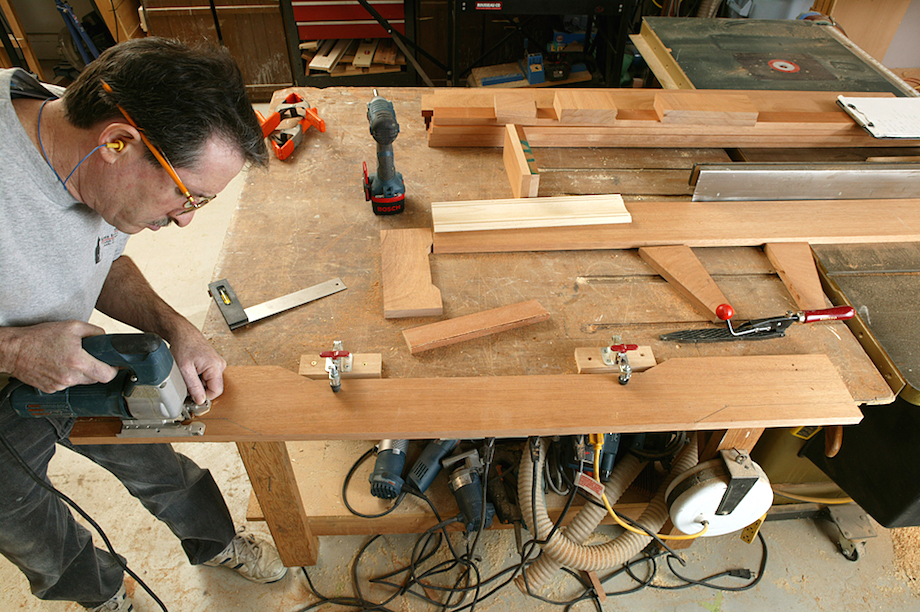 |
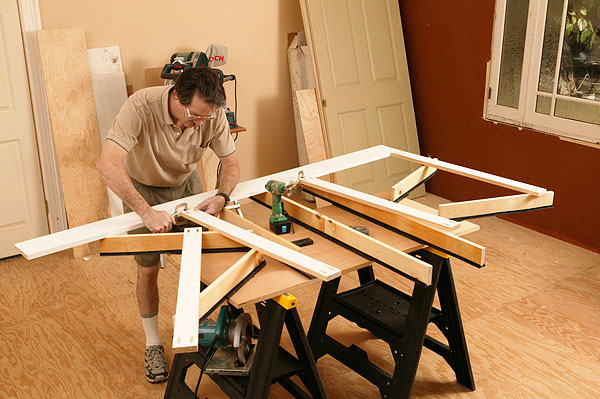
I used an ingenious lay-up table for assembling face frames. Manufactured by Eureka Zone, the uprights are attached to plastic guides, similar to drawer guides, so you can slide the uprights out to catch wider face frames and still have a small-footprint lay-up table. The end guides are attached with a single bolt, so they also rotate to support longer face frames.
| The bottom of the face frame is exposed to view from beneath the mantelpiece, so I eased that edge on the face frame, as well as the edge of the 3/4-in. x 1 1/4-in. back-out frame. You’ll see more of that in a minute. | 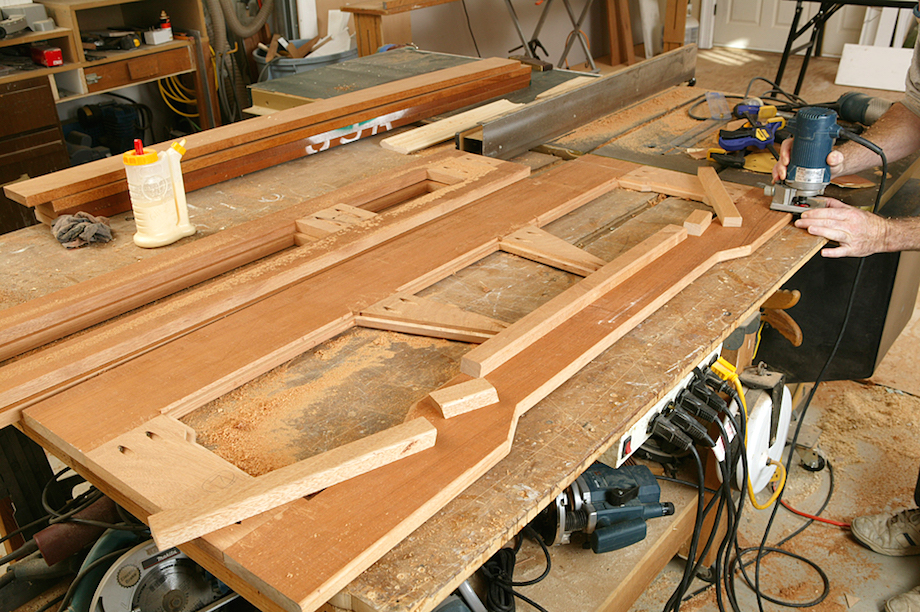 |
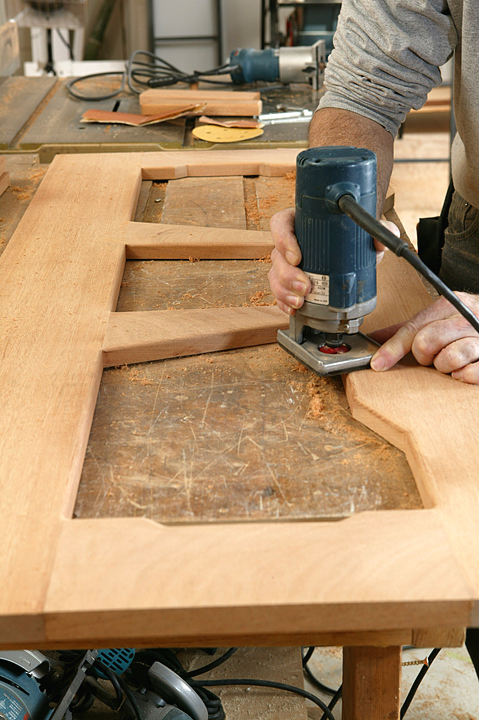 |
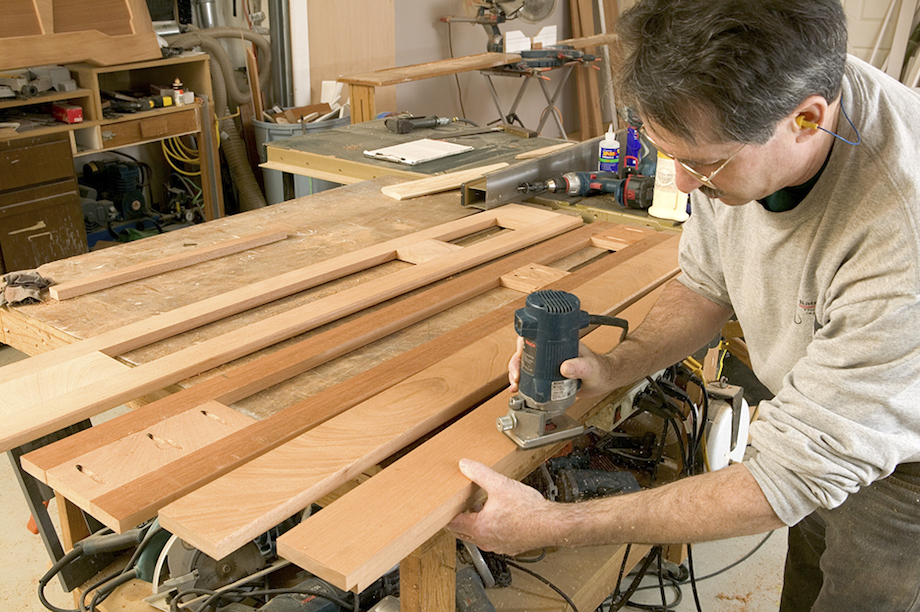
While I had the laminate trimmer with the round-over bit in my hand, I eased the front edges of the frieze, too, then touched up the acute angles with sandpaper. |
| Next I used a router with a rabbeting bit (the shoulder cut is determined by the size of the bearing), and cut a 3/8 x 1/4-in. deep rabbet all around the frieze openings. | 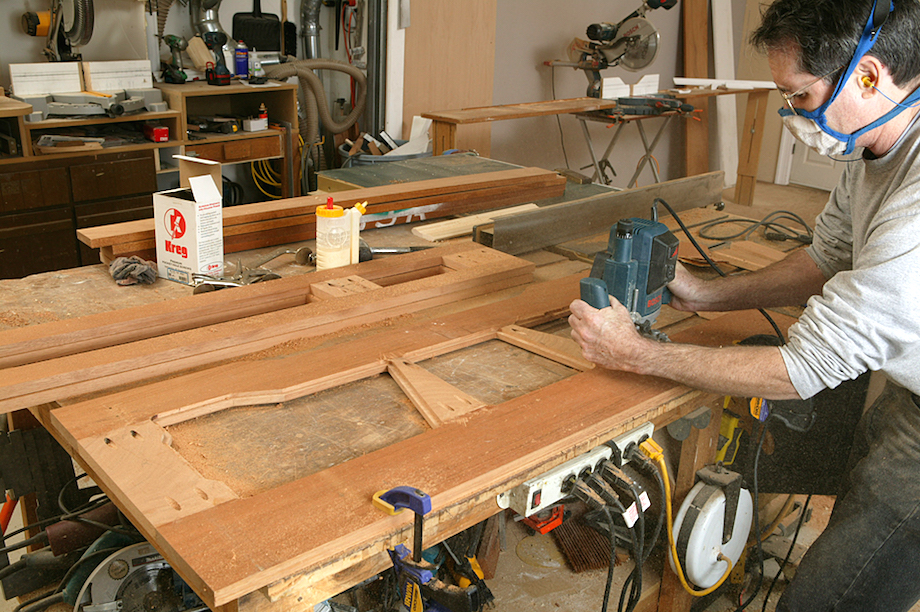 |
| The router left a radius on every corner, and wouldn’t even get close to the acute angles. I finished up all the corners with a sharp chisel. | 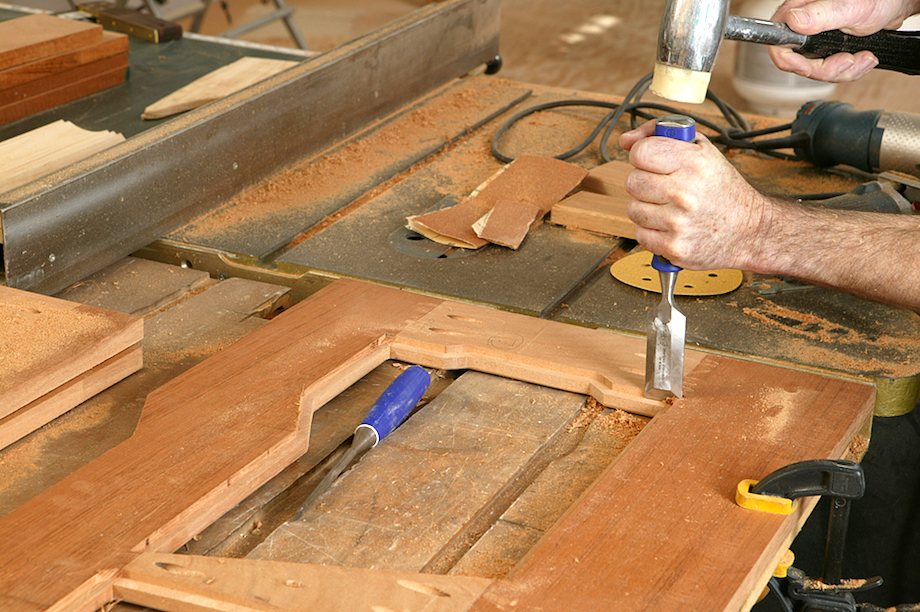 |
| I wish I’d learned how to use a protractor with my miter saw years ago. It’s the least expensive and most accurate tool you’ll find for reading angles. | 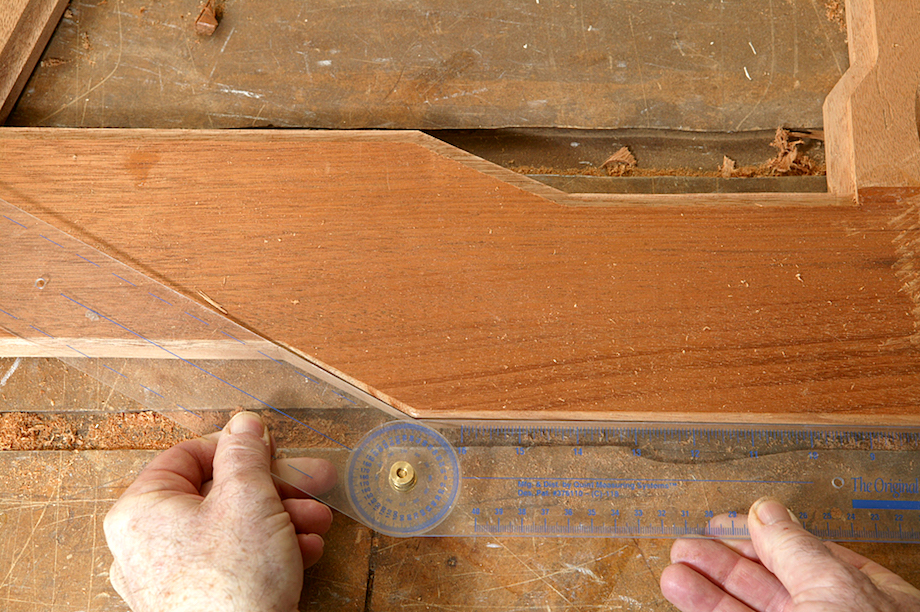 |
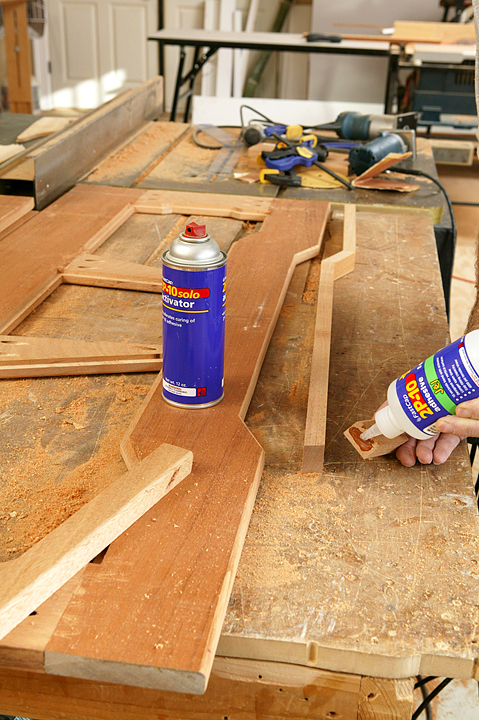 |
Use a Sharpie to note the correct angles on your miter saw—at 0 write 90°, at 10 write 80°, at 20 write 70°, etc., and you’ll be able to use a protractor, too. I cut all the pieces for the back-out frame and fastened them with 2P-10. |
| Just before I was about to fasten that frame to the back of the frieze, I realized I’d better trace the panels first. | 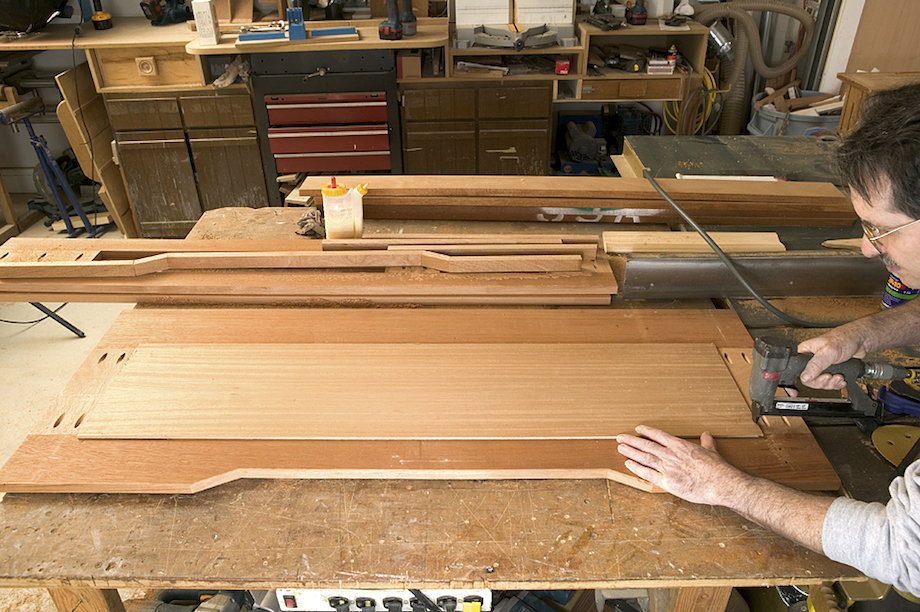 |
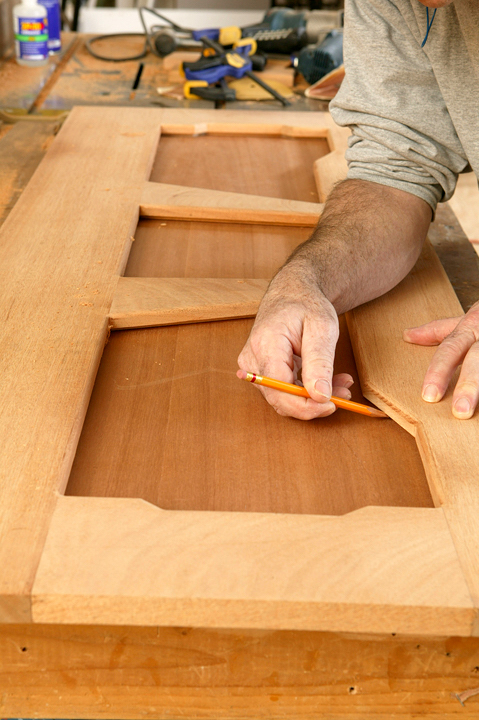 |
I stapled the 1/4-in. sheet material to the back of the frame, cut a long sharp point on a pencil, and traced around the rabbet onto each panel. |
After cutting out the panels with a jig saw, I ran a bead of glue on each rabbet and stapled the panels in. Made from 1/4-in. MDF with a mahogany veneer, I knew the panels wouldn’t expand or contract enough to crack the face frame.
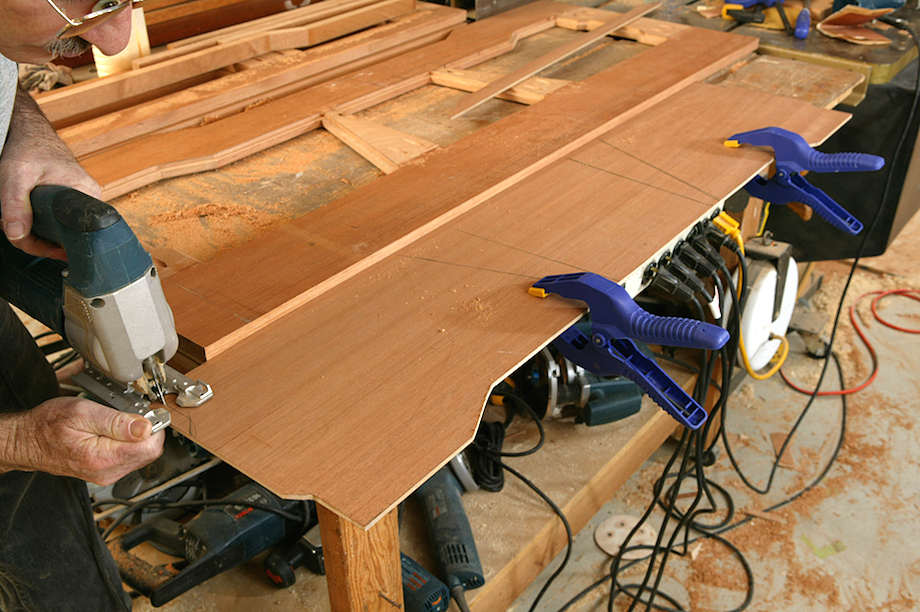 |
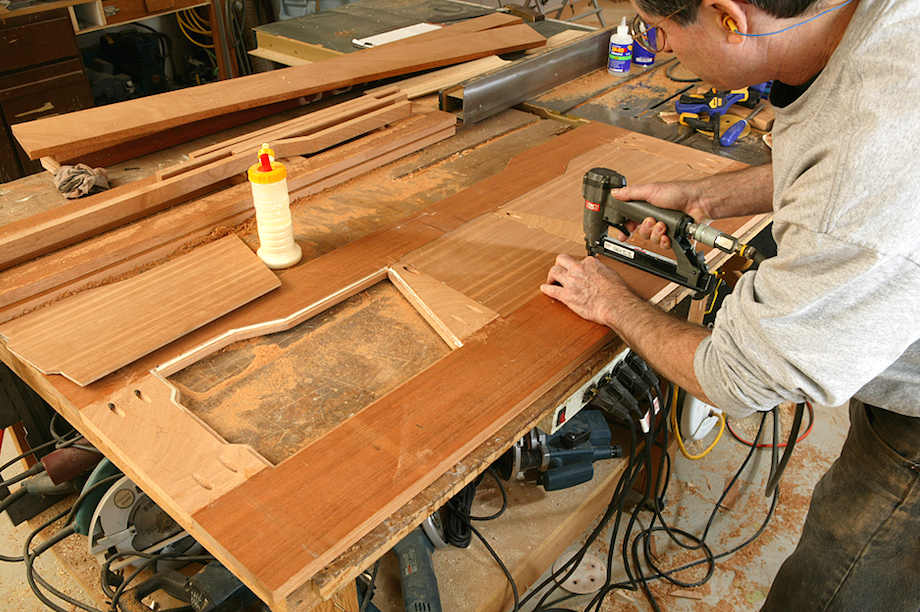 |
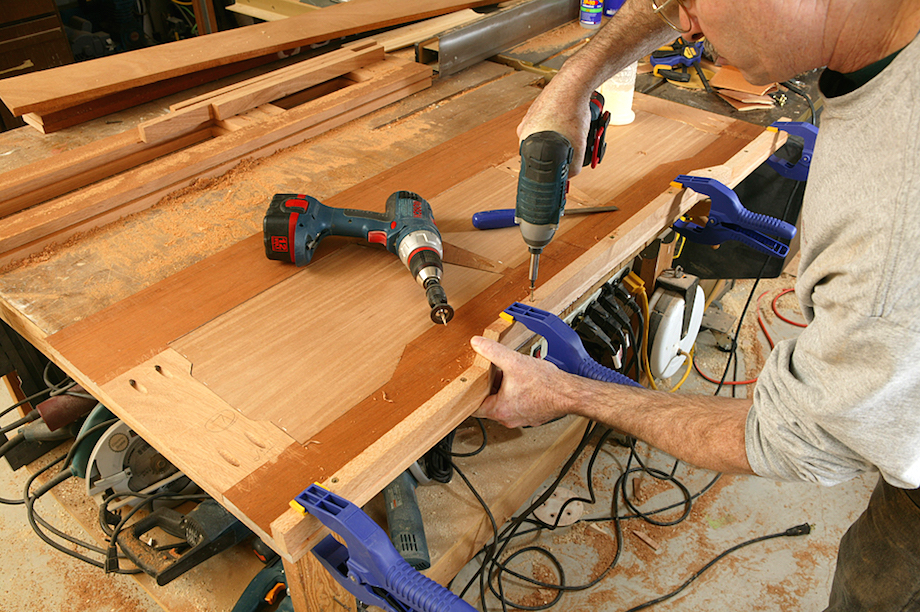
Then I returned to the back-out frame, screwing it to the back of the frieze.
 |
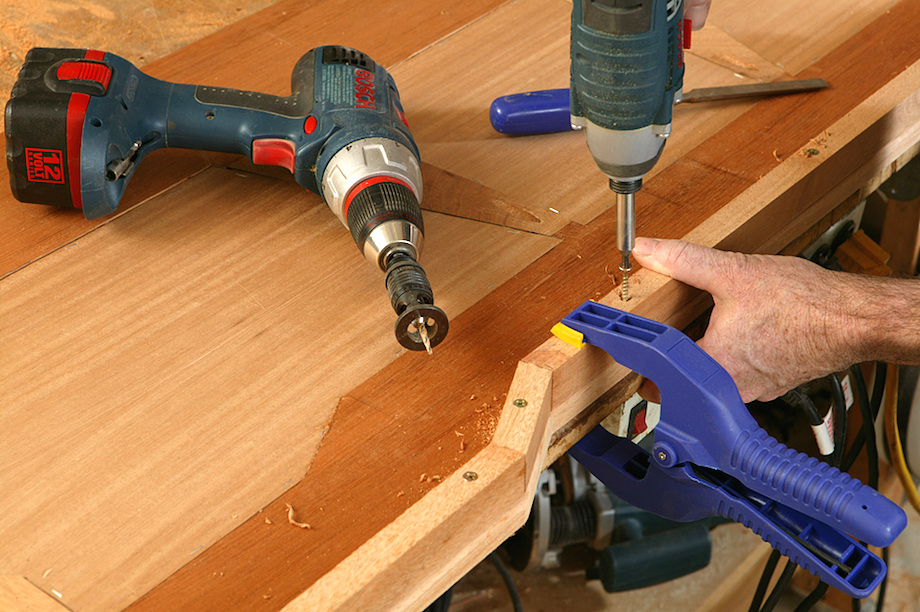 |
The only joints that are visible on the frame are along the bottom edge of the cloud lift. The others are butt joints.
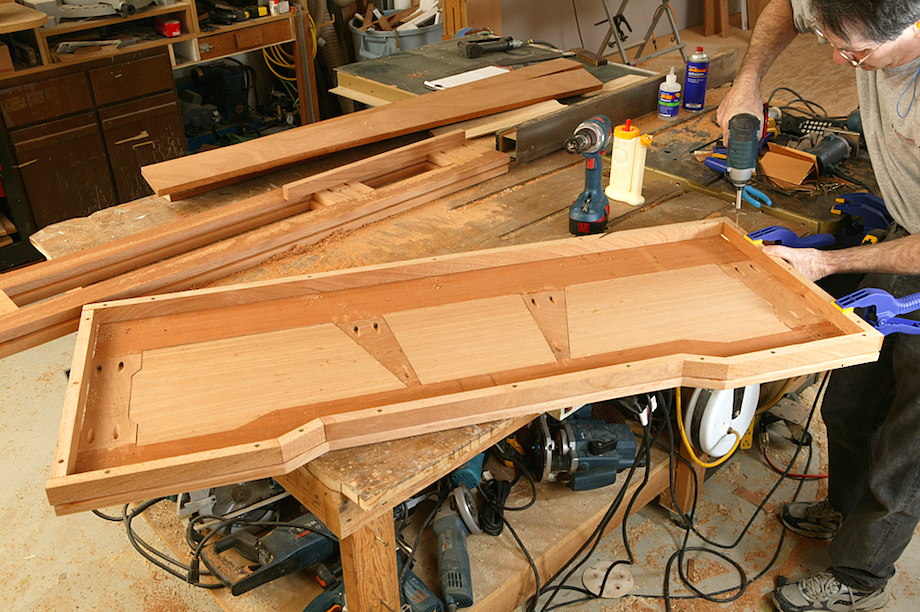
Next came the face-frame panels for the pilasters.
| I eased the back edges of both the face frames… | 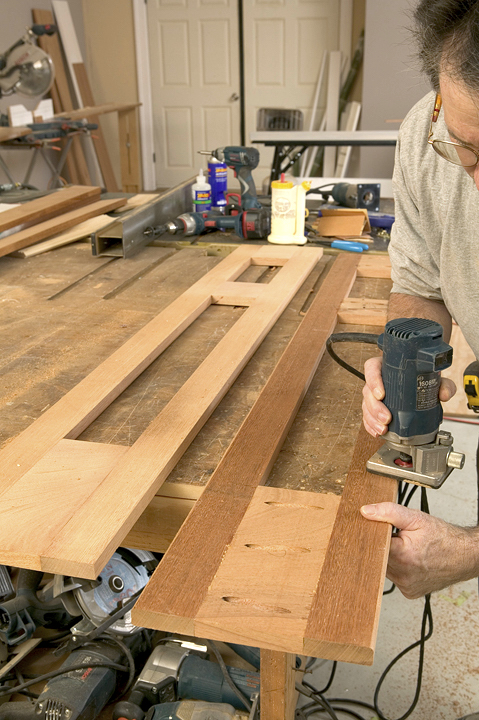 |
 |
…and the side panels that butted into them. |
To highlight the diamond-shaped pilaster panels, I used a 45-degree chamfer bit on the inside edge of the pilaster frame before applying the backing to each frame.
| Look closely at the photo and you’ll see the scrap block I placed at the top of the frame, so the chamfer cut would end before the rail. | 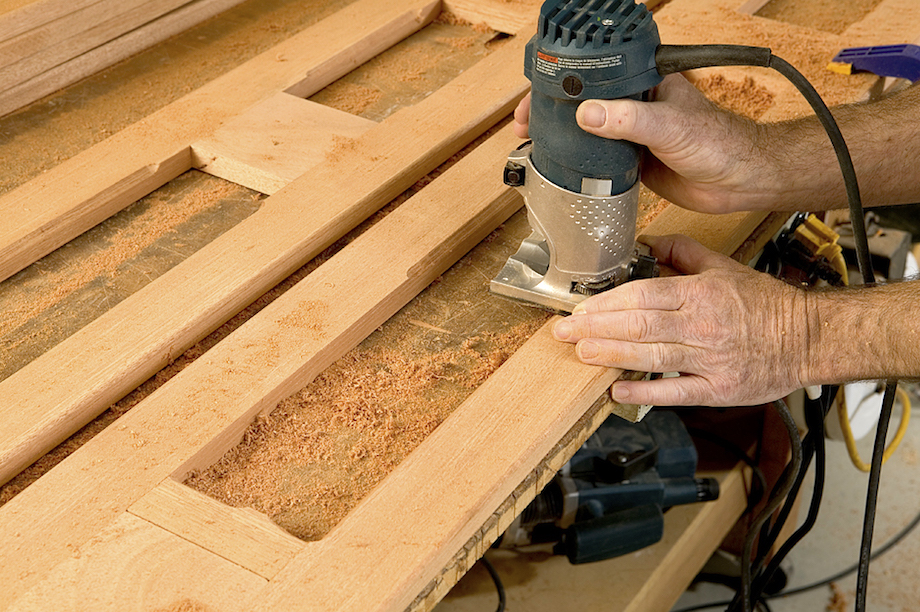 |
| Two scraps of 3/4-in. mahogany stock helped center the backing. Clamps held it in position until fastened with screws. | 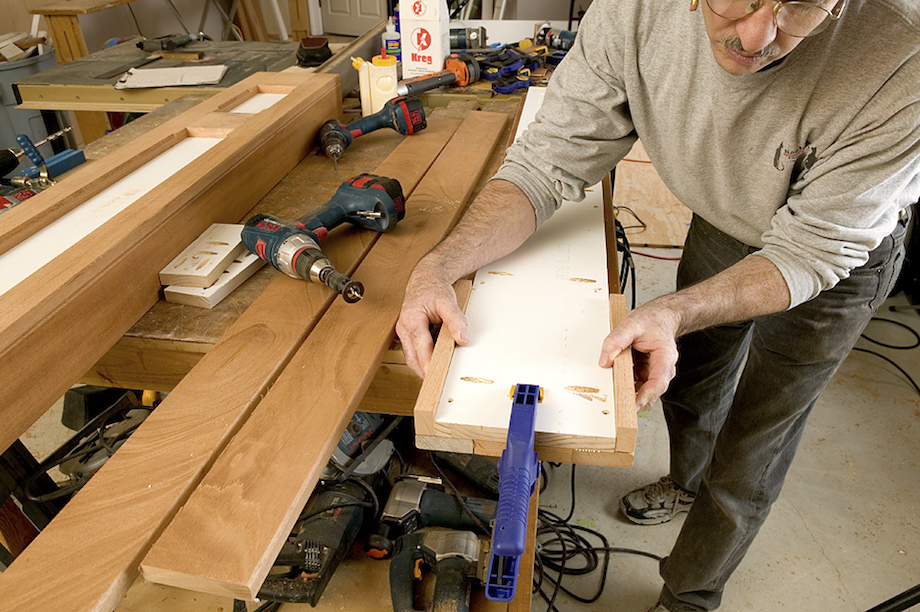 |
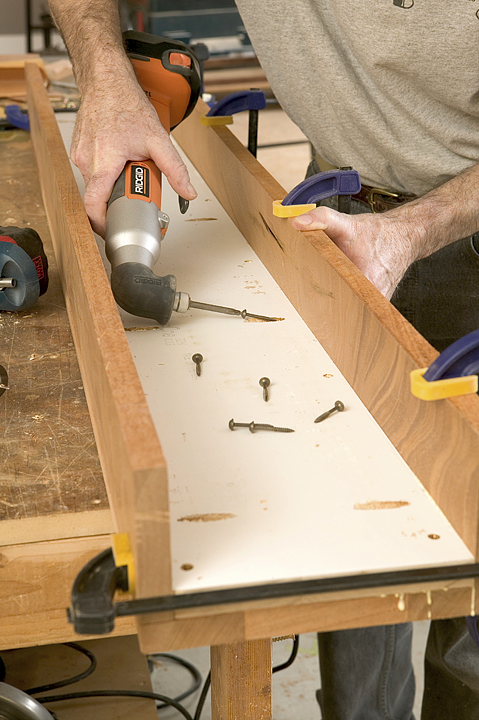
I used a Rigid right-angle impact driver to attach the sides to the pilaster, from inside the hollow frame, so no fasteners would be visible. You can also fasten the sides to the backing first, then screw the backing to the face frame, and save $200.00 on the right-angle impact driver.
 |
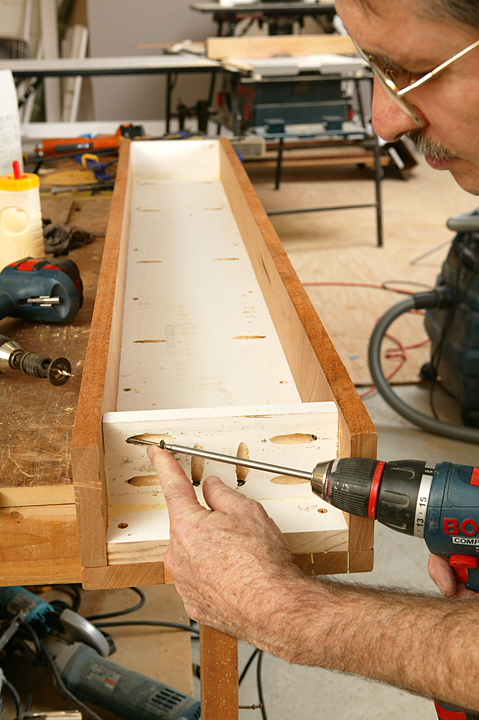 |
Blocks at the top and bottom of the pilaster ensure a perfectly square column. Hold the bottom block up off the ground so that it won’t interfere later when it’s time to scribe the pilaster to the hearth.
The top block should be flush, providing fastening for the mantelshelf. Clamp the frieze to the pilasters, then fasten them together with screws.
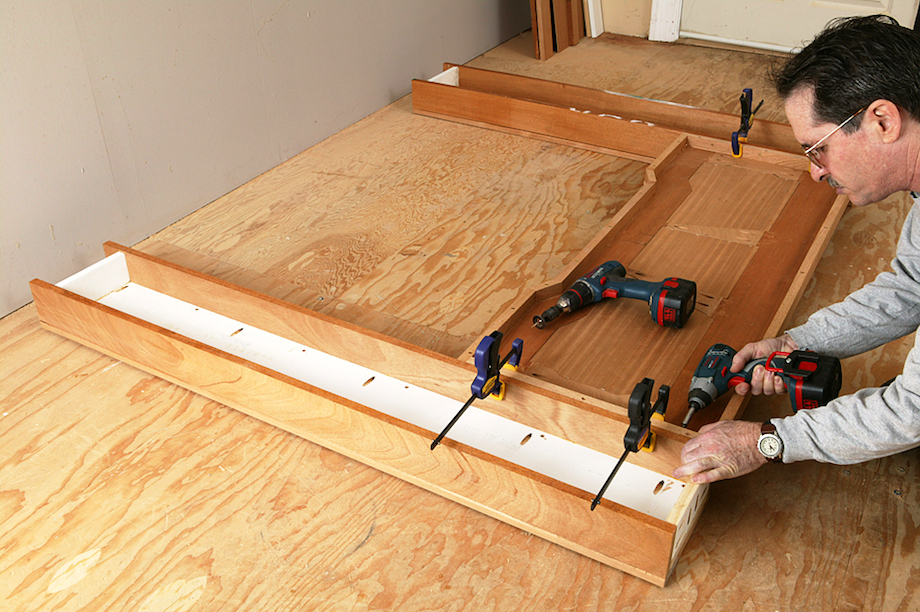
| After fastening, be sure to mark registration lines across the pilaster and frieze, so they can be disassembled for transportation to the jobsite… | 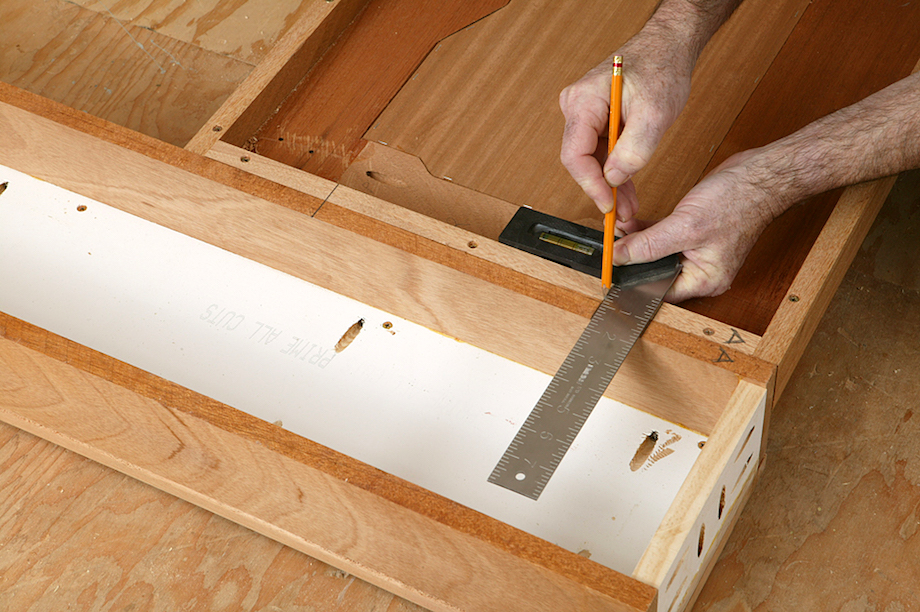 |
| …and then reassembled in exactly the same position before mounting the mantel to the wall. Scribing the pilasters and the mantelshelf to the wall is easier if the pieces are separated. | 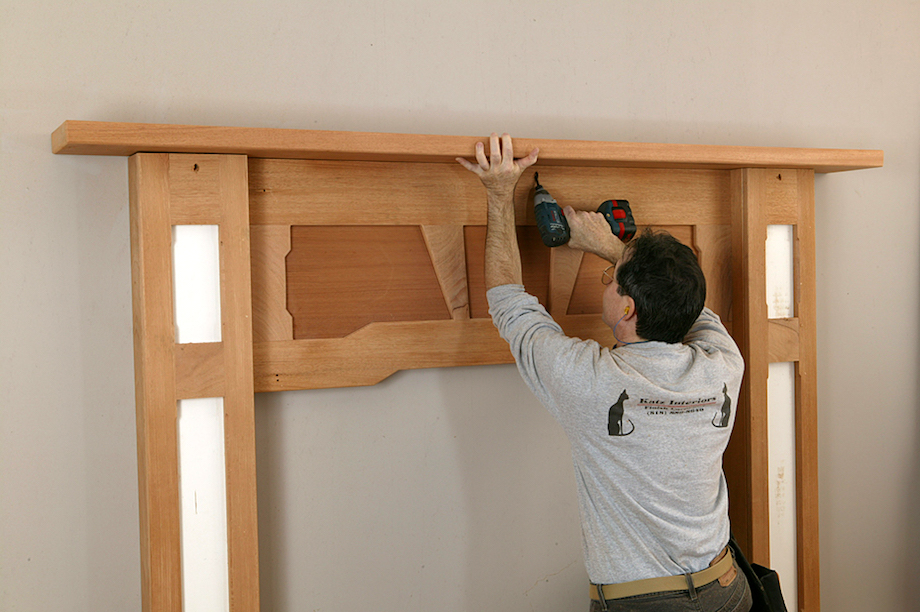 |
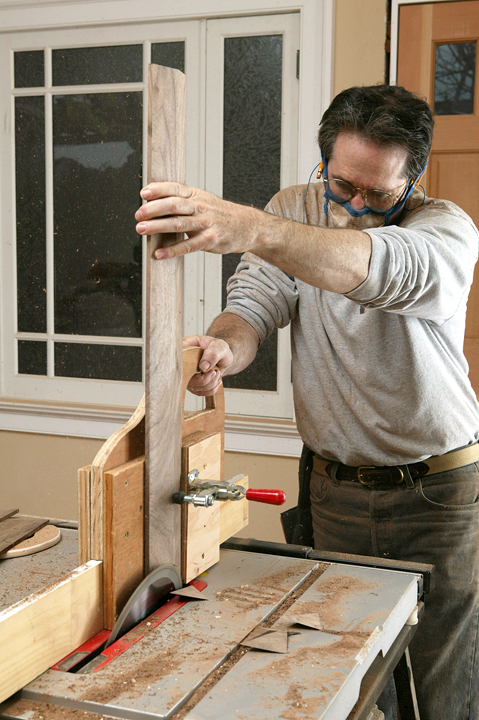
| I cut the diamond panels on the table saw and used a homemade tenoning jig for the end cuts. | 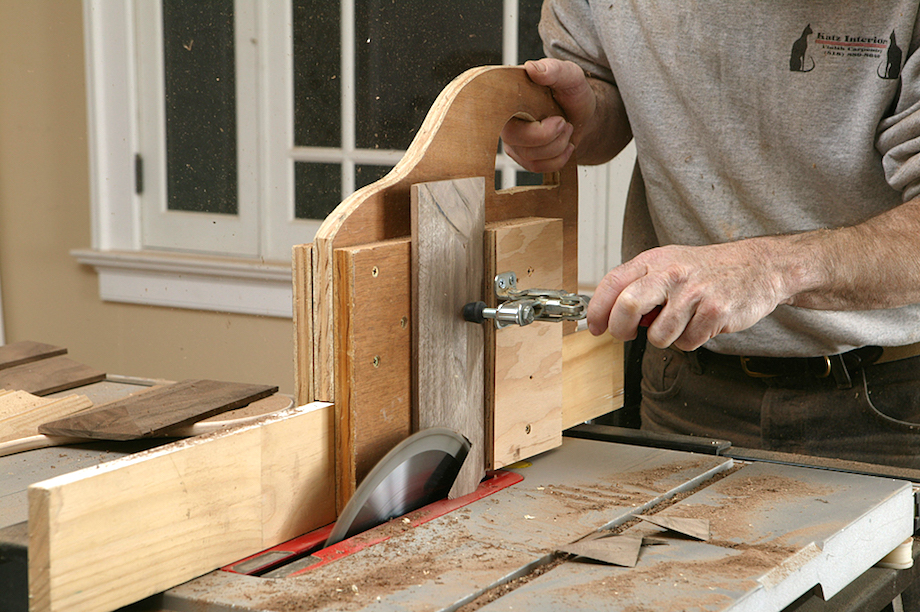 |
The jig is just a simple U-shaped fixture that rides on the top of the extension fence screwed to my rip fence. Even tall pieces are easy to handle once they’re clamped in place.
 |
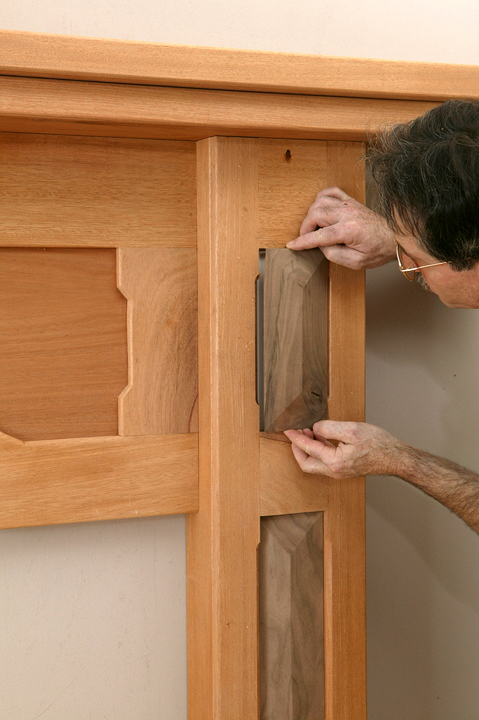 |
The walnut added good contrast to the mantel.
Making the crown
| After ripping the crown blanks to 4 in., I cut 45-degree bevels on both edges. | 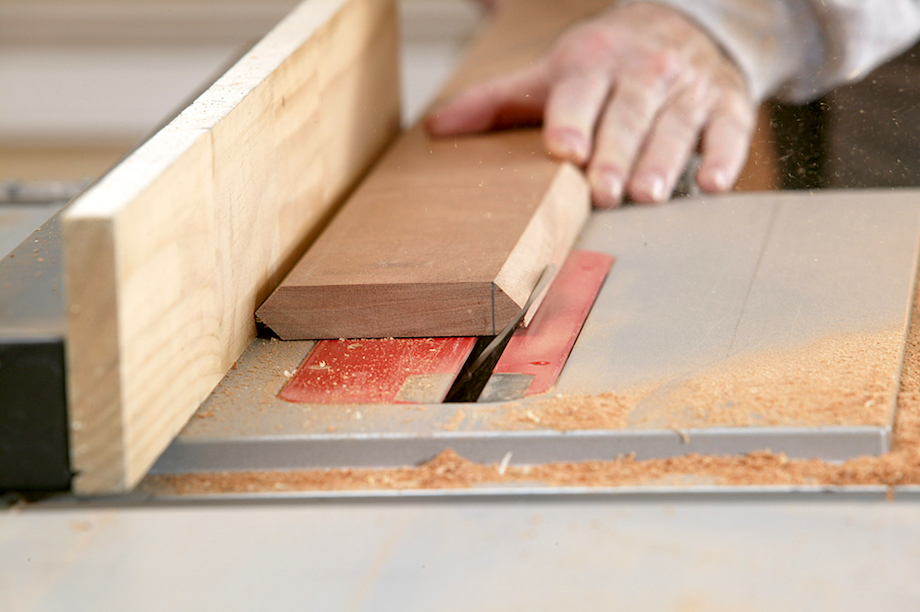 |
| I traced a line 3/8 in. back from one edge, then set the rip fence so the heel of the bevels would daylight at the line. | 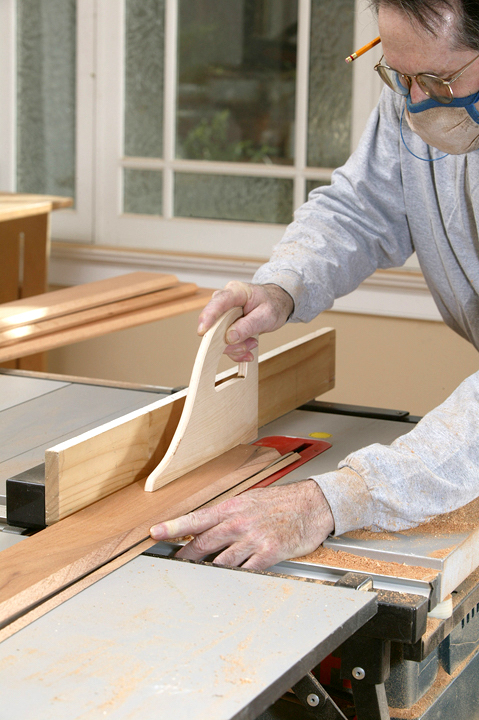 |
Next, I cut the rabbets that formed the crisp fillets. With a dado blade set 1/4 in. wide and 1/4 in. above the saw table, I adjusted the fence so that the first rabbet would intersect the heel of the bevel. I flipped the board to cut the second rabbet.
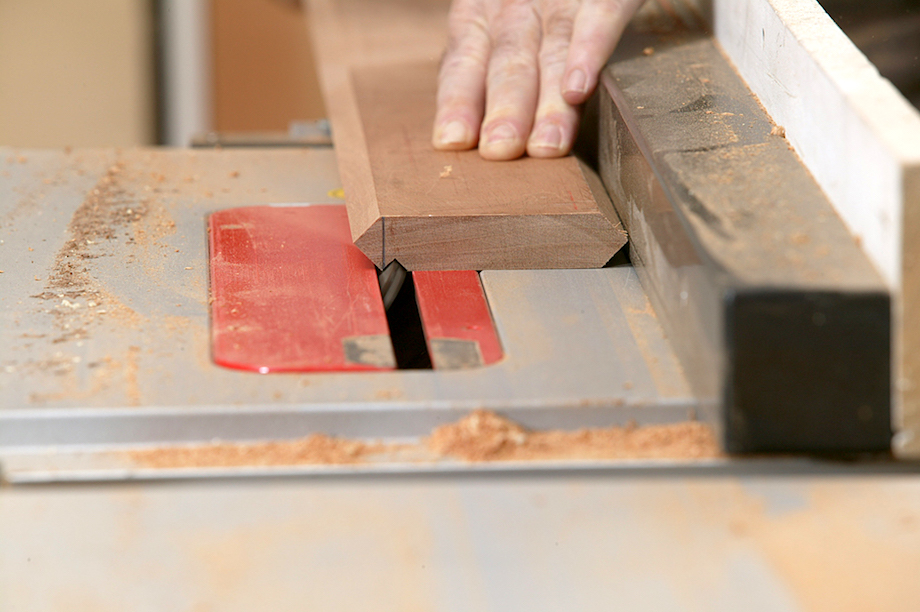 |
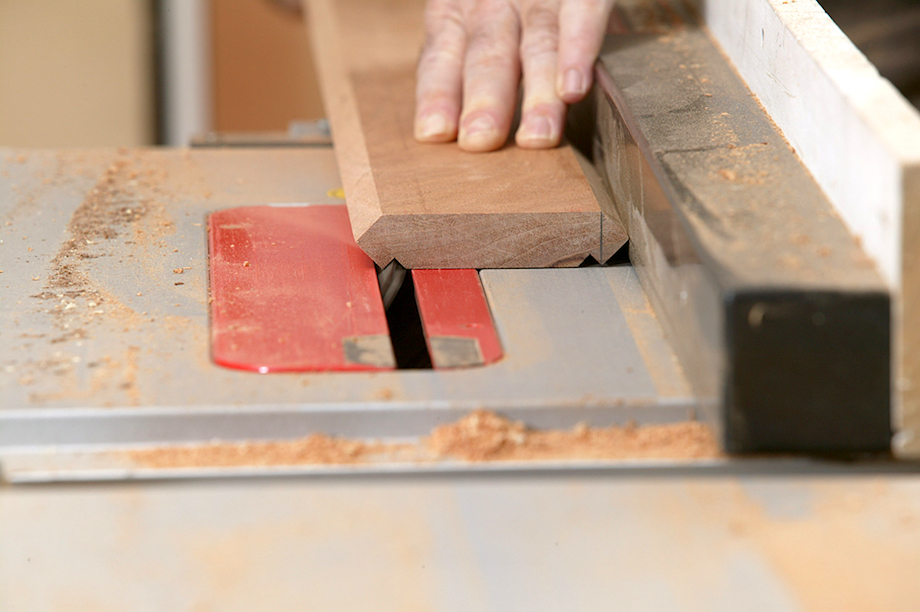 |
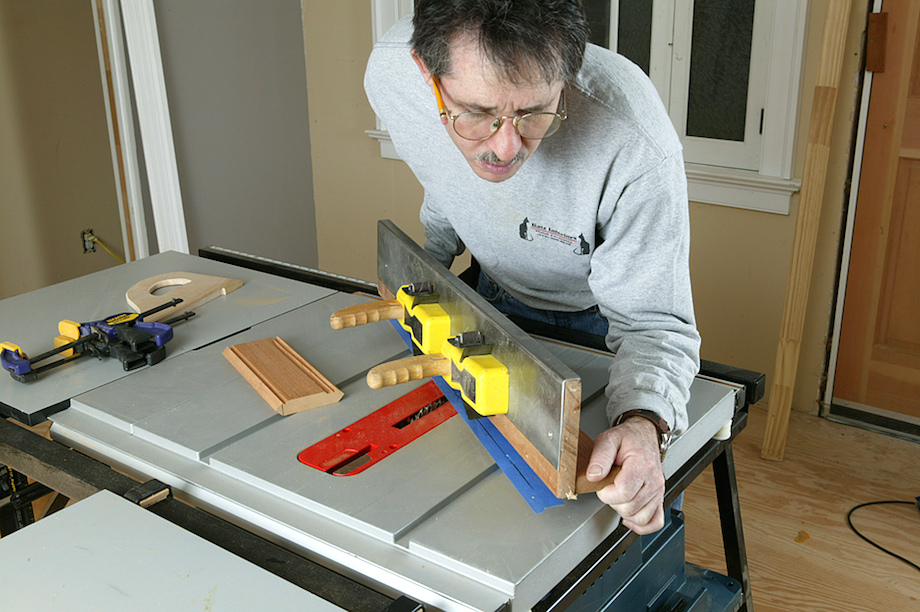
I adjusted the fence and moved it toward the blade for the second rabbet. After a few tries, I had the cut exactly on the heel of the first rabbet. Then I started in on the cove. An ellipse is a beautiful thing. I’m just beginning to appreciate their value and power. I wanted as deep a cove as I could cut–about 3/8 in. By adjusting the angle of the crown I was able to constrain the ellipse so that the cut came close to the heels of both rabbets.
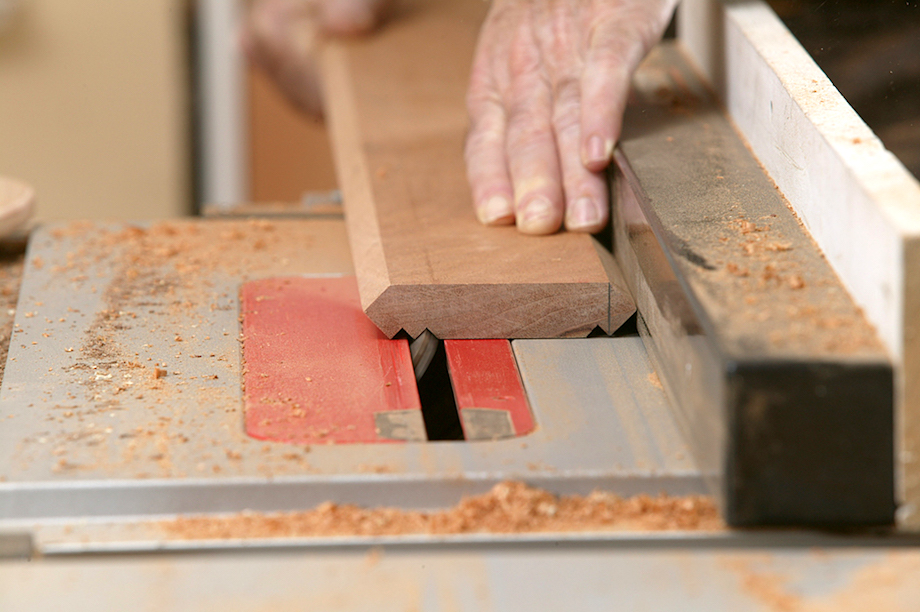 |
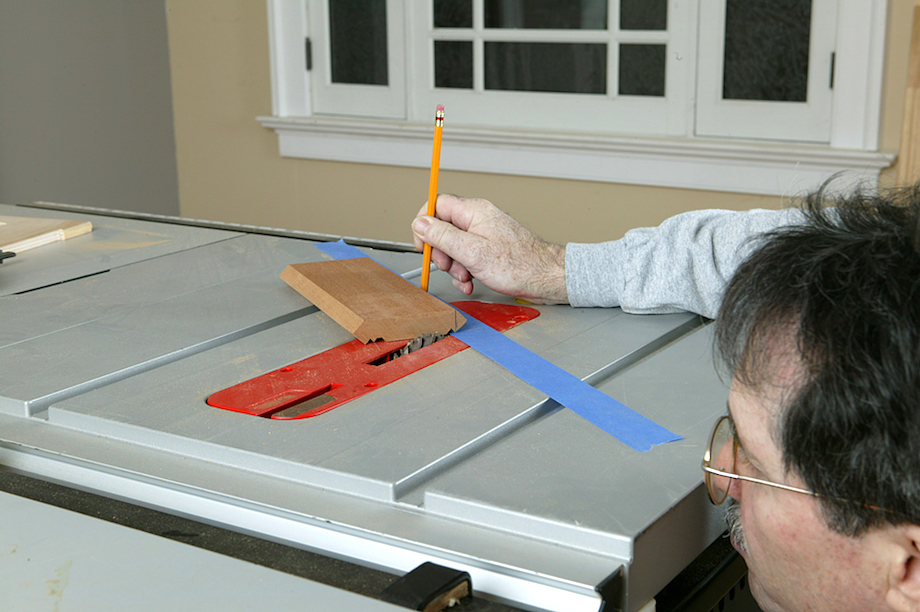 |
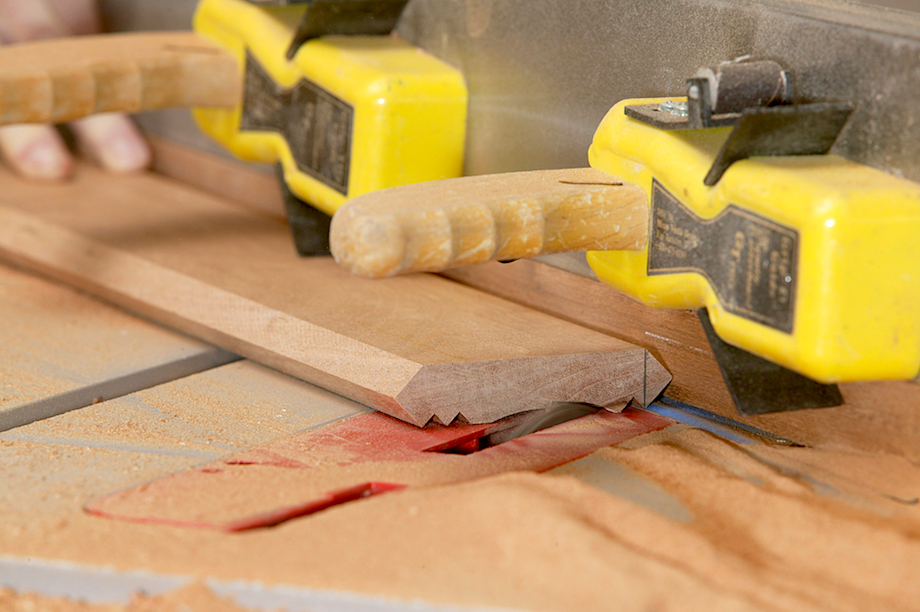
I used an auxiliary fence, fitted with a Grip-Tite hold-down plate, to make the cove cuts. The first pass was shallow. I adjusted the angle of the fence after each cut until the ellipse zeroed out perfectly on the heels of both rabbets.
 |
 |
| By making shallow cuts, the angle of the fence can be adjusted minutely after each pass. | 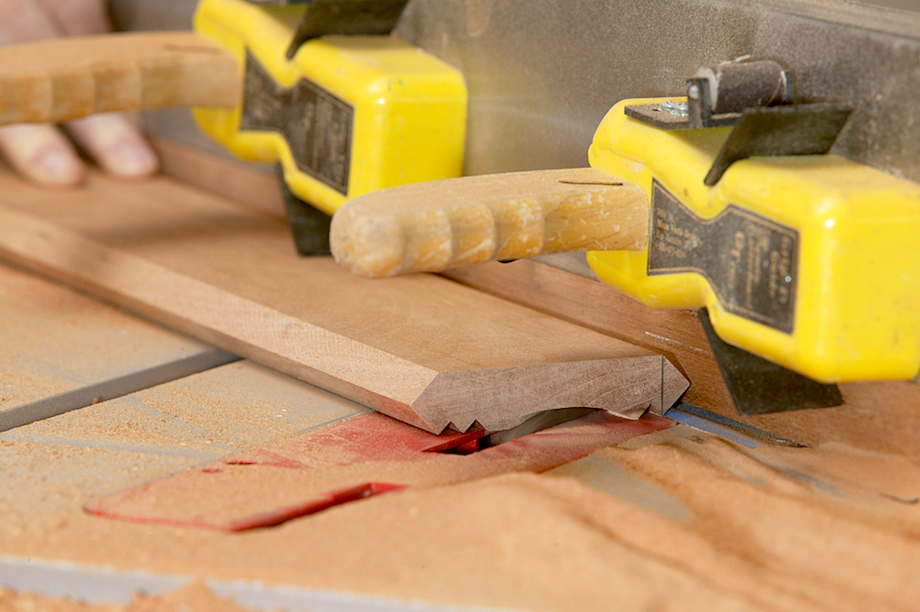 |
| A dust collector would have helped…maybe. | 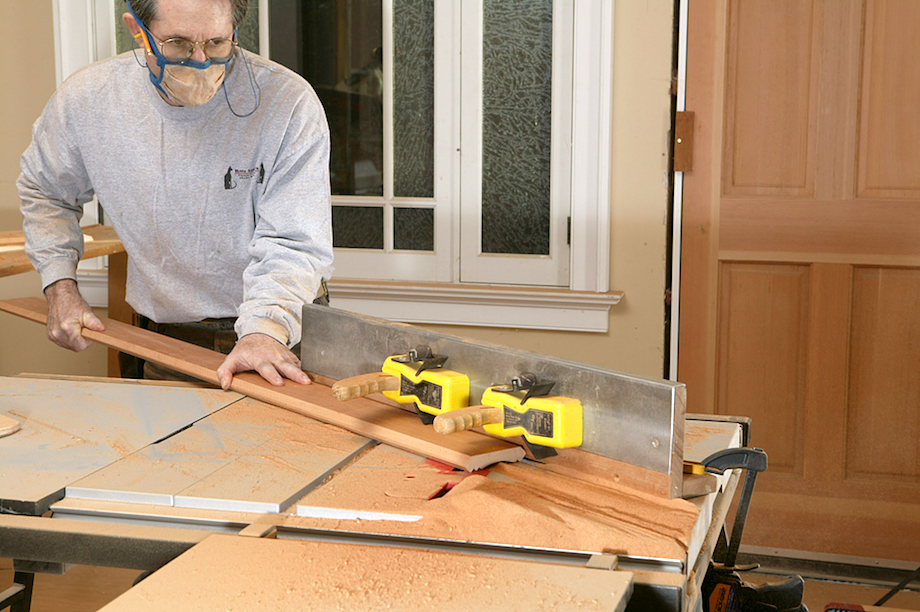 |
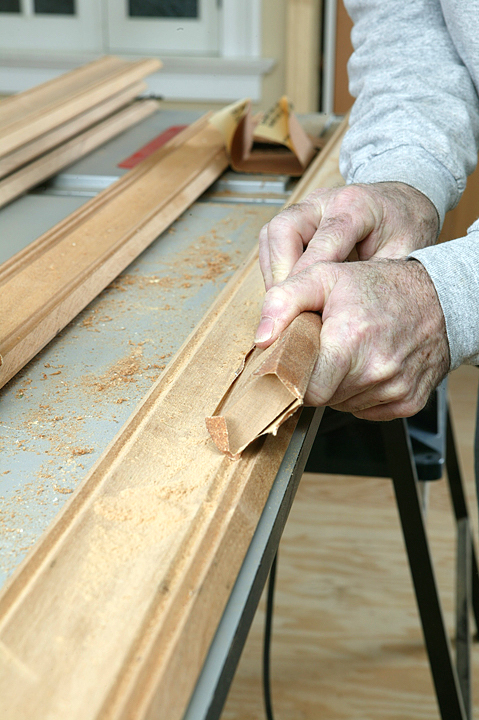
Sanding wasn’t that difficult in soft mahogany. I used a Klingspoor sanding block so I could easily follow the contour of the cove.
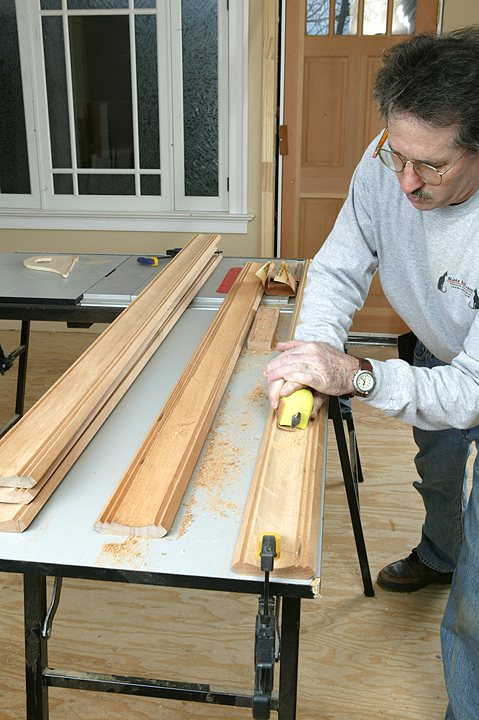 |
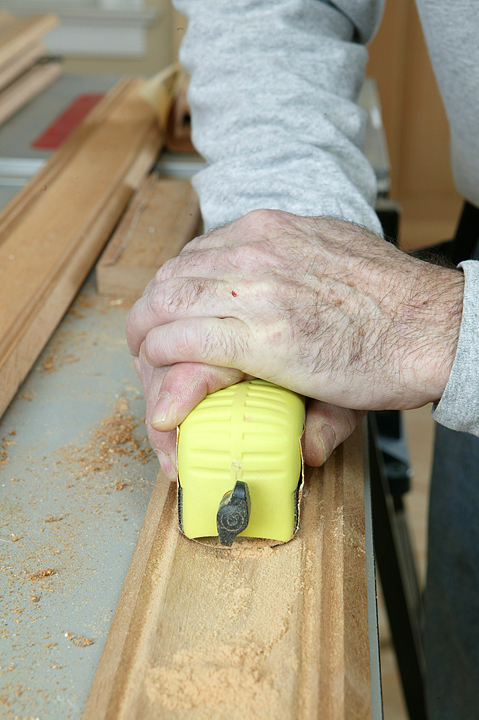 |
Thin plastic sheaves slide inside the handle. Press the sheaves against the workpiece, then tighten the knob. The Klingspoor works well on stair rail, too. To sand the rabbets, I used a sharp-edged sanding block, so the edges of the fillets would be crisp.
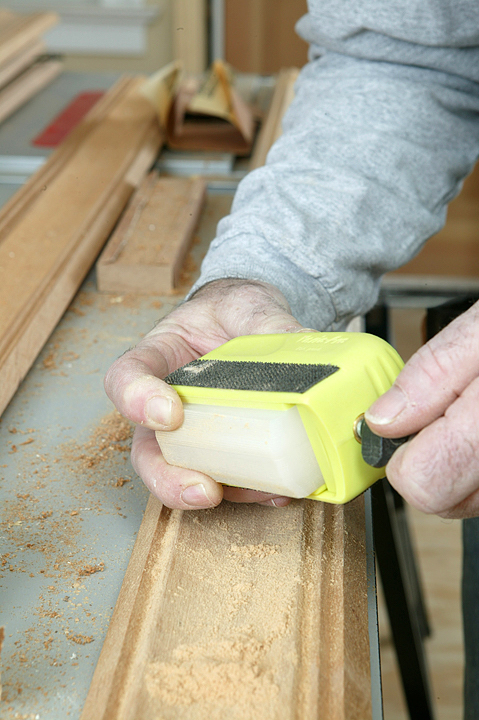 |
 |
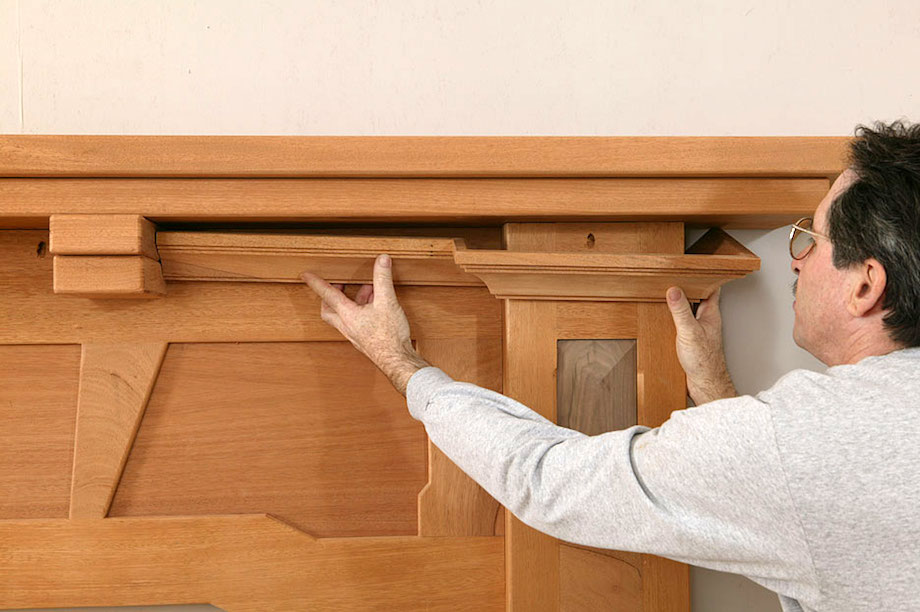
I borrowed the baseboard design from an historic home in Columbus, Ohio (The Sells Mansion). I knew the day I saw that detail I’d use it eventually. At the time, I figured on installing a piece of 3/4-in. stop at the bottom of the wall, to kick the base out at an angle, but then realized the stop wouldn’t be necessary. I approached these compound cuts just like the self-returns on a mantelpiece.
| With the material lying on its face, I first cut the compound miter on the corner of each self return cap. | 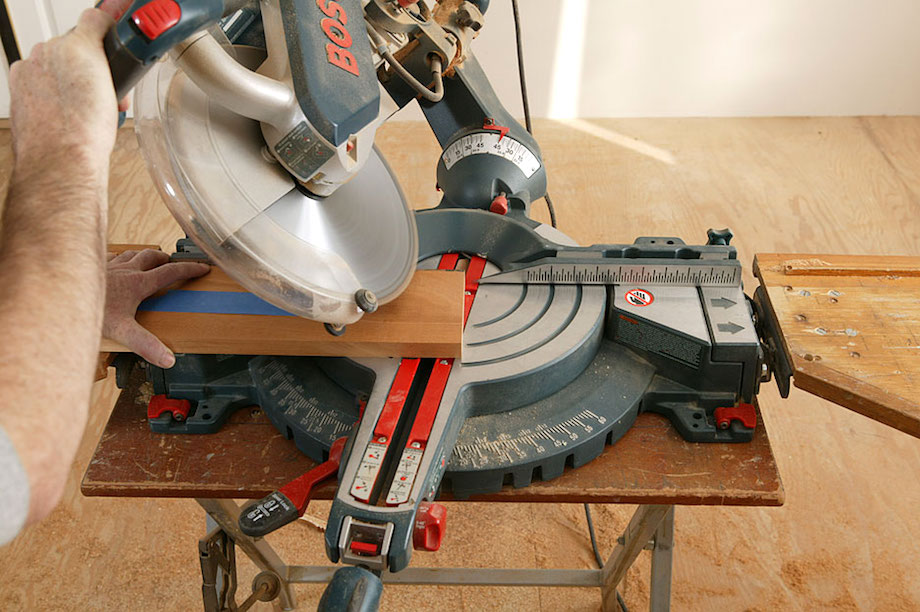 |
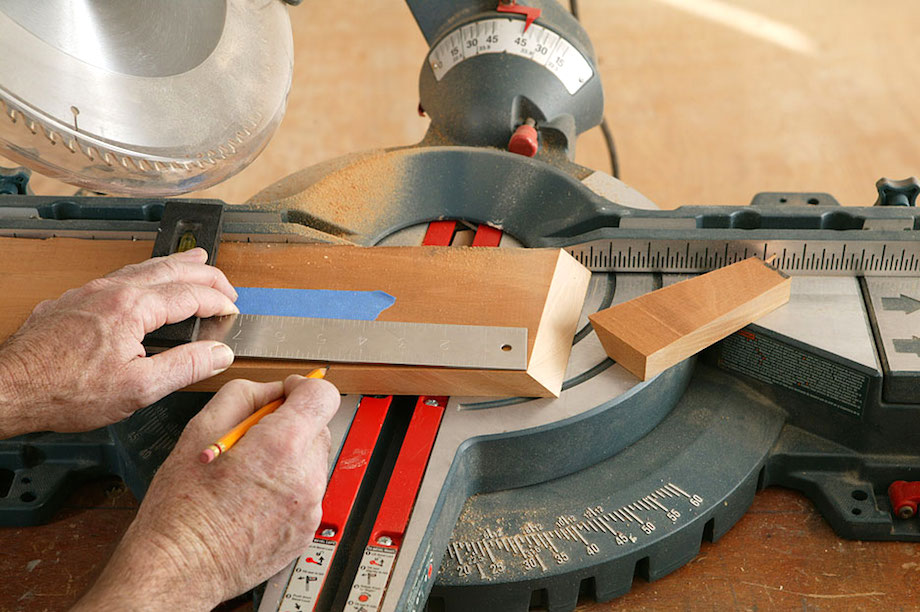 |
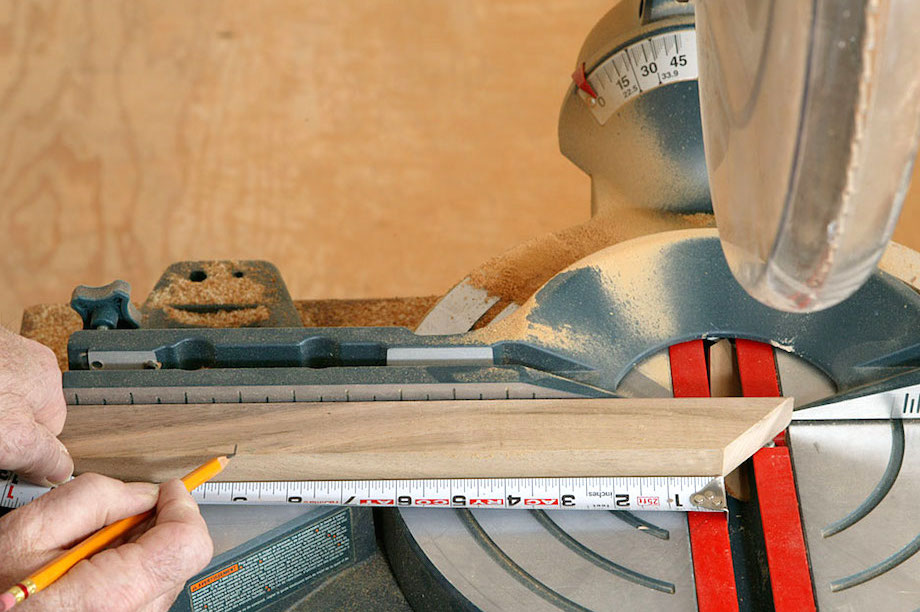
Then I measured 4 in. from the short point—that’s the depth of the pilaster—turned the saw plumb, and cut square through the stock, making the butt cut on the back of each return. |
| Next, I turned the material face up, dropped the saw back to the 45-degree bevel position, and swung the miter to 5 degrees (though maybe I made that 10 degrees—I can’t remember.). | 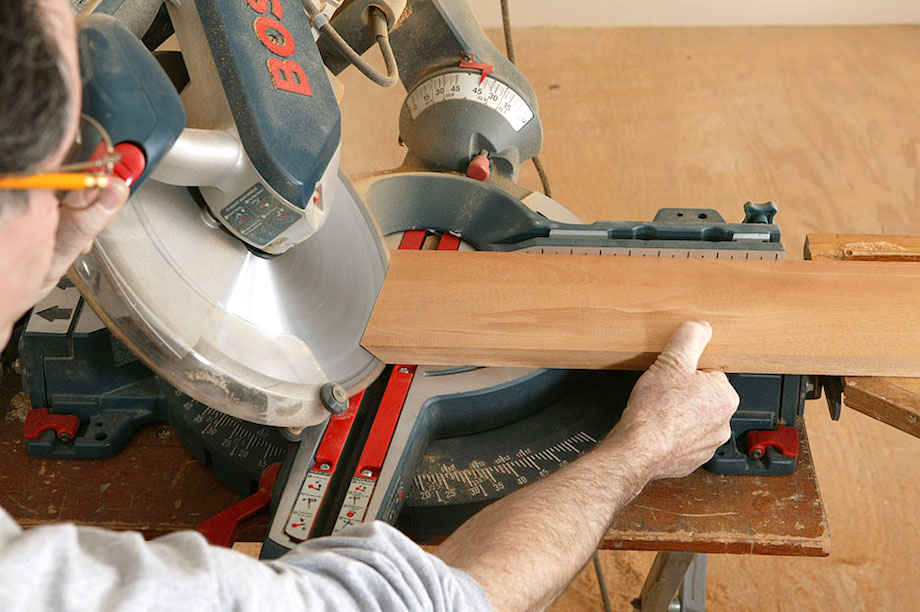 |
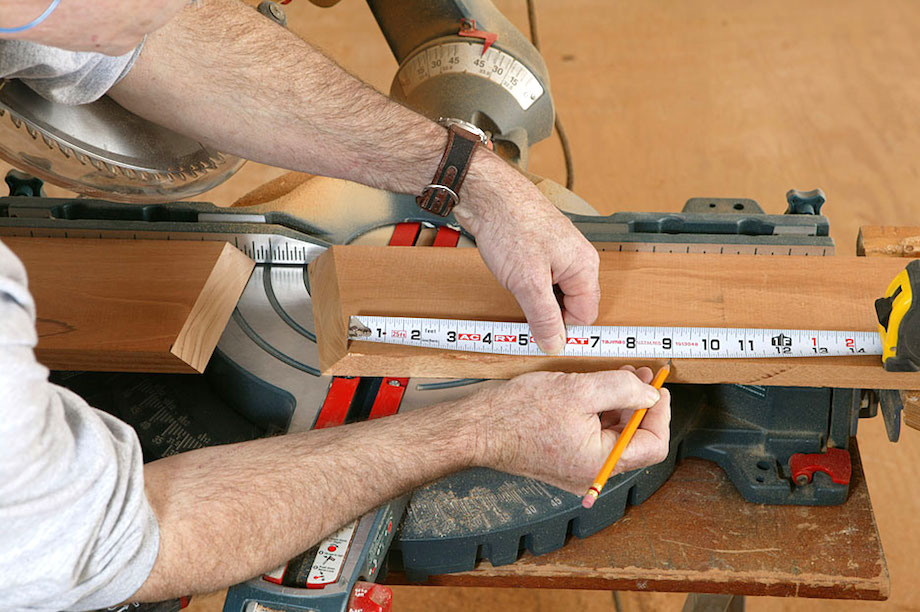 |
The first cut is from the long point, on the face of the material. But by turning the board back over, with the face down, I could measure from the short point of the miter—the pilaster width. |
| Because I flipped the material and was cutting the opposite miters, I didn’t have to change the position of the saw. | 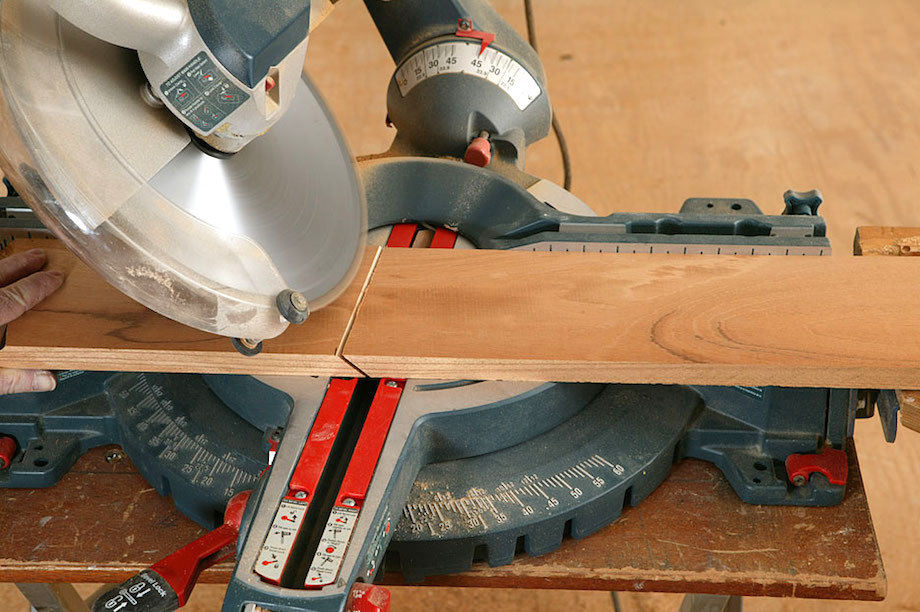 |
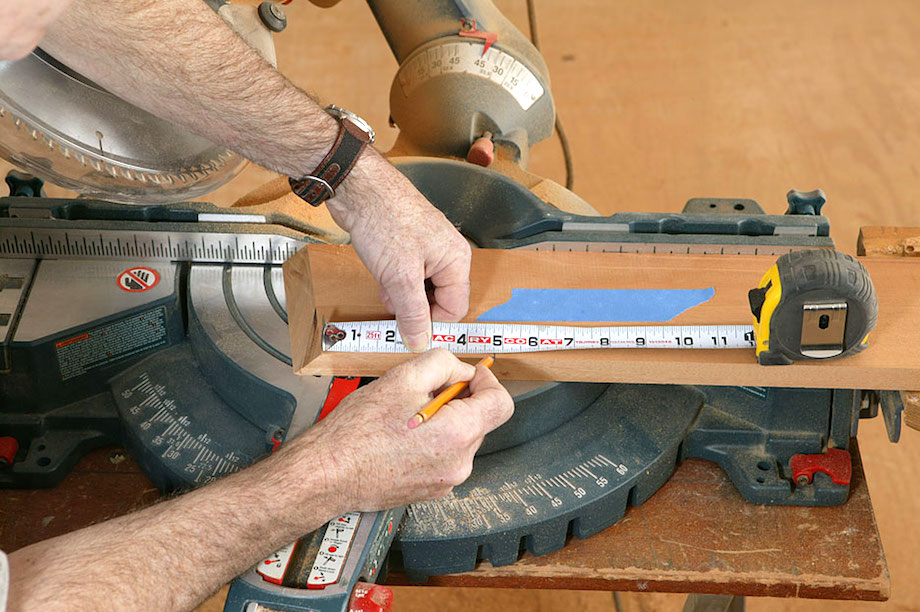 |
Finally, I turned the remaining material right side up (the angle cut was exactly what I needed), and measured over the same 4 in. for the opposite return cap. |
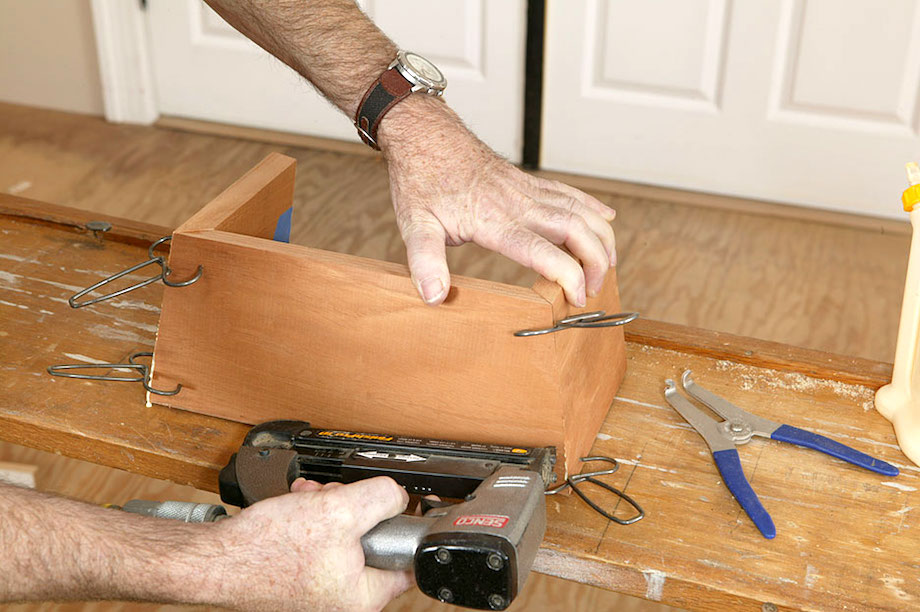
I held the corners with spring clamps and fastened them with glue and pine nails, then cut the scotia molding or base cap. (Although I guess you can’t call it scotia molding if it doesn’t have a radius profile?)
 |
 |
I pre-assembled the basecap, too, and slid the pieces on individually, so they could be transported from show to show throughout the year without getting damaged.
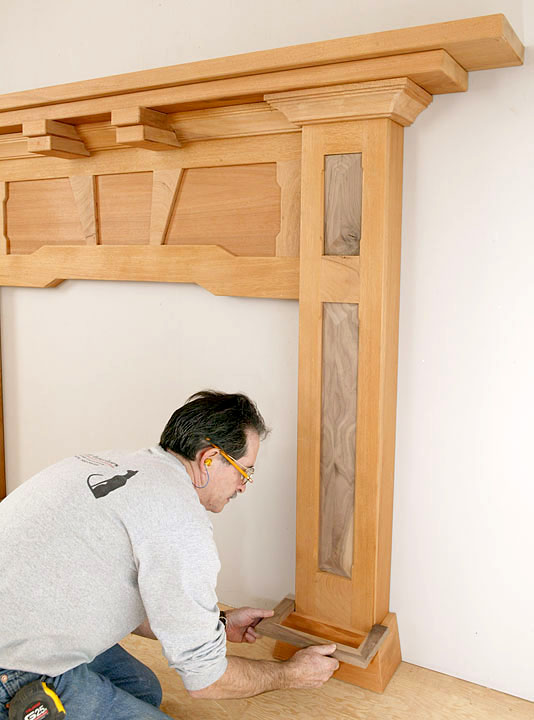
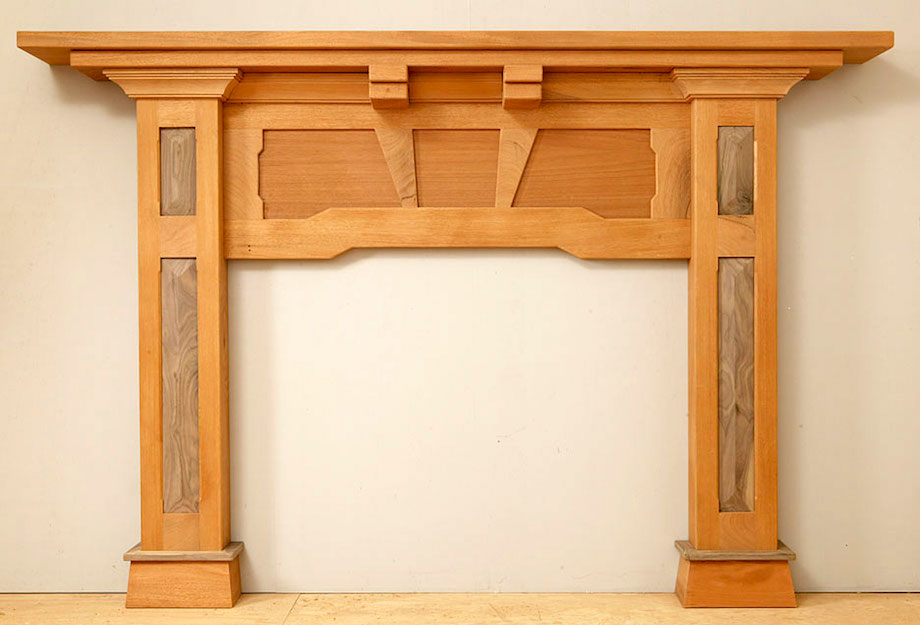
The final result looked an awful lot like the drawing. What a surprise.
Absolutely Beautiful! And great step by step photos/instructions.
how about some final install and finish photos?
How about you scroll up through the comments. I posted two more photos the other day. :)
Gary
is this the finished and installed fireplace…found the photo and later found your article which seems miraculous. Don’t think it was posted anywhere as you may have thought it was….whew, it’s so beautiful cannot believe how much work it is..i thought my husband might be able to tackle it but wow……maybe not. it would be perfect in our home…i gave you the website for our home…we are going to move back a wall and add the fire place – take away the wood burning stove. thanks so much for sharing…
Well, no, that’s NOT mine but the design is! :) That’s a nice one, though, huh? Thank you for sharing that! It appears that one is made from alder and birch plywood–at least from what I can tell, and walnut panels in the pilasters? The one I built was made from mahogany. But this one look very good especially with the arts-and-crafts tile slip. Very nice indeed. But looking at all the wonderful photos from your place near Three Rivers, I’d say leave that wood stove and the tile behind it alone! It looks great! :)
Gary
is this yours? ; ) posting in response to this request…
Beautiful work! I love the inclusion of the cloud lift-like detail on the side panels.
I too can’t see the final photos and would love to, as I’m struggling a bit with the dimensions relative to the firebox as I design a mantle for my house. (the comments section says there are three responses, I can only see two) Your mantle opening appears to be 33-1/2″ tall which would make your firebox only 21-1/2″ tall to have the required 12″ clearance from flammable material, assuming 1″ thickness of the mantle at that point. Is that right? I have to figure out a good looking design no taller than yours overall, but accommodating a firebox opening a good 6″ taller.
Absolutely gorgeous! Question: is the center of sunray a square? If so, what are the dimensions. I would like to have my woodworker place a craftsman tile in that space.
No, the center is not square, in fact, it should the inside angle on the sun rays should be MUCH steeper than I made them on that mantelpiece! And I’m not sure a tile would look right in that spot–it’s supposed to be sun rays penetrating a could. Here’s another example, from a shower door I made for my home, taken right from an example at the Gamble House.
HI, I am in a middle of remodel of mission style kitchen and decor and was looking for a fireplace surround. THIS would be perfect might you all sell this as a kit?
My top mantel is a little smaller other than that its pretty close.
I would be interested in purchasing a mantle also
Hi Brian,
Sorry, I don’t make mantelpieces for sale. Usually the installation requires careful fitting and scribing. If you’re able to accomplish THAT part, you should be able to build one yourself!!! ;)
Gary
Gary Katz. Your a master.
What kind of table saw is that looks like mine.
Is it a Bosch?
Great job. Very elegant. Very beautiful