


I love how people can’t resist jumping to conclusions—as if they can’t live without a firm judgment, a conclusion to every question, no matter what that judgment is.
For instance, people always ask me what I do. I tell them I’m a musician. Honest. And every time I say that, without exception, I’m asked: “Can you make a living at that?”
No, I can’t. Few musicians can. But I make a good living as a woodcarver. And I love my work. When I tell people that, they always respond with shock, as if there’s no connection between music and wood.
(Note: Click any image to enlarge)
Nonsense. Working wood is a lot like making music. Like music, with its foundation of harmonious notes and chords, meter, rhythm, melody and tempo, woodworking has a certain structure, a history of design going back thousands of years. Ignore that history, through laziness or hustle, allow incomplete design into your work, and the result will always be dissonance. Like music, there is symmetry to woodworking—a tone followed by feel and by ear, the direction of the grain, the angle of the cut, the sharpness of the tool.
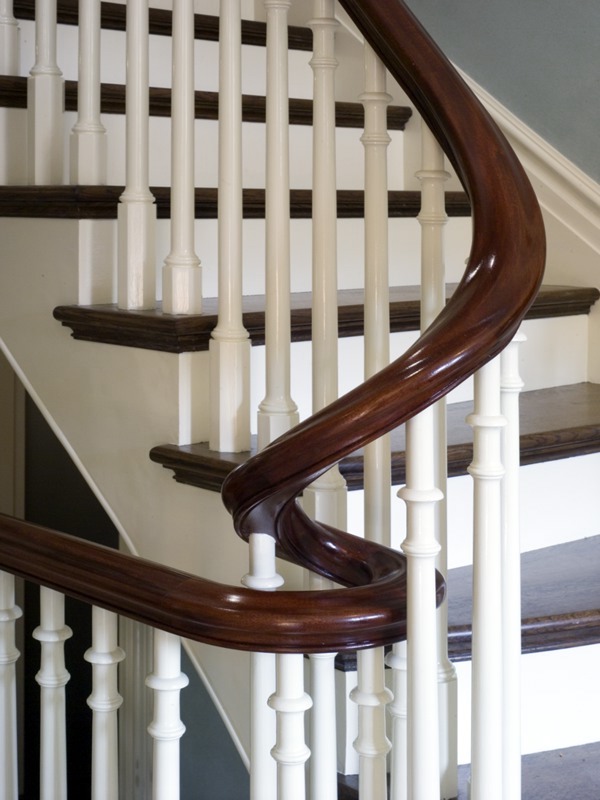
When I tell people I’m a wood carver, that I also make my own instruments from wood, they often assume I’m a luddite—that I do all my work by hand. There’s another rush to judgment. Nonsense. Like I already said, I make a good living as a wood carver. I couldn’t do that, couldn’t meet a deadline on a set of stairs, couldn’t carve a handrail—then three more for the upper flights of stairs in a brownstone, all by hand and still put food on the table, pay the mortgage, send the kids to college, etc.

But that doesn’t mean I do all my work with saws, routers and grinders. In fact, woodcarving is the perfect blend of hand tools and power tools—the marriage of past and present. Ignore that marriage, skip the hand-tool work, and more than likely the best details, then sometimes the entire coda, sometimes the whole bridge, are missing.
I’ve never met a CNC machine that can come close to producing the work I cut by machine and carve by hand, by eye, and by heart.
A lambs tongue template
Oh…sorry, guess I went off on a tangent. But I’m back.
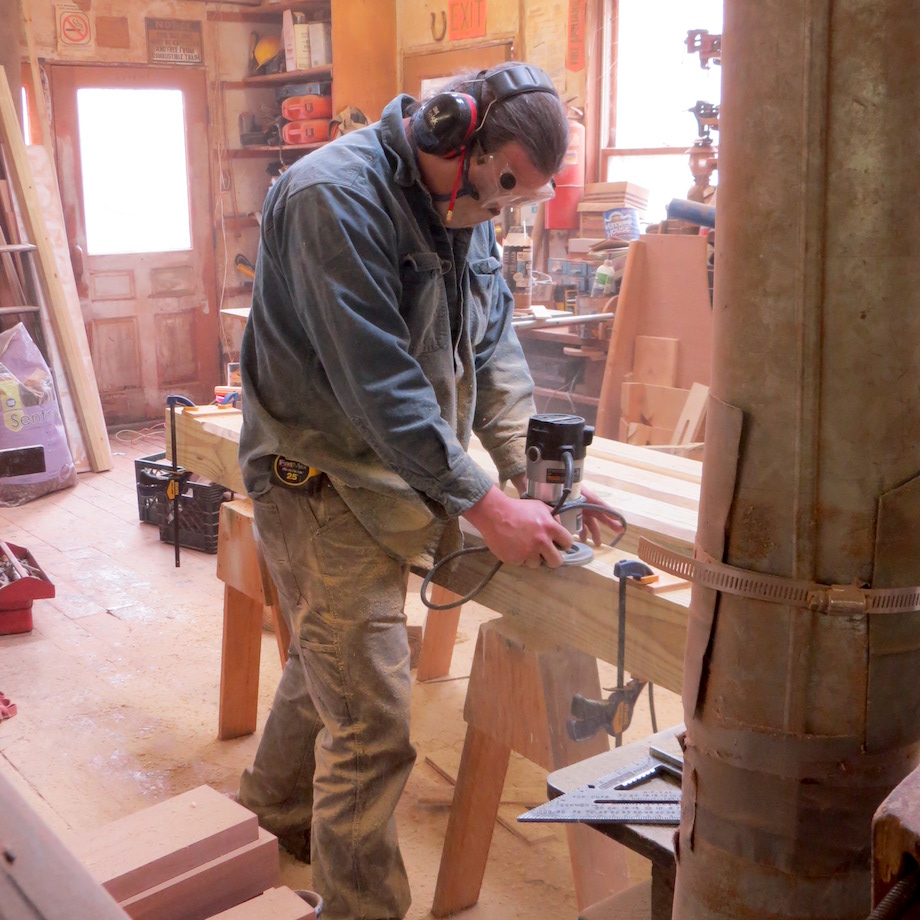
Cutting a lambs tongue detail is one of those tasks that’s best achieved with a combination of power tools and hand tools. The lambs tongue detail looks a lot better on a stop chamfer than the curve you get when you just use a router, and it’s a time-honored detail. I see them everywhere from delicate stair balusters to the giant exposed wood trusses in older churches and college auditoriums. The pressure treated yellow pine pieces in this article and video are replacement porch posts for the historic 1765 Allen Hill farmhouse in Foster, RI.
But regardless of the project, I always start with a drawing—of sorts: I start by making a small template for the lambs tongue detail, which is really just an ogee or S-curve. Just about any ogee works.
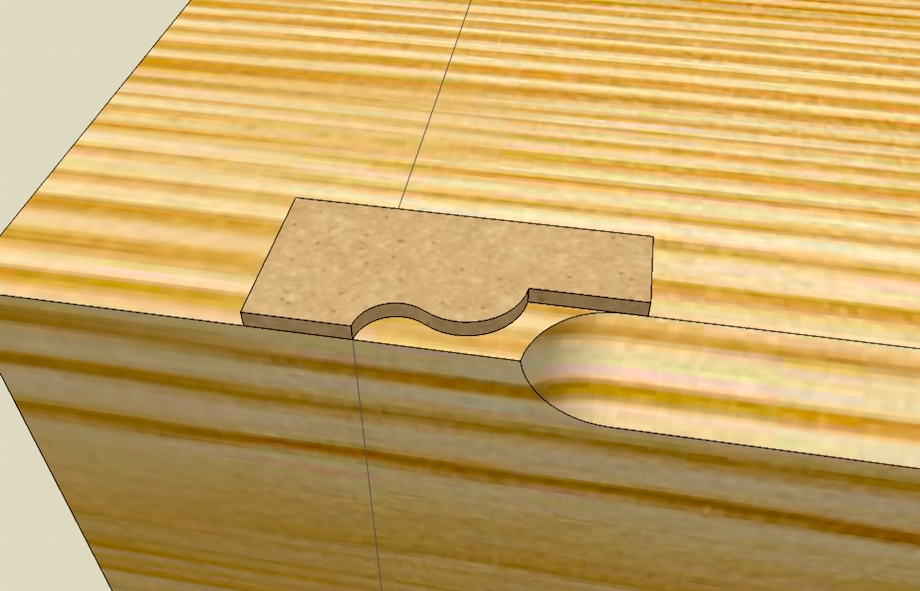
Once I have the template, I can layout the start and stop location for the chamfered edge, which I cut with a router bit, which identifies the start locations for each lambs tongue. The template also provides the cut line that I follow with my chisels.
Routing and carving
| For these posts, I used a large bearing-guided chamfer bit. |  |
 |
I clamped a stop at each post, top and bottom, to be sure I stopped the chamfer at exactly the right spot. |
| Once the bevels were all cut, I used that little template to lay out the ogee or lambs tongue. | 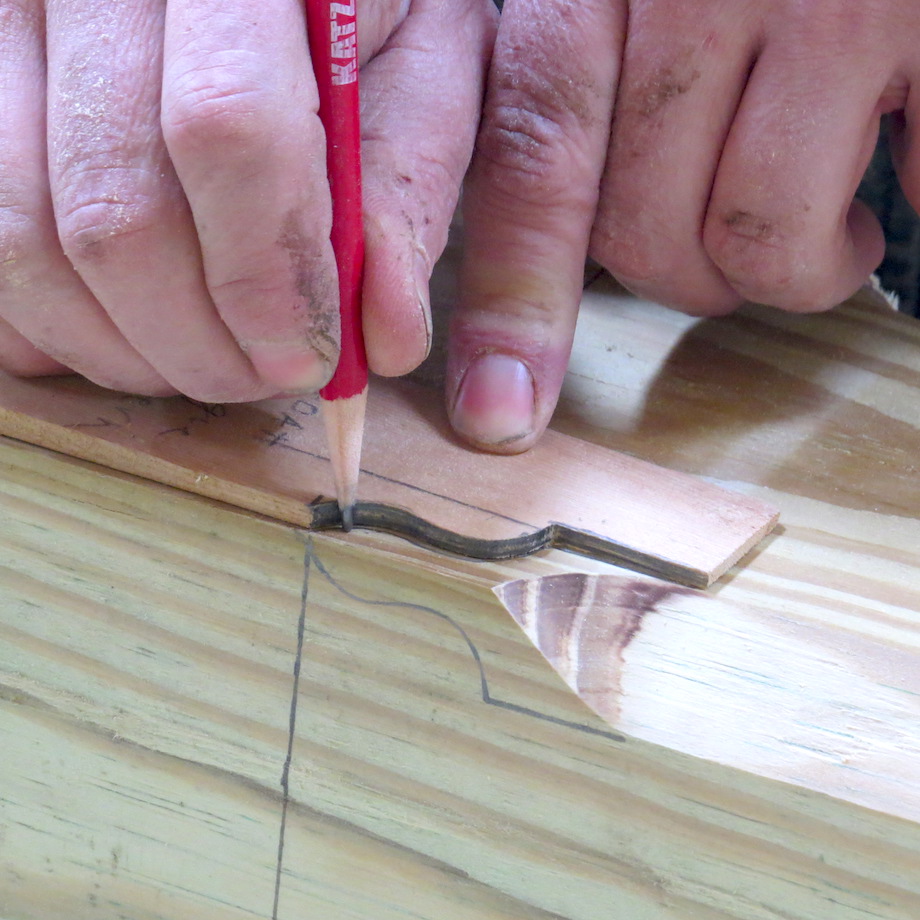 |
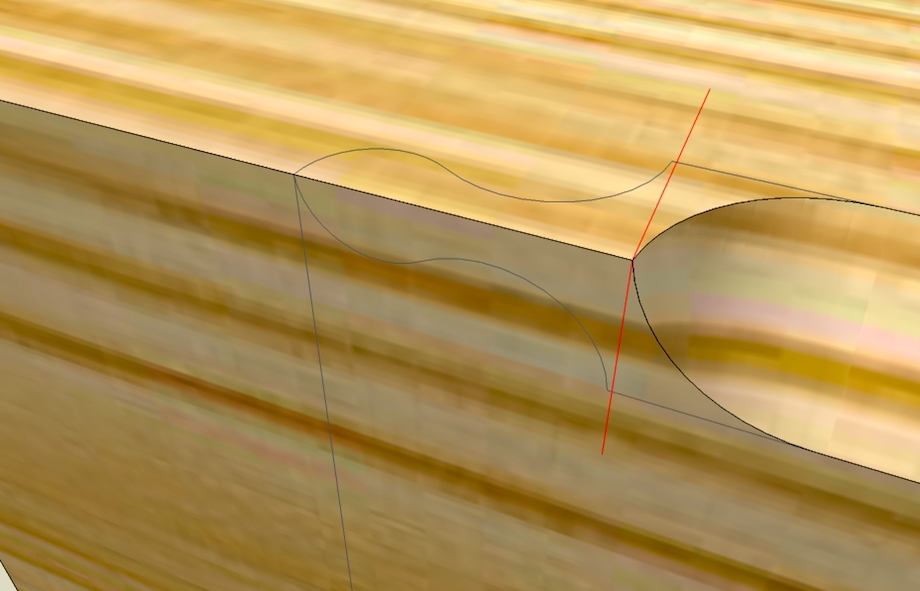
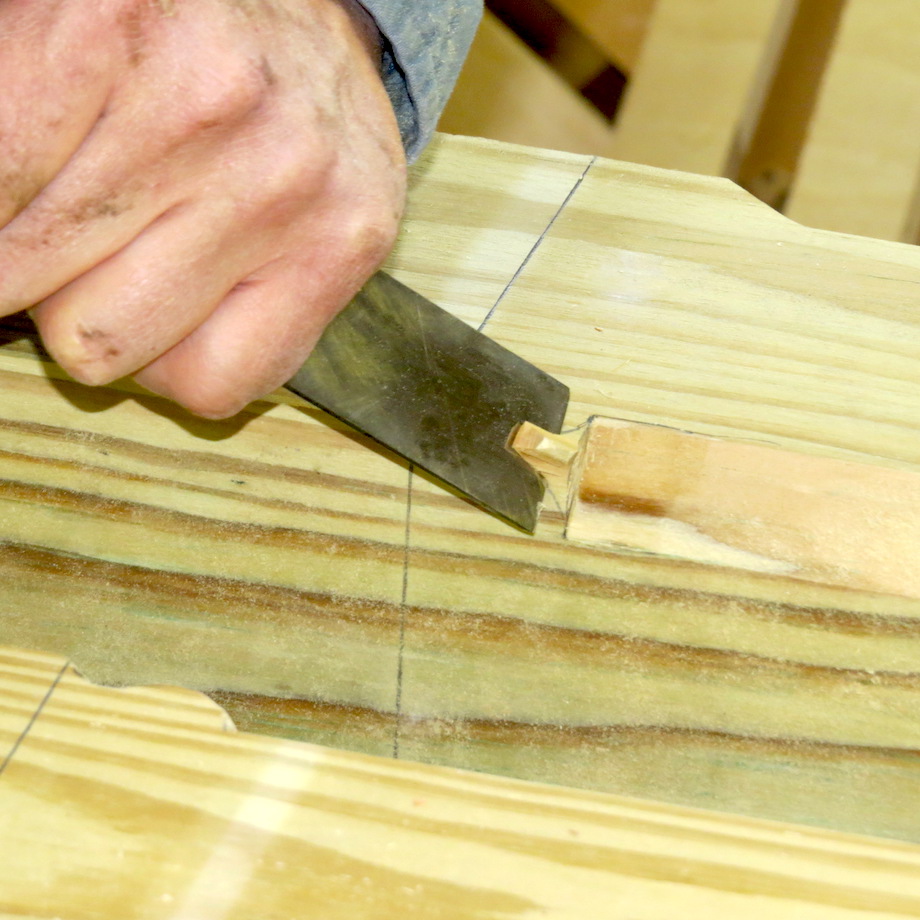
People may think carving is slow work, but with sharp-sharp chisels (and good tunes playing through your ear buds), it’s fast work. I always start by defining the limit or exit of the ogee by striking my chisel firmly at the stop line. Normally, when cutting a mortise, the bevel of the chisel would be inside the stop line, and the back of the chisel would be on the line.
| But with this carving, I want the bevel of the chisel to cut slowly into the corner, so that I can follow the contour of the ogee as well as establish the exit of the lambs tongue precisely on the line. | 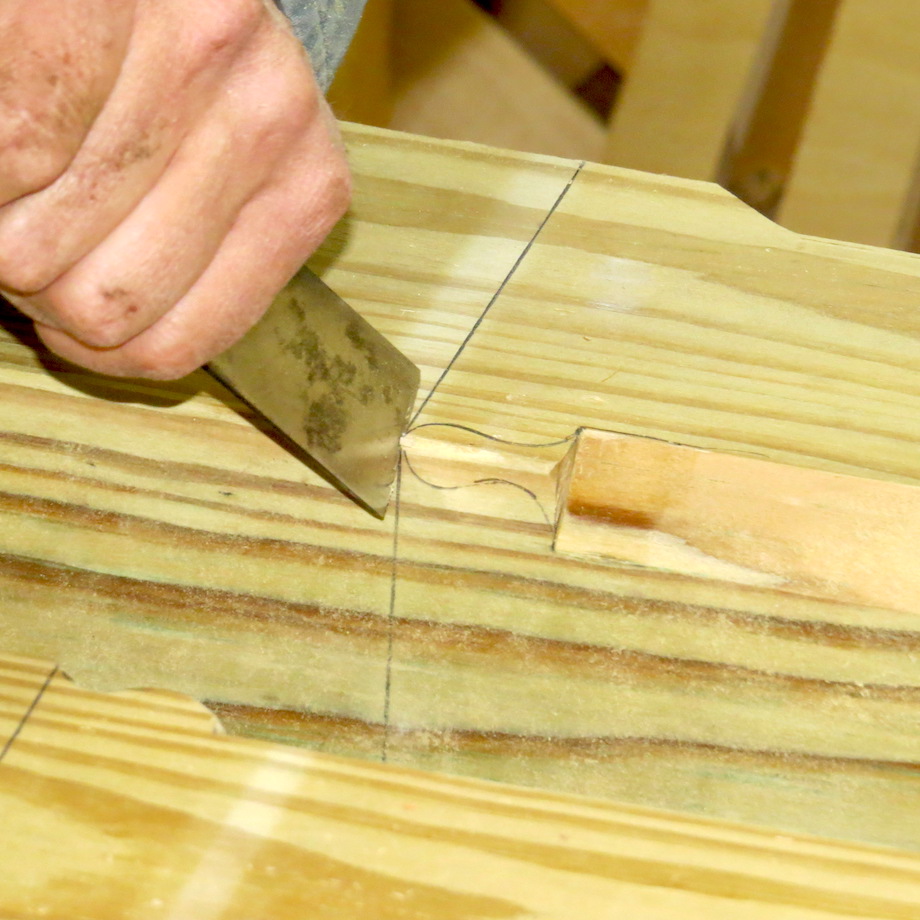 |
 |
At the same time, I don’t smack the chisel too hard—I feel the grain of the wood, following the outline of the ogee with the bevel of the chisel cutting into the deepest part of the cove. |
| After reaching the bottom of the cove, I reverse the chisel and cut from the opposite direction, cutting the slightly elliptical shape of the curved tongue. | 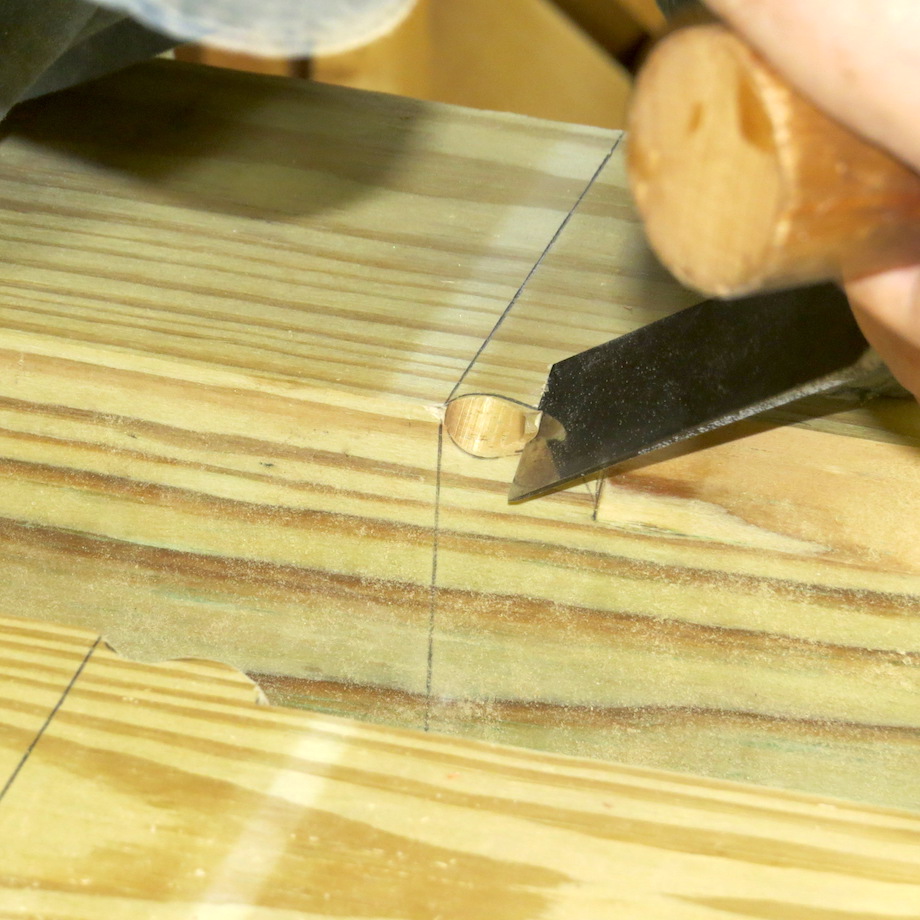 |
 |
Finally, I reverse the direction of the chisel once more, still holding the bevel against the work piece, and cut the torus or bullnose shape that turns down into the chamfer. |
| Notice how the bevel of the chisel must follow the curve all the way down, so that the back of the chisel finishes almost plumb at the chamfer, creating a sharp and well-defined transition. |  |
Some folks may think that repetitive work like this is BORING. Not me. Once I develop a system and practice the moves a few times on the first post or two, my mind is miles away, listening to good music, feeling the chisel slice through the wood.
Great article and video!
Great article, something I wanted to learn. Thanks
Beautiful woodworking,a truly great craftsman. Great article.
Thank you so much for sharing! I have a house, built in 1895 with this feature in all the doors and windows, and I always wondered about it. It’s in Nova Scotia, Canada, but I always felt it was from somewhere else. It was exhilarating to read about.
Thanks for this video, I watched it several times before completing 88 lamb’s tongue details on a trestle table and bench set. These really bring such a classic look to the furniture!