


In two previous articles, I described techniques for installing a single door and a sidelight-door-sidelight unit. In this video, I use the same techniques to install a pair of doors, because a pre-hung is a pre-hung is a pre-hung.
(Note: Click any image to enlarge)
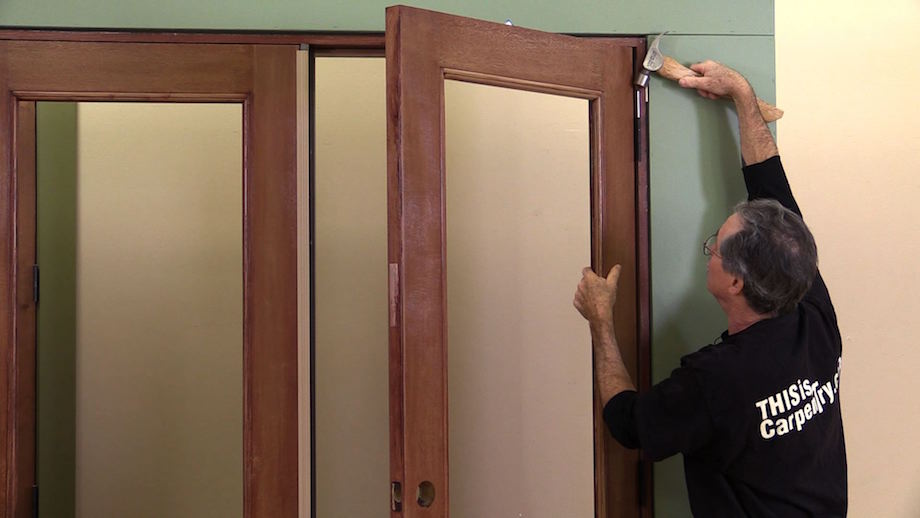
Regardless of what type of pre-hung unit I’m working with, it’s still a pre-hung unit and I’m not hanging the door. When I hang a door, I scribe it to fit the jamb, I plane it and cut it to the scribe lines, I mortise for the hinges, bore for the lockset, and hang the door on the jamb. In other words, I cut the door to fit the jamb.
But when I’m installing a pre-hung unit, the door is already hung—already cut, hinged, and hanging in the jamb. Which means the door can’t be adjusted to fit the jamb and the jamb must be adjusted to fit the door.
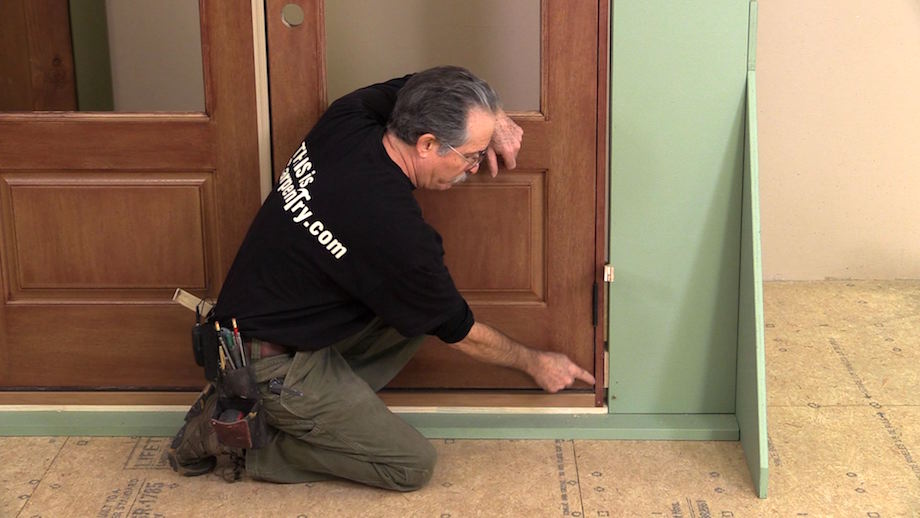
To adjust a jamb so that it fits a door, you have to make critical adjustments in the hinge jamb, especially right near the hinge locations. If you begin the installation by plumbing the hinge jamb, then nailing the jamb near the hinges, you will never be able to make those critical adjustments, especially with a pair of doors.
Follow the simple step-by-step process in this video and with very little effort, you’ll have a pair of doors that fits perfectly…
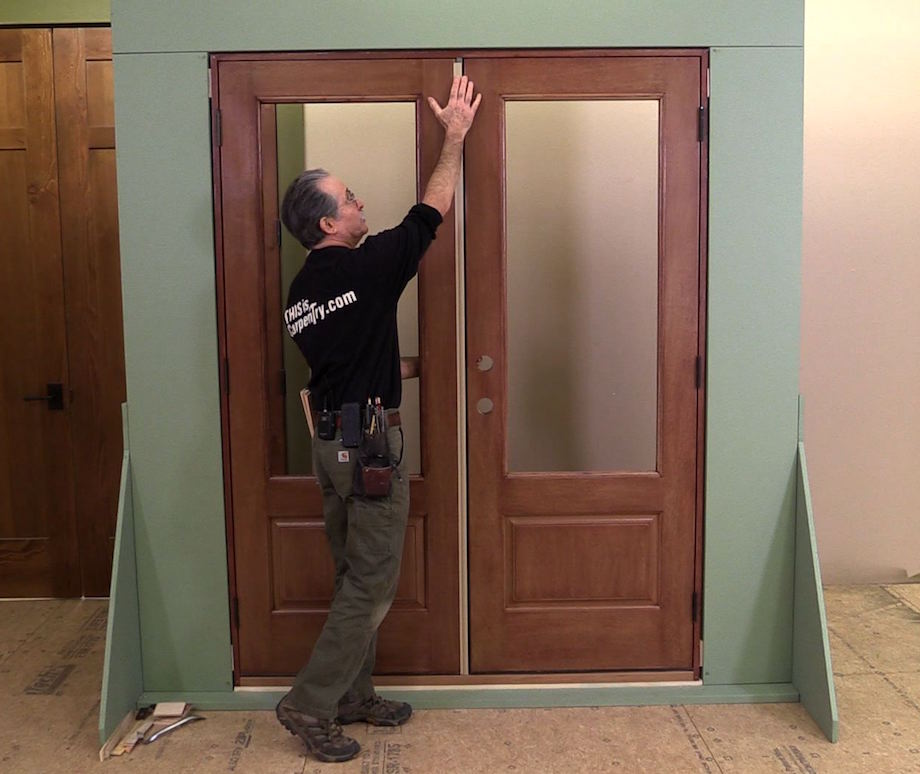
…both doors will be flush at the top, flush along the meeting stiles—from the top of the doors to the bottom, and all the hinge gaps will be uniform.
Superb !!!
Excellent presentation. I’ve learned a lot from Gary over the years, from his trim and finish books to his videos. Thanks Gary!
Cross leg. I could never figure out why my doors didn’t hang perfect. I could get them close but never perfect. No one else noticed the slight imperfections but I did / do.
The techniques in this video will help me get a LOT closer to perfection.
Thanks,
Joe Dokes
Gary: Again you have done a great job describing a complicated process in way we can use and remember. You are making us all into experts. Thanks Gary. You may be the best person ever to happen to our trade.
Great video as always. Sometimes it is the smallest tips that make the largest difference. Thank you. I have to ask Gary, what is the model on that impact gun? I have been waiting for them to make one but I have still not found one. I could only see on the top of the gun it says impact on it?!?!?
Thanks David. I’m glad you found something useful in the video.
Festool has only made one impact driver, and I don’t think it went over very well. It’s pretty big and heavy, and not nearly as ‘sweet’ as a Makita.
Gary
Hi Gary, is been a while since I’ve had to install a new pair of doors. Lately it seems like all my door work is correcting hinge bound or cross-legged doors on new homes that usually aren’t more than a year or two old and still on warranty. If only the original installing carpenters would stop nailing through the darn shim, just like you mention in the video. Please bring you road show to Las Vegas and spread the word!
Thanks so much for all your efforts training the next generation of Carpenters.
Thanks for the video Gary. Correcting cross-leg for me usually doesn’t allow for sledging over walls. Instead I have to go the dirty way of smashing drywall and cheating the jamb at all four corners. We use architectural hinges that do not include long screws. Instead I drill a hole at the door stop location before the door stop is installed. Obviously that doesn’t allow for later adjustment. If I’m particularly worried about future adjustment I’ll drill behind the hinge. As a habit when I’m first shimming, I nail above and below the shim.
After installing the screws and doing the final shimming, do you nail these last shims? If not, what keeps them in place?
Wow! I have all of Gary’s videos and have seen him multiple times at the Journal of Light Construction conferences back in the day. He’s been my main source to learn finish carpentry over the years (I’m just a home owner and do all my finish work after I saw a “finish carpenter” do sloppy work and decided that I could do as well or better.) I haven’t done anything for a while, and haven’t watched a Katz-video recently until now. We have to all agree: this man has the pedagogy down! I forgot how good Gary is. Jeez! Thanks Gary…you’re the man!
By the way, when I went to Gary’s presentations at the Journal of Light Construction conference (JLC Live), his helper was a young Dan Parish! He now owns Millworks By Design and does killer work.
Thank you Gary for a great series of videos. I run a custom exterior door shop, building over 1000 doors a year. For our customers installing their own doors I recommend your series to them. If I could only get my installers to watch them as well,……
Gary,
Thank you for sharing all this information on this post, it is very instructive and educational. I myself have a carpentry company and I would recommend my team to watch this to improve their technique. I saw you at the Katz road show and you were great.
Gary,
Thank you for the great techniques over the years. The cross leg situation is nearly always needed to be corrected for door installations. I have also experienced twisting the jamb of windows and doors when I do not use opposing shims for a flat shimming surface. This is something to consider during the installation.
Jim,
Totally true how you can twist a jamb if you don’t use opposing shims. But you don’t have to worry about that when you shim behind the to of the hinge jamb or strike jamb directly across the head–the head jamb prohibits twisting. Same with the bottom legs of the jamb if there’s a factory installed threshold. But really, if you prep the opening so that the corrected rough opening is 1/8″ wider than the O.D. of the jamb, and you use a single shim, the jamb shouldn’t twist very much anywhere! :) You’re not the first one to point out how important it is to use opposing shims, and I totally agree, but it’s not always necessary, not always a hard-and-fast rule.
Gary
Gary,
Always great to sit with my coffee and learn from a Master! My question is regarding the tweaking of walls in cross legging. What keeps the wall in position after sledging and making adjustment?
Thank you!
I’ve tried installing 2 doors in the past and neither where a success. They shut and locked, but one needed a little extra force and the other had a squeak when rubbing the jamb. I watched your videos on Youtube and tried installing two doors in our addition. They came out perfect. They are smoothest doors in the whole house. I followed your specific pattern of when to screw each part. Thanks for sharing your knowledge.
Todd,
Hot Dang!
Gary
Of the many “Installing French Doors” instructional videos that I’ve watched, yours is far and away the best. Your methodical approach and clear explanation have convinced even this inept
do- it- yourselfer to successfully tackle a job like that. Thanks.
Gary
All the exterior doors I see have brick mold already fastened on them from the factory. Is it always good to remove it before installing the door? Even for a single door? Otherwise, how would you correct the cross leg condition?
Jerry
Yes. If you follow the manufacturers recommendations, and you leave the brickmold on and apply sealant to the back of the brickmold, and then press the brickmold tight against the housewrap, you can not correct for crossleg or for any warp or wind in the door, and since 6/8 doors are guaranteed to be flat with 1/4 in., and 8/0 doors have no guarantee for flatness at all, then you often have to adjust the jamb legs at the sill in order to bring a single door flat against the stop and the weatherstripping; you have to make the same correction for a pair of door in order to bring the lock stiles flat and parallel with each other. So yes. You have to remove the brickmold, which also makes it much easier to shim the jamb, and much much easier to integrate the weather resistive barrier with the flashing around the door.
I watched this video so many times ad a few others and I still donked it up. It would be great if you did one for an interior double door. Mine was a solid core that has additional weight on it (pantry door) and it did not have a bottom jamb to keep it civil during install.
That said. My incompetency is my own. Your videos and articles are fantastic! Thank you so much!
I am from a long line of carpenters. However, your tips make all the difference in hanging double doors, which has always been a pain in the butt if framing isn’t square and plumb. Thanks for sharing your knowledge. I never stop trying to learn simple techniques that make a job a lot easier.
Gary,
I saw you at IBS 2020 and enjoyed your demo. The framers typically install the doors our company supplies on new construction projects and they typically explain the they have leveled the head and strike/hinge jambs but the door won’t latch. The reveal is not even, but they fight and say it is a pre hung unit issue.
Especially on double doors, they have been having difficulties. In the attached photos, you can see the two doors are not meeting equally and one appears to be sagging. Do you have any suggestions on how to fix?
I’m confused as to how this works if the opening you make with the initial shimming is still 1/8″ larger than the jamb itself. What am I missing?
Thanks!
Luke
Well, simply put, if you make the corrected rough opening any smaller, you’ll have a difficult time getting the jamb in it. Why make your life any more difficult than it already is?
Gary
Gary – I’ve bought a 18-year house (developer track home) with slab foundation settling problems. All the interior doors are giving us problems now, 4 years later.
1. Master bedroom jamming the middle TOP with a small gap on the bottom hinge side. Took out all the hinge pins and the door still did not want to line up.
2. On one bathroom and a bedroom bow out so much they can barely catch on the striker plate. This bathroom door is so twisted and bowed in the middle you can see in through the crack.
3. I have 20 doors that all need some kind of adjustment including the front & back doors. I am almost to the point of getting my vibrating plunge saw out to cut the doors out to the rough opening and preping the rough opening properly and re-installing all of them.
I watched your ‘5 Step Door Install’ and 100% understand the importance of establishing the square top and bottom corners first but you lost me on the adjustment after the slim above the bottom hing is more like 60% voodoo.
It is so much easier to do it right in the first place but on a track house, it is slam, bam, and thank you, mam, to place blame on anyone one thing.
Got your book order on door installation.
Dan OKC
Are the DVD’s still available?
I like what you said about adjusting the door jam. My door is splintering. I’ll have to hire a contractor to install a new door.
ThisIsCarpentry.com’s blog post on installing a pair of doors is a must-read for anyone planning a door installation project. The article provides valuable insights on the process of installing a pair of doors, including tips and tricks for ensuring a successful installation.