


For the past two years I have been lucky enough to be a student in the Preservation Carpentry program at the North Bennet Street School in Boston, MA. I’ve been in the building business for the last ten years, and a carpenter for around half that time, mostly working doing renovations, trim, cabinets, and the usual “stuff” that falls in the realm of modern carpentry. Occasionally, prior to deciding to become a preservation carpenter, I would encounter something that we all find from time to time—rotten or damaged wood in some part or piece of a structure that needed some attention beyond putty and paint to ensure it was going to last or pass muster. Now, working almost exclusively with historic or just plain old buildings, I encounter that very situation on almost every job in one form or another.
Enter the “dutchman,” or a wooden patch piece. Some dutchmen are straightforward and simple, like filling the hinge gains in a jamb, while others might require a little more planning and effort to ensure success.
I had the opportunity last summer to work in some of the most beautiful neighborhoods in Boston, and many of the homes I worked in were built well over 100 years ago and still retain their original period millwork, windows and doors that add to their beauty. It is wonderful to see that old work still in place, but in some instances either neglect or abuse has taken a toll over time. Often, window parts take a beating from weather on the exterior, and occupants on the interior. (Note: Click any image to enlarge.)
 |
 |
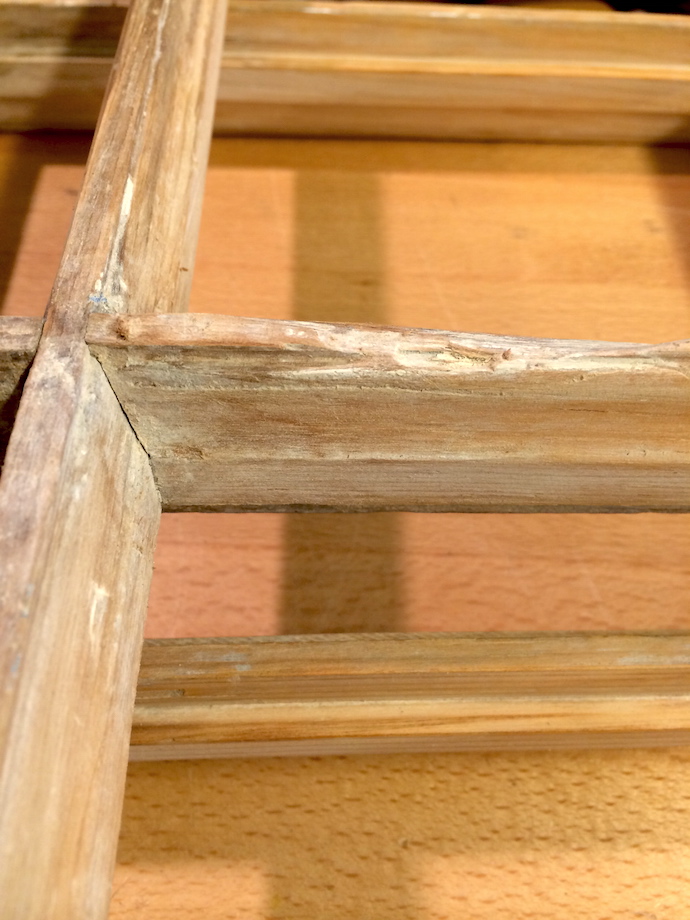
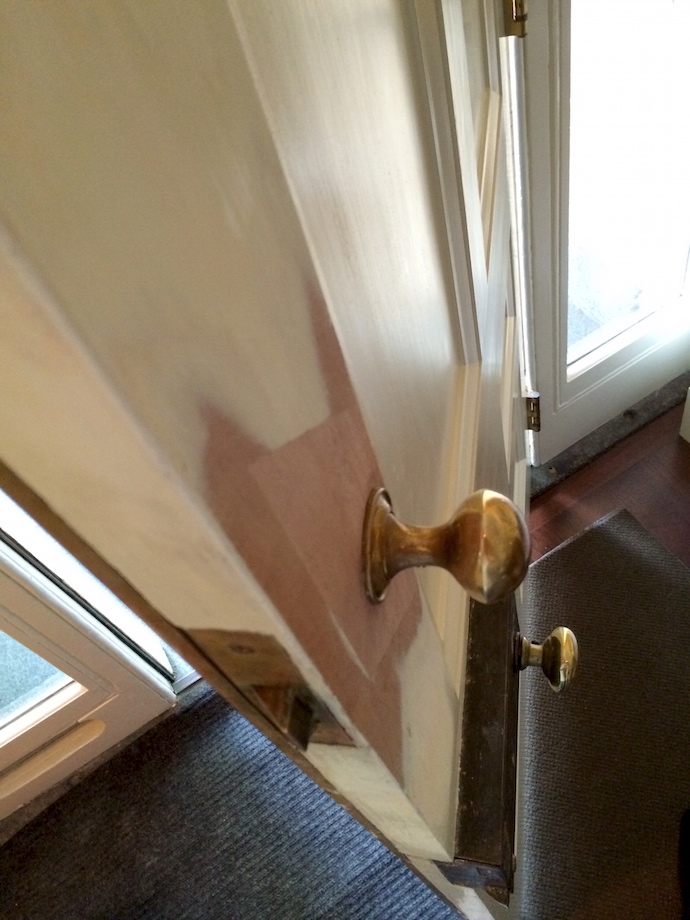
| Window parts or hardware installed that require different mortises or drillings from previous sets. |  |
In many of those cases, a “dutchman” is a relatively simple way to tackle a repair.
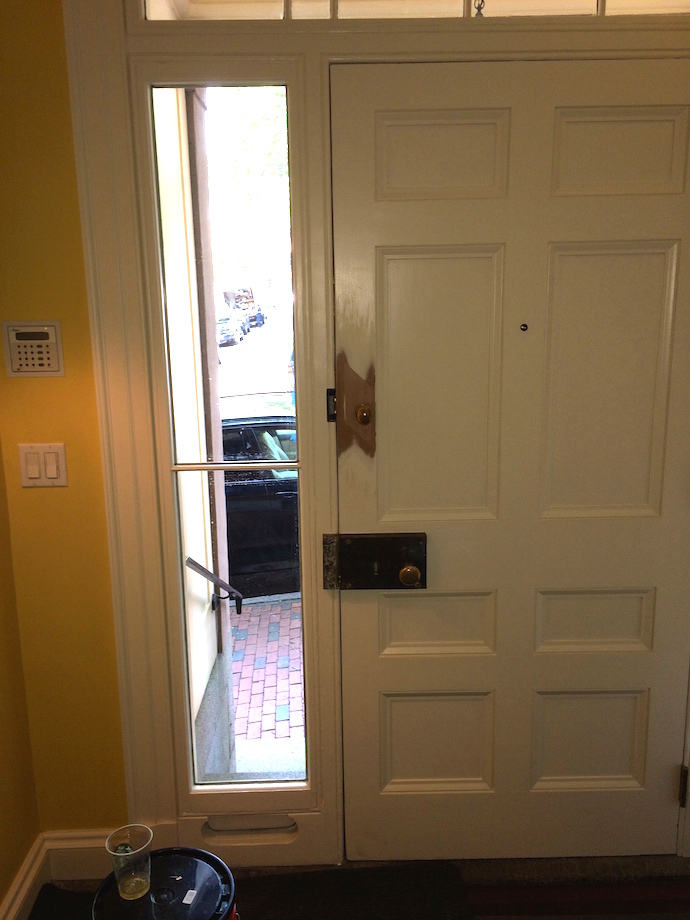
One such occasion was a beautiful solid mahogany front door on a residence in Beacon Hill.
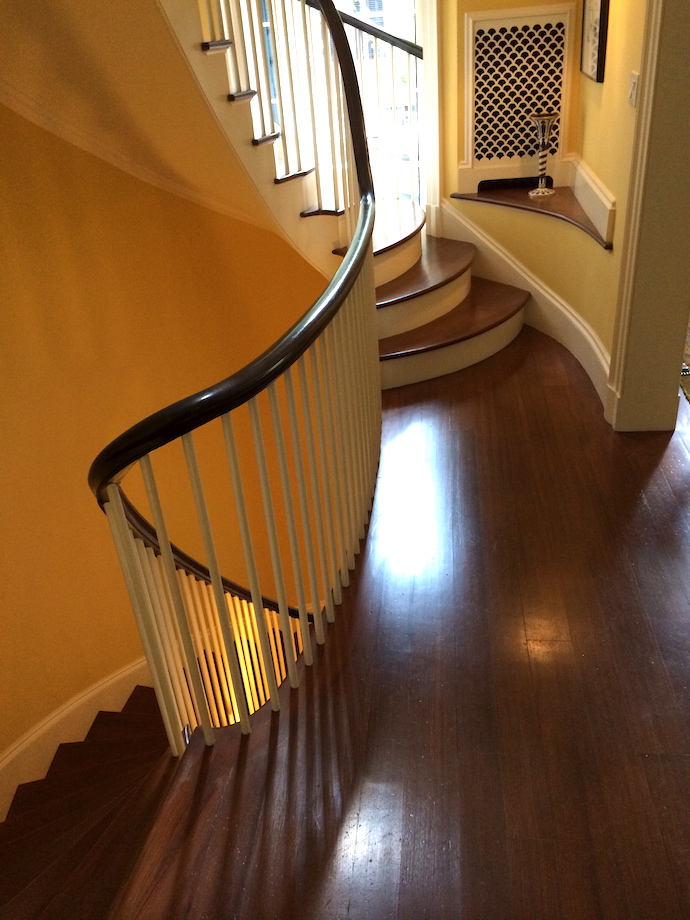 |
The home had recently been restored and is a real gem—just look at the back staircase! |
| The front door had previously housed a lockset that required a square cutout through the door that had been patched by simply plugging the hole with a wood block, the outline of which was very noticeable, especially on the interior. | 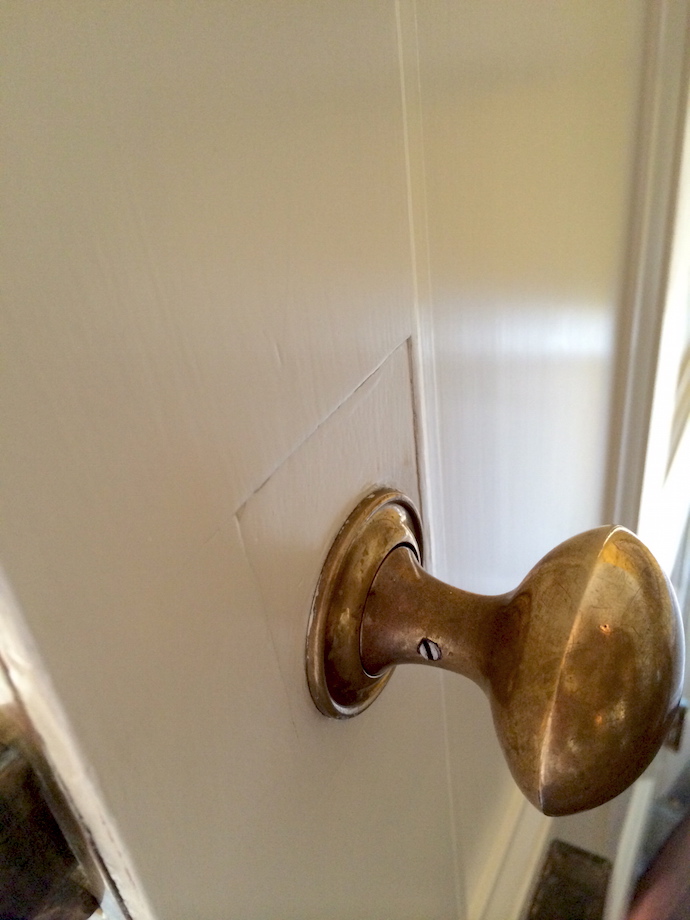 |
I was asked if I could improve this, and I quickly said yes and planned to return with all the materials and tools I would need to complete the job.
Preparations
I knew that the door was solid mahogany, and whenever I attempt to make a dutchman repair I like to use material as close to the original as possible so that grain and wood movement will match the existing as much as possible. I brought along a couple of different pieces of mahogany, one milled to around 1/4 in. and the other milled to around 3/8 in., so I had some options.
I also gathered my toolbag and 5-gallon pail since parking in the neighborhood is notoriously scarce and I knew I would be walking uphill for a good way to reach the job. My chisel roll, marking knife, block plane, handsaw, combo square, and a router plane all went into the bag. A small glue bottle, a couple of clamps, some sandpaper, and a dropcloth went into the bucket. I also always have my drill, bits, and drivers, along with an assortment of screws and hand tools in my bag so I can tackle most jobsite tasks without hassles.
When I arrived at the job, I saw that the painters had already painted the exterior of the door, so I would only be working on the interior. I first took some photos of the lockset and the orientation of all the parts so I could remove them and reinstall them properly. Once I removed the existing knob and spindle I was able to begin the layout.
The Layout
As with any carpentry project that requires precision, the layout is where it happens. This was a fairly straightforward job—my new piece simply needed to be larger in all dimensions than the hole it would cover, and it would need to blend into the surrounding wood nicely. Given these circumstances, I had to make my patch about 3 1/2 in. x 6 in. so it would cover the problem spot but not cause me extra work by getting into the edges of the door stile.
The Dutchman
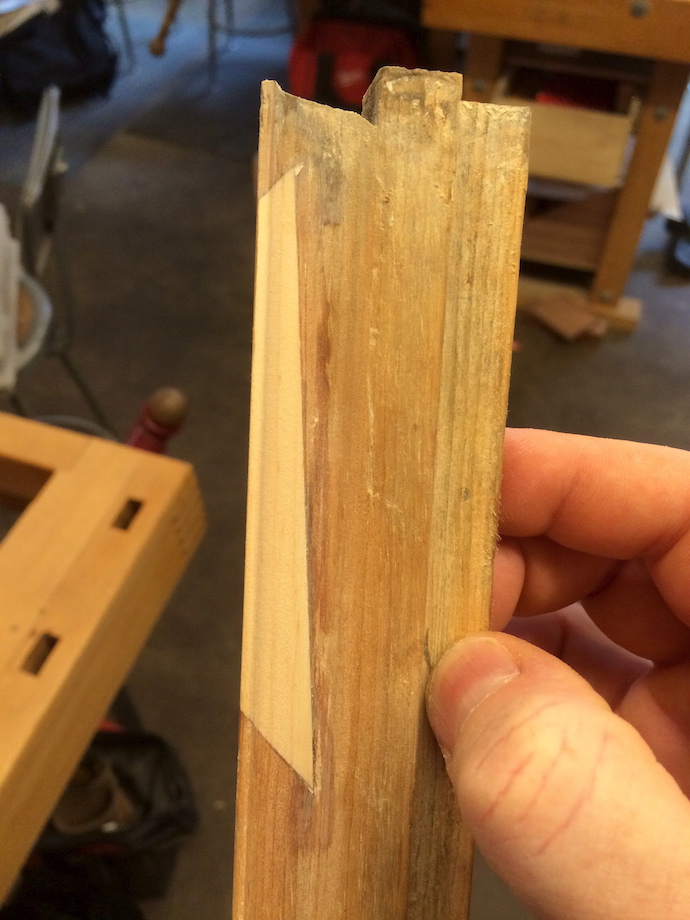
Once I determined the size and shape necessary, I laid out the dutchman on the patch material itself, not the door…
| …and I shaped the new piece. It was a sort of parallelogram—it’s easier to disguise lines that go along the grain rather than straight across. | 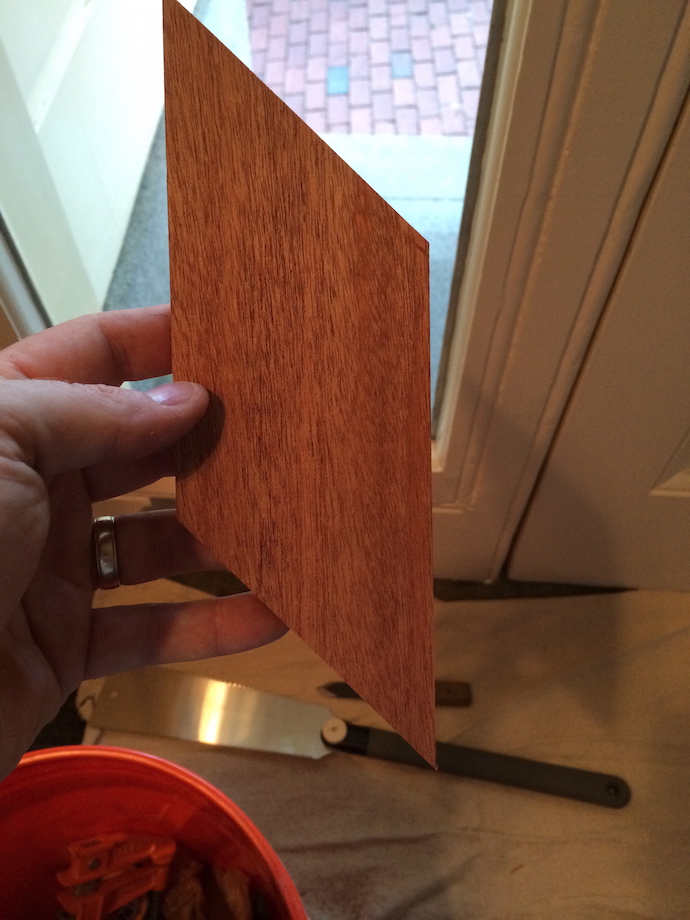 |
Then I simply cut the piece using my handsaw and trued up the edges with a couple of passes with my block plane at a very slight angle so that the piece would fill the new mortise tighter as it sinks in. I also went ahead and laid out and drilled the hole in the piece for the lockset at this point, since I Ieft the guts of the lock in the door and wouldn’t have an easy way to drill it later.
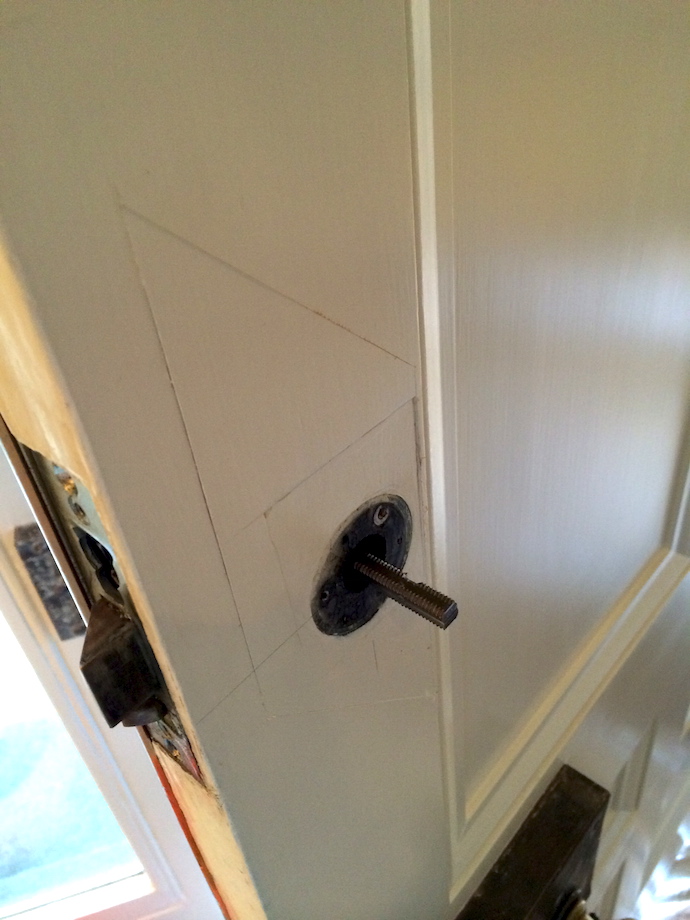
The Door
I then placed the patch piece on the door where I wanted it, clamped it on and scribed around it lightly with my marking knife. Once I did that it was time to remove some wood. Using a chisel, I established the outline deeper, tapping it down into the line made by my knife and removing a little bit of wood on the waste side, repeating the process until I reached my depth (around 1/4 in. or so in this case).
 |
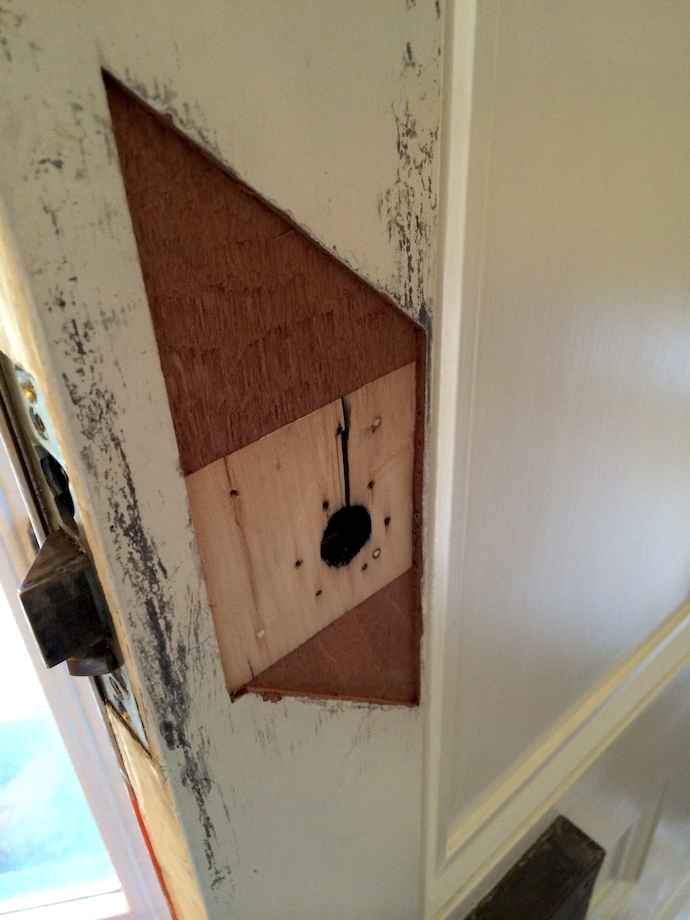 |
For the bulk of the material in the middle I used the router plane set for a light cut and I started in the existing hole where the lockset passed through, dialing it down until I reached my full depth over the whole area, cleaning up the corners with a chisel.
Now that the new mortise was clean, I could move on to glueing in the dutchman. Since I used the dutchman itself to lay out my mortise, there’s no need for any fine tuning; if you go right to your lines cleanly everything is perfect!
| I spread some glue on the patch and some in the corners of the mortise, and I pushed the piece into place and clamped it using some scraps to protect the door. |  |
I let the glue setup for a few minutes while I cleaned up a bit, though I only had to contend with some light sawdust and a few plane shavings and chips—much easier than if I’d used a modern router! Once I was confident the dutchman was secure I removed the clamps.
| Since I started with an oversized dutchman, and I took care of the excess length and width in making the piece, all I had left was a little extra thickness to take care of, which went quickly with the block plane—just a few quick swipes and it was down to the surrounding paint. | 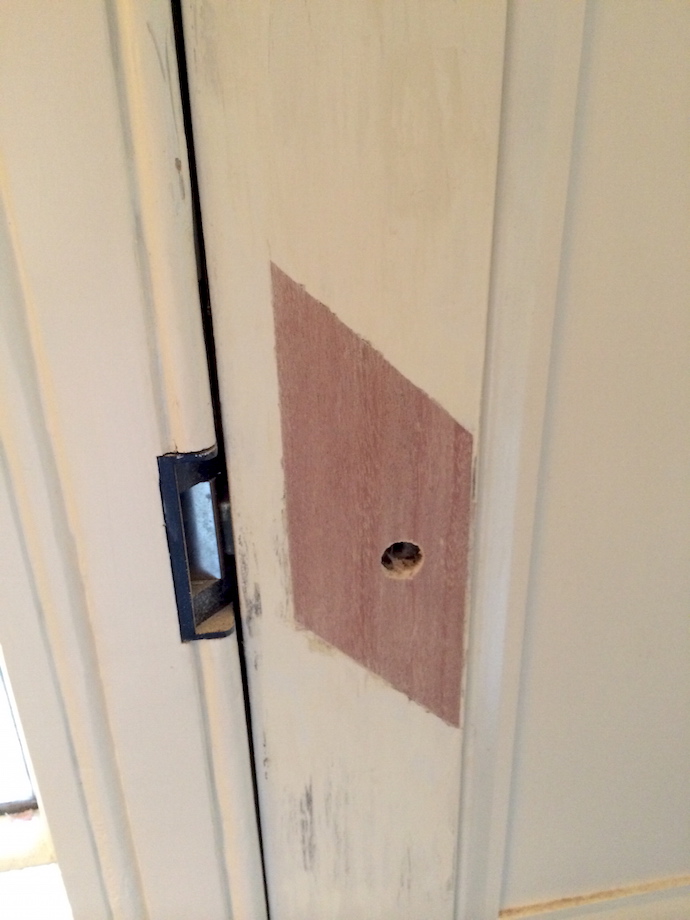 |
In order to make sure this patch wouldn’t be visible at all, I needed to fair it in further by hand sanding it flush to the surrounding wood on all sides.
 |
 |
Now, I mentioned this was a very old house, but I know that the door was completely stripped and no lead hazard existed from sanding the door. Otherwise I wouldn’t have done this without a HEPA vacuum and protective practices! Once I was satisfied that the new patch blended well with the surrounding door, I went ahead and reinstalled the door hardware, cleaned up my tools, and headed back to my truck—job complete!
This particular dutchman took about a half day from start to finish to complete, including the many interruptions to reinstall the knob to let people pass through the doorway (there were three other contractors in the building, and a neighbor in and out running errands during the day). Under paint it isn’t visible at all, and if you are careful with your grain match a repair like this can blend so well that it will easily pass in stain-grade work also.
•••
AUTHOR BIO
 Evan Kistler graduated from the North Bennet Street School in May 2015 with a certificate in Preservation Carpentry and he is currently working as a carpenter in Jamaica Plain, MA. Over the past ten years he has worked in many capacities—from a short stint on a framing crew prior to college, to project management for a production builder, to owning and operating a small renovation company, and now trade school.
Discovering a great affinity for older homes led him to pick up his life, work, and family in Greenville, SC and move to Boston, MA to learn everything he could about preserving our beautiful buildings and their stories and history. His interest in repurposing and saving old things occasionally gets him in trouble with his wife, but it doesn’t seem to bother his nearly 3-year-old daughter or his 6-month-old son.
When he isn’t studying or working to become a better carpenter, he enjoys hiking, spending time with his family, and dreaming about old houses.
Nice article Evan.
Do you perhaps know the historical origin of the word “dutchman” to describe a patch? I first heard it when, as a beginning carpenter, I put a mortise on the wrong edge of a door, and the contractor told me to “fill it with a dutchman.” I’ve heard painters use it to describe filling a hole with spackle. And online, it comes up a lot in descriptions of wooden boat repair, but I can’t find any historical background on the root of the word…
Thanks, Craig. I do not know the historical roots of the name for sure, but I’ve heard Wim’s version a few times. I would be interested to know the full history there.
Well documented.
Being Dutch, as far as I know the name is given because it is a cheap way to repair rotten pieces in wood or cracked parts of stone without replacing the whole part. Through the centuries, the Dutch were known to be penny pinchers. So when something cheap came up, in the eyes of the English it had to be Dutch.
The story goes that the Scottish were originally Dutch but they were kicked out because they were spending too much.
Not much to say but nice job.
Thanks for this great article. Love what you do.
I like the tip of not making the patch perpendicular to the grain but more with it to help disguise. I’m going to try the parallelogram next time rather than a rectangle. Thank for the article
Excellent article and description. I too am impressed with the idea of keeping away from straight lines in this situation.
Being also of Dutch ancestry Wim’s comment above caused a chuckle…I’m glad to see there are places teaching people the specifics of preservation carpentry. I have been working in this field for 30+ years and have seen a void in people going into this area as a career.
Thanks, great article and I’ve definitely learned several things.
Excellent write-up. I learned several things from it and will certainly use them in the future. Thank you so much for taking the time to document your work so well. Cheers.
Mack