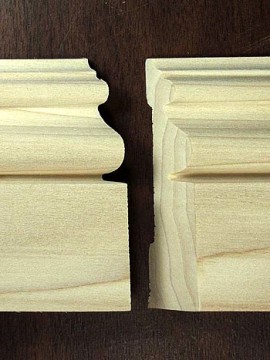
The standard scarf joint. Every carpenter is expected to make this field splice to join two lengths of molding. How often does the joint match perfectly? Any number of variables can affect the quality of the splice: Imperfections in the millwork, waves in the wall framing, taping compound buildup, inaccurate miter saw setup…The list is very long and well known to us all. I have intentionally assembled this scarf joint to resemble the kind of joint that occurs frequently on real job sites. The overlapping piece of molding has fallen a hair low and is out a bit at the top.
 |
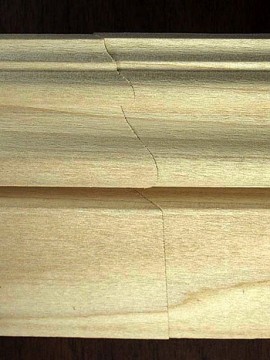 |
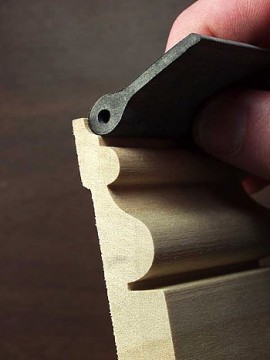
This is one of those joints that is really close, but not good enough to walk away from. If this were pre-finished material, it would signal a quick trip back to the miter saw. Luckily for us this is Poplar molding that will be painted. There is an easy way to fair this splice without damaging the profile. As you can see from the angle (right), the splice has full contact for glue surface, and other than the profile misalignment, it’s actually not a bad joint.
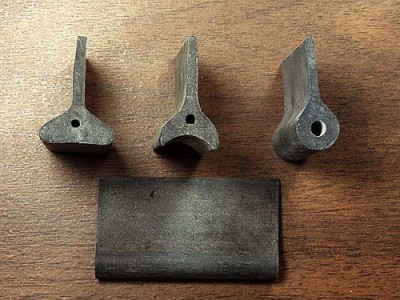
| To solve this problem without a lot of tedious sanding I use contoured sanding grips. These are just little pieces of molded rubber similar to car tire material. |
 |
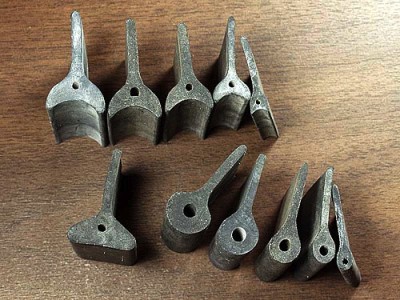 |
They come in a variety of shapes and sizes. You can purchase them in sets. |
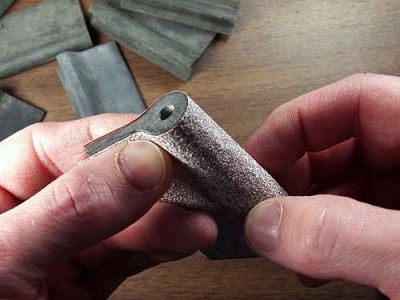
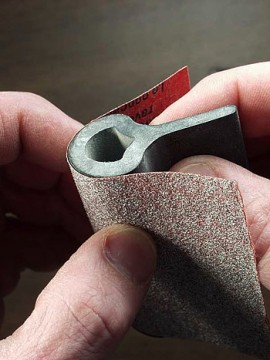
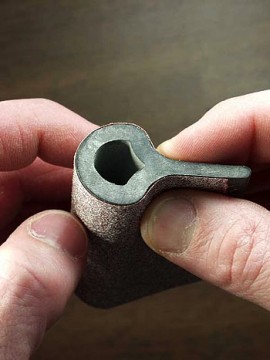
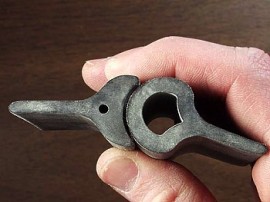
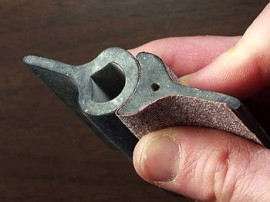
Wrapping the contour grip with regular sheet sandpaper creates a handheld sanding tool that will fit the various millwork profiles.
These are very similar to the sanding heads available for electric detail sanders. This one is from a $50-kit that I purchased for my Fein Multimaster. 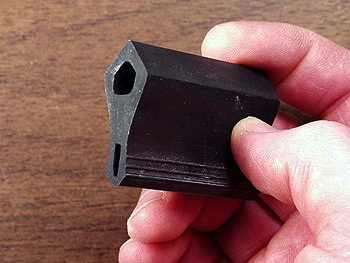 I was very disappointed with the kit for a number of reasons. For one thing, it was outrageously overpriced. More importantly though, the size and number of available profiles was so low it made the kit almost useless. To top it off, there is almost no tactile feedback when using a power detail sander. More often than not you will end up dulling the crisp edges of the profile while trying to smooth the joint because you just can’t see or feel what is happening.
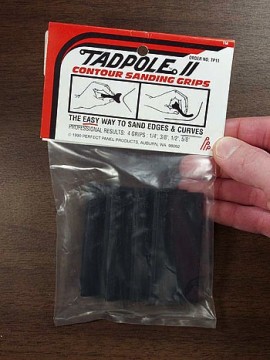
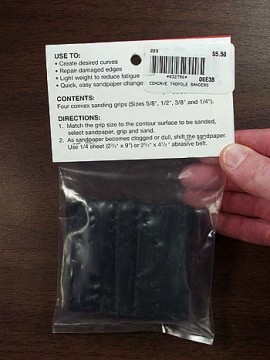
So instead, I have been using my collection of sanding grips. They are available from several manufacturers. The ones shown here are part of the Tadpole series made by Perfect Panel Products. I buy them at the local Woodcraft store. They are fairly inexpensive with an average price of $6 per bag of 4-6 grips.
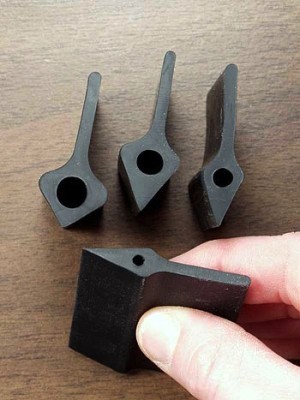
| The most useful grips are the hollows and rounds. They do make other shapes, like these wedge profiles. These are nice for cleaning out v-joints and crisply cut fillets. They are cut at 30°, 45°, 60° and 90° angles. Series VII is the last set that I have seen locally. The Series I kit comes with a variety of shapes and also two different kinds of sanding pads. |
 |
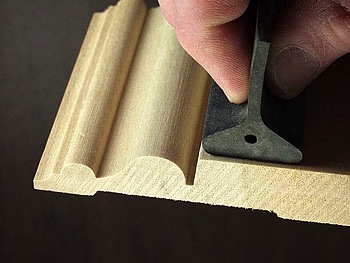 |
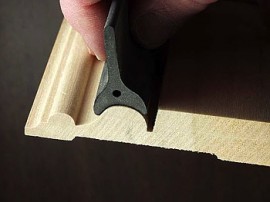
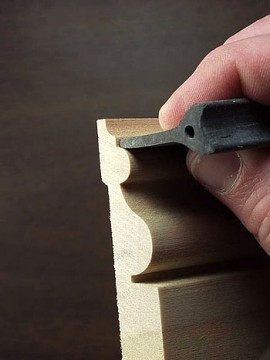
Start off by finding the grips that will work best with your molding profile. This grip is excellent for fairing the flat portions of smaller moldings. For larger stuff, like baseboard, I use a sanding block. |
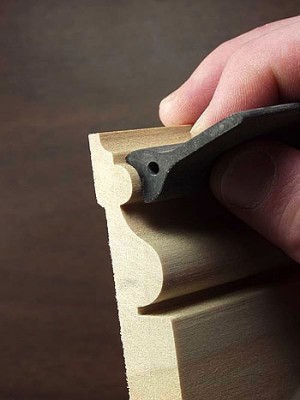
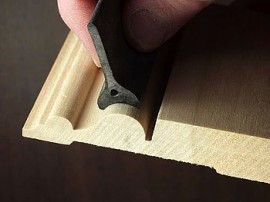
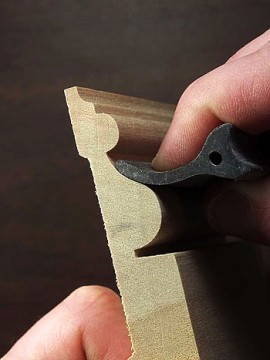
Check the curves to see which radius fits. While the first one fit reasonably well, it’s usually better to select the smallest match. That way you will have better control and have less chance of inadvertently dulling the adjacent section while sanding.
| This radius is too large for the job. |
 |
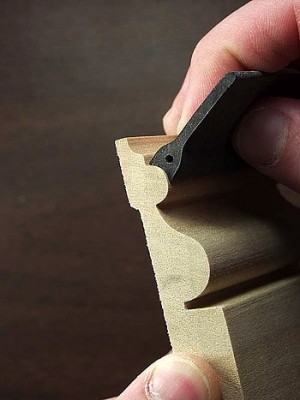 |
This little one fits like a glove. |
Some of the radius grips are elongated so that they will work for both circular and elliptical profiles (they look like tadpoles too). Flexing the grip in sideways will sand this section in one shot.
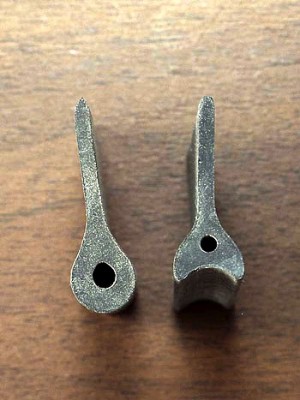
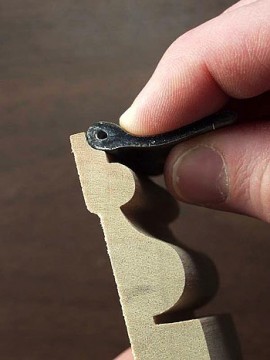
The handles on the grips can also be used to clean out fillets and they can be flexed to pick up areas that do not fit the other shapes.
| The smaller grips have narrower handles. |
 |
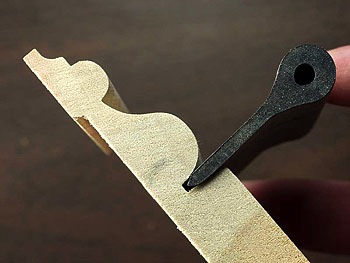 |
This handle is a little bit too big to clean out this fillet. You may have noticed that the last grip had a pointed handle. Most of the grips come with rounded handles. I have found that it is easy to modify the handles with a sharp block plane. You can cut chisel shapes, long tapers, or even just square the edge for crisp channels. |
Like the traditional hand plane hollows and rounds, these are matched by radius. If you have trouble setting the paper in the cove shaped grip, you can always use the matching radius grip to tighten it up before you sand delicate materials.
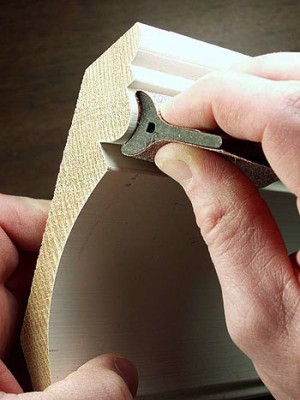
| So what about moldings that have some small details, and a few large ones like the cove on this crown molding? That’s a bit too big for the regular grips. |
 |
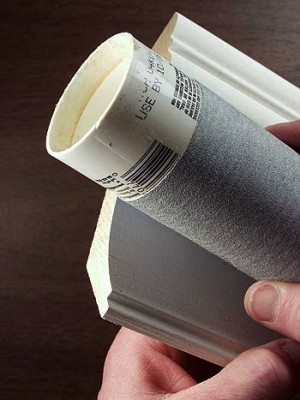 |
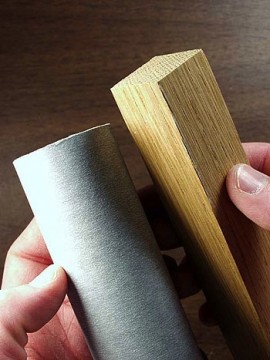
In circumstances like this I would normally use a large wooden dowel wrapped with PSA (Pressure Sensitive Adhesive) sandpaper. I have been known to use any cylindrical shape in a pinch, like this caulking tube. The key to using this is to sand diagonally while slowly rotating the tube. It’s kind of like using a rolling pin. Otherwise you could try the sanding pad, but I prefer not to use anything soft. |
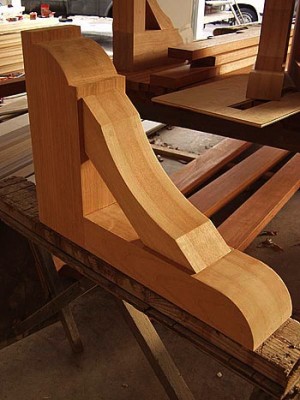
| A full set of dowels comes in handy for tuning copes, and sanding odd shapes. I used a short length of 1 5/8-in. fir closet pole to remove the band saw marks from the radius cuts on these brackets. I didn’t have to pull diagonally in this case. |
 |
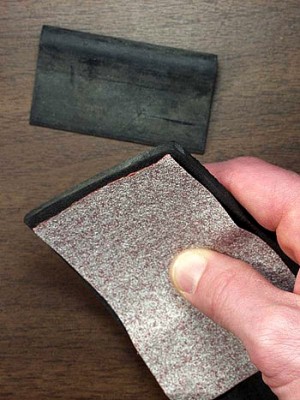 |
This is one of the sanding pads that comes with the Tadpole I kit. I used this last to smooth the edges of two double action doors that I rounded over with a 3/4-in. router bit. This pad helps fill out the shape of my hand while also preventing friction burns as I sand the entire stile in one pass. |
Another useful thing to have is a set of sanding blocks made from small hardwood scraps. Wrapping these blocks with PSA roll sandpaper creates some very handy sanding tools. Crease the paper tightly when you wrap the block so that you will be able to get into 90° corners. Cut the blocks to the width of your PSA roll. 1×4 blocks work great for sanding plugs, and small 1-in. square sticks are handy to keep in your pouch. These are great for removing fuzz from miter saw cuts and any little touch-ups that you would normally use a small paper scrap for. Plus they are much easier to find in your pouch than sandpaper.
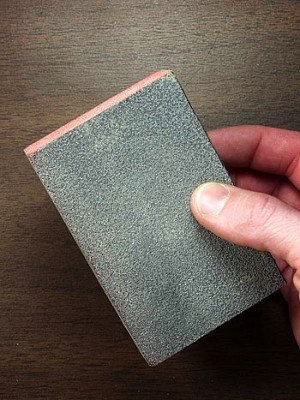
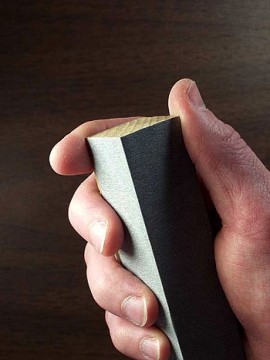
| Sanding sponges like this have their place. I use these all the time for drywall touch-ups, but they are mostly useless for carpentry. There are other stiff sanding blocks like this that have grit all throughout. This is a soft sponge with sanding grit on the outside only. |
 |
 |
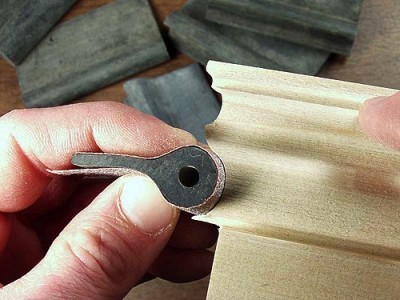
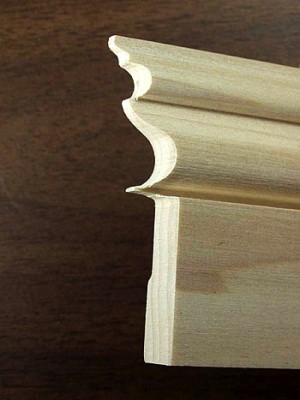
You may be thinking, “Why not use the sanding grips to tune copes?” |
| The truth is that they are really too soft for this task. It would be too easy to distort the profile. |
 |
 |
Besides, if you had an old Copemaster you wouldn’t need to tune your copes. Unfortunately, it seems that the Copemaster is no longer in production, and the manufacturer most likely went out of business. But maybe you can find a used Copemaster online! |
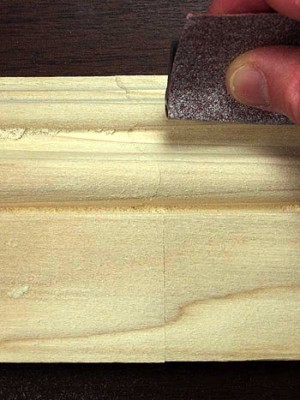
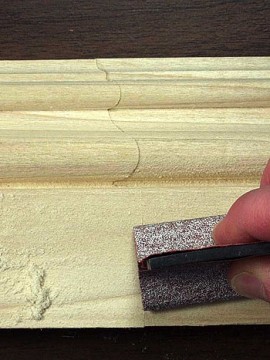
Now that you know, let’s sand that splice starting with the flat section. If you have used yellow glue for the joint, it is imperative to make sure that both the glue and the wood are dry. The moisture in PVA glue will raise the grain of your molding. If you sand or plane the wood flat before the wood has dried, you will be left with a depression when the grain goes back down. Start in with short strokes so that you do not tear the paper or lift splinters from the overlap. Gradually increase the sanding stroke until you have smoothed the wood out at least several inches in each direction. Keep working the profile until you can no longer catch the splice with your fingernail. It should not take more than a minute or two to complete the job.
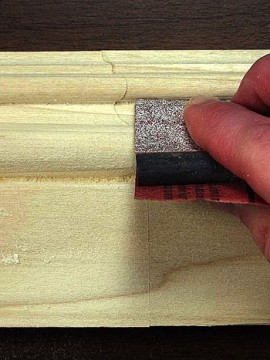
| Work your way up the profile hitting every area that your current grip will fit. Use the handles to get into the fillets. The hardest spots can be reached with just the folded edge of the paper. |
 |
You may wish to go over the profile again with a finer grit. For this demonstration I have just used 100. Normally I would use 180 or 220 to fair my joints. By the way, the Norton 3X sandpaper is really great stuff. I was skeptical at first, but I have found that it really does last a lot longer and cut better than the old brown stuff.
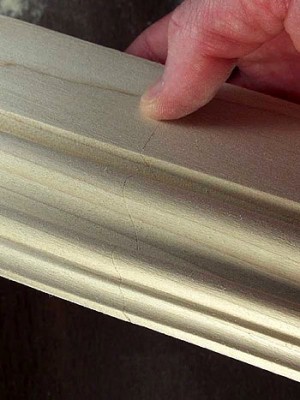 |
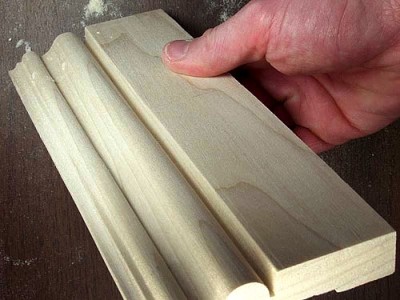
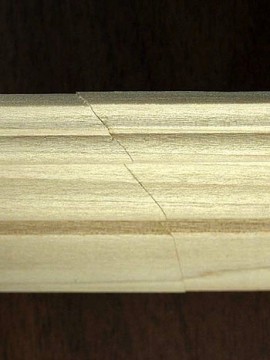
All of the overlap has been removed in the final joint. You can still see the glue line because I did not apply pressure to the joint. I used 2P-10 for the test so that I could force the misalignment. Even though you can see the joint, you would not be able to feel it. |
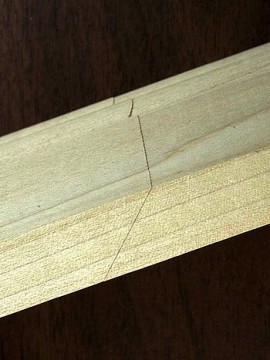
| The joint is almost invisible when viewed from the end. You can also see that the molding is slightly hinged at the splice because of the misalignment. This was a continuous piece of straight molding before I cut it (note the grain). |
 |
Countour sanding grips can be purchased from a number of retailers; Lee Valley Tools sells a variety of sets online, starting at $5.20 for a set of 4 angled sanding grips.
(This article originally appeared on GaryMKatz.com)



Funny I was just thinking about this very subject. Thanks for beating me to the draw. This article is much more inclusive than what I had planned. Regarding the matching seams. I was thinking that if some planing of the front mating front edges was needed to allow invisible seams on painted boards that is what I would do. And I might just use epoxy to blend the various boards as well.
hmm. seems like a quick trip to the saw would be a whole lot faster.
Maybe. I’ll bet that once you’ve done it a few times it will take only the minute or two mentioned. Besides, are you absolutely certain you’ll correct it on the first try? What about the extra kerf thickness from the trim? That could throw off the length. I think I’d rather clean up the existing “almost, but not quite” cut than to recut it. After all, the devil you know…
Great article on this subject. Those sanding heads are nice. Ill have to pick them up!
One might consider installing splices with running trim using a reinforced (biscuits, dominos, pocket screws, splined) butt joint instead. The problem with the mitered scarf joint is that it won’t last. Movement in just about every thing inside a home, will break that nicely sanded joint. I like to call it plate tectonics…your making a slipping fault line with your trim, with that kind of joint. . Happens all the time. Glue alone is not enough, especially 2P10!!
A butt joint will sand just as easy, and can be reinforced to eliminate, or in some cases, minimize the movement much more so than a scarf, especially with crown molding!
Still, with either technique these sanding heads, will be most useful!
Thanks for sharing!
Jesse,
While your point was besides the main focus of the article, I have to take exception with your conclusions on linear trim joint failure.
Mitred scarf joints do last. Scarf joints greatly increase the available glue area over a butt joint… and results in a relatively strong joint that is easily sanded– as Mr. Burks carefully illustrates. Further a scarf joint and also allows one to apply clamping pressure when nailing the two scarfed pieces together in an overlapped configuration; particularly with the use of nail guns. Clamped surfaces of this nature, particularly with the use of aliphatic resin glue (carpenters glue) are amazingly strong.
In my opinion, most running mouldings do not need the additional reinforcement of a loose tenon connection; nor is the additional time usually justified. The stable relative humidity of today’s conditioned homes (typical R.H. changes are within 10%) rarely results in wood moisture contents variations that would typically lead to tangentially and radially oriented dimensional changes resulting in scarfed glued joint failure. While I am certainly a big fan of the Festool Dominio and its innovative and time saving features, I use it where it makes structural (and production) sense. Incorporating its routine use into running linear trim (as illustrated in this article) is not one of them.
Hey, Jeff,
Nice article. Don’t forget backer rod, and even pipe insulation, for sanding profiles!
I also save Ethafoam scraps –– you know, that UPS-packing stuff that’s stiffer than sanding pad foam, but more flexible than Styro. If push comes to shove, you can run it through the tablesaw, incrementally changing the blade depth, until you have matched the profile.
But when you’re talking pre-finished, your whole approach has to change:
If, for instance, a bead is proud, you need to block-plane the scarf behind it to provide the necessary relief.
Solid wood stock being stiff, though, I use 3rd-Hand poles, or the like, to flex the piece back into line with the lower-sitting stock until the glue sets. Depending on the angle/ width of room, 2x sleepers on the floor may be needed to push against, padded with foam sill sealer if finished hardwood beneath demands.
Whatever it takes, right?
Hey Gary,
Some 35 years ago, apprenticing with a highly skilled cabinetmaker, I was taught to forsake the elongated scarf for shorter butt joint. Over the years I’ve done moulding joints both ways. I recently did the main floor of a home, including an adjoining coffered billiard room using butt joints with nice results. I’m with Jesse on this one…reinforcing joints with glue blocks and fast curing gorilla glue. As usual, great article, learned about new tools…perhaps this will spare me the “origami” sandpaper folding?
Mike Rigby
Jeff,
Great article and images. I had not seen the Tadpoles before but have some of those Fein profiles.
I went searching for the Tadpoles and after quite a while found a source. Here is a link. http://woodworking shop.com/product/kl12000/
I am not affiliated with the product nor the link.
Don’t forget about the goosenecks scraper for the cover molding. I find it much faster than sanding through the grits for removing mill marks.
Thanks for the heads-up on the contour grips! They just moved to the top of my want list.
I’ve gone to butt joints in many situations for all the reasons already mentioned.
One thing I try to do to make matching profiles easier is, when possible, to avoid scarfing or butting the last six inches or more of long pieces together. The ends of any board are more affected by humidity than the center and will be more shrunken or swollen (usually shrunken, where I am.) If I’ll be using short pieces on some runs I can rough cut those lengths to get further into the meat of a piece.
JW
Re the pros and cons of scarfing,
We decided to butt-join some pre-finished crown a few years back, and the customer was not happy at all. It was definitely easier for us to get the profiles flush that way, propping them with 3rd Hands until the glue set, but after that I decided that we would not do that anymore since there is a chance of bad PR.
I always used to scarf at 45º, but now I do 22 1/2º. It still looks professional, but it is much easier to push a proud detail flush without opening another part of the joint.
Rockler also carries a selection of the Tadpole sanding grips:
http://www.rockler.com/product.cfm?page=10380&site=ROCKLER&filter=tadpole
Hi, I am new to the finer aspects of finish carpentry.
As wood expands and contracts across the grain and only very minutely with the grain wouldn’t a scarf joint be acceptable for a real wood piece of trim?
At work the older trimmers have told me to use a butt joint when dealing with mdf as it is a more likely culprit of lengthening.
Is the answer to the scarf question different for different products?
Stephen,
I completely agree. But this is one of those subjects that gets very subjective and personal: carpenters have specific experiences on their own jobsites and they develop the techniques that work best for them. Sometimes I feel like we’re all working with one hand and trying to figure out how to do it.
Jesse Wright is an exceptionally good and gifted carpenter. If he says butt joints work better for him, then trust me, they do. Personally, I find scarf joints work better for me. But that doesn’t mean my way is better or more ‘right’. It just means that it works for me.
I have way too much respect for accomplished carpenters (like Jesse) who have learned and polished their trade to say something categorically judgmental about their techniques.
While it’s true that a longer glue joint would seem to be more durable, that’s obviously not the experience some carpenters have. And before I believe in someone else’s categorically judgmental opinion, I’ll need to see the quality of their work so that I’ll know they are an accomplished craftsman. And to tell you the truth, I don’t really know too many accomplished craftsman who would criticize to the point of being judgmental another craftsman’s techniques, at least not without their tongue in their cheek. And at the risk of falling into the category myself (you’ve really jump-started my motor!), if you’re new the trade, remember, it’s usually the guys who say the least that you learn the most from.
Gary
Stephen,
Good question regarding different products! You can add to that list of product considerations: stained grade finishes.
Beyond recognizing that glued scarf joints are plenty strong and do last, you should consider the benefit of having an oblique cut line (as in a scarf joint) between moldings to help blend the joint when installing stain grade moldings. This is particularly true when a radius profiled molding is milled from plain sawn stock (such as Oak) which can have heavily figured grain. The human eye has a harder time following a cut line that rises and falls along an oblique profile rather than stopping abruptly at an easily discernible butt joint. After all, sanding a molding to appear as continuous is the goal of this article; employing a scarf joint clearly adds to that potential over a butt joint in a stain grade installation.
You can put that in your hip pocket as you weigh the pros and cons of each technique while deciding for yourself what is the best trim joint “answer” for your product. Not to mention for your customers.
Cheers!
Sonny
The PSA paper for the “Tadpoles” I’ve never had much luck with it. I’ve been wrapping regular paper around the tadpoles and it’s been good for me.
Now this is the level of craftsmanship that I like – detailed, passionate and able to deliver beautiful results. Thanks for the excellent write-up Jeff, a great read for anyone that wants to level up their detail sanding skills!
Great article, I know it’s been 10 years since you posted this but I was wondering what your thoughts are for doing this with stained crown. It was my first time ever doing crown and I’m happy with how it turned out except for one 22.5 degree seam. Due to the dip in the ceiling it was impossible for this first-time DIYer to get it lined up nicely. All the other seams look just fine. If I sanded the problem seam using these techniques and carefully re-applied stain would it be an improvement or make things worse?