


A door is a door is a door. And although doors might differ in construction or design, you should be doing the exact same thing every time you install one.
For example, always prepare the opening before you attempt to set the jamb.
But the most important steps involve the first five fasteners.
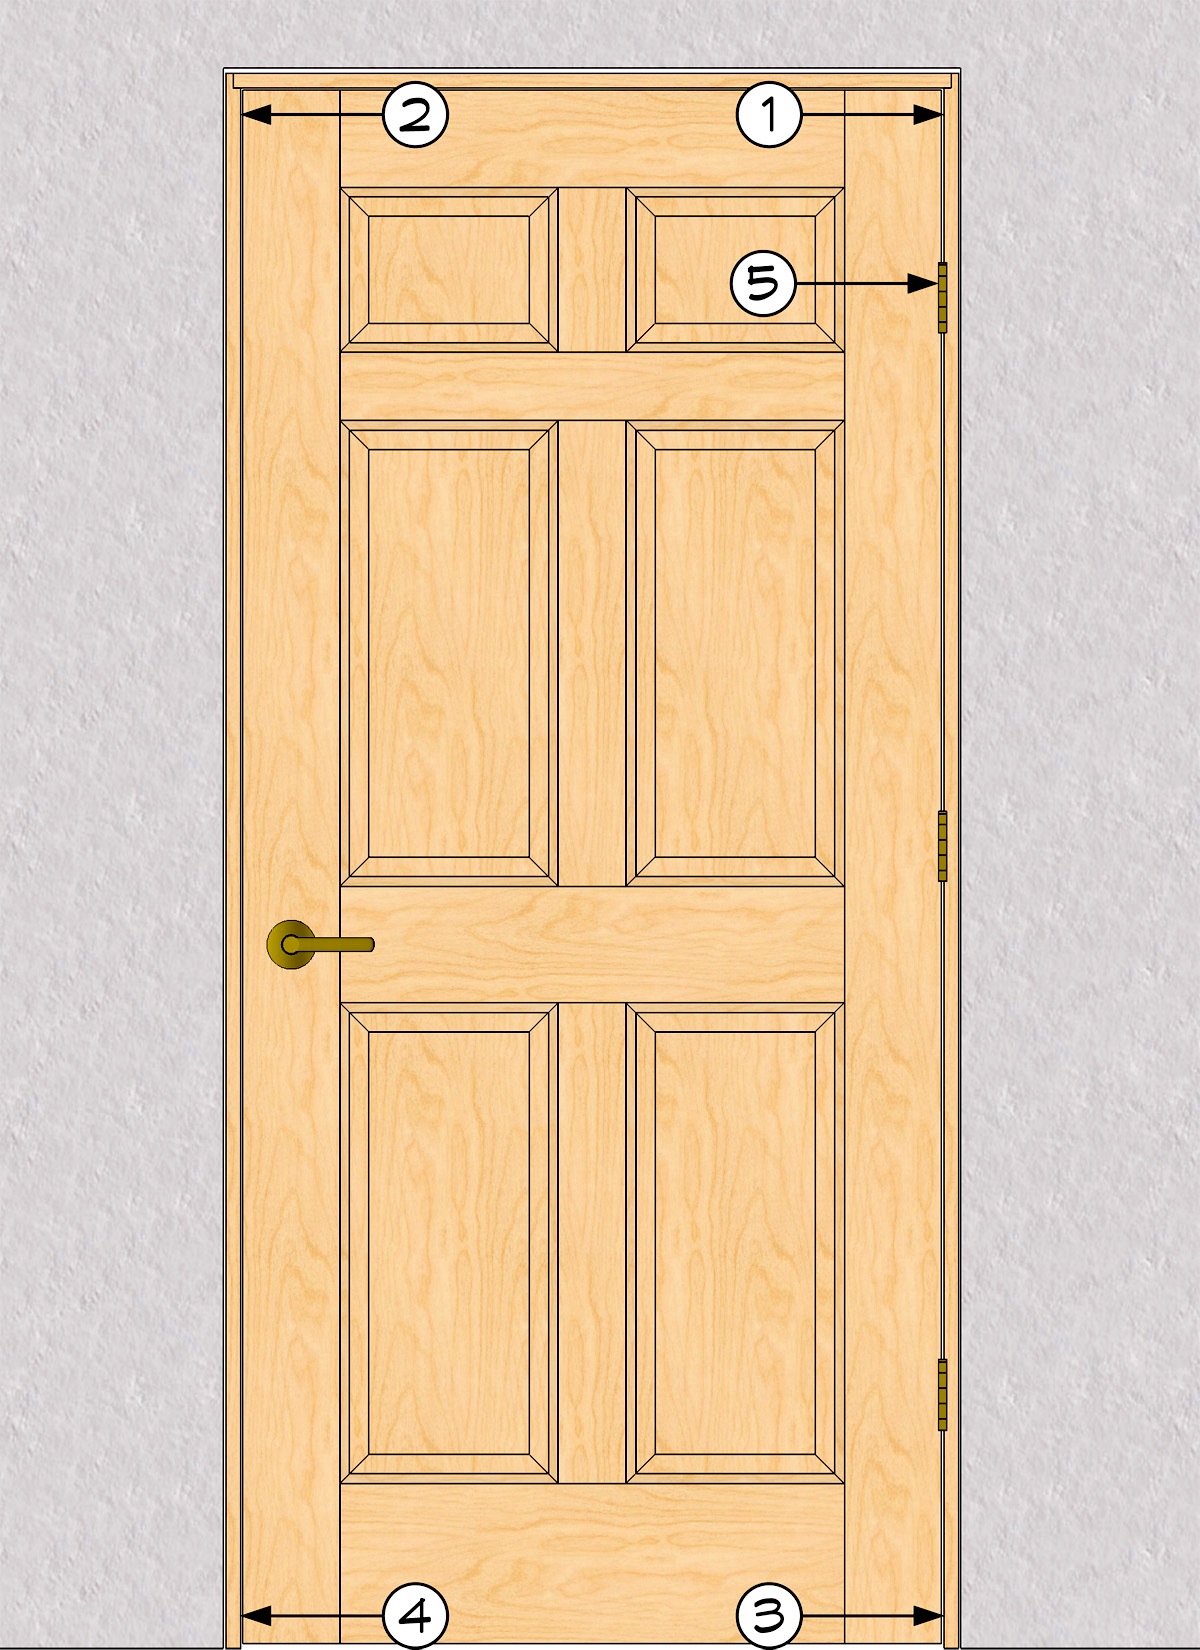
The following video was originally published as part of a Feature Article on Problem-free Prefit Doors. In the video, I break down the first five fasteners. Install these in precisely the correct locations and in exactly the right order. Otherwise, you may not be able to adjust the door properly.
Gary,
What a great instructional video. I’ve set more prehungs than I can remember but seldom had an intentional or consistent procedure. It seems like I have spent a large part of my years in the trade working harder, not smarter. Your knowledge and communication are a great tool for anyone at any season in their career that maintains a teachable spirit.
Gary,
Nice job. Great tips on the installation. Looking forward to using a few of them on my future projects.
Thanks
Wow, I’ve hung some doors, and learned alot of what you were teaching but man do I appreciate learning the things I didn’t know, especially towards the end. Great instruction.
Thanks a bunch
Great tip at the end (too). Thank You.
I hang a lot of heavy doors and after setting a long screw through the top hinge, I will then shim behind the lower part of the top hinge. (like you mentioned, jamb stock has gotten thinner).
And when installing cheap prehungs, I set the short jamb / high side of floor and then the long screw – then check to see if the door mfg has a parallel (reasonably even gap) across the top before setting strike jamb.
Phil,
Exactly! I do the same thing with cheap prehungs–when the finished floor hasn’t been installed.
Gary
So no glass in the mock door… I get it – less weight. But for illustration I wish you had used a door without a giant HOLE in it in the video when you were placing it in the RO and “pinning” it with the first 2 shims at the top
When most of the the doors I am working on are closed, I can’t reach through them to install shims on both sides and onto the door when smacking on the shims. But if the door is swung open before being secured in the RO it moves in the opening (potentially falling!) How does one carpenter work both sides of the opening without a hole in the door?
Stephen,
I use that demonstration set at shows all over the country–why would I want to transport that thing with glass in it?
And what difference does it make? I’ve hung thousands of doors that same way–without a giant HOLE. If you correct the rough opening so there’s only 1/8″ of wiggle room, the jamb is already almost stuck in there from the get go. If you have trouble holding that still or can’t seem to do it alone, take the door off and set the jamb first! :)
Gary
When installing the plywood shims, how do you handle twisted trimmers? I saw one video where they used drywall screws to shim the plywood so it was square to the wall.
Darrin,
GOOD question! I try to cover everything in our videos and articles, but some stuff slips by. If you recall from the video, I always measure the rough opening to be sure I’m not shimming it too much–I want the CORRECTED rough opening (the rough opening width AFTER the plywood shims are installed) to be 1/8″ over the O.D. of the jamb. And those are the two shims at the top of the rough opening and the two shims at the bottom of the rough opening. If the opening is so big that you need to use more than 1/4″ plywood shims (like 3/8″ or 1/2″ or 5/8″ plywood shims!), the you’ll also have to throw in some additional plywood shims between the first four shims (the two at the top of the jamb and the two at the bottom). Be sure when you install those intervening shims that they do NOT touch your level when help plumb between your top and bottom shims. I like to leave room between the level and the intervening plywood shims for two tapered shims, one from each direction. So dealing with twisted trimmers or jack studs is pretty easy! Just measure from the high-point of the twisted stud, that way your jamb will still fit into the opening. THEN once the jamb is set and the first five fasteners are installed, and you start shimming the jamb, you can easily correct the twisted trimmers or jack studs. Yeah, sometimes if the studs are badly twisted, you’ll put two tapered shims in back to back, in the same direction, to fill the void between the plywood shims and the back of the jamb. Easy peasy.