


A long time ago, I lived in Prescott, Arizona and built new homes from the ground up. Being from California, the ground in Arizona was new to me. Through footings, framing, and finish, I struggled to bring those houses out of the rocks and trees without damaging the landscape—and still make a profit.
But it wasn’t just the trees and rocks that made the ground in Arizona different. Around Prescott, there was nothing in the ground—no bugs, no slugs, no mealy worms, no worms at all—nothing! Just dry dirt and rocks. The ground was so dry I once built a temporary shed at my home, on untreated 4×4 posts, and five years later still used it. In fact, that shed may still be there. Wood just doesn’t rot in Arizona, because it dries out quickly every time it gets wet.
And that’s the secret to rainscreen walls, too.
|
A Note from the Publisher: WARNING: POTENTIAL CONFLICT OF INTEREST! Many people have asked about my new home and shop, so we’re publishing a new series of From the Road articles. You’ll notice I’m using a lot of Katz Roadshow-sponsored materials. We choose our sponsors carefully, from among the best manufacturers in the industry, and that’s why I chose to use their products on my own home, too, some of which were donated. |
.
(Note: Click any image to enlarge)
I first learned of the term “rainscreen” from an article in Fine Homebuilding written by Mark Averill Snyder, published in issue #137.
The idea wasn’t new to me—I’d worked on homes with cedar shake siding, and we always installed battens or strapping on top of the feltpaper housewrap. But I’d never heard the word or the concept explained, and it made a lot of sense because by then I’d moved back to California, where wood rots fast when it’s near the ground because it doesn’t dry out. And I’d grown frustrated with exterior trim failure caused by moisture problems—especially ‘sandwiched’ trim, layered trim like you install on columns, corners, and paneling.
| While the old-growth trim on this historic home in Pittsburgh, PA may have lasted a few hundred years… |  |
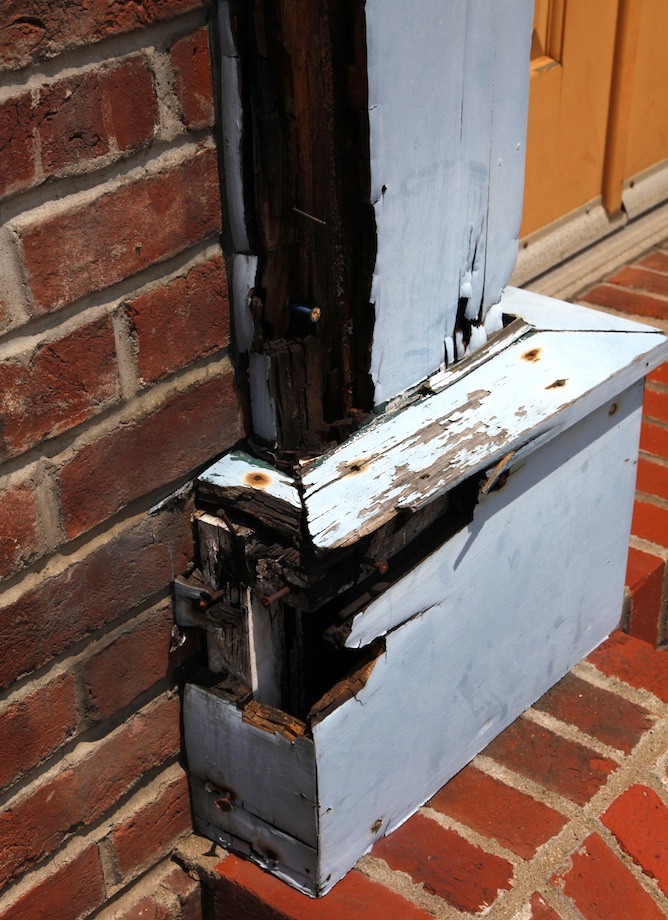 |
…today’s fresh-growth, face-grain trim won’t last a year if it’s sandwiched in this ‘traditional’ manner. |
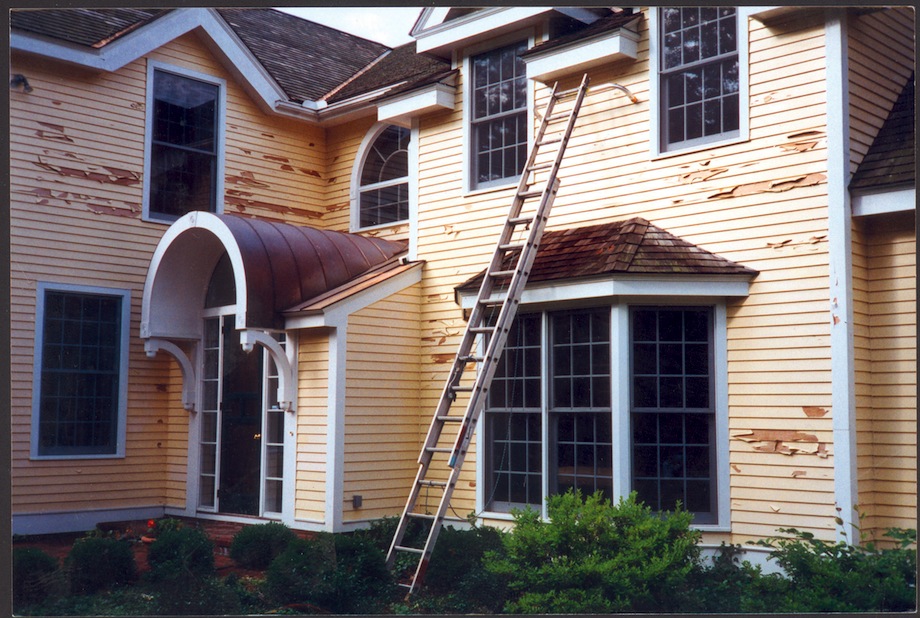
In an attempt to keep the moisture out of built-up trim work, I tried every form of caulking and sealant known to man. Nothing worked. Paint began to fail within a year or two, miters opened up, water got in, and those sandwiches turned into peanut butter and jelly.
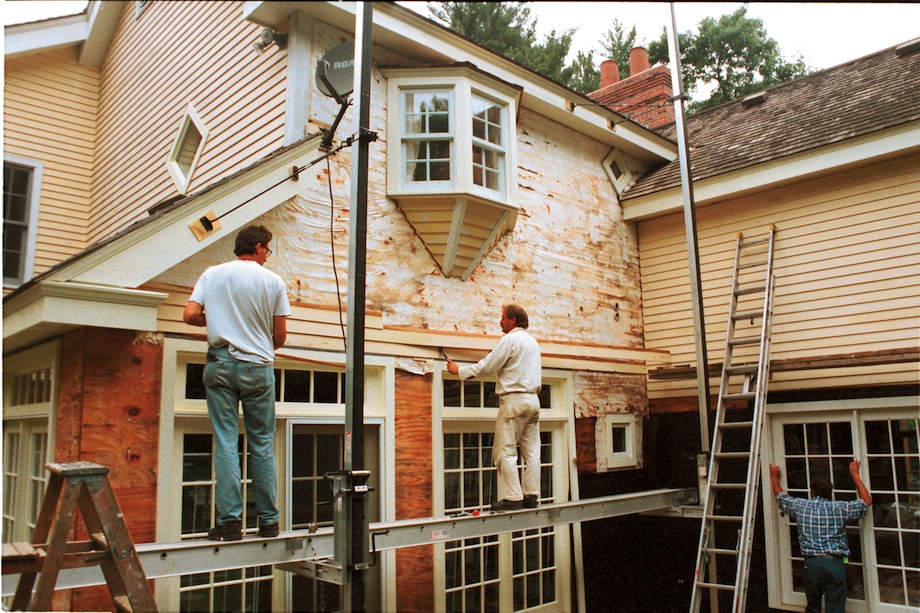
| And it wasn’t just me that was having problems with exterior trim… | 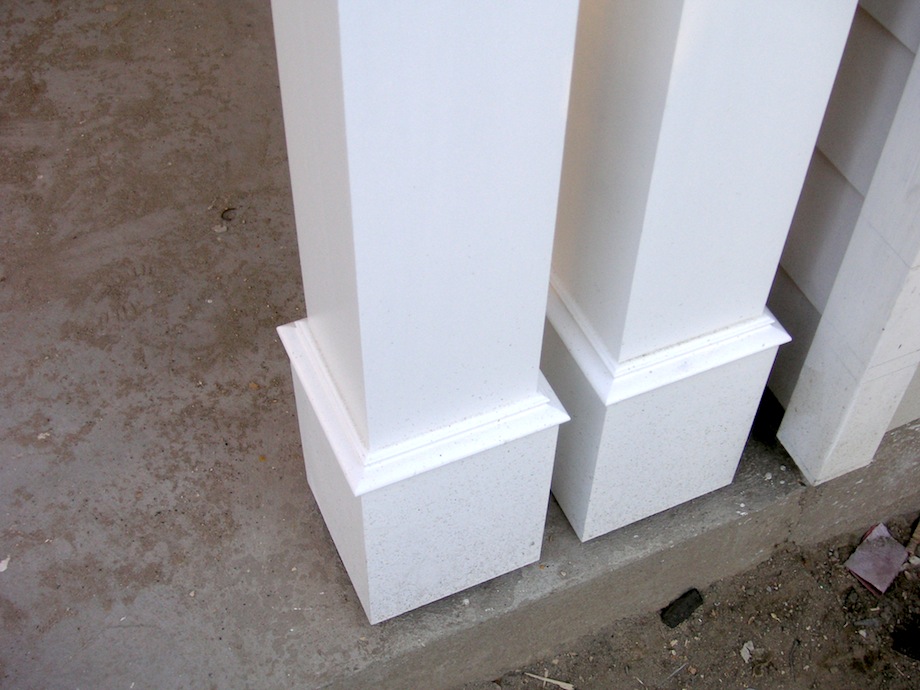 |
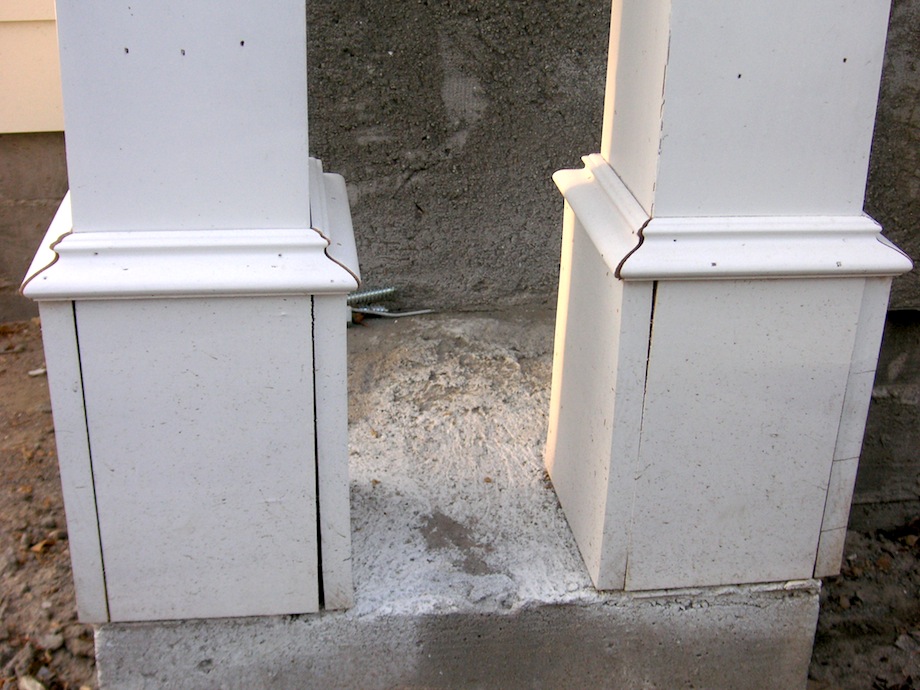 |
…one carpenter sent me these two photos, taken just months apart. |
That’s why Mark Snyder’s article meant so much to me. I immediately started using rainscreen techniques for installing all exterior trim. And I was happy with the results. In fact, a few years later, Mark Snyder wrote a follow-up letter to Fine Homebuilding, which tells the whole story better than I ever could:
From “Cross Section,” FHB #168
Rain-screen walls are a better way to install siding
Magazine editors love a provocative headline; builders love enduring craftsmanship. When I wrote about siding in issue #137, the headline read “Rain-Screen Walls: A Better Way to Install Siding” (visit www.finehomebuilding.com to read the article). I expected some opposition to the better claim, but readers were surprisingly quiet.
I wrote the article about a house that I had worked on. Recently, I had a chance to see the house again, eight years after I had installed and painted the siding, and it turns out that rain-screen walls truly are a better way to install siding.
…The story began when I went to bid on repainting the eight-year-old exterior. When I arrived, sheets of paint were peeling off the siding. I suspected that the problem ran deeper than the paint. I was right. Removing a few clapboards revealed degrading housewrap and rotting sheathing. After consulting with building scientist Joseph Lstiburek, I decided to re-side the house using a system that Lstiburek called rain-screen walls.
His theory is that water is going to get underneath the siding, so why not build a wall that allows the water to drain? Rain-screen walls create an airspace between the siding and tar paper (housewrap) that allows water to drain. Of course, the flashing details were important, and every clapboard was sealed on all six sides and topcoated four times with premium latex paint. But the paint is how I know the rain-screen walls are a better way to install siding. Eight years later, my paint job still looks like new, and there are no signs of rot. (Courtesy of Fine Homebuilding)
• • •
Joe Lstiburek has played a critical role in my understanding of rainscreen walls, too. His most recent article, “Mind The Gap,” should be required reading for every contractor, architect, and building department in the country. Especially with the new materials we use for cladding homes today.
As Lstiburek puts it:
We learned through trial and error (mostly error) that if you use OSB and really good cavity insulation and a housewrap make sure you have an air-gap between the cladding and housewrap/OSB interface. These types of assemblies with gaps work almost as well as those uninsulated assemblies sheathed with plywood we used to build decades ago. Except now we have insulation. Lots of insulation. This is a good thing.
Of course, a few paragraphs later, in his inimitable style, Joe gets back to the insulation:
Things get very risky if you use a high-density spray foam on the inside of OSB sheathing…. There is no way that any appreciable moisture in the OSB can dry inwards. The only drying possible is outwards. We need the gap.
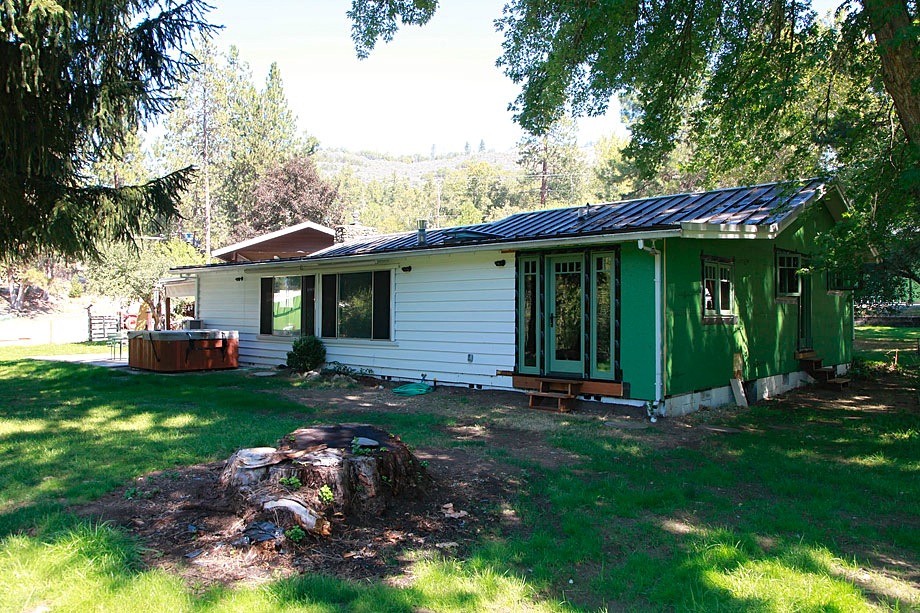
My New Shop
Last year I moved to Oregon. Ironically, this state leads the country in code requirements for Water Resistant Barriers (WRB). As explained in a recent white paper by housewrap and rainscreen manufacturer Benjamin Obdyke:
The Oregon code mandates that ‘…the [building] envelope shall consist of an exterior veneer, a water-resistive barrier (housewrap, building paper, etc.) and a minimum 1/8″ (3mm) space between the WRB and the exterior veneer. The required space should be formed by the use of any non-corrodible furring strip, drainage mat, or drainage board.’ An exception to this is that ‘a space is not required where the exterior veneer is installed over a water-resistive barrier complying with section R703.2 which is manufactured in a manner to enhance drainage and meets the 75% drainage efficiency requirement of ASTM E2273 or other recognized standards.‘
So WHY a Rainscreen?
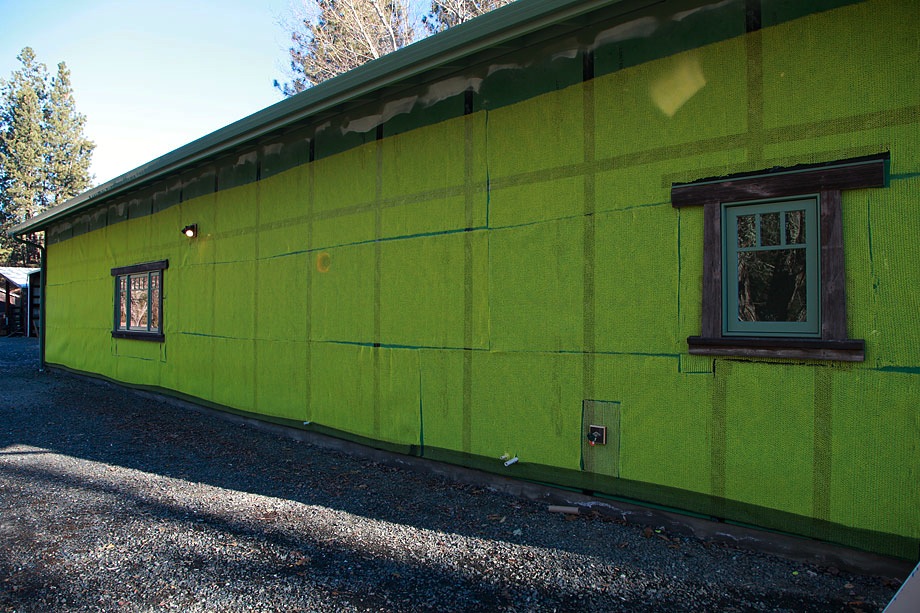
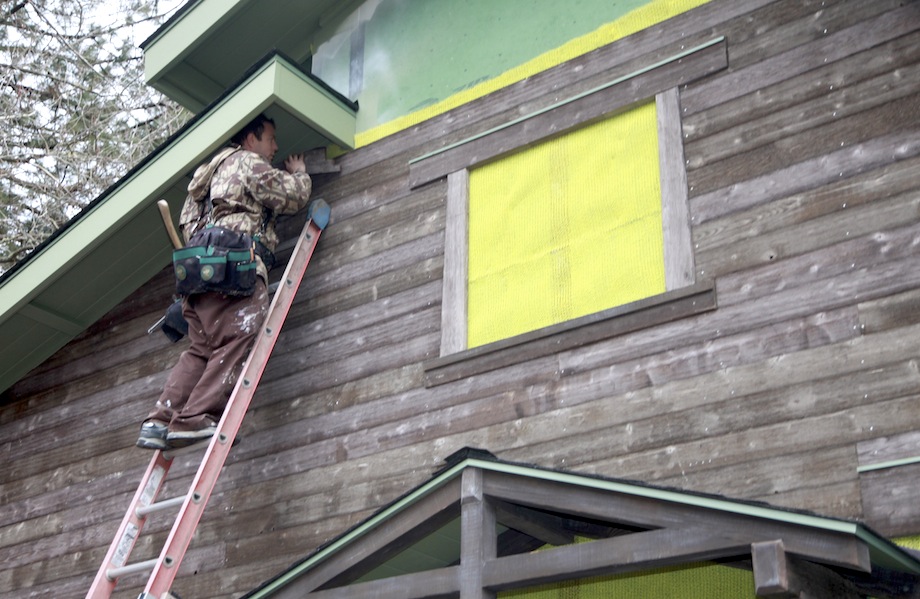
All of these issues, together with the cladding choice I made, explain why I installed Benjamin Obdyke’s Home Slicker on top of the Zip R-Sheathing around my new shop. I’m slowly doing the same around my home.
Huber Engineered Woods’ Zip R-Sheathing, has a 1/2-in. layer of foam applied on the inner surface, and provides a good thermal break, which reduces heat loss and heat gain. R-Sheathing is first a water resistant barrier—the waterproof ‘skin’ or membrane is thermally applied to the OSB core, and all seams are taped with a highly-effective acrylic flashing. R-Sheathing is also an excellent air barrier.
| Once the seams are taped, the sheathing won’t leak, even after a few thousand nails are fired through the trim and siding. Additionally, R-Sheathing has a drain rate that far exceeds the Oregon code—90% in a recent test. | 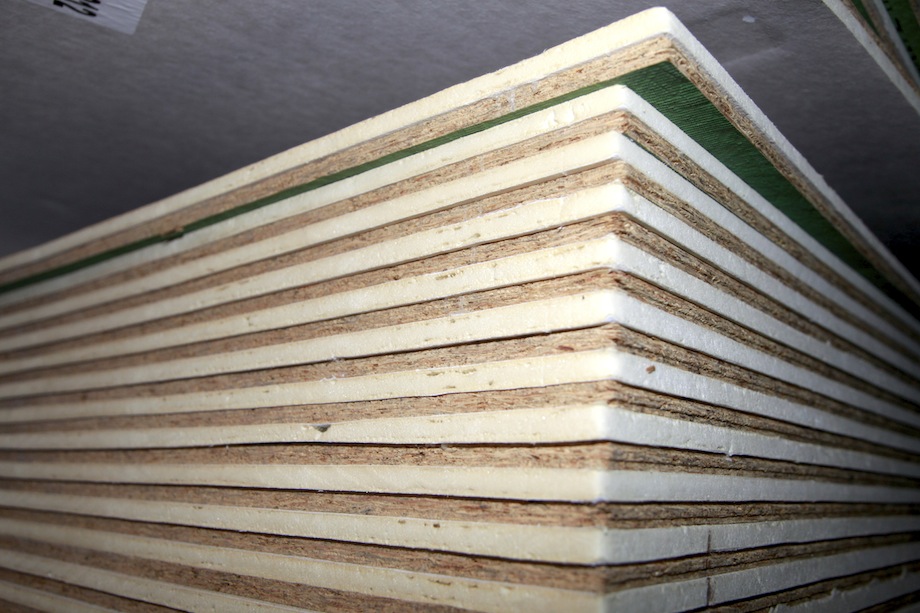 |
So really, I didn’t need a rainscreen product on top of the sheathing. But I did, for two other reasons. First, I used closed cell foam in the 2×4 walls of both structures, to insulate the walls and eliminate air leaks, and we just read what Joe said about that!
And second, I’m installing pine siding.
Traditional Techniques vs. New Materials
 I’ll be the first to admit it: I’ve been using fast-growth, face-grain pine for years—WindsorONE, for both siding and trim. And though I’ve heard horror stories from some carpenters (and later learned that they didn’t prime end cuts, didn’t maintain required clearances from roofs, hardscape, or landscape, and didn’t flash horizontal surfaces), I’ve never had an issue. It’s probably because I’ve taken care to incorporate all those ‘new techniques,’ plus more, when I install trim and siding.
Given rainscreen walls and the new WRB products we have today, together with paints and sealants, I sometimes wonder if you can install almost anything, maybe even cardboard, for exterior cladding—if you allow it to dry out, just like those untreated wooden posts in Arizona. Just think of an old barn: it’s never the cladding that rots on a barn—it’s always the roof that fails first, then the foundation and the frame start to rot, but the old weathered siding boards are still in good shape.
And the siding I’m using is like an old barn, too, except it’s newly milled and pre-finished to look like weathered barn wood by a company in Wyoming: Teton West. I love the look of the material, but I also love the origin: most of the wood comes form Rocky Mountain beetle-kill pine trees.
Sadly, there are millions and millions of these trees standing dead that we can’t use because, due to regulations and contraction in the lumber industry, we no longer have the milling capacity to take advantage of the resource.
Still, like recycling plastic grocery bags, we have to start somewhere.
Short, sweet and to the point, thanks Gary.
I was in Presskit from 1982 through 1983 going to school at Embry-Riddle. Maybe I saw you and didn’t know it.
Phil
Here here Gary, sub facial degradation, or what is known as structural trim rot was so bad in Massachusetts when I was learning the business as an apprentice we had to completely tear the siding off houses and continue with the house wrap and anything else until we couldn’t find a trace of rot and then we would call the foreman to inspect what we had done. He would inevitably find vast quantities of decay that we missed and make us continue until there wasn’t any more siding or sheeting left if need be. We then had to replace any rotted framing, sheeting felt, flashing and siding until we had it right. If we got it right at least twice in a row, that’s two houses without any screaming at us for missing anything by the job foreman, we could then progress to something nice and warm inside the structure. Until then we had to put up with freezing fingers and a screaming loud obnoxious sour pussed foreman. Hey it may have been a pain in the butt but we eventually got the process right. If you don’t get it right people will have big problems with their houses. If something was wrong we would almost always have climb scaffolding in January of February to fix it. Oh my fingers still hurt thinking of it.
Between thermal break and evap/rainscreen we can now build a house that will protect us and the house against the elements. Good article Gary.
Anyone have any comments on the use of Tyvek Drainwrap as a rainscreen?
Great article! Mark … tyvek drainwrap won’t work as a rain screen in my opinion. It has ridges that allow for water to drain nicely, however, I don’t think that it will provide enough or any airspace between the back of the siding and the face of the paper. The goal of the rainscreen is to get an air space between the two materials, when you attach the siding to the drainwrap it will close off any airspace.
I have wanted to use the HomeSlicker product for a while but we have always just chosen more low tech options with either PVC or wood lathe strips behind the siding.
This picture that I attached is actually weathered steel on an “open-joint rainscreen” … talk about a water proofing nightmare.
Michael,
“This picture that I attached is actually weathered steel on an “open-joint rainscreen” … talk about a water proofing nightmare.” Please give us more detail! We are planning a similar combination you have here with a rain screen and corten – what were your nightmarish issues? Can we avoid them?
I have never heard of rainscreen. The problem of the rot is that there is no air circulation beneath the boards. What we did was cut 1/4″ think plywood in 2″ wide strips (by 8 feet long), nailed them to the studs vertically, placed a spacer with mesh screen along the bottom length of the wall (but above the flashing) – make sure not to place the nails for the plywood at the same location which you will nail the siding (we might have used a stapler – it was almost 15 years ago). This allows the siding to “breathe” which prevents rot. We then proceeded to hand nail the siding using antique reproduction nails (as we were creating a reproduction Colonial era home).
Nice article. I would like to know how the siding is holding up 7 years later. Has the Home Slicker been effective at keeping the backside dry and free from rot?
I am debating between Home Slicker and furring strips for a siding renovation. Hence my interest in this. Thanks!