


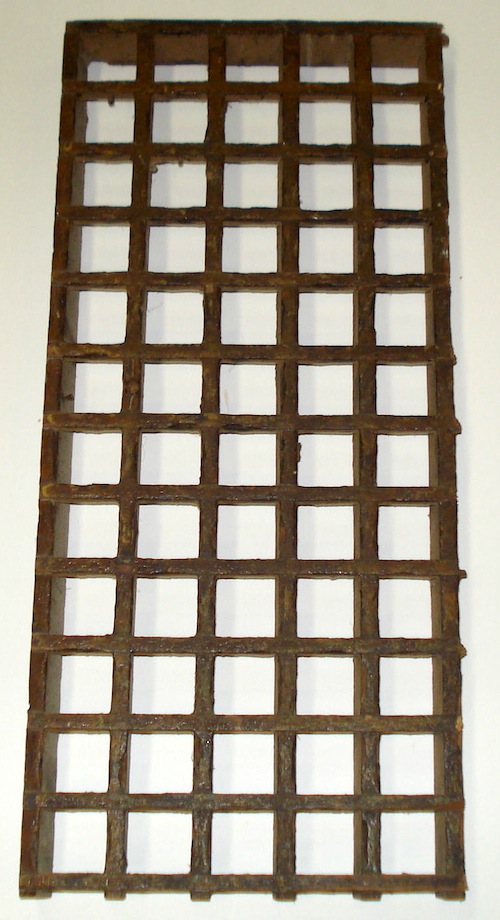
When the old timers changed their homes from fireplace and stove heating, they used gravity hot air, steam, or hot water. Gravity hot air required large return air ducts in the floor, so they put a metal bottom on a joist space to create a duct. Code guys today would have a heart attack to see that done. These large returns needed a cover in the floor, and usually those covers were made out of wood.
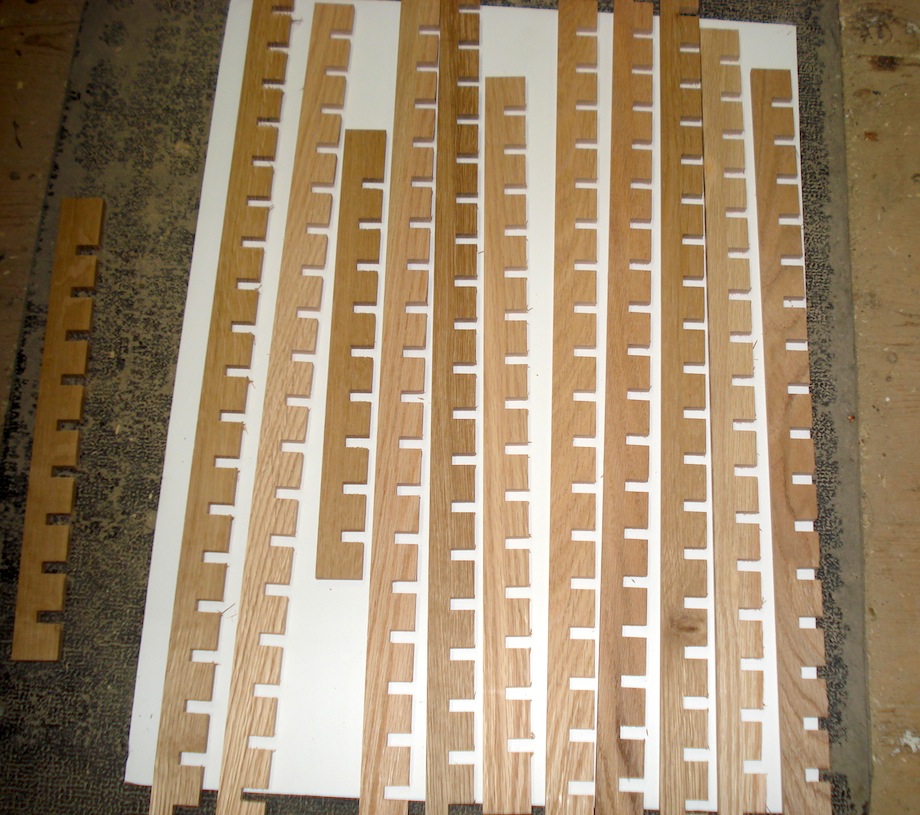
| When I had to recently fill in a hole in the floor from an air conditioning duct, I decided to make an old fashioned wooden one, taking inspiration from the old timers. I studied the old ones and realized they used a woodworking technique called a cross lap joint. Most of you are probably already familiar with this technique. I found it to be visually appealing, and easy to replicate. I used a dado blade on my table saw. An adjustable one is ideal, but you can also pick a combination of dado blades about ¼” thick and then cut your strips that exact thickness. |
 (Note: Click any image to enlarge) |
• • •
|
Please don’t try anything you see in THISisCarpentry, or anywhere else for that matter, unless you’re completely certain that you can do it safely. |
• • •
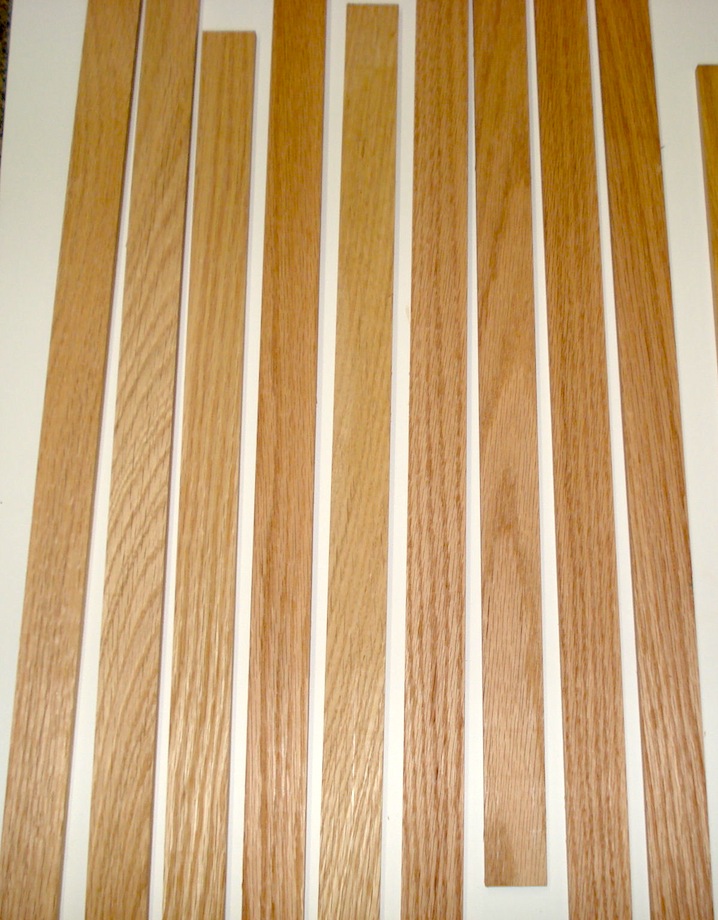 |
I cut my strips a little over-sized and then planed them to make them smooth. Sanding would do the same thing. |
I cut several extra strips since the little nibs could break off in the process. I’d suggest not cutting them to length until after you’ve assembled them.
| I screwed a piece of wood to the sliding miter gauge to act as a fence, and I sent the miter gauge and wood across the dado blade, cutting the first slot. | 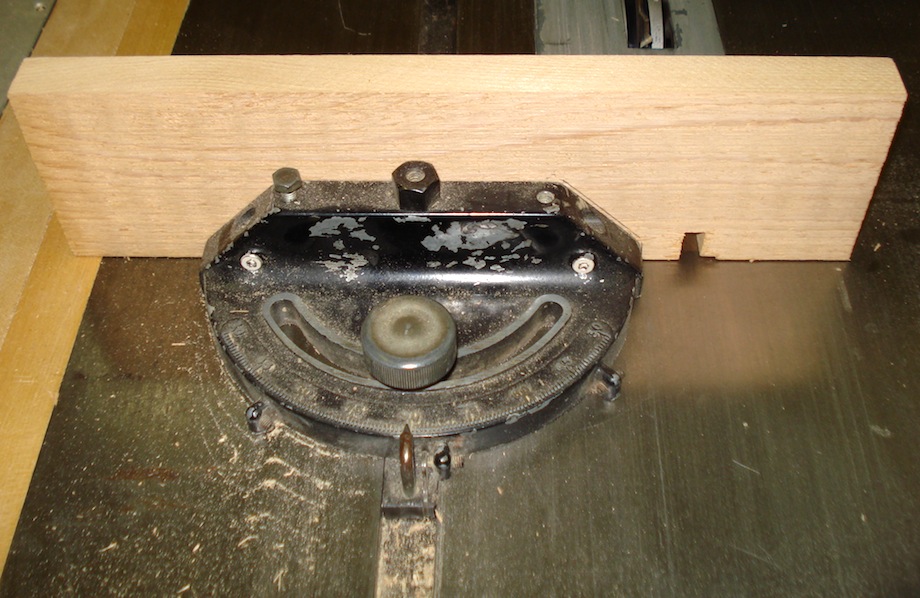 |
 |
I then made an index pencil mark on the wood and miter gauge, and I moved the wood over the exact width of the planned spaces in the grate. I cut the second slot in the fence, moved the wood back to the index mark, and screwed it back on again. |
If you’re trying a similar project, I recommend that the blade be half or more as high as the strips are wide.
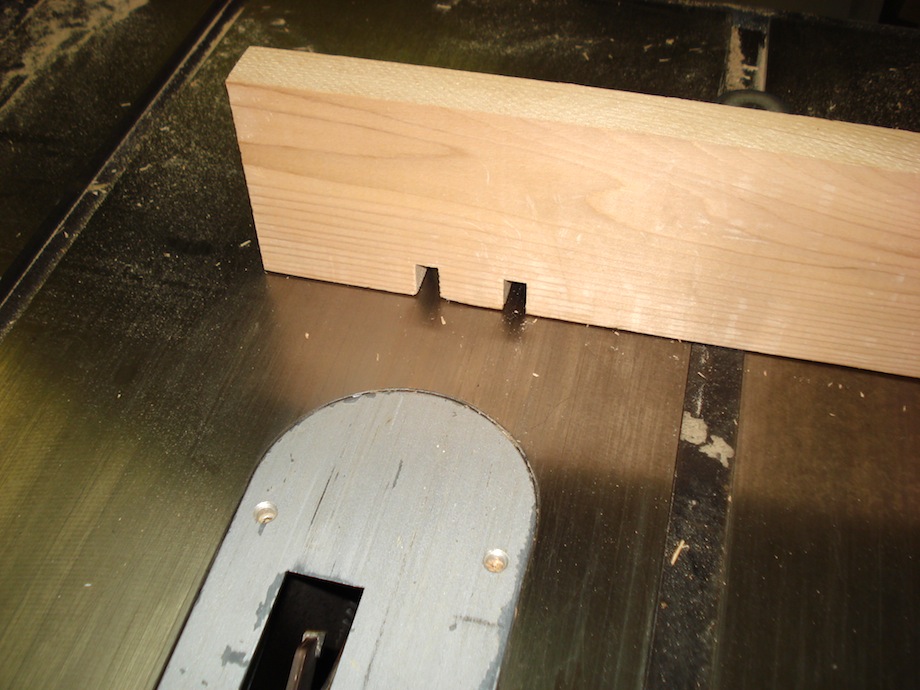
| I placed a little piece of one of the strips in the second slot to act as an indexing pin—I made mine long so I could cut five strips at once—and I waxed the saw top and sliding miter gauge so everything would move smoothly. | 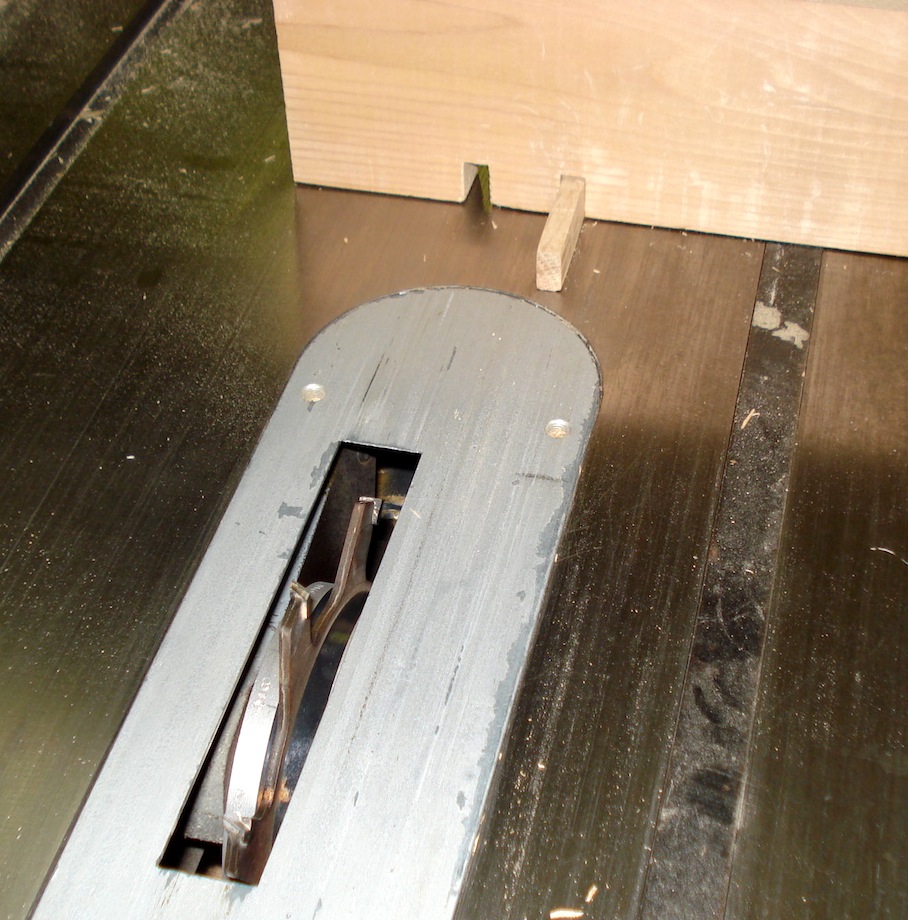 |
| With my bundle of strips registered against the indexing pin (and clamped securely in place), I cut the first slot in the strips. Next, I moved the strips over and placed the previously cut slot onto the indexing pin before cutting another slot. | 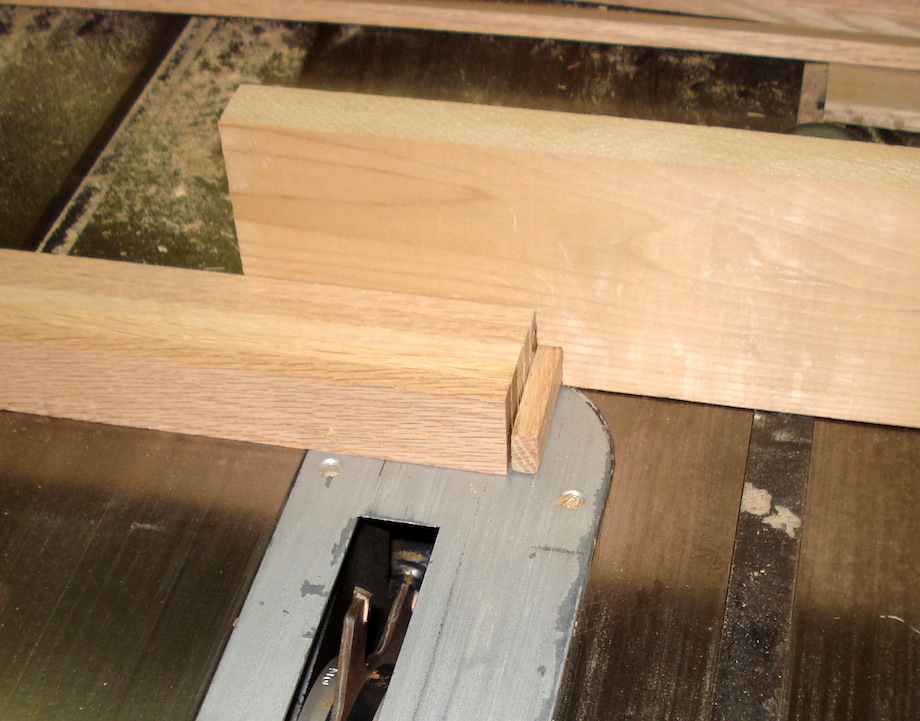 |
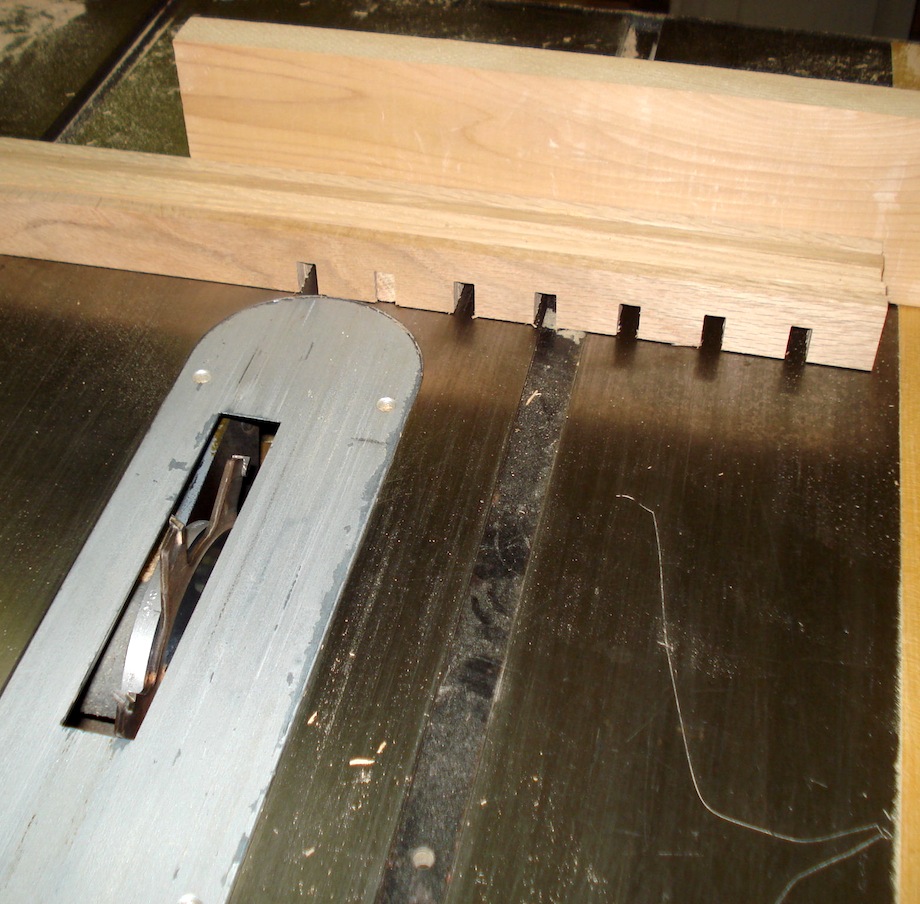 |
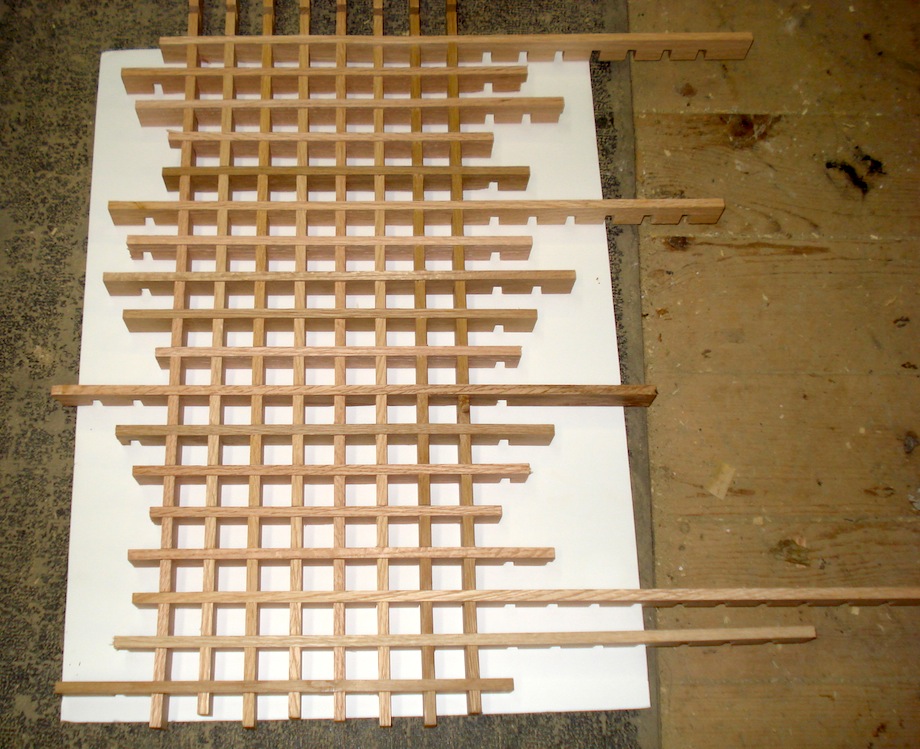
I repeated that process until the whole length of the strips were cut. |
| I used a soft hammer to work the strips together. | 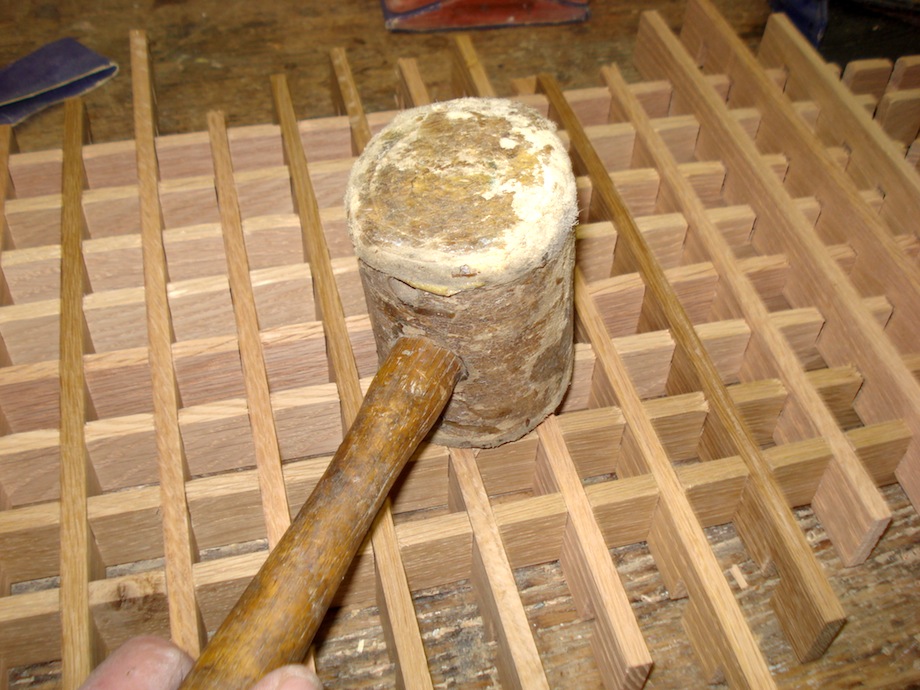 |
 |
If they were tight, I wouldn’t need any glue. But too tight, and they’d be a pain to put together. |
When I was finished assembling, I cut the ends of the strips off, and I used black paint to conceal the inside of the duct and any joists that might show.
Here is the new grate installed in the floor:
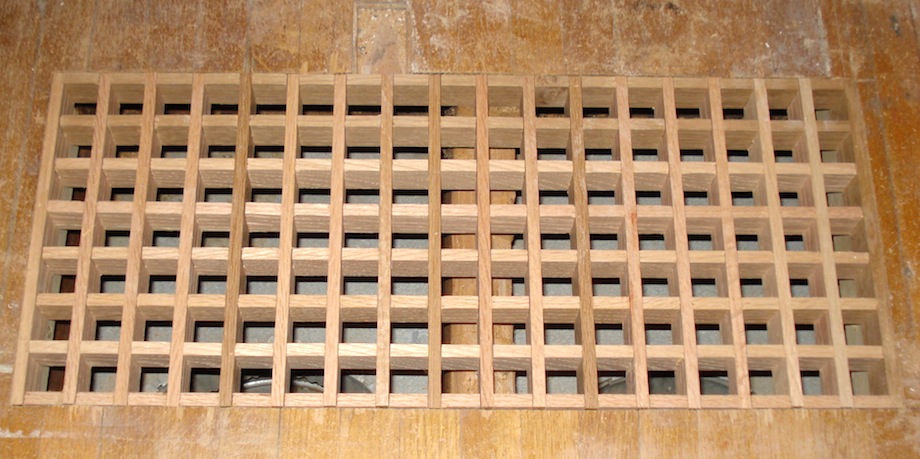
With a little floor repair and refinishing, the floor and grate will be as good as old.
•••
AUTHOR BIO
 I started woodworking as a twelve-year-old, in the 60s—I made an automotive creeper as a 4-H project. I made the rails from oak, and when I cut them on my father’s table saw it filled the room with smoke and left burn marks on the wood. I thought it was because oak was so hard. It took me hours to sand off the burn marks. I have since learned the importance of sharp tools.
In 1975, my wife and I bought our first old house. Being teachers, we had more time than money so we became avid do-it-yourself’ers. I bought my first table saw at a garage sale and asked for power tools for birthday and Christmas presents, and in 1979 we bought an investment property. It needed a lot of wood repairs, which allowed me the opportunity to sharpen my skills and buy more equipment! In 1986, we bought our dream house: an 1875 Italianate-style home. The wraparound porch needed complete reconstruction. The porch was all milled from redwood, salvaged from an old water tower. It took me three summers to build.
I retired from teaching in 2005 and started an architectural woodworking business. I have done a terrific amount of old house woodworking as a volunteer for Habitat for Humanity and for our neighborhood organization’s house rehabs. My wife and I also bought a foreclosed 1870s home to rehab. I spent a winter and a summer making an appropriate porch for it. The challenge of putting back round-topped pocket doors was my first exposure to making curved moldings. It was very satisfying work.
Grate job! Thanks for sending the project. Your renovation work sounds very interesting and challenging. Keep up the good work.
Nice job. Similar details are found in many locations on boats. One useful adaptation to houses is a “dust pan”, a flush grate with a removable sheet metal pan in an entry way.
You might consider putting a couple of crossmemeber supports under your grate.
I can see the wood shrinking over a couple of seasons and loosening up.
I don’t step on anything like your grate when in someones house.
I step over threasolds and sills out of respect for the builder.
I’ve noticed alot of people step right on them and jump up and down a few times for good measure.
I’ve noticed the same thing with my garden beds. Some people walk right through them. They have no idea how hard I’ve worked on it to get it that way. I even put down sidewalks and paths for them to walk on. But they have to cut across like they are pioneers cutting a path through the wilderness.
Mind you step!
Nice job and great easy to build indexing jig. We’ve worked on older buildings for many years and have done a few of these; we learned from an experienced woodworker that it was easier to start with wider boards and cut the cross dadoes before ripping the boards into narrower strips, quite a bit faster and tear out from the dadoing was no longer a problem either
We also dado before ripping, much faster.
Great idea and nicely done.
Thanks for sharing.
I recently did a set of 7 small floor grates out of teak, to match the floor. I made a simple fixture to hold the wide stock and a guide for a router that indexed with dowel pins @ 3/4″ o.c. I also used spring clamps to quickly secure it as it went along the board. In teak, it took two passes with a plunge router to get a good result. These registers had a 2″ frame with a lip to sit on the floor and I dadoed the frames also, and cut the top 1/2 of the grate to fit flush into the frame. I quoted a hefty price, the client had leftover teak, but it’s tough to make money on stuff like this.
TGM
Great job; now I want to hear about the other jobs you have done, i.e. the porches…
Here is a slide show of the porch my wife designed and I built on our home. I was a teacher and it took me three summers to build. All of the details were milled from the wood from a redwood water tower taken down in Chicago. The only parts that were store bought are the flooring and the roof rafters.
http://www.flickr.com/photos/31300792@N08/sets/72157627601113463/show/
Uhhh… you sure you aren’t lying about being a master carpenter in disguise!? This is amazing. I wish I had a project like this that I could advertise. That really is amazing from a woodworking stance. Bravo Dan (and wife)! I don’t care how long it took, I think it’s amazing!
Dan your house looks amazing. Very few things make me mad at myself for not building them first but your porch is one of them. When you said hey look at these pictures of this porch my wife and I did, I was not expecting to see that. You guys should be very very proud.
Dan,
Thank you for contributing to TiC, and thank YOU for posting that link to your porch photos. Wonderful work and a gorgeous home.
Gary
We bought the house next door to us when it was foreclosed upon to improve the quality of our lives. We have been working on it for three years and have two left. Here is a slide show of the porch we built there last summer. http://www.flickr.com/photos/31300792@N08/sets/72157628315023645/show/
I made the lattice for our porch using the same method.
Fine woodworking has a great video on how to make box joints:
http://www.finewoodworking.com/how-to/video/how-to-cut-a-box-joint.aspx?utm_source=email&utm_medium=eletter&utm_content=fw_eletter&utm_campaign=fine-woodworking-eletter
What are the dimensions of your slats and at those dimensions do you think it’s string enough for a 24 inch by 36 inch opening? It does get stepped on regularly.