


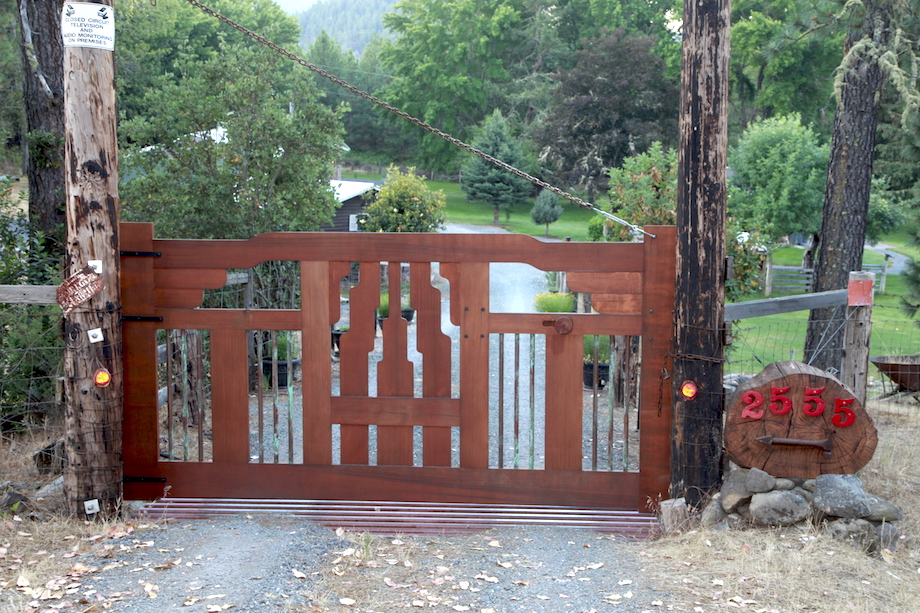
Like every part of my new home in Southern Oregon, I wanted the garden fence and gates to reflect the architectural style I enjoy the most—the craftsman style that I learned to love while living in California, surrounded by bungalows and Greene and Greene homes.
I can’t count how many times I’ve visited the Gamble House in Pasadena and the Thorsen House in Berkeley, among others. Viewing those homes is like eating almonds…you just can’t eat enough of ‘em.
A few years ago, I built the front gates incorporating the same style, mimicking a gate from the Thorsen House.
(Note: Click any image to enlarge)
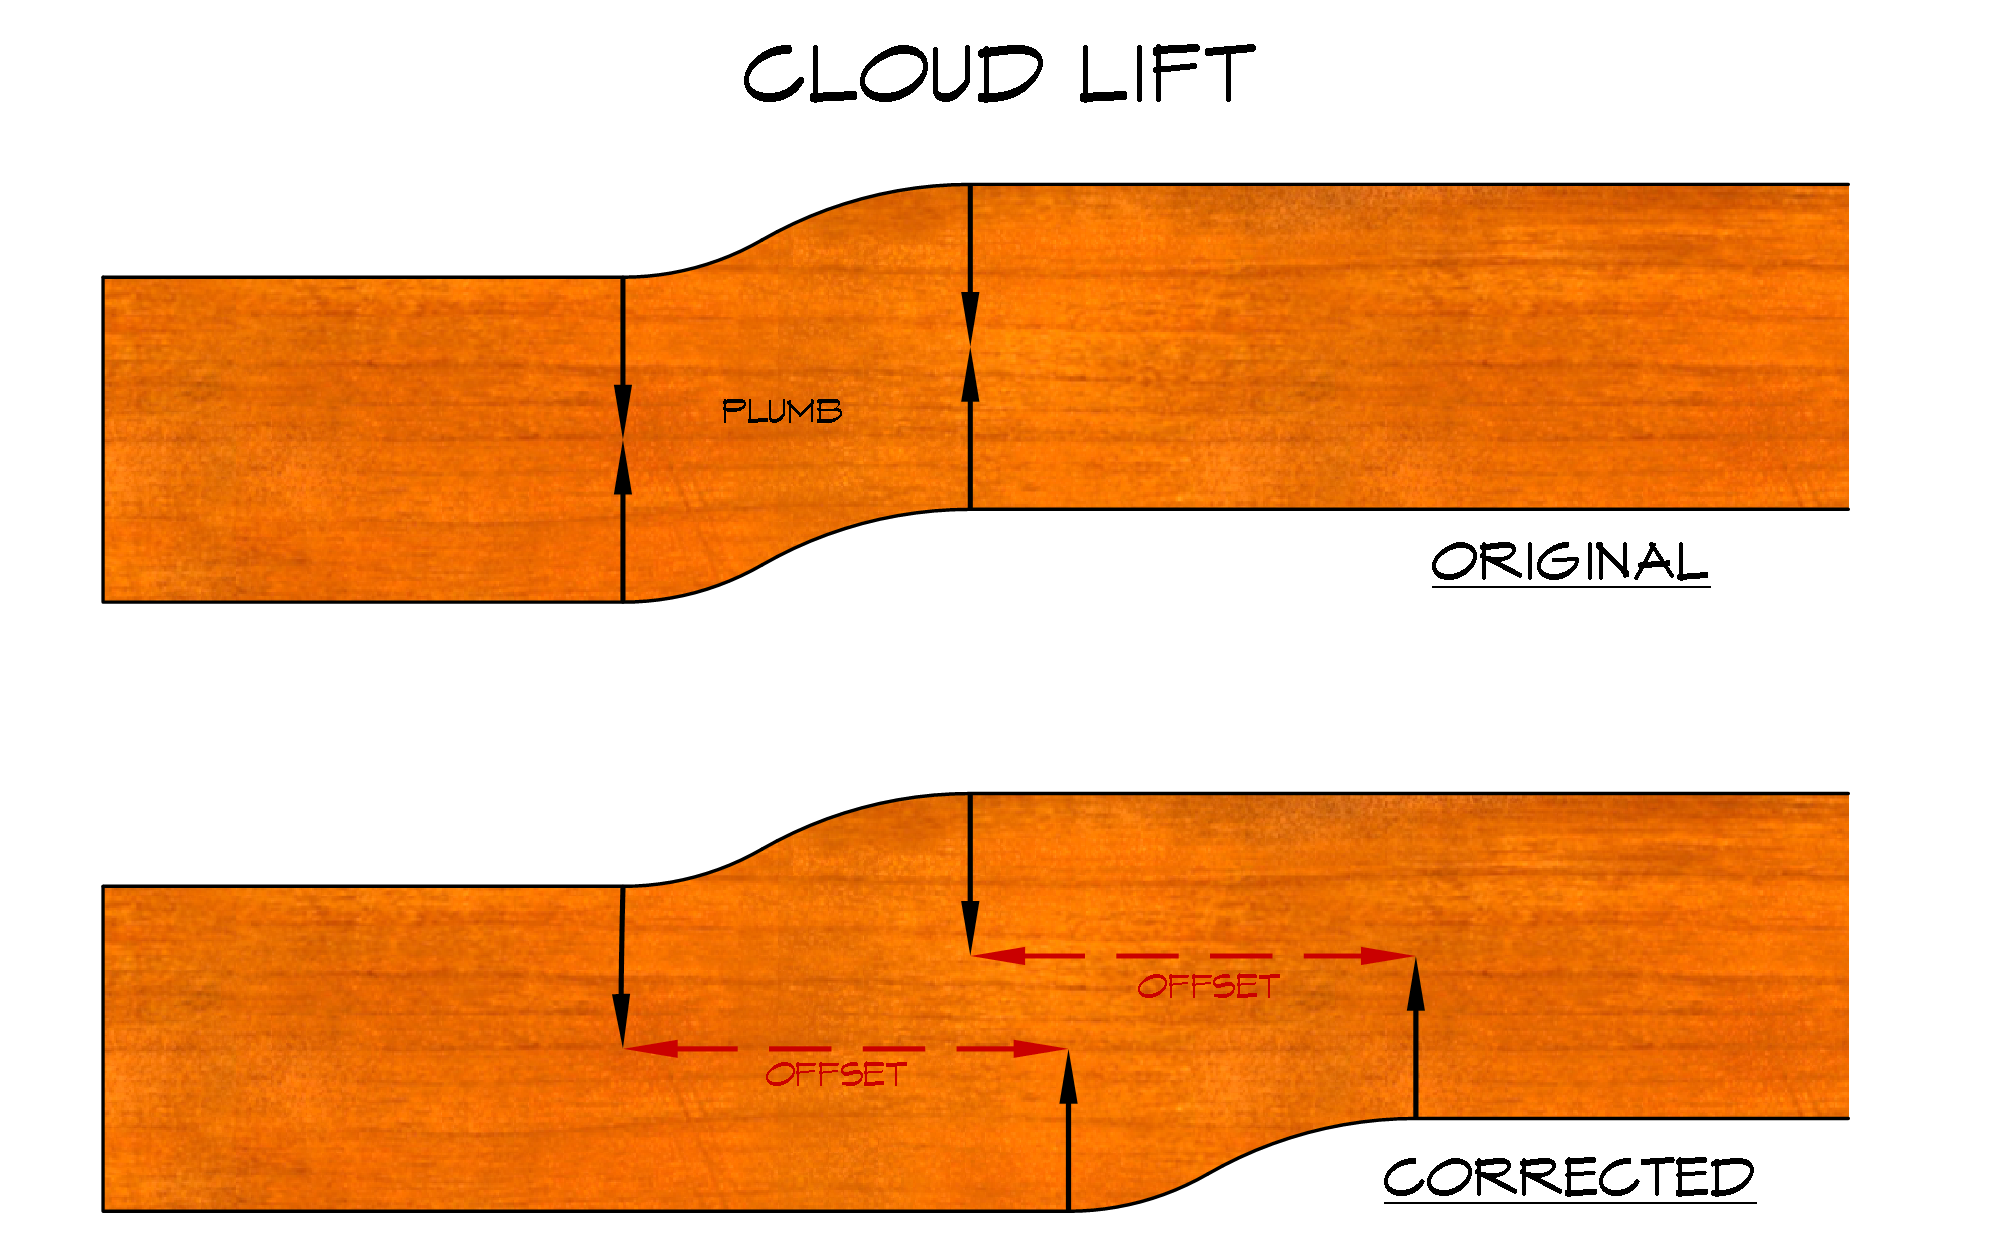
Along the way, I discovered a valuable lesson: the cloud lift design is not meant to be symmetrical—the upper and lower curves of the lift shouldn’t be stacked directly plumb on top of each other. Look at any example from nature, like a tree branch or a human bone, and you’ll quickly discover that nothing is perfect, nothing is straight—in fact, there isn’t a straight bone in the human body.
Unfortunately, when Todd Murdock and I designed the garden gates, we hadn’t ‘evolved’ our understanding of the cloud lift; only later, while designing my shower door and Murphy bed, did we learn from past experience, designing the cloud lift in a more natural and organic way. The difference might be subtle to the eye, but it sure isn’t to the hand: when you cut this pattern, ease the edges, and sand it smooth, it doesn’t feel like a post-to-post handrail with mitered joinery; it feels like an over-the-top handrail where an easing slips down organically to a volute.
Watch this video and you’ll see and hear me talk a lot more (maybe too much!) about that organic feeling.
But building the gates was almost the easy part. The material I bought for the fence posts made hanging the gates a real challenge. The posts were all cedar, and they were center cut: in other words, they were cut from the pith of the tree—the eye or center of the growth rings. The moisture content was high, too, at about 16%. As the posts dried, they twisted and bowed…badly.
| The first task was straightening the posts. I started by making a series of kerf cuts, so that once the gates were swinging, I could adjust the gaps by straightening the posts where necessary. | 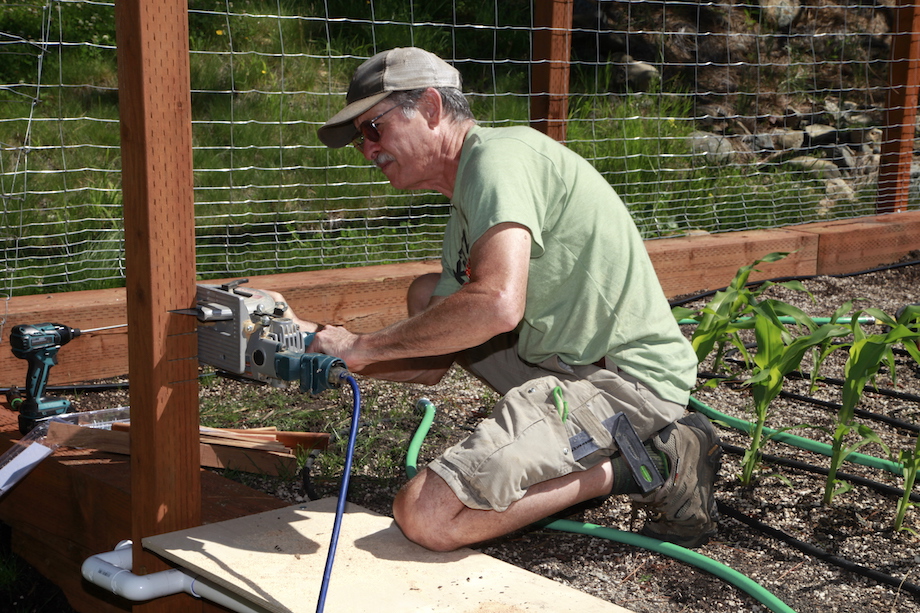 |
 |
Next I hung the gates on hinges, shimming the gates up off the raised garden. |
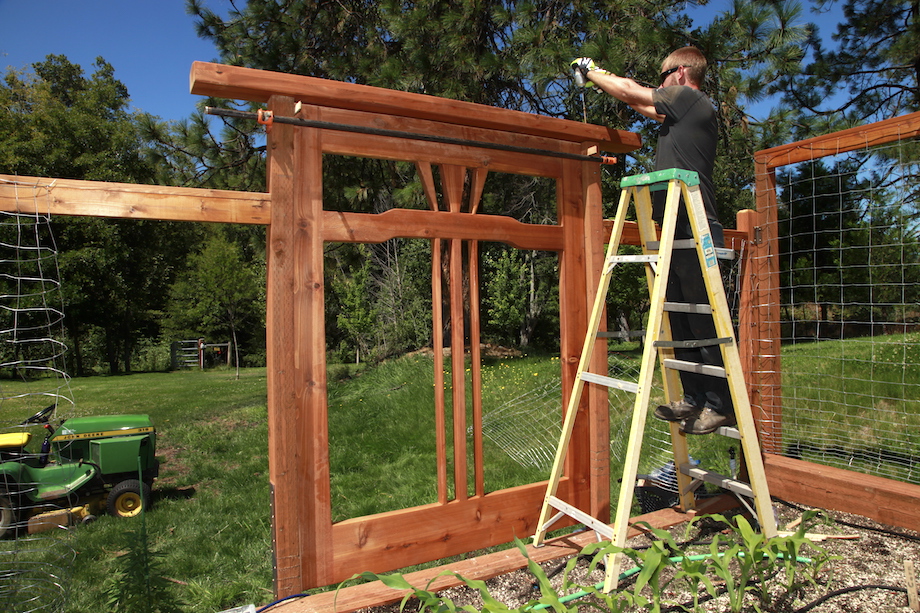
| Then I clamped the posts across the top, shimming between the gates and the hinge and strike posts, to make sure the gaps were even. | 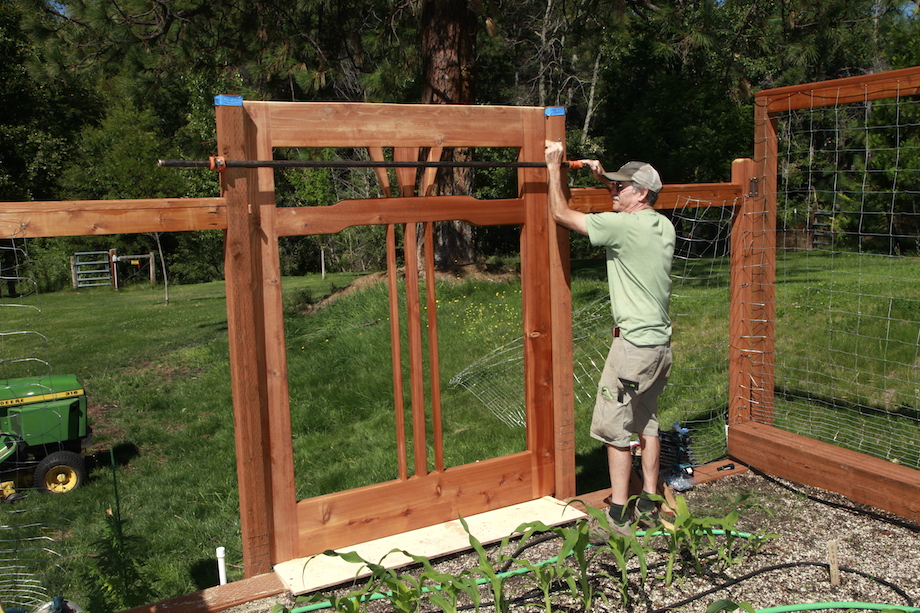 |
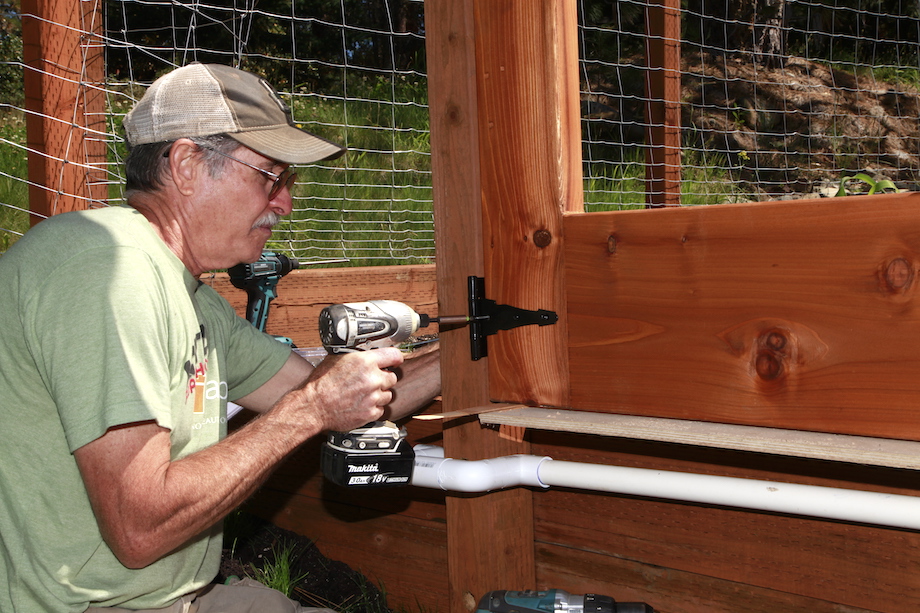
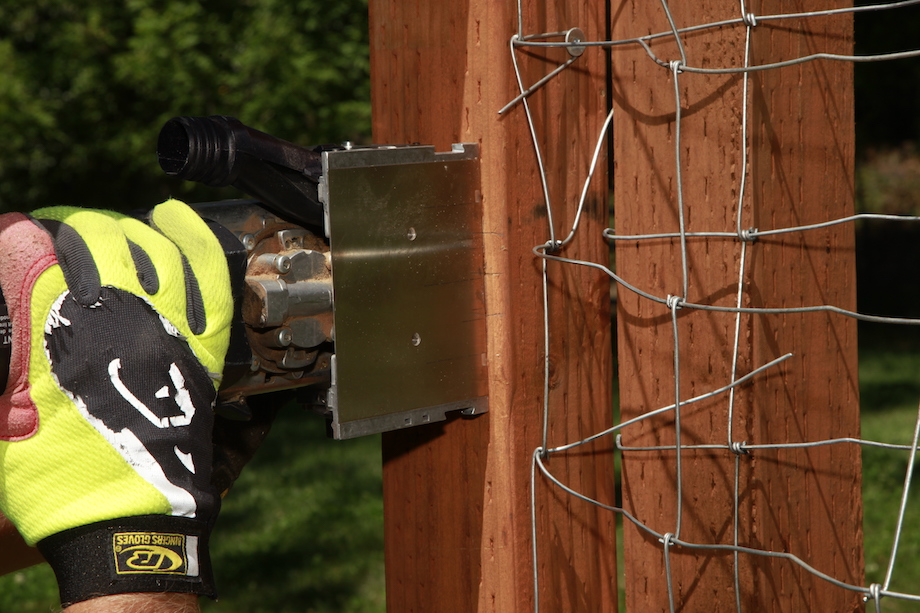
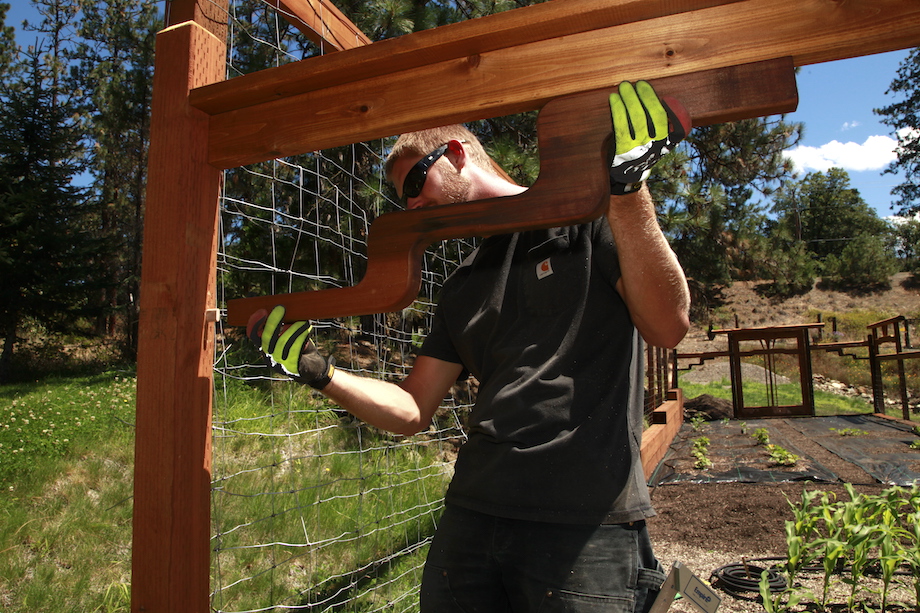
| Devin (my true right hand), helped me pull, push, and bow the posts to remove any crossleg or twist. Once the gates seemed to fit well, I installed steel plates across all those kerf cuts, to hold the posts rigid in their new ‘true’ position. | 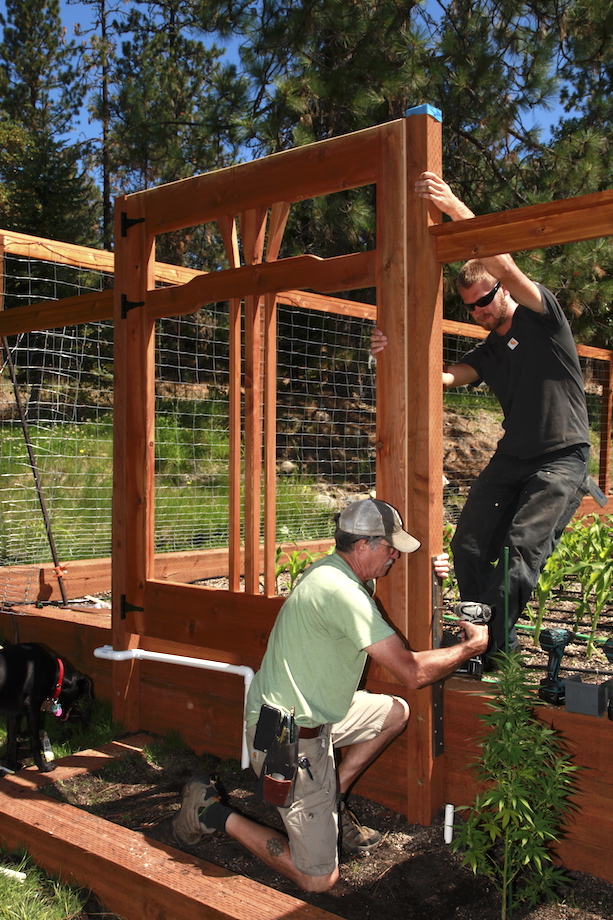 |
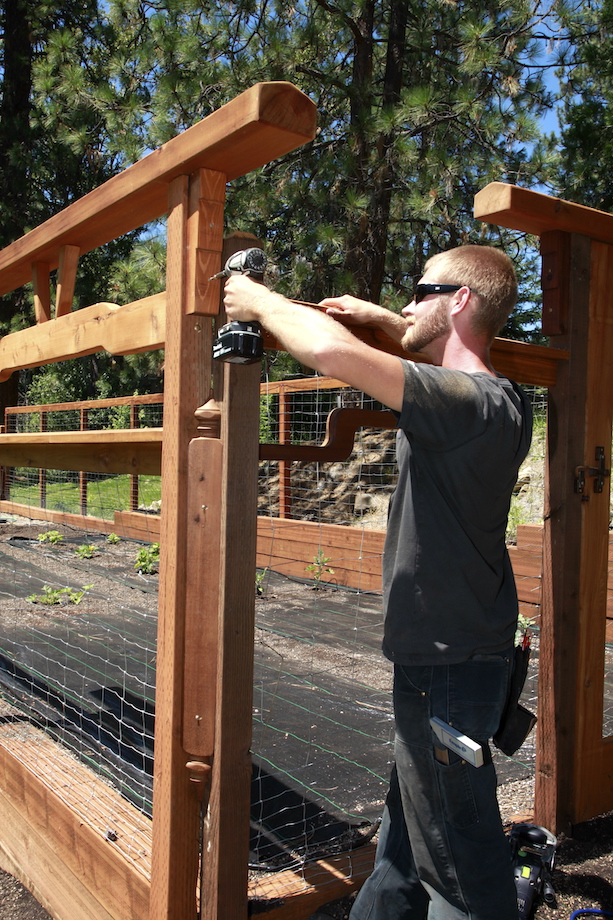
Headers, with emphasized horizontality (extended projection or length), helped lock the posts in their permanent position.
Of course, if you know me, I wasn’t going to stop there. I had other details I wanted to include, too.
We installed Thorsen-style lightning bolts (another organic design!) at each corner, pinning the bottom of each lightning bolt with a domino, and fastening the top with a coated screw.
 |
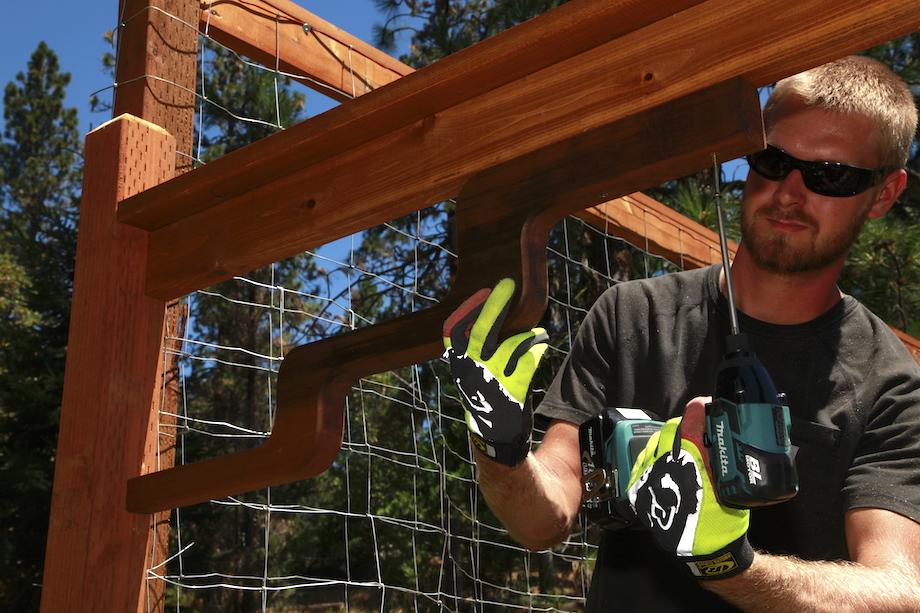 |
Waterfall brackets (thanks to Darrell Peart for that terminology!) punctuated the headers—another organic detail. And…I couldn’t resist…I had to turn something on the lathe, too, so I added the decorative corners.
I always enjoy your breakdowns of the classic details Gary.
Nicely done Sir. I can’t imagine you not turning a piece of cedar into a work of art. Thanks for sharing Gary.
well done
This post is much too helpful. Thank u so much, GARY KATZ.
I’ve recently started my own carpentry business, and I’m constantly looking to other experienced professionals to further my knowledge. Am I ever happy to have come across this article. So much detailed information, and the photos to go along with it are perfect. Thank you Gary for taking the time to write this piece, I really appreciate it.
Regards, Rob.
Love the posts and the projects. I’ve been checking in on this site for a few years now and have been able to alter and refine my work based on the insights posted here and it’s resulted in some beautiful projects! Thanks for the work and attention to details you present, it helps a ton!
Best,
Tyler