


…with appreciation to the Katz bros.
It all started when my wife decided we needed a new gate on the side of the house. The existing gate worked, but being 20 years old, it needed more than just a facelift—it needed a structural lift, too. I’m sure you know what I mean!
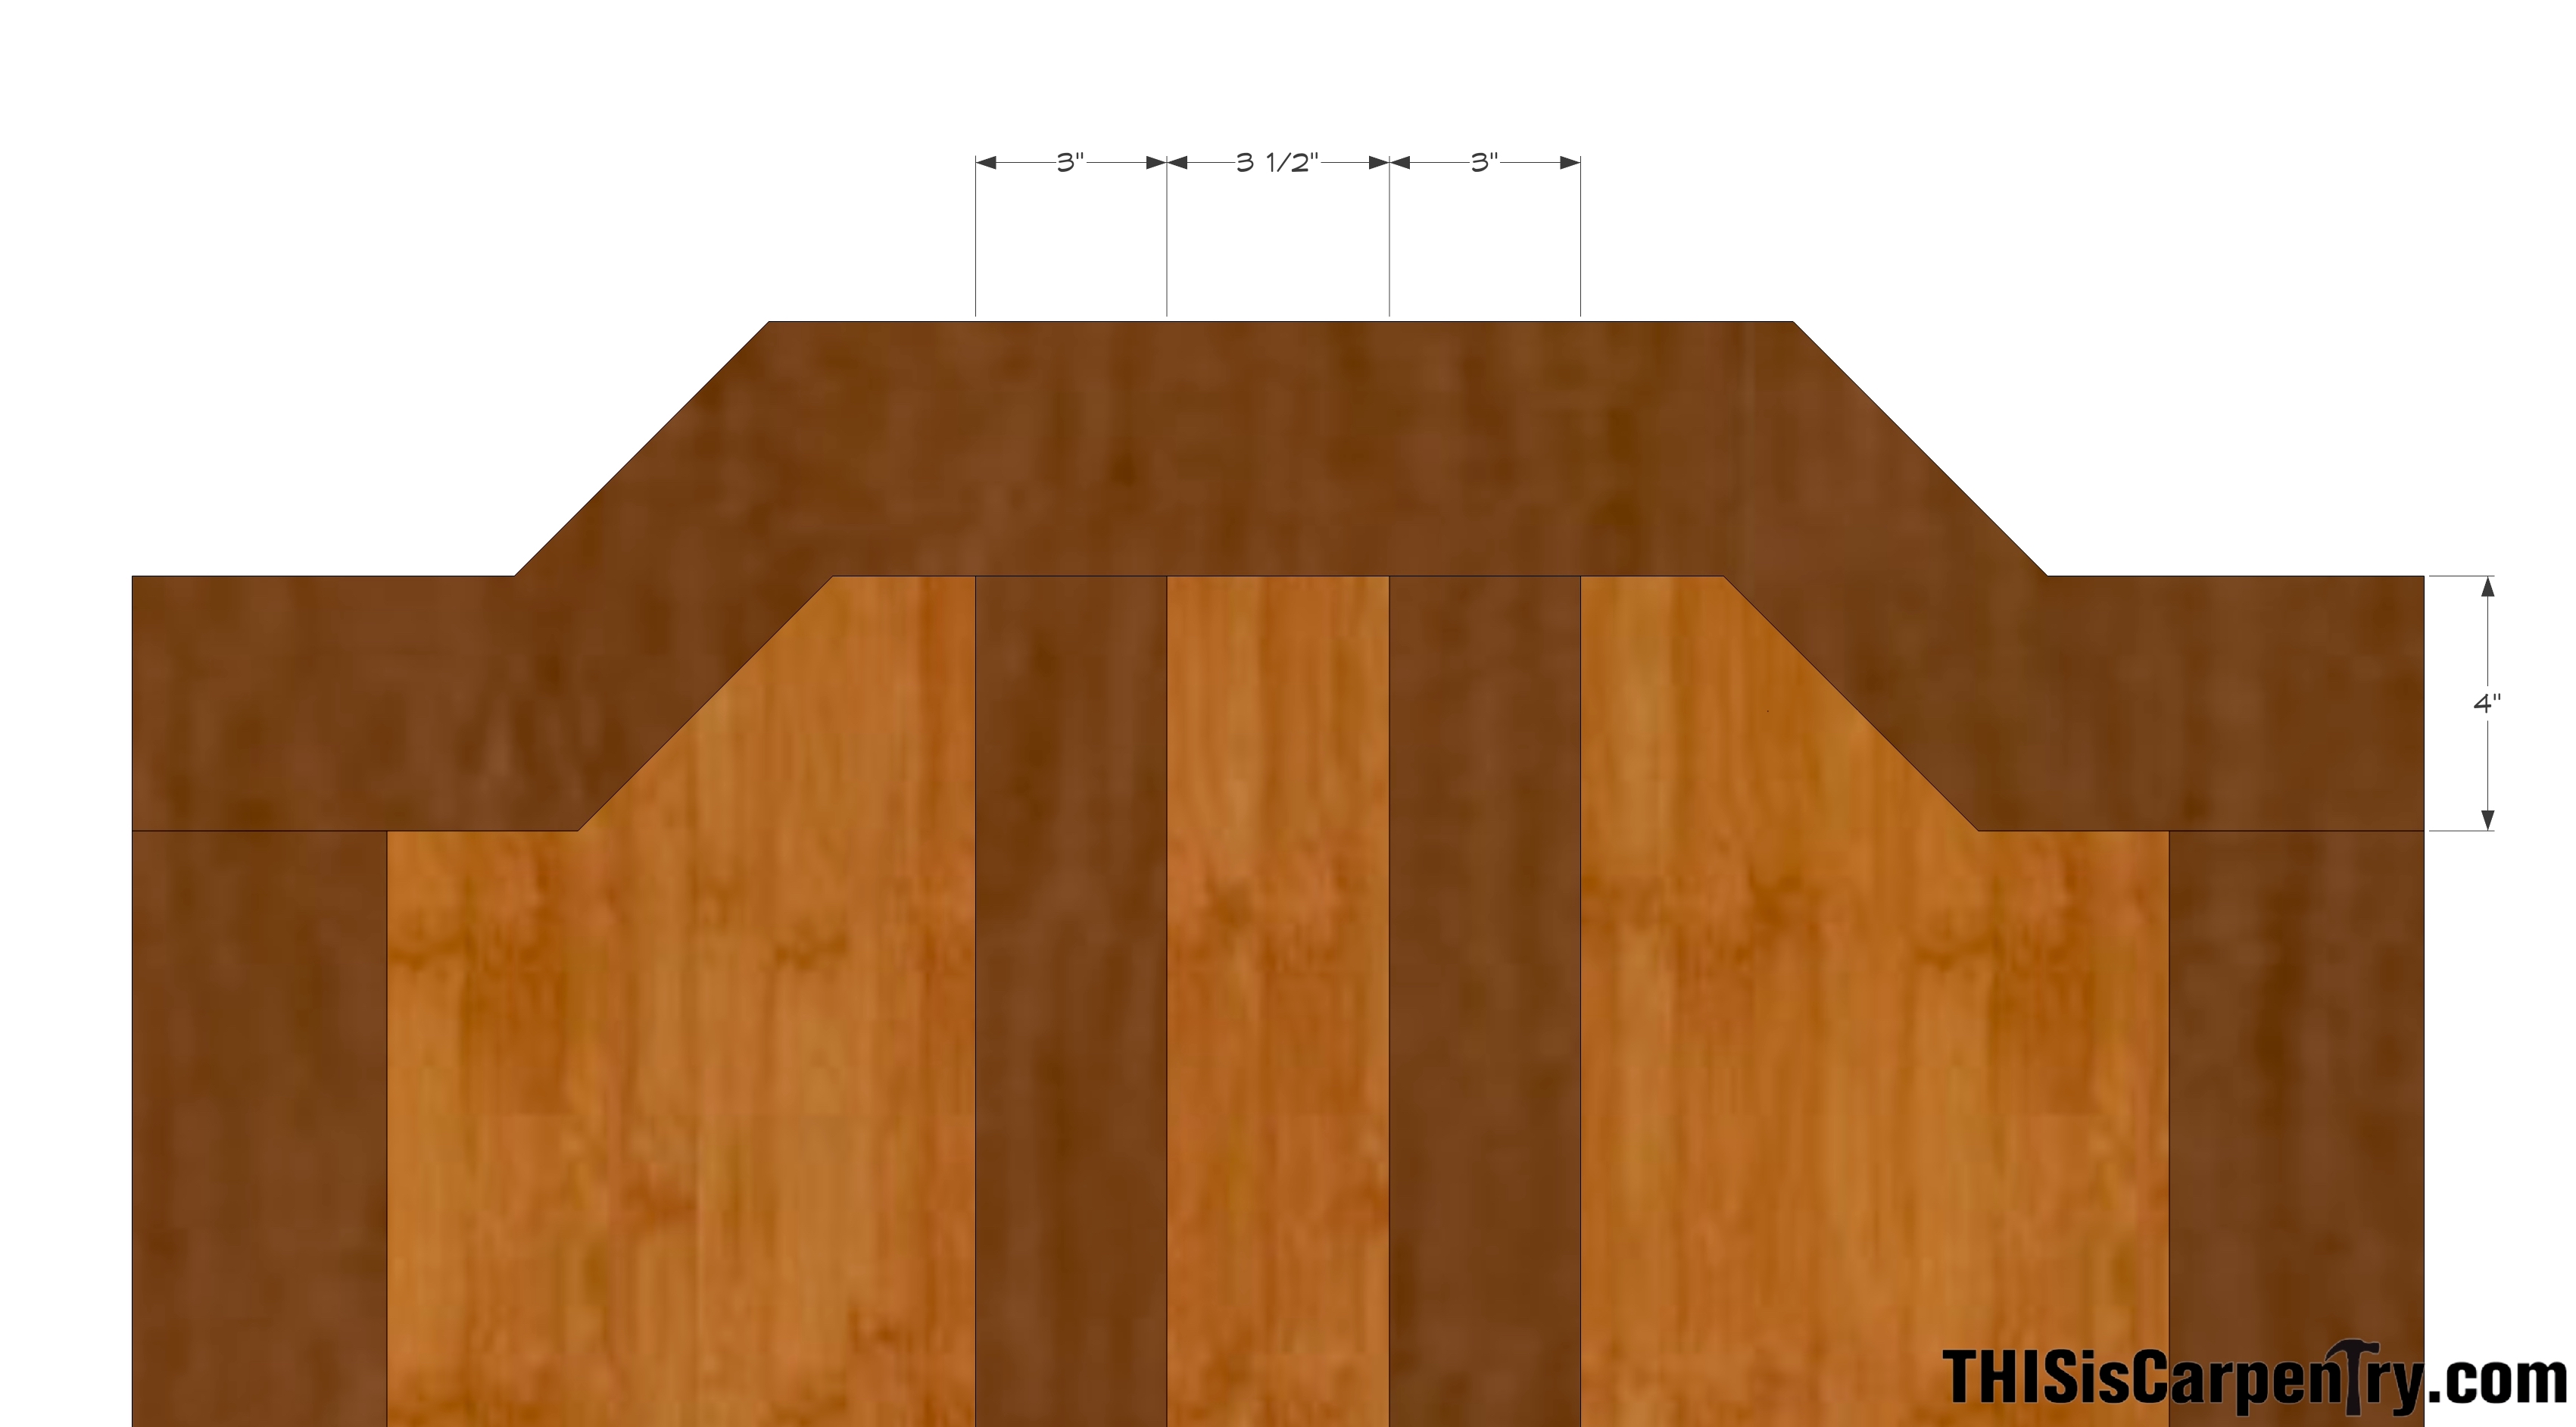
Linda found a design on the Internet—an Arts and Crafts gate with a cloud lift for the top rail (you can guess where she found that!). I had never made one before but have faced a lot of tougher challenges in my life.
I started by designing the gate in SketchUp, which proved to be a problem right out the gate. I couldn’t figure out how to make the cloud lift look right. And when I showed my hard work to my wife, she asked if I could soften the corners of the lift. I couldn’t figure out how to do that in SketchUp.
(Note: Click any image to enlarge)
So I called in the big guns—my good friend, Gary Katz. Fortunately, Gary had designed a cloud lift for his garden gate and sent the drawings to me.
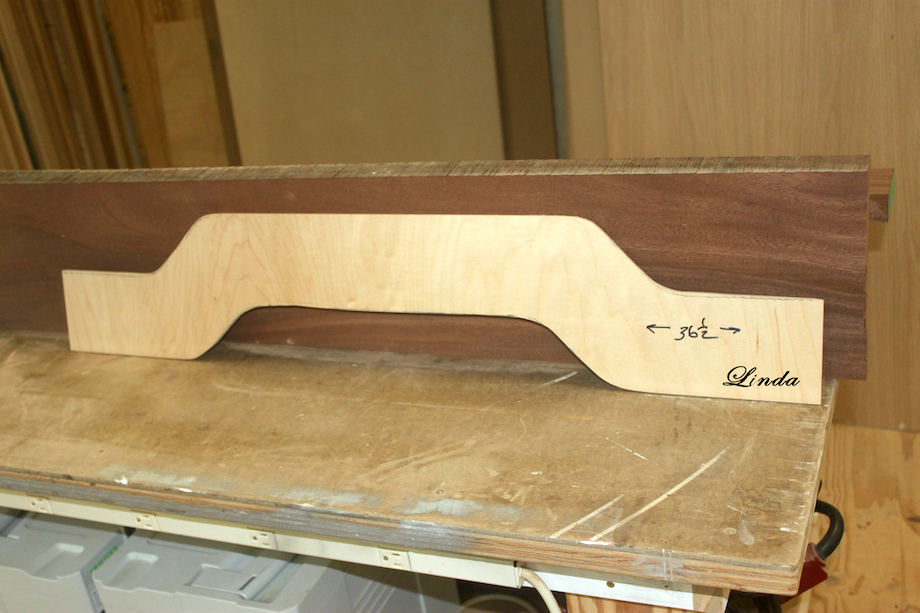
Once I got his SketchUP example, I was able to make the necessary modifications. I started by making a template, but before proceeding, I made certain ‘the customer’ signed off on the design!
Now I had to build the gate.
With the template in hand, I drove out to Larry Katz’ shop. Yes, that’s Larry, not Gary.
If you’ve attended a Katz Roadshow, you probably already know that Gary has an ‘older’ brother. As Gary put’s it, Larry is “a year older and knows a lot more.”
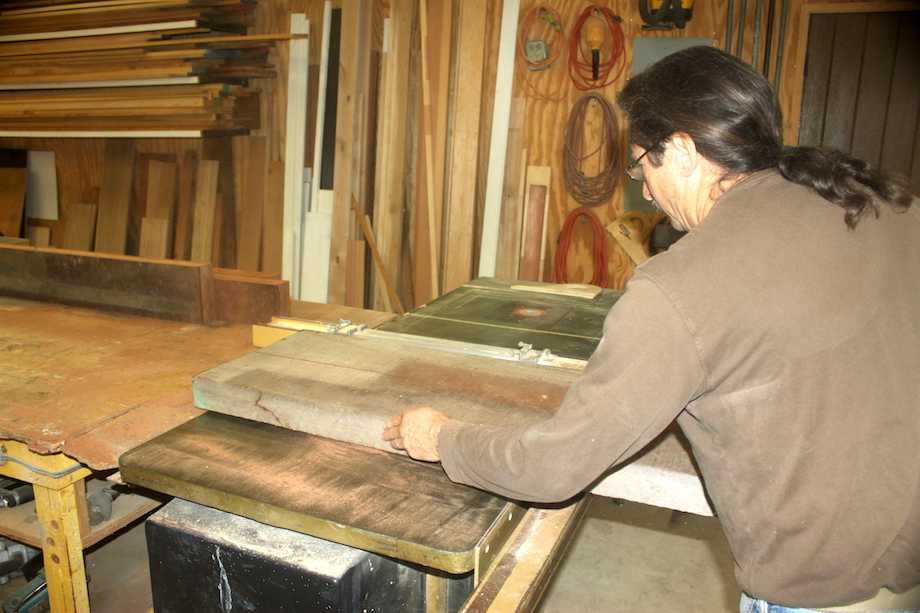
Larry has a sweet little shop and a wide variety of hardwood boards he has collected from countless jobsites over the last forty or more years. We found some mahogany boards that—though beautiful—weren’t in the greatest shape—a little twisted, warped, crowned, etc. But they were BIG and THICK, so we had no problem getting the material for my gate.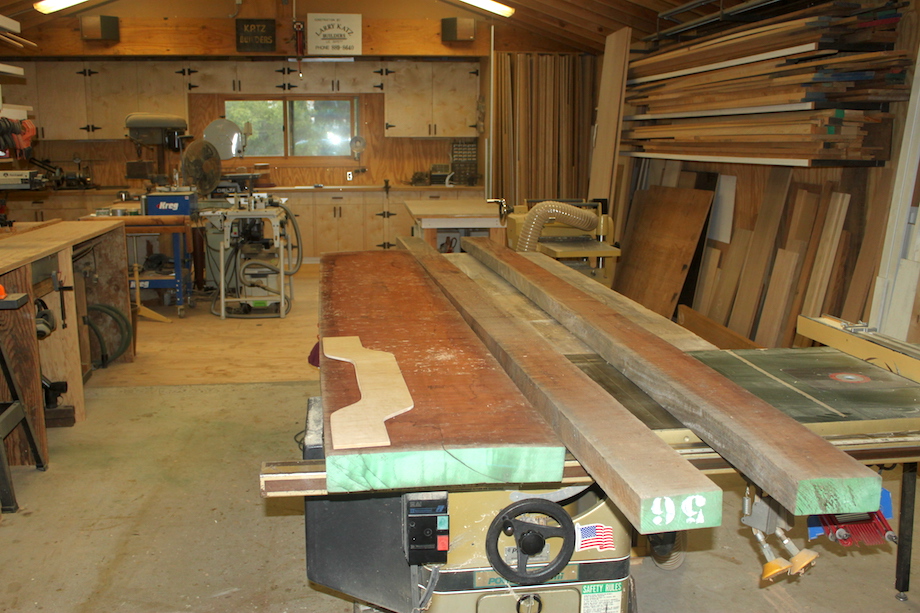
First we cut the monsters into manageable pieces. Yes, that’s Larry with the ponytail.
 |
 |
Milling the rough pieces took some time, but once they were jointed and planed to final dimensions, things started to look more manageable.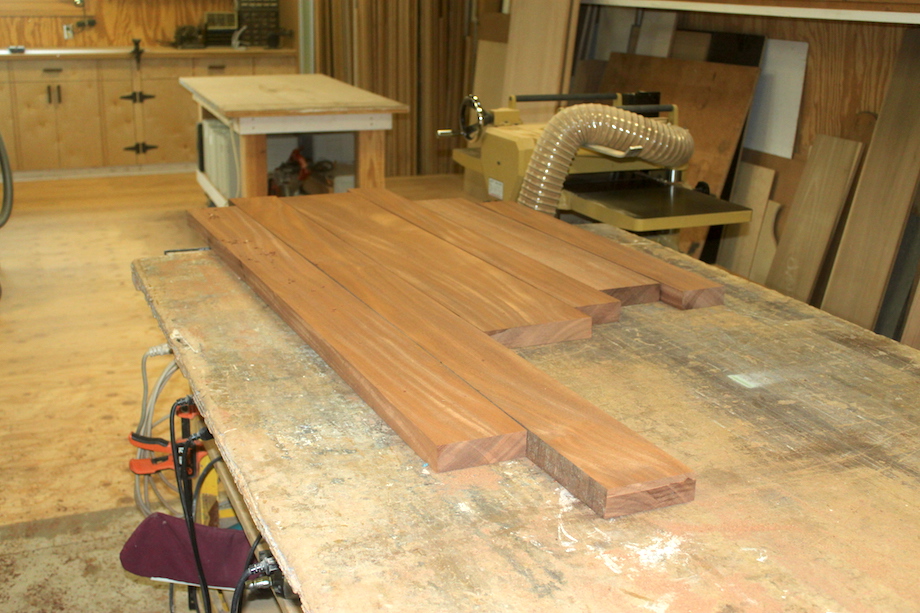
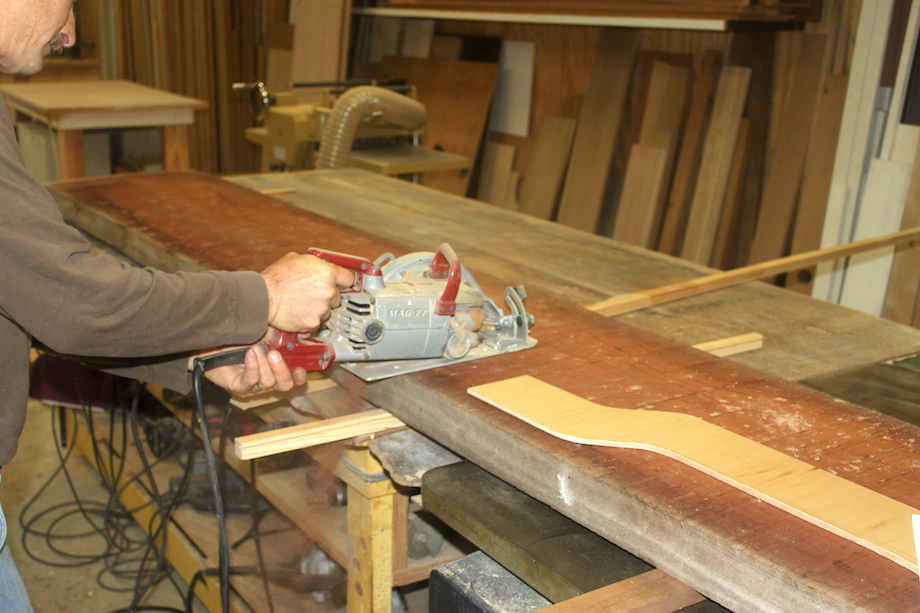
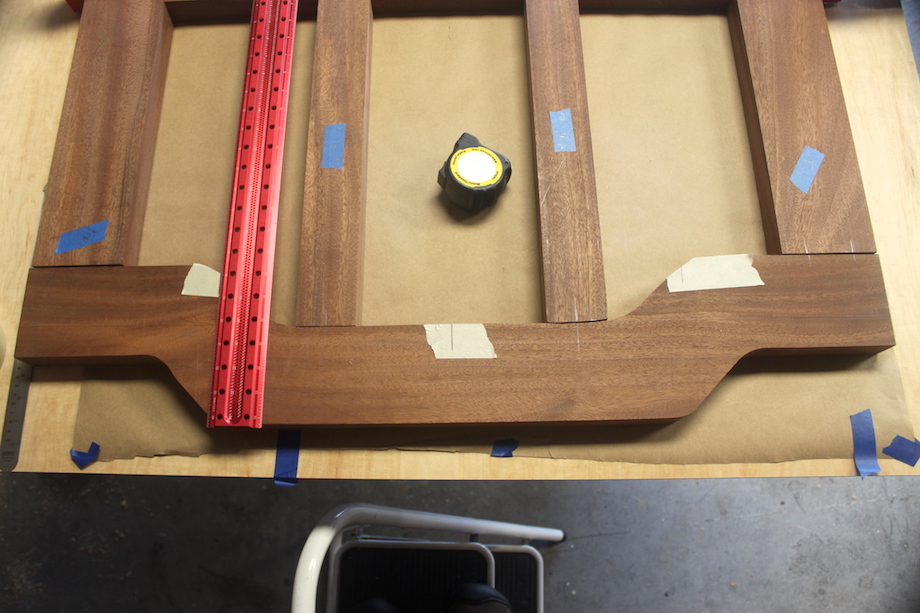
The template came in very handy. To make the top rail, I secured the template to the workpiece with FastCap’s double-sided tape, and threw in a few 23-gauge pins just to be SURE it couldn’t move. I had a lot of waste to remove and wanted the cuts to be straight and clean. I started by trimming the board on the table saw, and then decided to layup all the stiles and rails before cutting out the cloud lift pattern.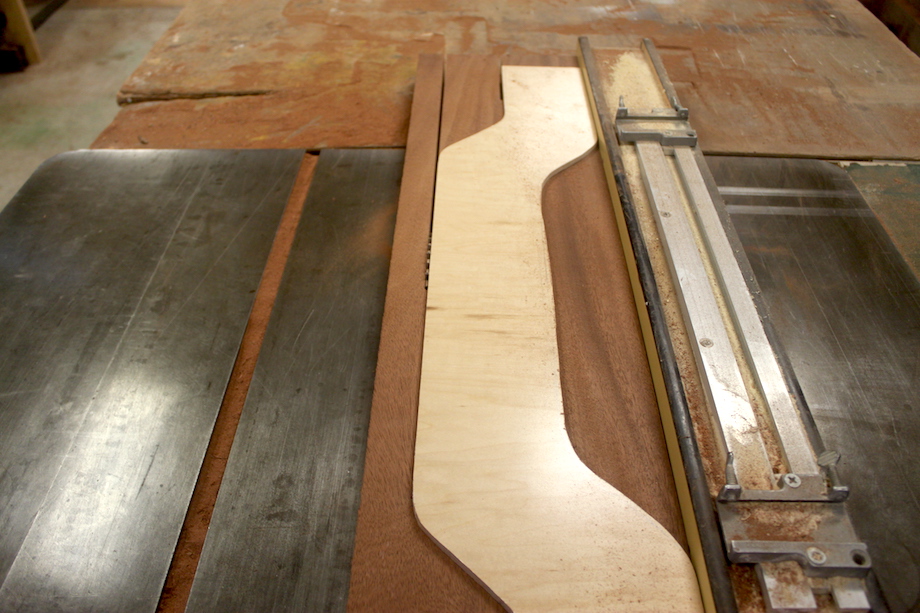
That’s when it finally started looking like a gate.
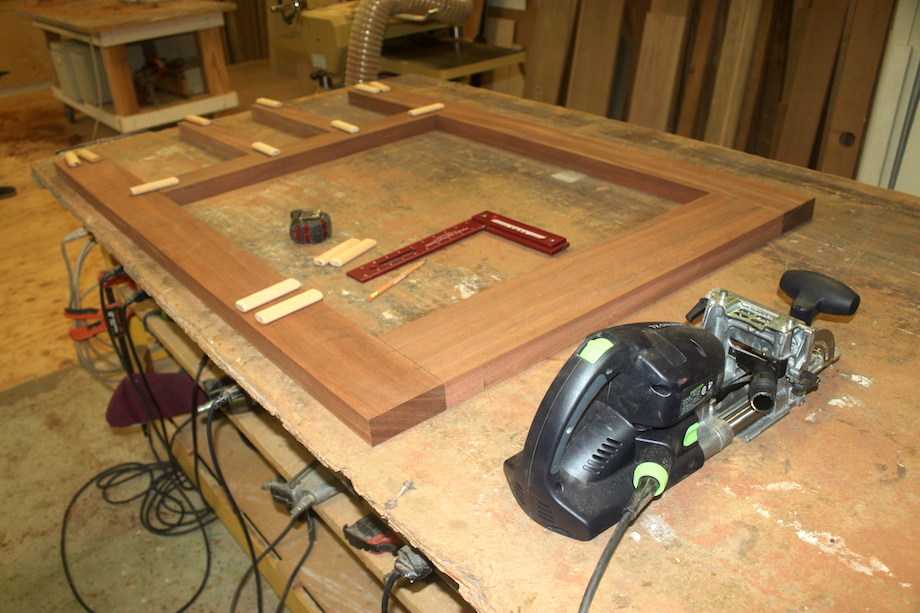
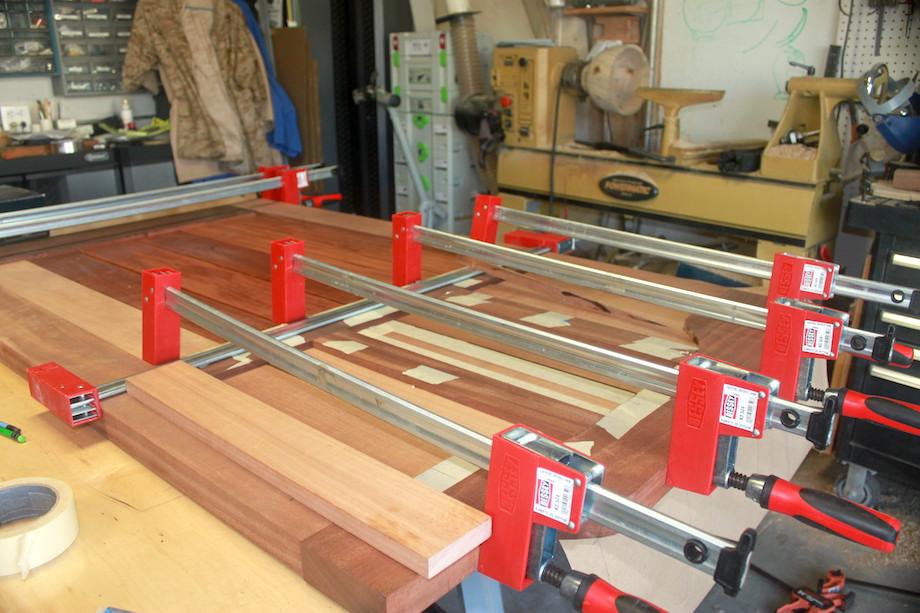
Of course, being Gary’s older brother, Larry has all the best tools, including the Festool Domino XL. I don’t think any other joinery system would have made the construction stronger, faster, easier or more accurate.
We marked the stiles and rails for 10mm dominoes, placing two tenons in each of the outside stiles, and one in each of the narrower interior stiles. In both cases, because of the stile, we weren’t able to use the retractable index pins to position the cutter, so we marked heavy center lines for each mortise.
Not only did the snug-fitting dominoes make for secure joinery, but they held the frame perfectly square, too. Once the mortises were cut and a dry-fit tested the assembly, I packaged up the project and went home to complete the gate in my garage shop.
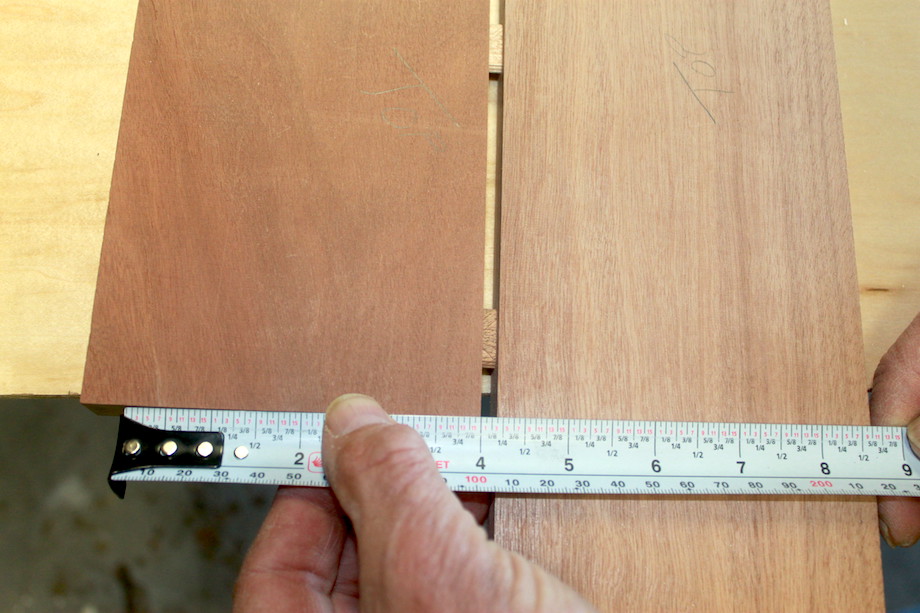
With the frame complete, all that remained was cutting and placing the panels. I picked up some slightly contrasting wood at my local hardwood store—Makore, or African Cherry—and made sure I had about 10% more than I would need. While this species is great for exterior applications, it’s terrible on the sinuses. Next time I’ll definitely choose an alternative, and there will be a next time—there’s another gate on the opposite side of my home!
Laying out the interior panels was the toughest part of the job, especially since Gary suggested I give the panels a “floating look” by elevating a 1/4-in. gap between the boards, which would also allow the boards to expand and contract seasonally, and allow rainwater to dry out without soaking into the wood. I learned a big lesson about listening too much to other people’s advice! Maintaining that 1/4-in. gap was a bear, and I took my sweet time.
| I wanted to vary the size of the panels, too, so a calculator came in handy, and a full-scale layout on my workbench was also helpful. | 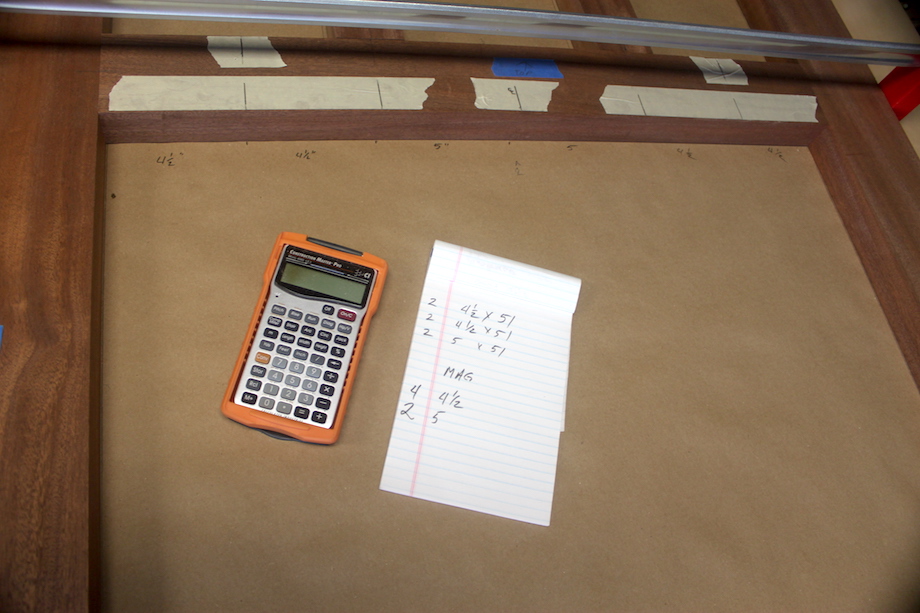 |
Once I had all the layout lines marked—this time on easy-to-see masking tape, I cut the mortises with the smaller Domino 500. Or course, that was the easy part.
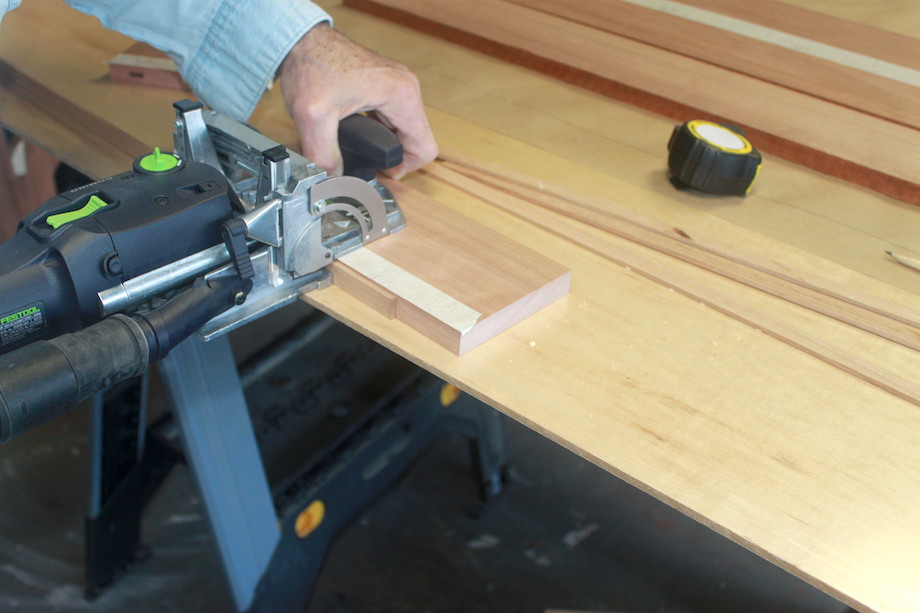 |
Rather than adjust the depth of the cutter on the Domino, I made a 1/4-in. spacer, which guaranteed a precise gap. |
 |
I was so worried about that ‘floating-look gap’! I even checked it several times as I cut the mortises. |
| Trust me, there are times when you definitely should NOT listen to your friends, no matter WHO they are. I spent hours drawing careful layout lines on those panels—and in every direction! | 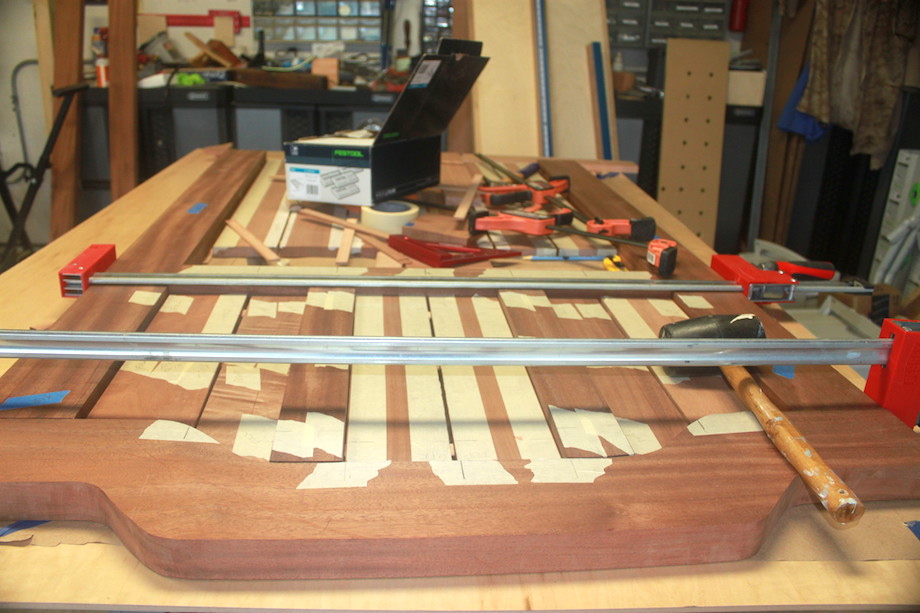 |
After cutting all the mortises, I dry-fit the whole thing—thankfully! When Linda and I saw the mocked-up gate, we decided we didn’t like that look at all! Back to the mortise! I closed up all the vertical gaps, glued everything together (you can’t have enough clamps), and I gave the project a final sanding.
After much deliberation and questioning the experts about exterior finishes for gates, I finally decided on Sikkens Pro Luxe RE in their “natural” tint. Living in California, we can only get the RE or reduced emissions version. I cleaned the surfaces with acetone to make sure I’d get complete penetration, then brushed the finish on. The finish looked great on the mahogany, but the lighter Makore showed a few brush strokes. If I stand back a little, it looks just fine.
Larry came by my place a few days later with his door-hanging bench. I was all set to help, too! It didn’t take long for me to get the hint. The last thing a true door hanger needs is help from an amateur. Larry set up the gate centered between the posts, scribed and planed the stiles, mortised for the hinges, and installed the latch, too…all in about one hour.
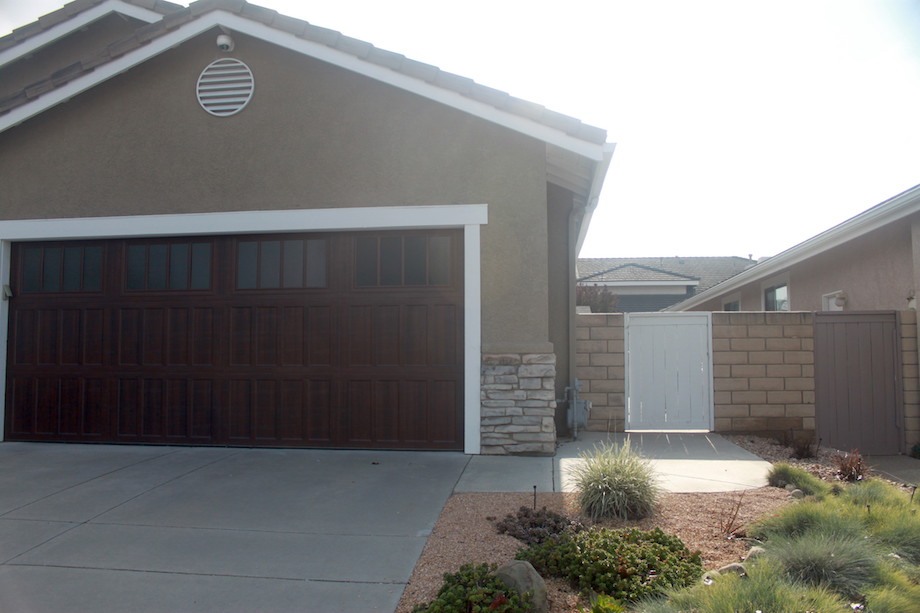
Sure, my fifteen-year old tract home in Southern California ain’t much in the way of architectural icons, but boy, when you compare the old gate…
 …to the new gate…
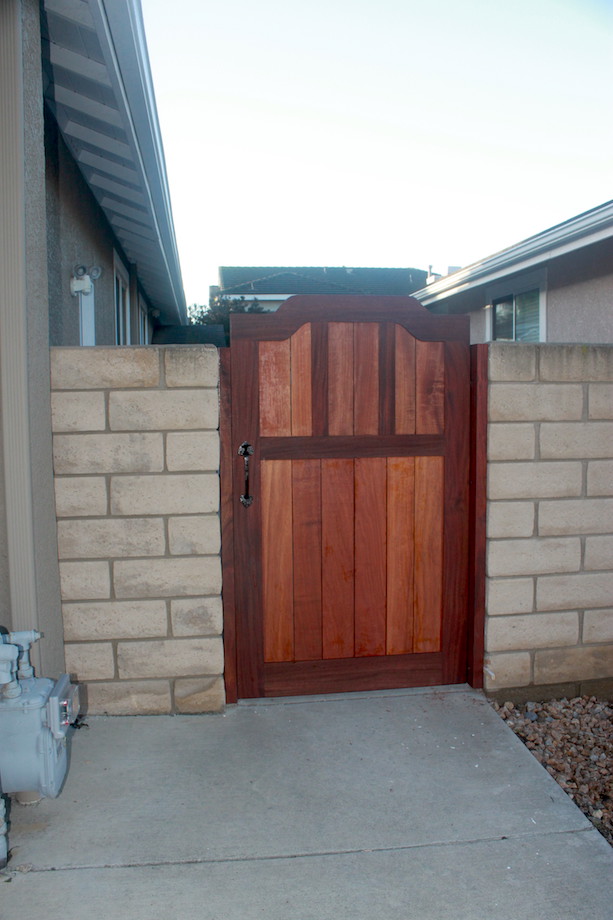
…I’m pretty happy with the improvement. And so is the client, which is really important when you live with your customer.
• • •
AUTHOR BIO
 Joel lives with his wife Linda in Ventura County, California. When he retired from public service in 1992, he took up woodworking as a hobby. Joel discovered a community college woodworking class and signed up. During his second semester, the instructor asked him if he would consider being a teacher’s assistant in the class. Joel spent five years assisting in the college class and mentored in a local middle school’s wood shop. Eventually, Joel was taken on as an apprentice in a local furniture shop, studying and building for about four years.
It was during this time that Joel discovered his love for woodturning and joined a local woodworking guild. Joel worked at a local woodworking store for five years where he taught woodturning classes. Joel still enjoys teaching woodturning and woodworking, welcoming home-schooled high school students into his shop to teach them the skills others have shared with him.
Beautiful gate and nice colors.
Enjoyed the detail of how the gate was built.
Now, if we all had a Katz nearby.
Nice classy gate. Your client has good taste.
Many years back I added an arch to my garage and finished it off with a heavy pine gate.
Awesome!
Does the solar light above the door knocker get enough sunlight to work ?