One of the most time consuming aspects of my work has been machining and hanging doors. Installing doors and casing has never been a problem, but beveling, mortising hinges, and drilling the doors and jambs always slowed things down. Plus hanging doors is a rats nest of potentially expensive errors.
It seems like every couple of months, I’m building door hinge templates, trying to improve the way they work. But I’ve never been satisfied. I’m tired of pulling my tape out constantly, and walking back up the stairs to the opening to double check a swing and translate that to the door. I wanted to eliminate all the variables. So I came up with a template and system that I’m finally happy with.
With this jig, you can machine 6/8 doors, 7/0, 7/6, 8/0, even a 9/0 door! Hopefully the latter does not become the new trend, as some of our 8/0 doors weigh more than 200 lbs.!
The template I use machines both the door and jamb at the same time, in the same pass of a router. This assures a perfect fit, and saves time—both of which I think we can all appreciate.
Materials
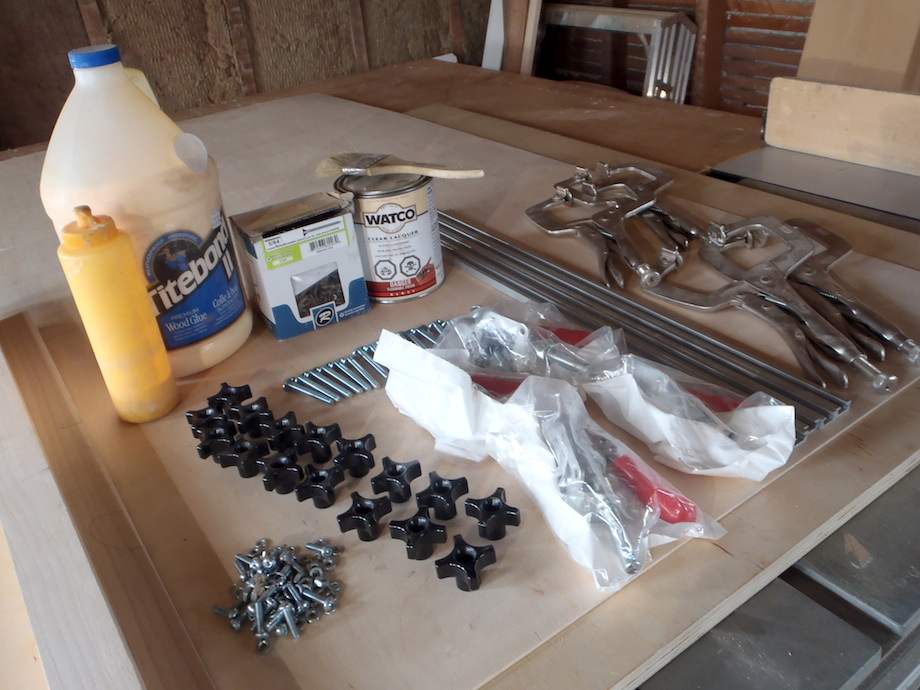
First, let’s start with a material list. You can modify this list to what you have available. The whole jig costs about $250.00 Canadian (about $225 US), with plenty of extra scrap ply for future use. This template is built for 1 3/8-in. doors with 3 1/2-in. x 3 1/2-in. hinges, as they are the most common size we get. The same design can be applied to any template, especially one for 4-in. hinges and thicker doors.
(Note: Click any image to enlarge)
1 – 4′ x 8′ x 3/4″ pre-finished birch plywood 1 – 4′ x 4′ x 5/8″ plywood
4 – 24″ long T-track
12 – 2″ T-bolts to fit the track (buy extra—these are always good to have on hand!)
12 – hex handles, threaded for T-bolts
1 1/2″ flooring screws; lots of pull on the thread
Titebond wood glue (I used Titebond II for a little extra time)
4 – in-line toggle clamps
6 – spring clamps
16 – #10 x 1″ – machine bolts with matching nuts and lock washers
Making the master template
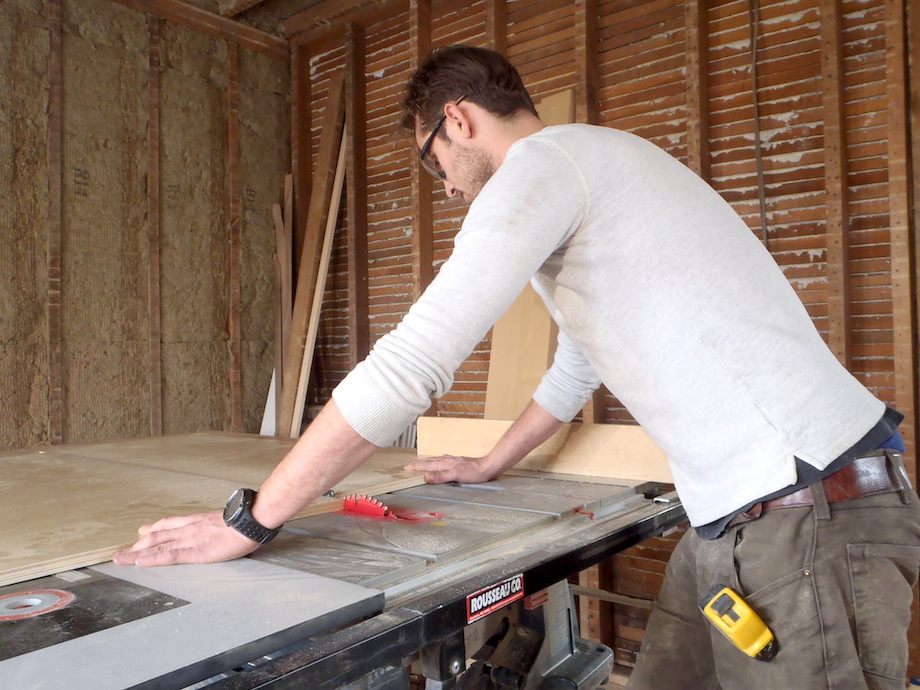
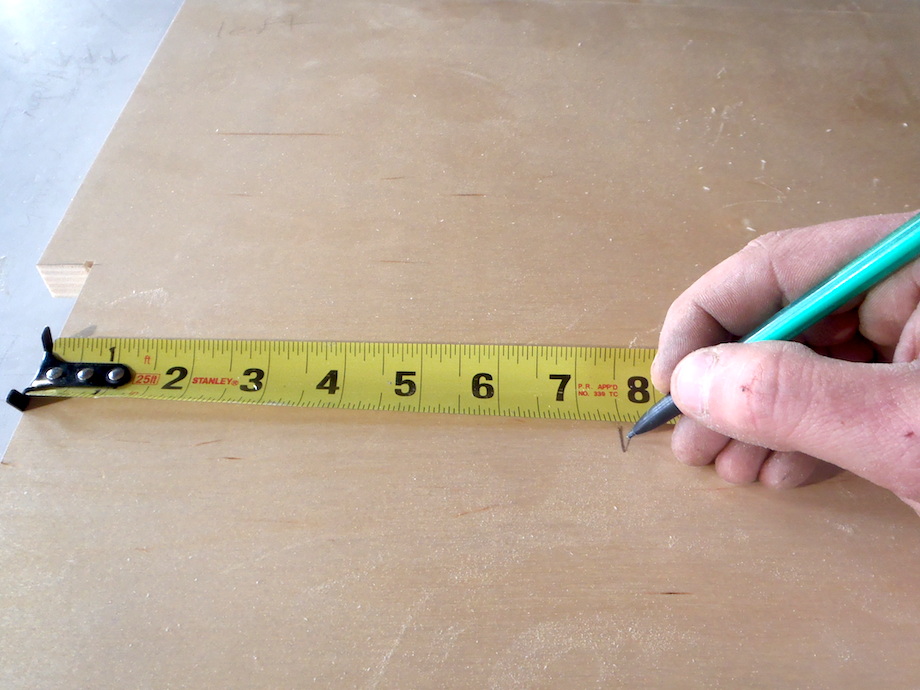
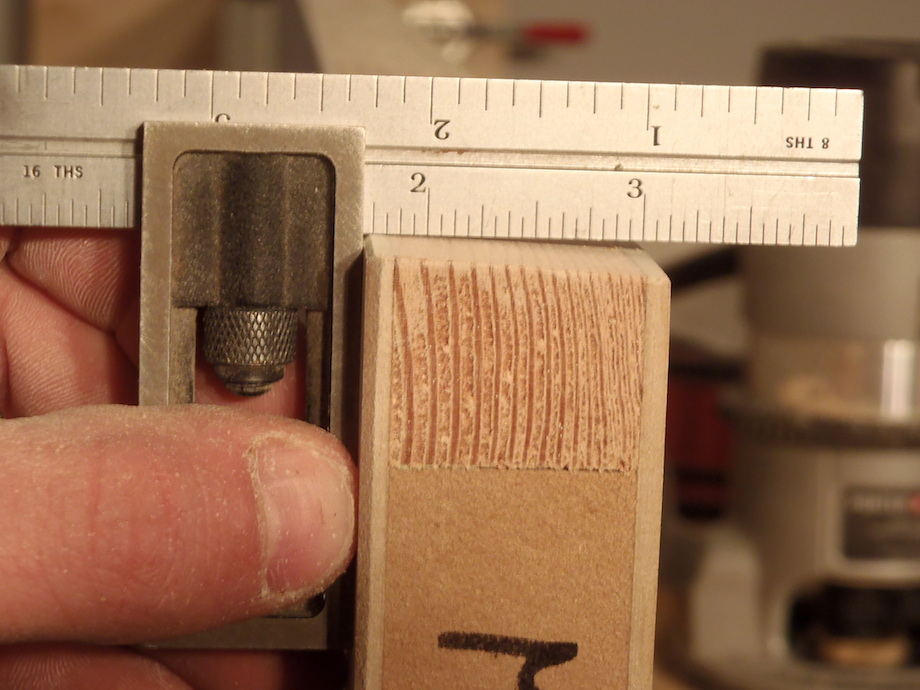
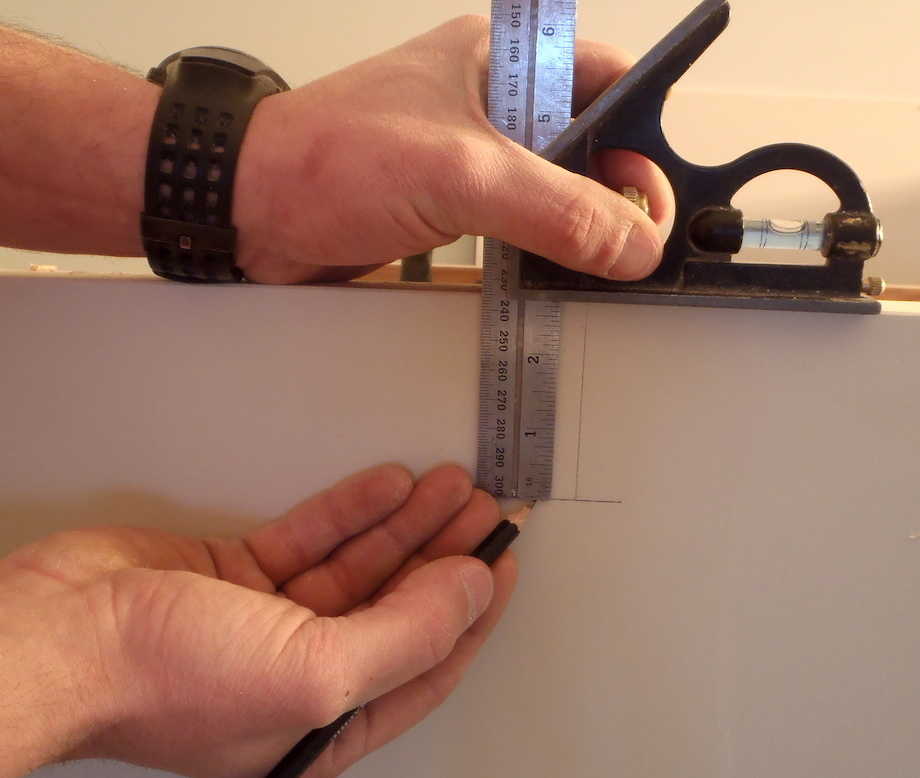
I start by cutting a blank piece of plywood at 20 in. x 20 in. for the master template.
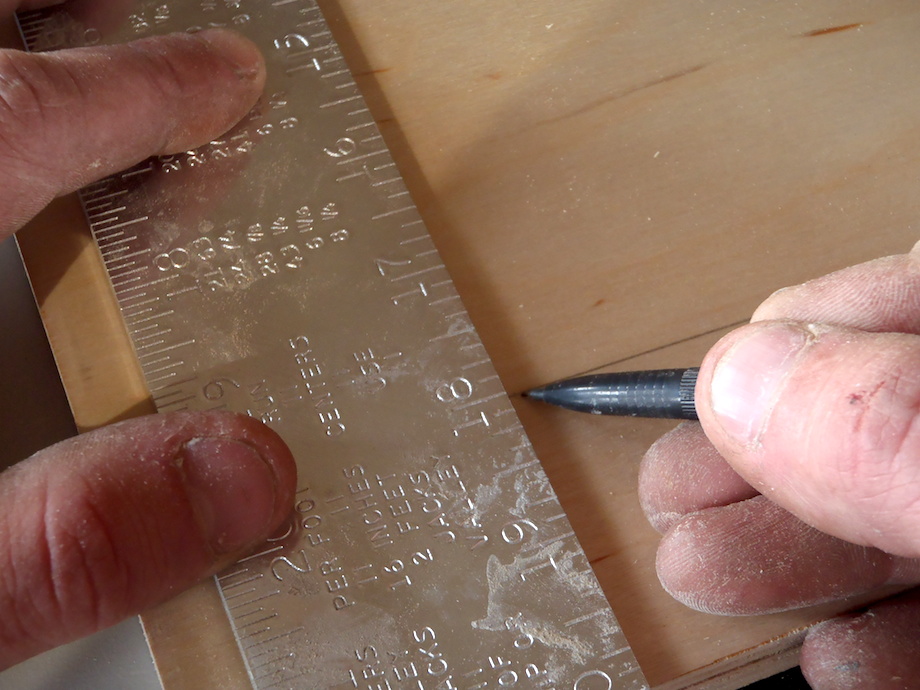
I set a measurement for an edge guide 18 in. from the edge of the master template. Then I mark pencil lines on the template centered off of the 18-in. edge-guide line.
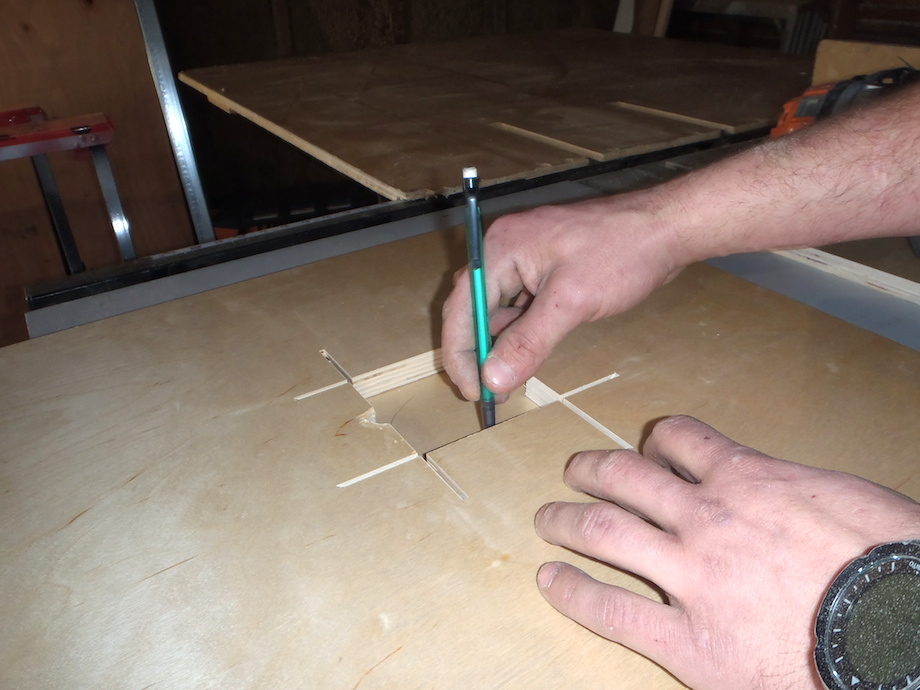
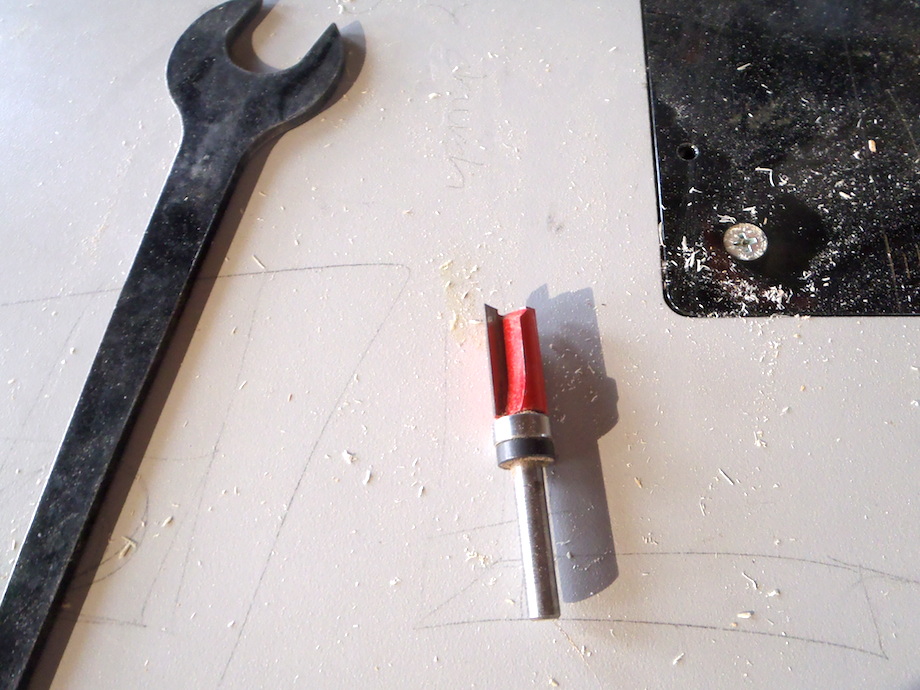
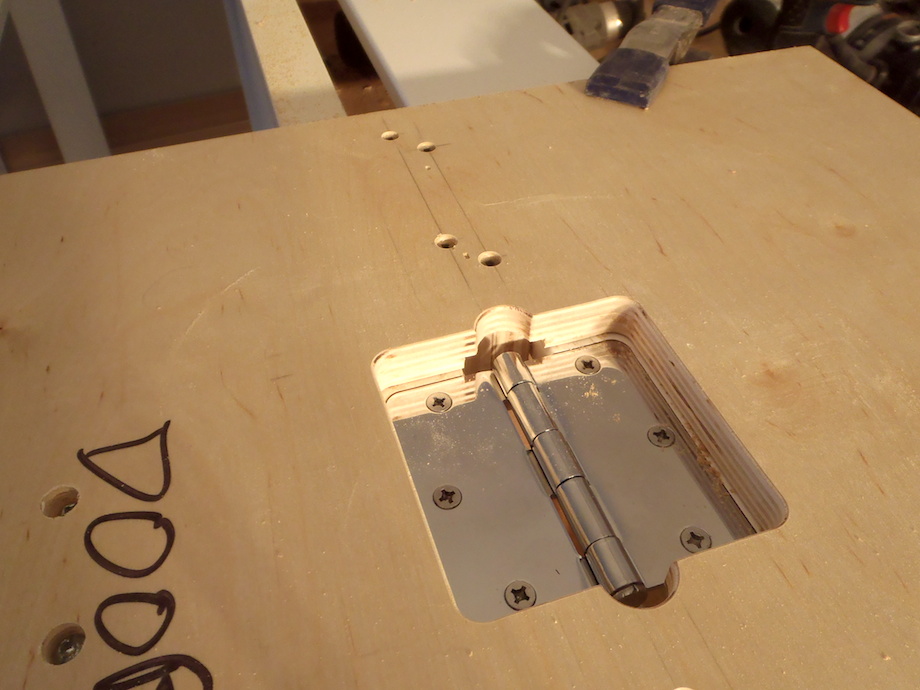
I use a 5/8-in. template guide on my router, so I add an extra 1/8 in. to the hole I layout for the 3 1/2-in. hinge, making the entire template opening 3 5/8 in. x 7 1/4 in. square—perfectly centered off my center lines.
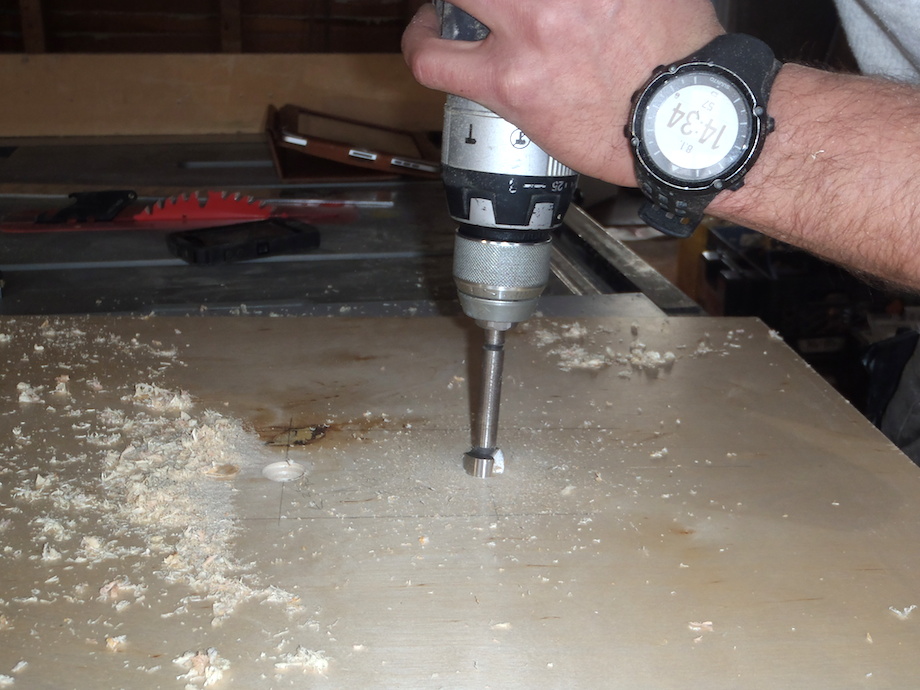
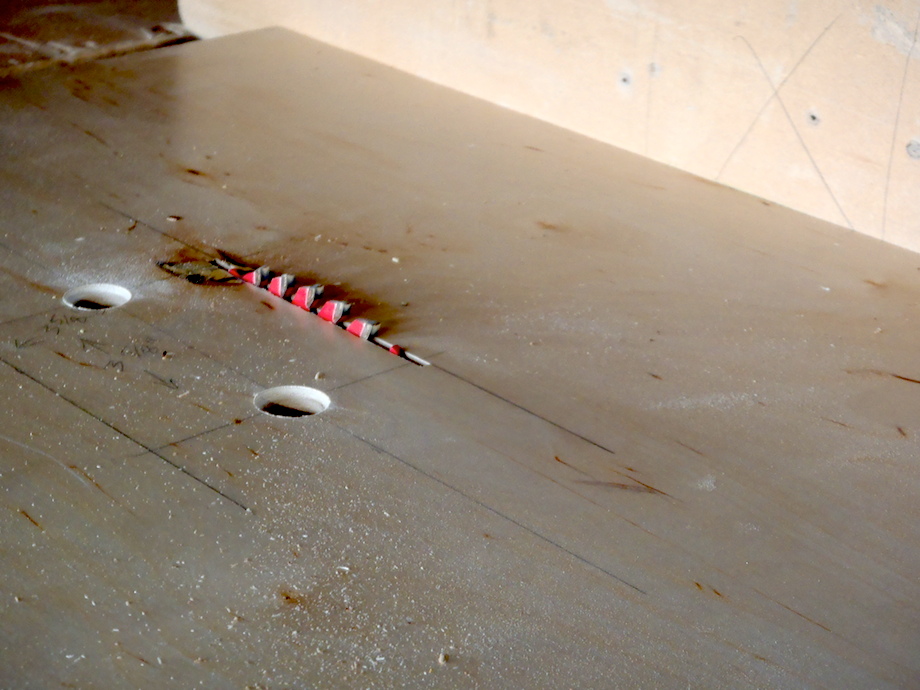
Next I drill 5/8-in. holes centered above and below each hinge layout in order to accommodate and allow for hinge pins.
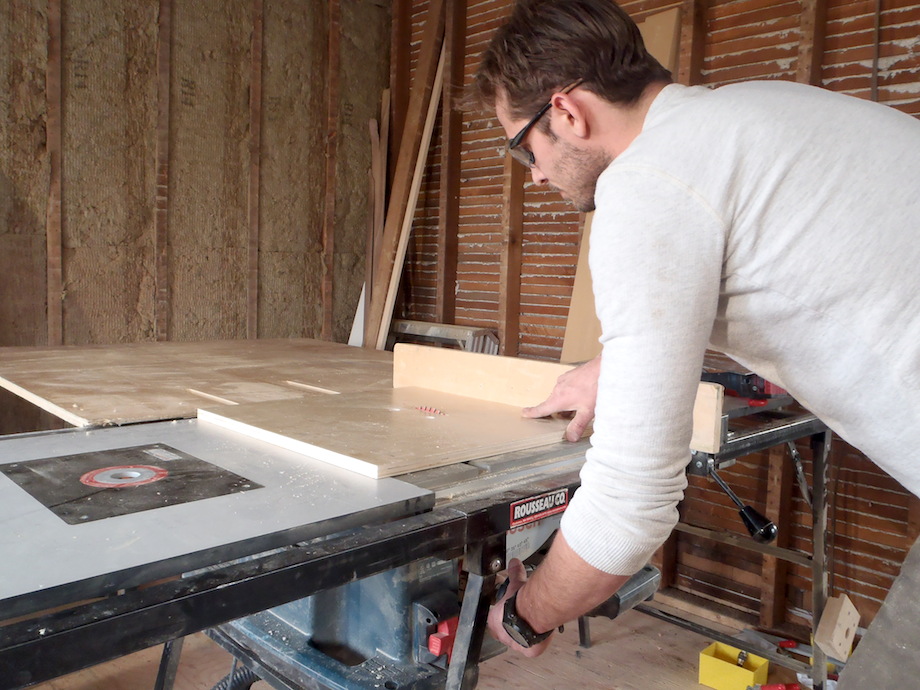
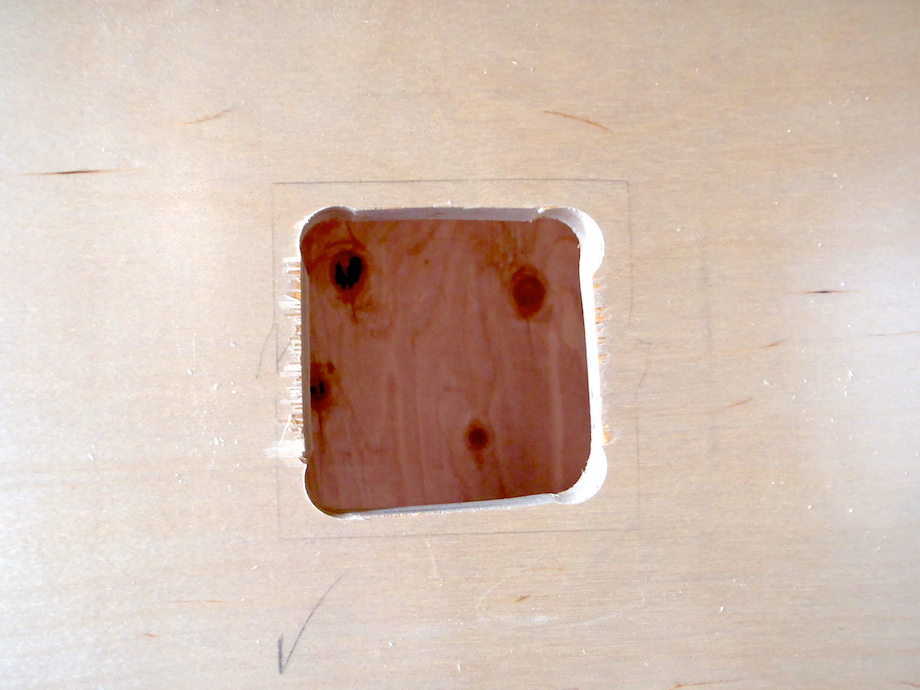
I use my table saw to cut out the hinge opening—to ensure a perfectly straight and precisely sized template. A word of warning here (SAFETY REMINDER): this is a dangerous technique. The workpiece must be held down firmly against the table and against the fence; and the blade must be raised very slowly!
Once the fence is set at precisely the right distance from the blade, I raise the blade through the plywood from the bottom to make my cuts. Remember, this is the master template—overcutting each line is not an issue.
Making the final templates
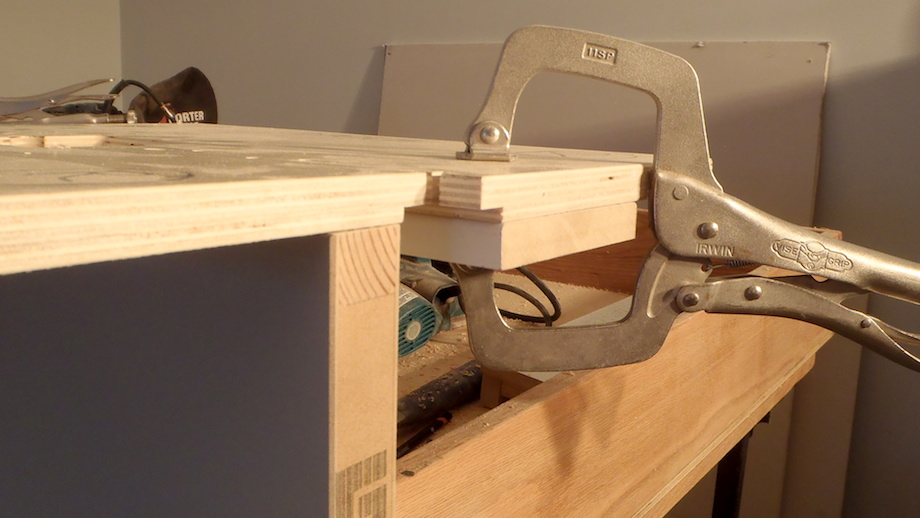
Finally, I attach a solid stop along the 18-in. mark I made earlier, which—along with clamps—allows me to positively position the final templates to the master template.
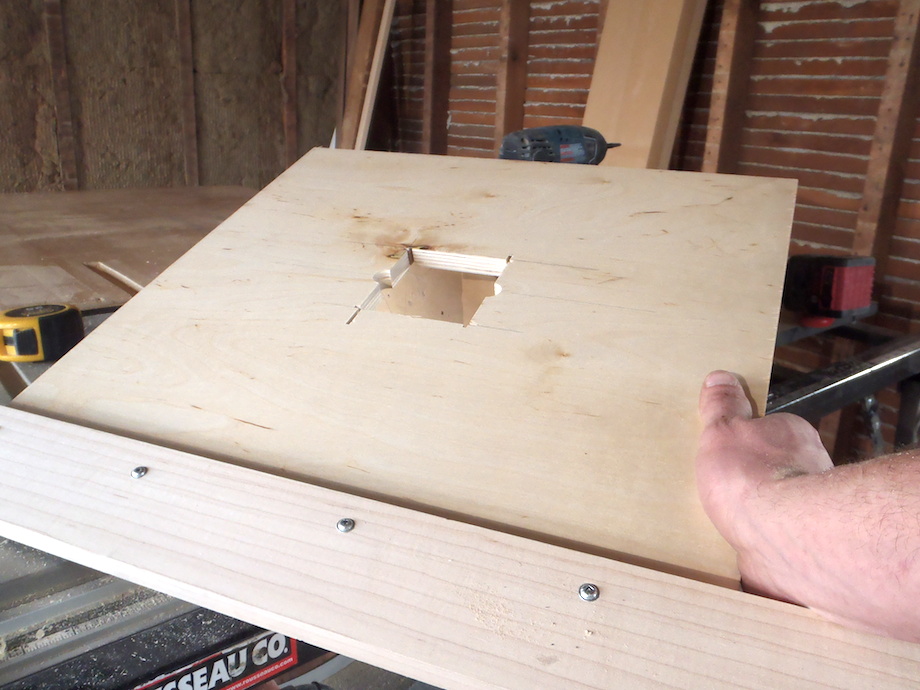
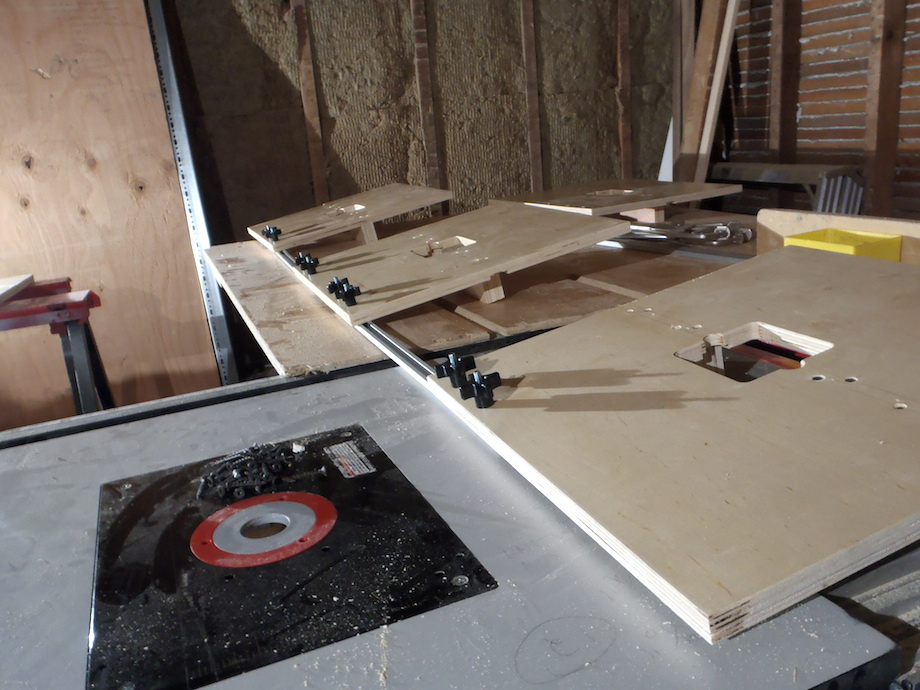
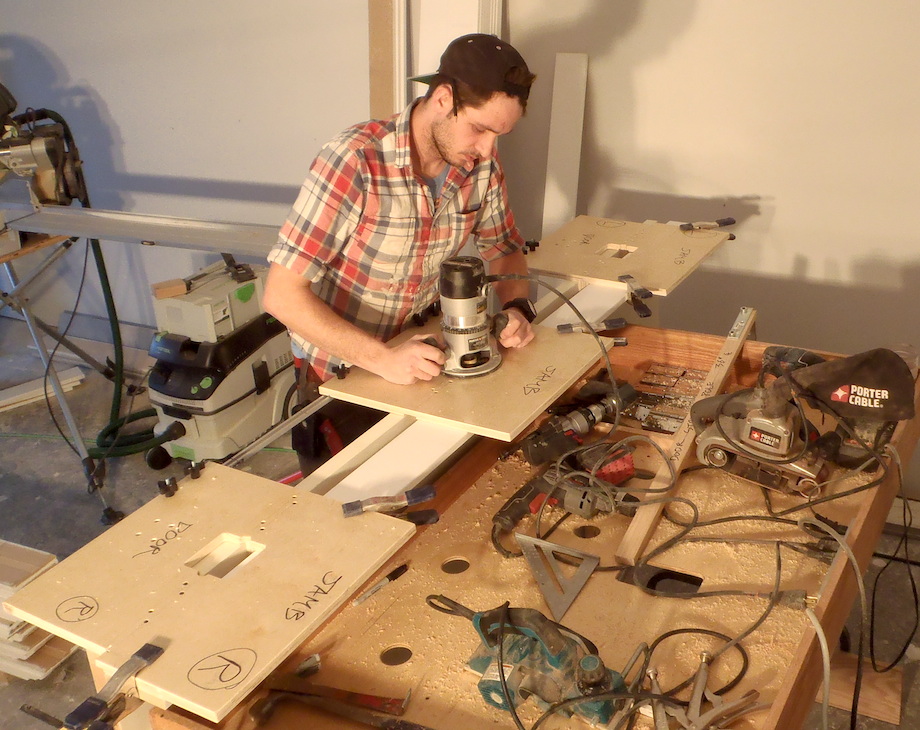
I make the final templates from 3/4-in. plywood and cut out the hinge opening using a pattern bit in my router. I made four 18-in. x 18-in. hinge templates so that I can use the fourth one on 8-ft. doors that require four hinges per door. But I’m getting a little ahead of myself.
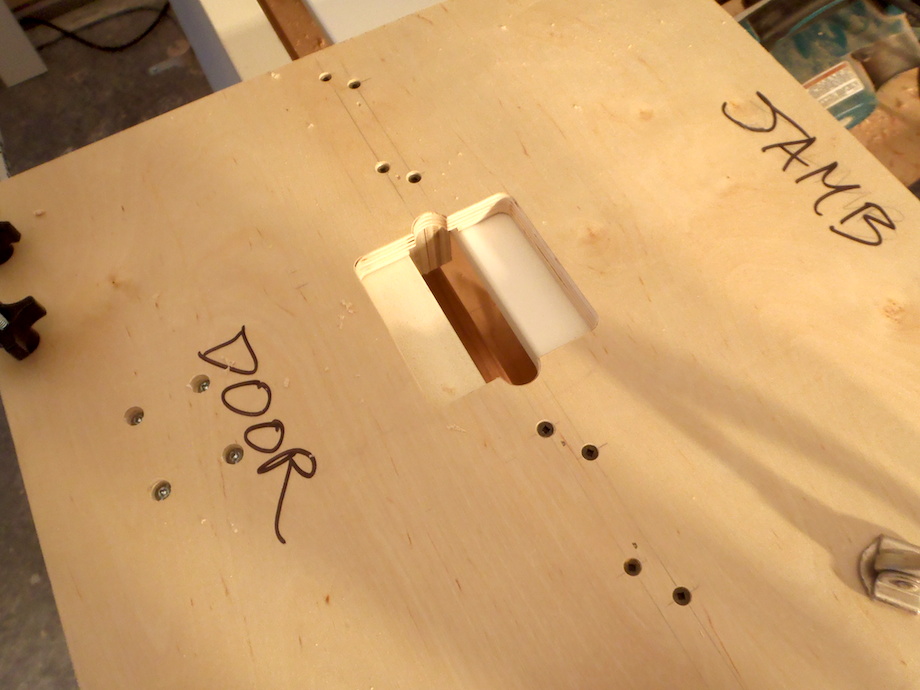
Before using the pattern bit, I make a few other improvements. Both the top and bottom templates must be notched to allow for the extra length on the hinge leg jamb for the head jamb. These notches must be handed, too.
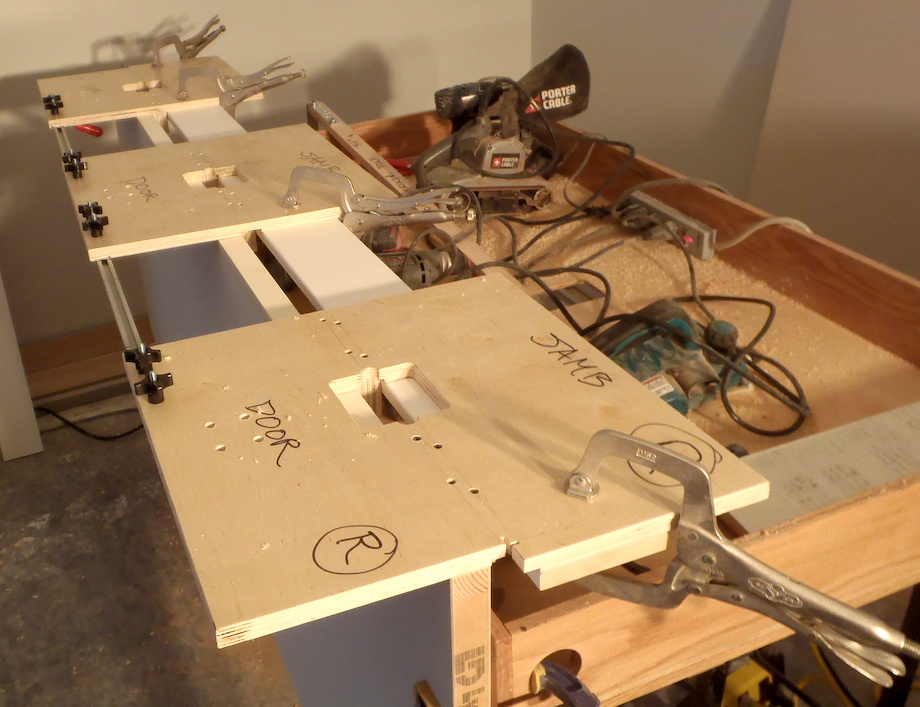
We commonly use 11/16-in. thick jambs, so the edge of the top and bottom templates must be longer by 11/16 in. + 1/8 in. for the spacing between the door and the top jamb. By notching these two templates, I can simply flush up the top edge of the door with the short point of the notch, and flush up the top edge of the jamb with the long point of the notch. If you’re confused, I’m not surprised. Door hanging can really twist your head around. Here’s a photograph of the hinge template in use, clamped to the door, and with the jamb clamped to the bottom of the jig. The notches in the top and bottom templates allow me to hold the top of the hinge jamb past the top of the door to allow for the head jamb.
The top and bottom templates must also position the top hinge the proper distance from the head jamb—which I’m accustomed to making about 7 1/2 in.
Therefore, I layout the top and bottom templates so that the hinge opening begins at 7 1/2 in. from the shoulder of the notch.
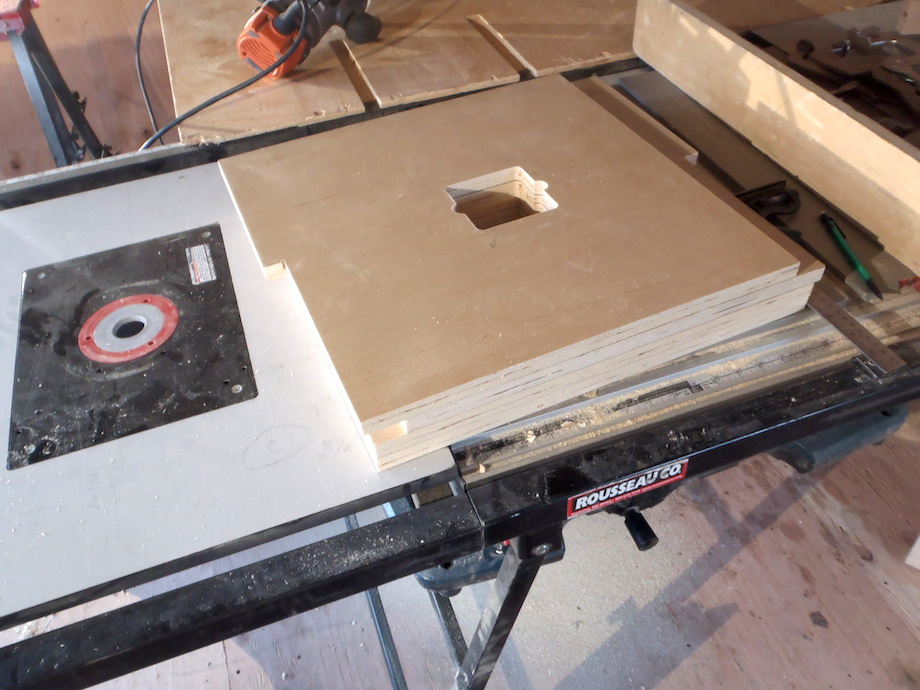
With the top and bottom templates laid out, I use my master template on all four final templates, scribing the outline of the hinge mortise on each one.
To make the routing a little easier, I drill out and jigsaw most of the waste from inside these pencil lines.
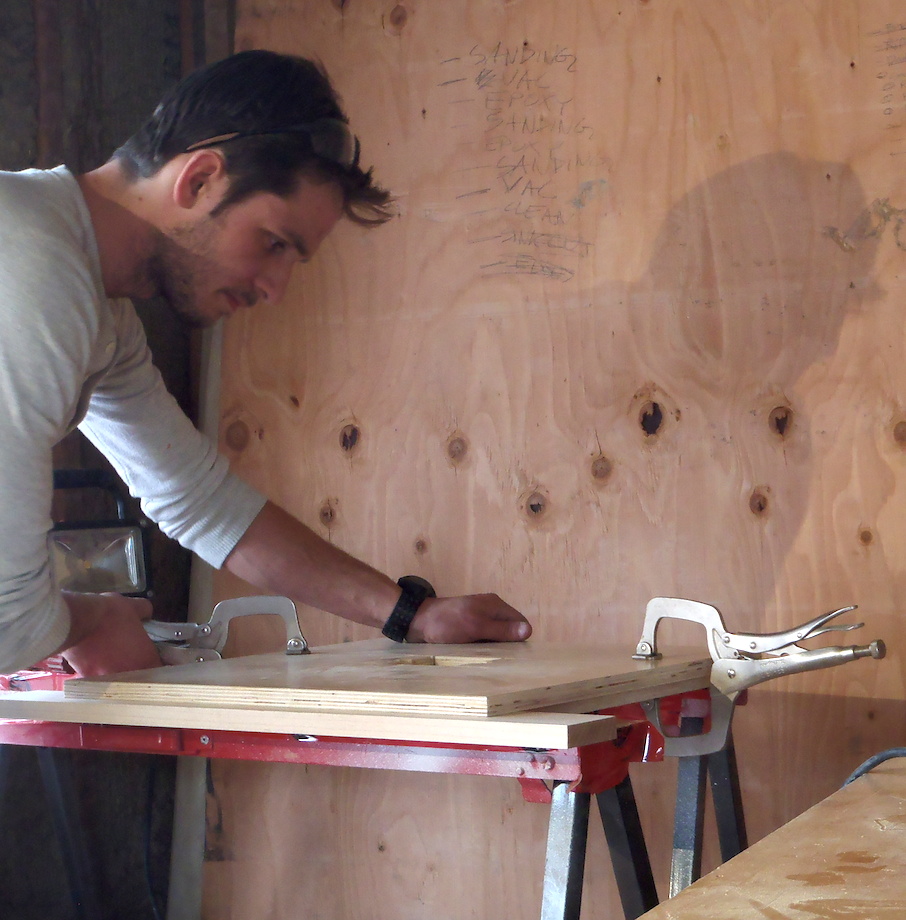
I rout out the final templates using a 1/2-in. pattern bit, making sure that each plywood plate is clamped securely to the master template,…
…centered on the center plates, and positioned 7 1/2 in. on the left and right plates.
After all the notches and hinge openings are cut, I use a 1/8-in. round over bit on my trim router to ease all the edges, including inside the mortise template. This helps with handling, and reduces your chances of chipping the templates during use.
Installing the hinge backset stop
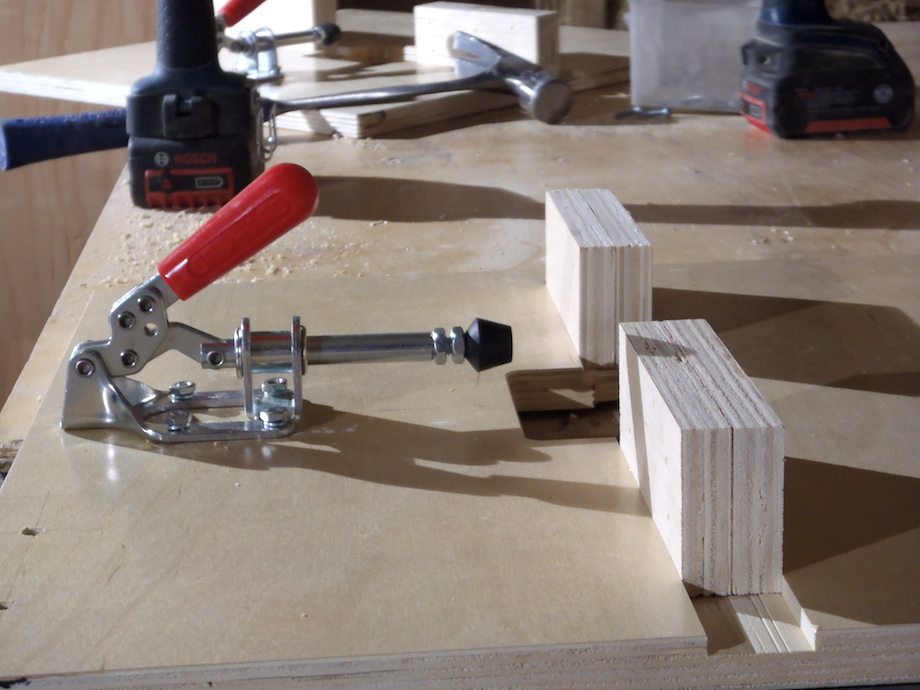
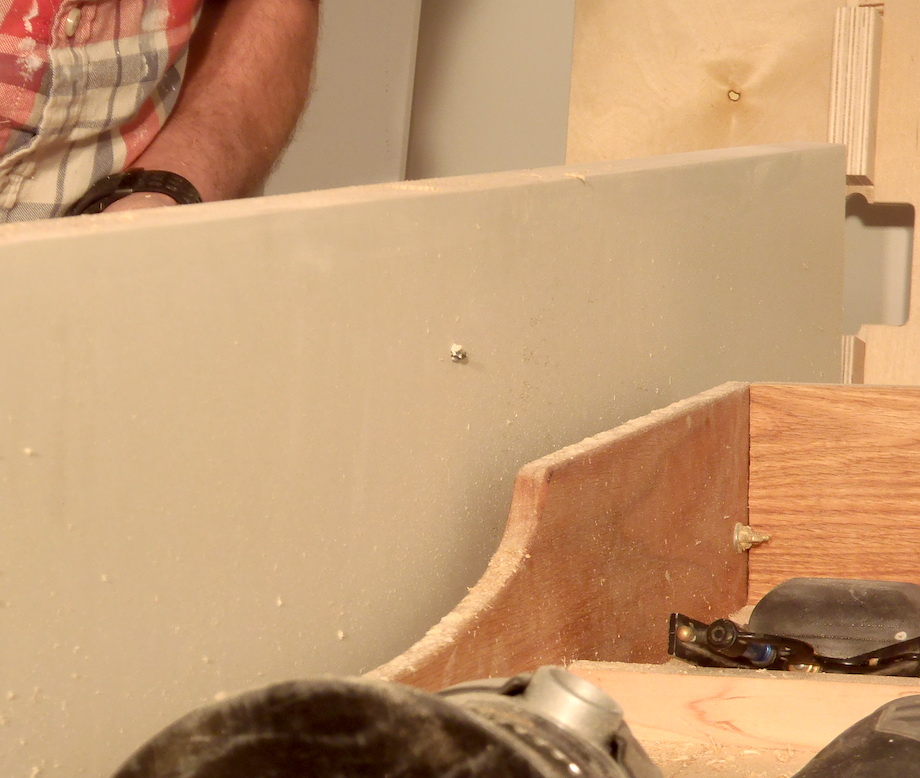
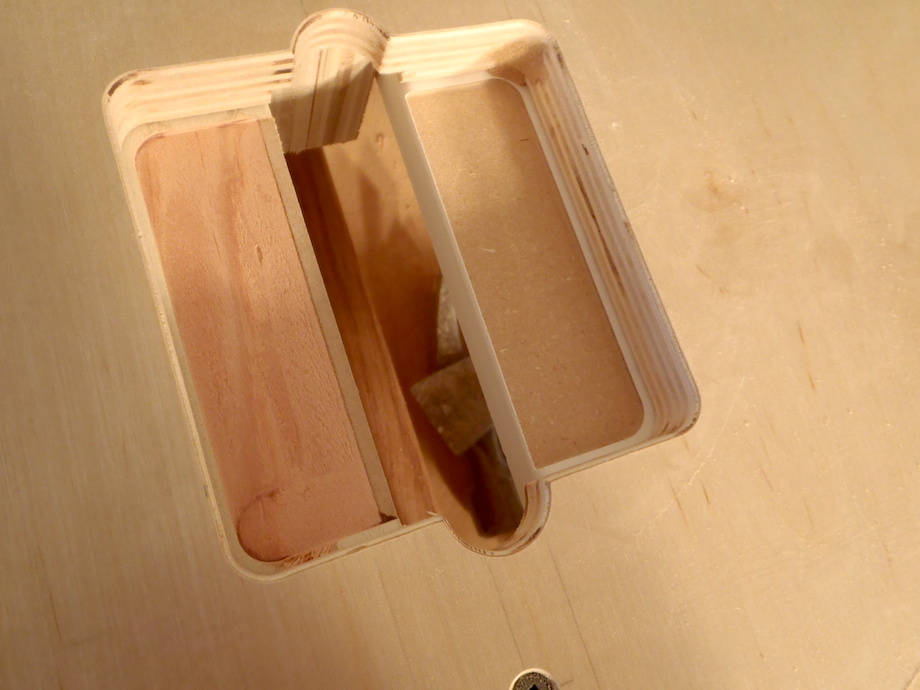
To establish proper hinge backset from the face of the door and the edge of the jamb, I install a ‘spine’ or rigid stop on the bottom of each template.
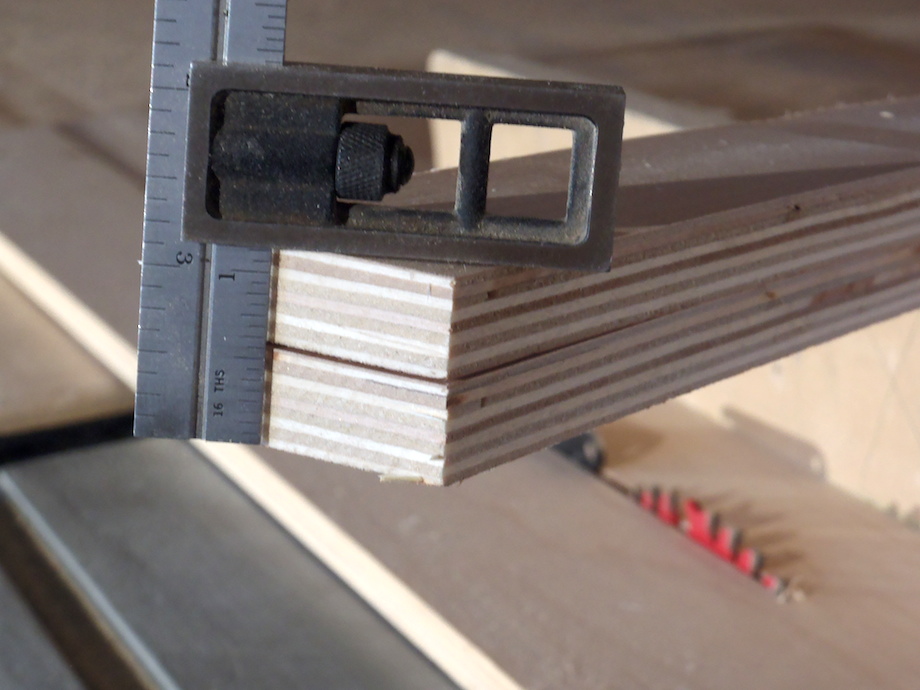
I made the stop from two pieces of laminated 5/8-in. plywood, ripped to 2 1/2 in. wide. I used two pieces of 5/8 maple I had lying around, and rip them to 2 1/2 in. When sandwiched together, the 5/8-in plywood measures about 1 3/16 in., which is the perfect backset spacing for the hinges on the door and jamb.
To ensure that the backset stops are centered perfectly on the bottom of each template, I cut a precisely-sized groove using a dado blade in my table saw.
I use Titebond and countersunk screws to secure the stops, checking that they seat and tighten up absolutely square, holding the stops 1/2 in. to 1/4 in. from the hinge mortise hole.
Once the templates were done, I drilled holes for T-bolts and mounting the plates to the T-Track.
To secure the jig on top of the door, I use in-line toggle clamps, which stay clear of the routing area and are very fast to manipulate and tighten. These clamps even help take a bow out of a door that’s been leaning against a wall overnight!
I adjust the toggle clamps so that they can easily squeeze a 1 3/8-in. door, and I center the clamps at each hinge opening. To secure the jamb, first I position it with spring clamps, then I secure it with vise clamps.
Using the templates
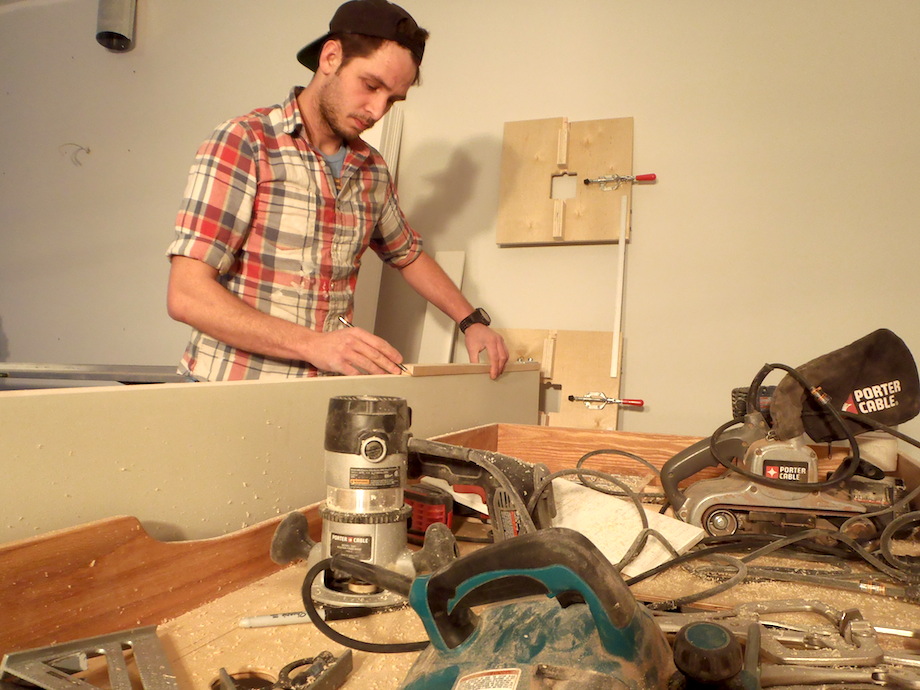
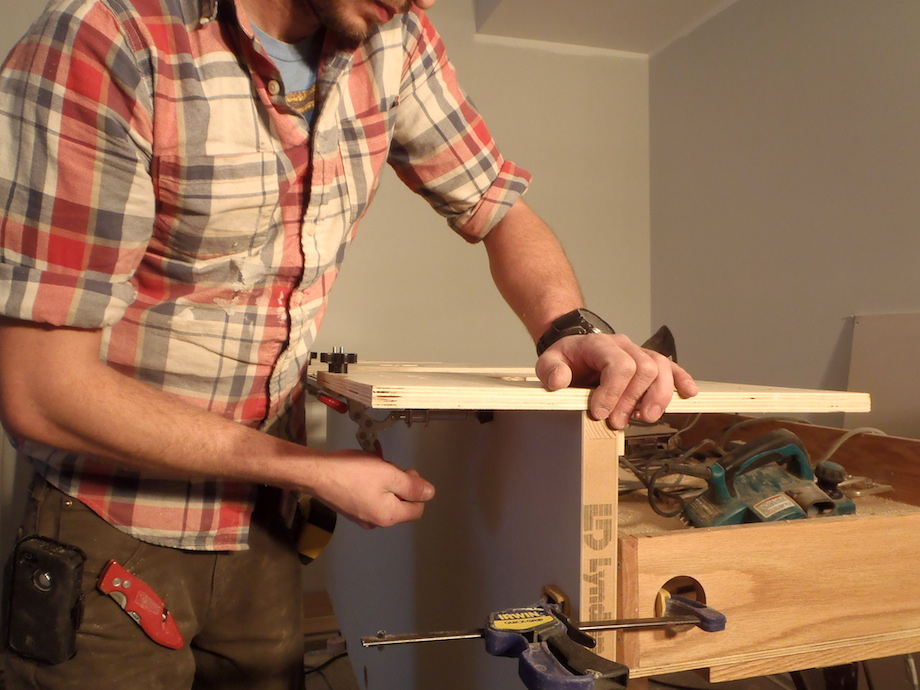
Once I have my jambs, doorstop, and casing cut, all that’s left is machining the door and jamb legs.
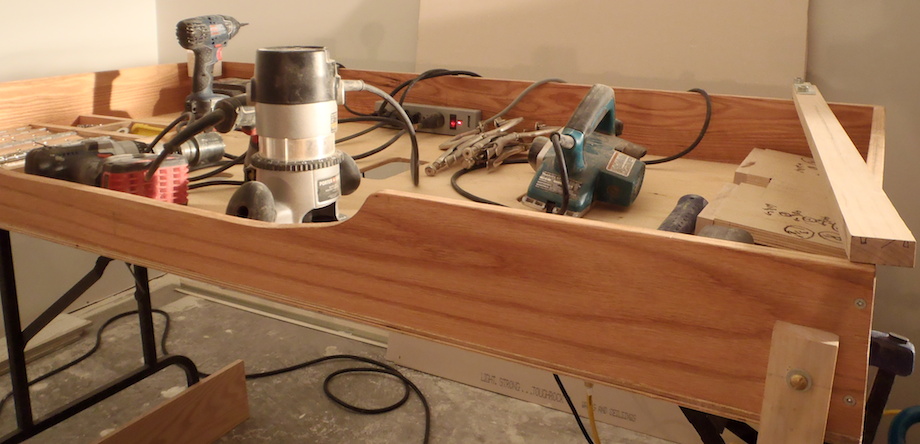
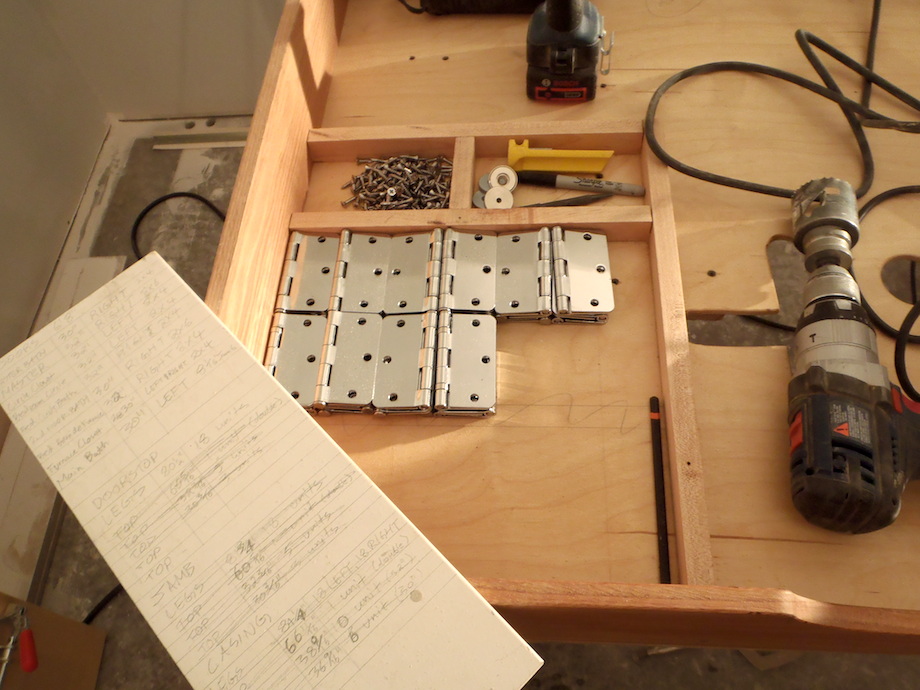
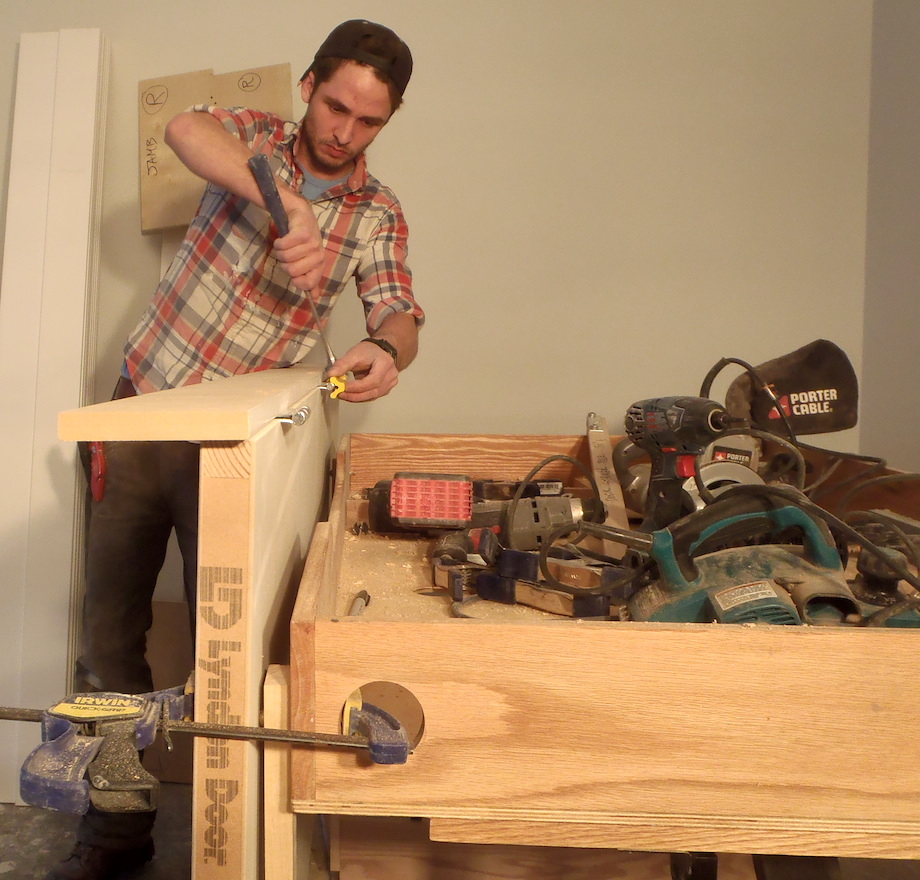
I use a simple door bench fashioned from a fold-up table. The bench holds all my tools, ready to go: my router fitted with a 5/8-in. template guide, a planer with an edge guide ripped on a slight bevel, clamps, drills and the appropriate bits for the lockset.
I always unpack all the hinges and screws, and lay them out on my bench so I don’t have to waste time fumbling around while I’m processing doors and jambs.
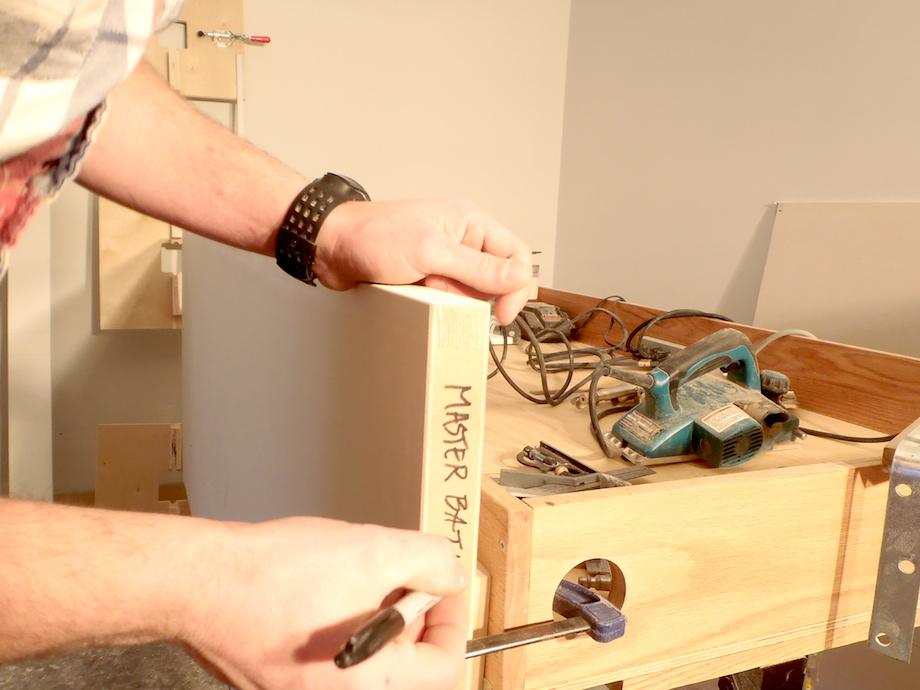
In this example, I start with a right-hand door, which means I have to place the TOP of the door to the right side, on edge, in my bench. I label the door with a sharpie to match the opening.
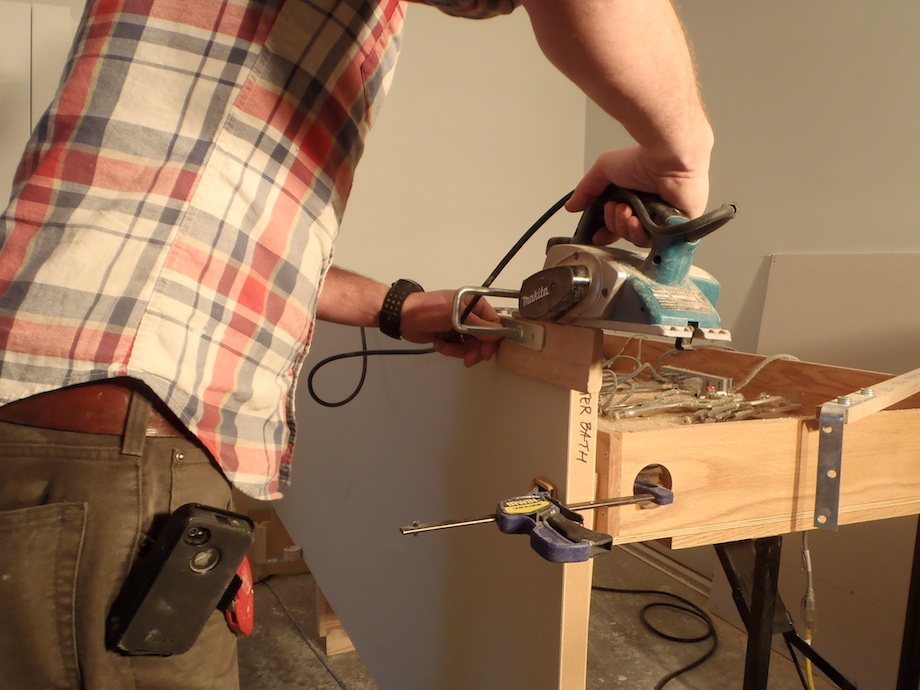
I make a few passes with the planer, beveling down towards the bench. I bevel the strike-side edge of the door, but not the hinge-side edge. I leave the factory edge untouched so that it’s perfectly straight and the door measures full width.
Next I beltsand any chatter marks or snipe using slow, steady passes.
I use a home-made story pole to mark a line 36 in. from the bottom edge of the door for the latch and lock bore.
Then I strike a center line across that mark. I bore the latch hole with a 1-in. bit.
The latch sets we use generally have a 2 3/4-in. backset, so I strike a line on the door’s face, center it 2 3/4 in. from the edge of the door, then cut the 2 1/8-in. face bore, allowing the pilot to just penetrate the other side.
I finish the hole off from the other side, following the pilot hole.
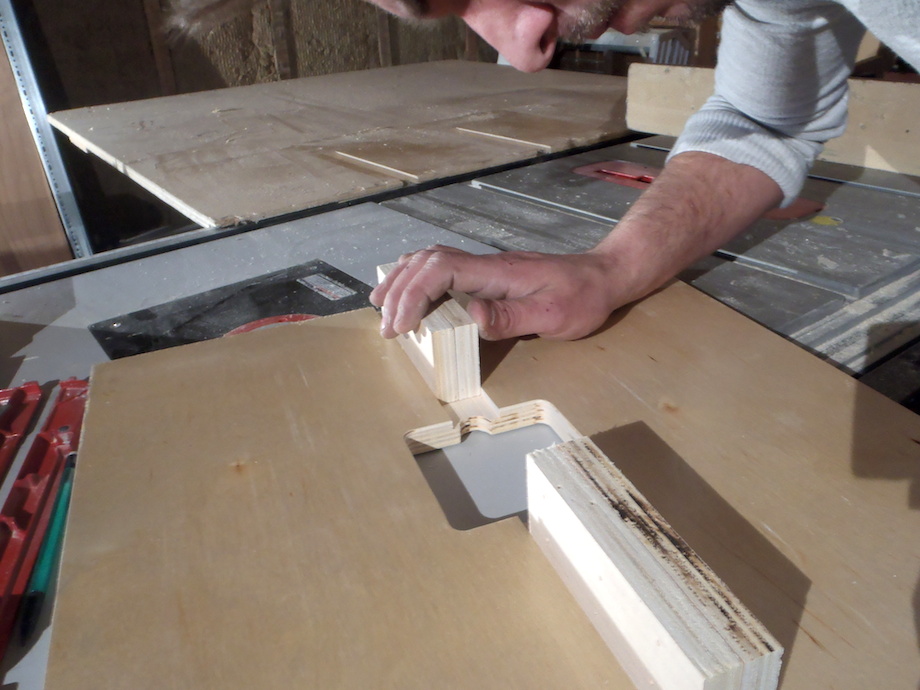
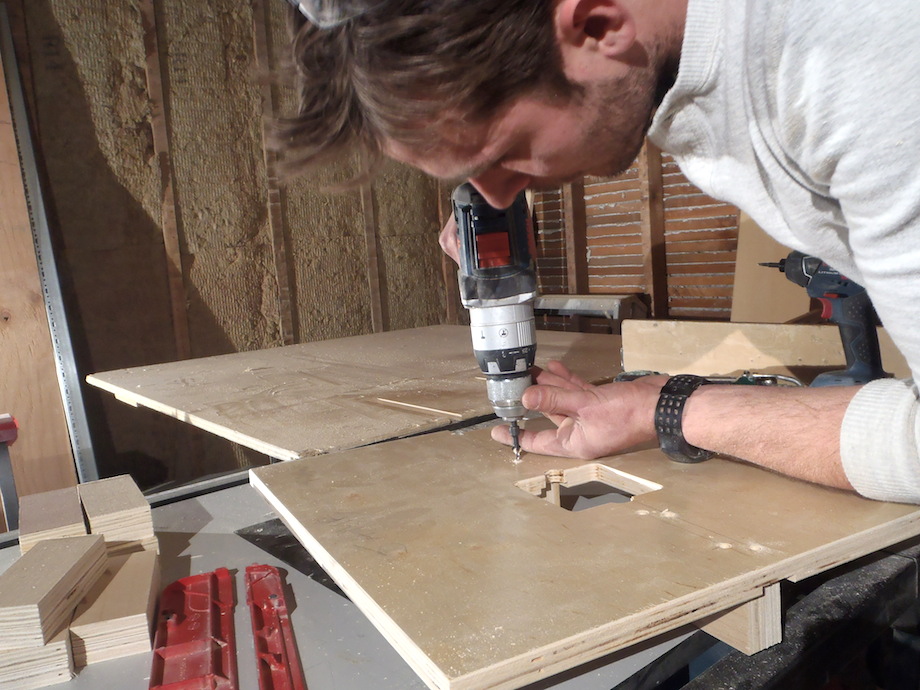
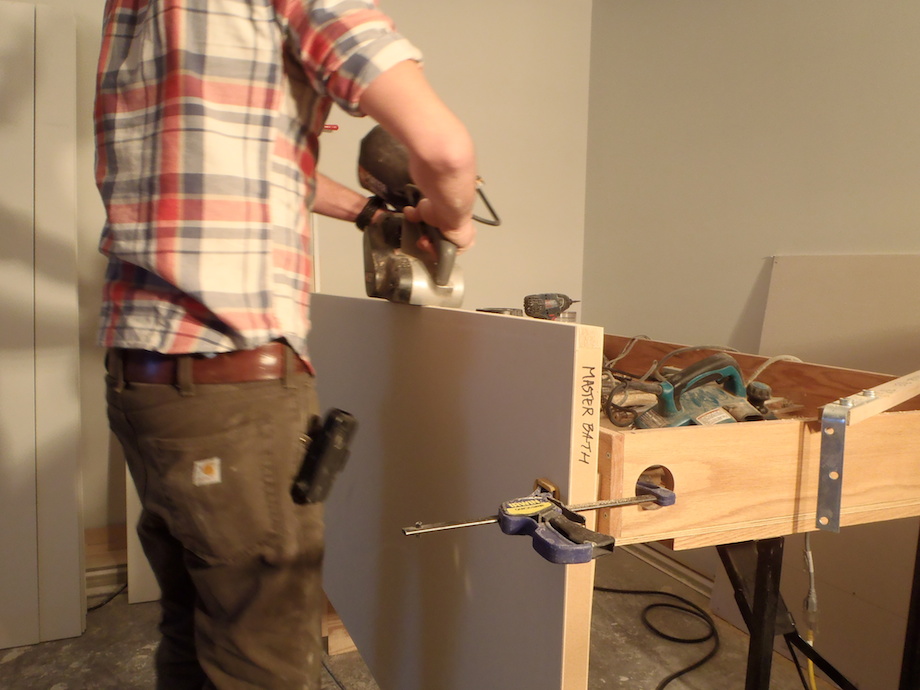
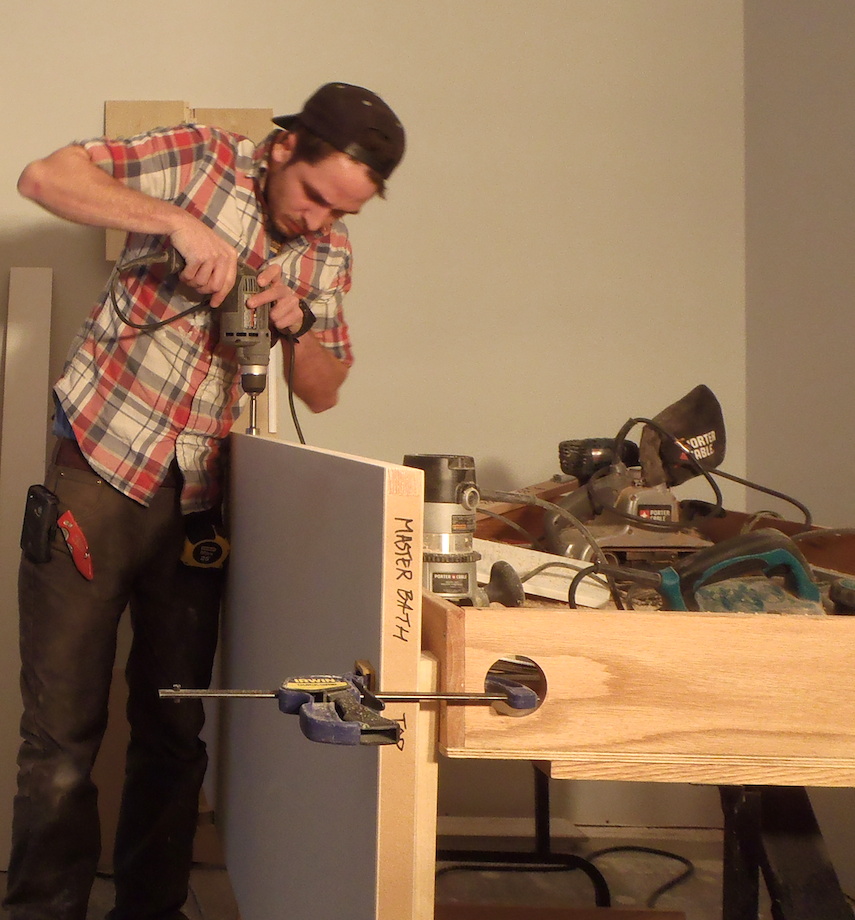
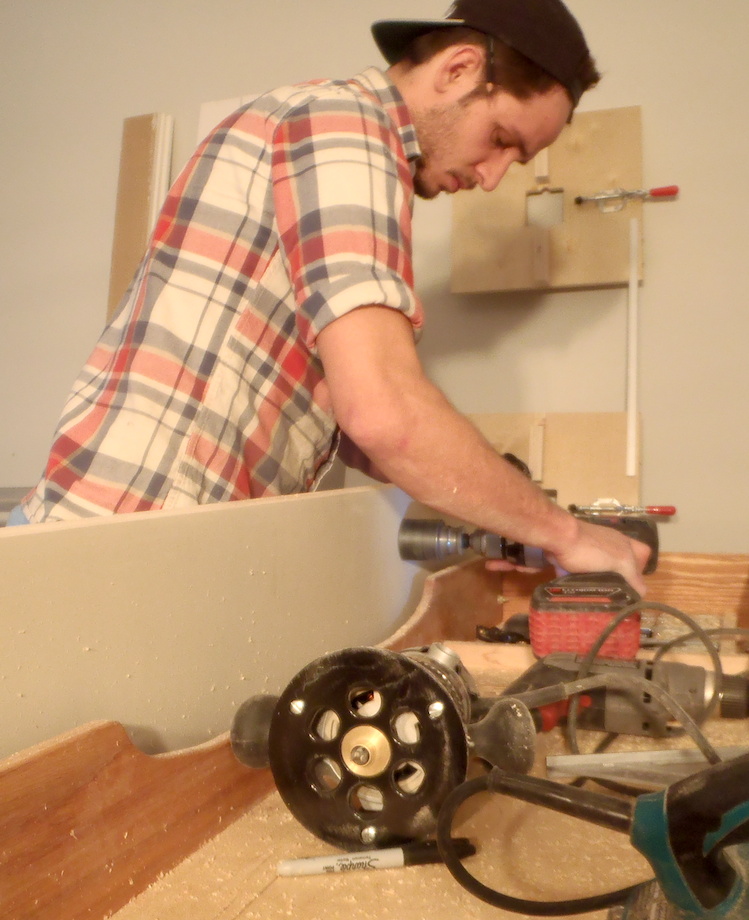
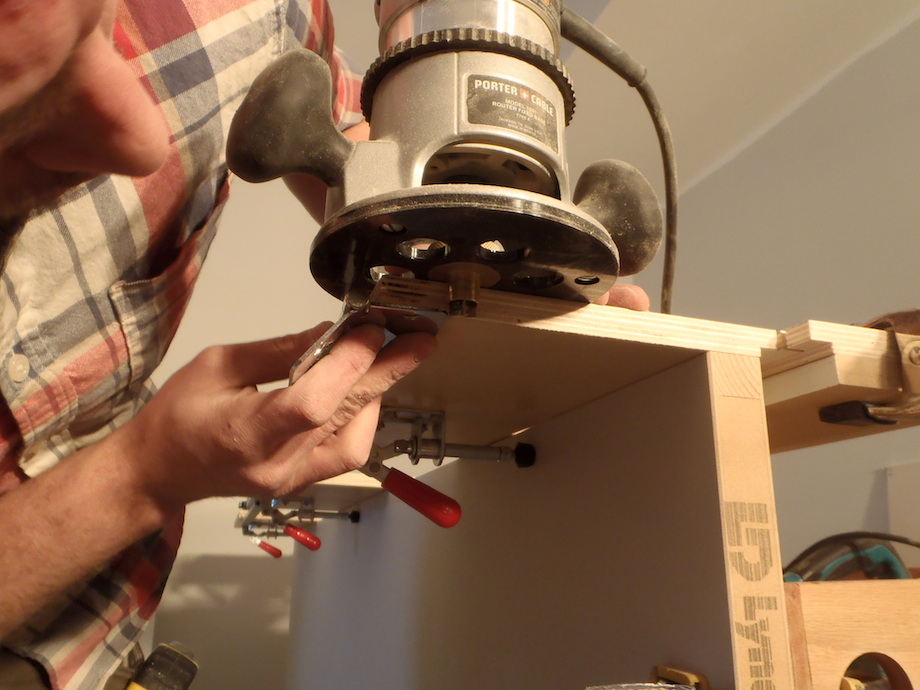
The next step is mortising for hinges. I flip the door onto the other edge, while still keeping the top to the right. Since I’m working on a right-hand door, and the top is on the right side, I set my jig on the door’s edge, and slide it so it is flush to the top of the door.
I engage the toggle clamps to pinch the door against the backset stop, then flush up a jamb leg to the jamb side of the jig and temporarily clamp the jamb leg, too. Before routing, I check to see that the door and jamb are both tight against the backset stop.
I set the depth of my router bit by extending the bit past the bottom edge of the hinge template exactly the thickness of the hinge.
The jig is extremely efficient—both the jamb and the door are mortised simultaneously for each hinge.
Both hinge and jamb mortises are always perfectly aligned.
Before removing the template, I lay the hinges into the mortises, pre-drill for hinge screws using a self-centering bit, and drive in the hinge screws.
With lightweight hollow-core doors, I assemble full pre-hungs, but for heavy solid-core doors, I prefer to carry the doors separately, especially when I have to climb a lot of stairs. So I pop the pins and remove the jamb from the door.
Believe me, once you have invested the time in building this jig and dialed in your step-by-step system, you can cut a door package, process the door and jamb, pre-assemble the whole thing, and install the door in less than an hour per door.
I hope this article is helpful and provides other innovative tradesmen with some useful ideas for getting the upper hand on production door machining and hanging.
•••
AUTHOR BIO
When I first started doing trim, I literally “cowboyed” my way into it. I was working odd jobs for renovators, restoration companies, general contractors, etc. I always enjoyed getting into the carpentry side of things, and tried to get as many opportunities doing so as possible. At first I wanted to be a framer, but I soon learned that getting rained out and working winters would be a tough way to make a living.
I came across an ad on Kijiji looking for finish carpenters with their own WCB, licensed business, tools, vehicle, and experience. Luckily I already had the tools and vehicle, but I had to go out and get myself set up legit. The major thing I was lacking in was experience!
At that point I had never worked on a new house doing trim. I had generally done repairs or hung the odd door or window casing, usually with minimal gear and a lot of wood putty. I had read a ton of articles on templates, jigs and specialty tools, but literally didn’t know where to start. Luckily, my boss at this time was an older guy; he was fast, efficient and knew how to get things done and done well.
After watching the other guys machining and hanging doors, casing windows and constructing built-in cabinets, I knew I had to excel fast, or fail. The first couple weeks I pulled in about $100 a day, as it was piece-work, and I hadn’t developed any systems.
My efficiency developed, and so did my speed and the money I was making. I was hooked! I really enjoyed putting the nicer things together in homes, and once I got a little faster, the money was pretty good.
After working for many other trim contractors, on bigger and more elaborate homes, we started doing a lot of shelving, built-in cabinets, railings, etc. Once I picked up enough experience, I assembled my own crew, and I began doing private projects for homeowners and homebuilders alike.
I now own and operate Celtic Finishing, and I find that our methods and systems are contributing to the cultivation of a good reputation.
In my spare time, I work on the renovation of my 100-year-old Cape Cod home, and hike in the Alberta Rockies.
Whenever I hear about multiple passes to bevel a door it makes me sad. Set your planer to 1/16″ and grab a washer or coin and hold it under the lead edge of the planer so that it rests on the door about 1/8″. 1 pass and unless you have really dull blades you should need about 20 seconds of sanding with an orbital.
Blake,
Love the discussion. I worked summers in Ann Arbor with a very experienced door hanger and we did everything by hand. I learned a lot, but your template would have been terrific. For the record, I have been using the Bosch template/guide for years. I see the advantage you have with this set up doing all the routing and matching at once….clearly. However, how often do you need to build a template? Will this last you for weeks, months, years? Just curious. Thanks for the write. I know the article takes more time than the project!!!
Excellent work. I guess I should take this moment to appreciate my local door shops though. There are four Norfield machines within a 30 mile radius near me. As much as I enjoy doing this sort of thing the cost of pre-hungs in my area is so competitive that it would never make sense to attempt it on the site. One supplier in particular, Caseywood Lumber, produces perfect work and is capable of custom work, including Soss hinges and a machine to match service.
Do you Dado the top jamb where the leg meets? I suppose this works in place if you were to dutchman an existing jamb and remove the stop? Is there a way to make it work on rabbeted exterior jambs?
Thanks for the article.
The pre hung game is getting pretty competitive here too, but I’ve had a hard time finding well machined doors at a decent price.
My biggest issue has been with consistency from suppliers, odd lengths of jamb and inaccurately cut pieces.
Generally, we get mdf jambs, and for the trouble a dado doesn’t do much good. For paint grade stuff we staple our jambs together and use 2″ 18 gauge brads. As long as everything is shimmed tight these wont open up.
If we are getting stain grade jambs and casing we might use some trim screws to hold tight, or biscuits and some brads. I have a job coming up where all the jambs are solid maple, 8′ solid maple doors too. Going to have to buckle those guys up real good.
This template does not work for rabbeted exterior door jambs. This is for a fresh house with RO’s that need entirely new door assemblies.
Hey Nolan. As for the bevelling of the door, i run my planer pretty hard sometimes and ufortunately do end up with less than razor sharp knives pretty often. So i do about two passes and belt sand , the process only takes me a minute or so. But whatever works!
Hey Big Bob, this template will last a year or so, unless i accidentally jam the router bit into it or damage it in some other way. Your best bet would be making the template out of something durable such as phenolic or good quality ply.
I just keep master templates for every successful template i build so i can reproduce them as needed.
I also carry the bosch jig in my trailer for service work or matching doors to existing jambs. The bosch does work well but i find it needs to be tightened every other use, and i have lost a few of the parts due to thing vibrating loose on site and disappearing into heaps of sawdust!
Also try plumbing your door with GRK – RT Composite™ Trim™ Head Screws. Driving one of those in flush to the surface of the jamb behind the doorstop will allow you to actually move the jamb in and out because of the reverse thread at the top the screw. These coupled with shims make hanging doors much simpler and faster. I tend to set everything after wards in place with a 3″ framing screw. Your Jambs will be solid as a rock and straight as an arrow.
Just Awesome, we need to train more guys to do the higher quality work. Awesome article, keep at it and keep writing.
Thanks for sharing. The more we learn, we really appreciate how little we know. Credit to all the “old timers” who have taught us so much.
The door bench is smart and makes working more enjoyable and efficient. Someone makes a door lifter with a pivot pad to help with those heavy doors and the air bag does work, might need two for heavy doors.
Do any of you guys know where I can get a “Norfield like” template without paying $1,000 and without making it? I only need it for 3.5″ hinges with a .625″ radius.
Outstanding tutorial!
I admire not just the quality of your graphics and the design itself, but the professional description of each step in the build process and operation.
I don’t understand why you’d take the bevel off, it’s there for a reason. I don’t want to appear rude but I also don’t understand why you wouldn’t just buy a professional Rockwell jig instead of trying to reinvent the wheel. I used one for years doing probably a thousand doors a year with no problems.


 When I first started doing trim, I literally “cowboyed” my way into it. I was working odd jobs for renovators, restoration companies, general contractors, etc. I always enjoyed getting into the carpentry side of things, and tried to get as many opportunities doing so as possible. At first I wanted to be a framer, but I soon learned that getting rained out and working winters would be a tough way to make a living.
Home made Norfield template. Well done.
Whenever I hear about multiple passes to bevel a door it makes me sad. Set your planer to 1/16″ and grab a washer or coin and hold it under the lead edge of the planer so that it rests on the door about 1/8″. 1 pass and unless you have really dull blades you should need about 20 seconds of sanding with an orbital.
Really admire the resourcefulness, savvy and creativity involved here!
Blake,
Love the discussion. I worked summers in Ann Arbor with a very experienced door hanger and we did everything by hand. I learned a lot, but your template would have been terrific. For the record, I have been using the Bosch template/guide for years. I see the advantage you have with this set up doing all the routing and matching at once….clearly. However, how often do you need to build a template? Will this last you for weeks, months, years? Just curious. Thanks for the write. I know the article takes more time than the project!!!
Excellent work. I guess I should take this moment to appreciate my local door shops though. There are four Norfield machines within a 30 mile radius near me. As much as I enjoy doing this sort of thing the cost of pre-hungs in my area is so competitive that it would never make sense to attempt it on the site. One supplier in particular, Caseywood Lumber, produces perfect work and is capable of custom work, including Soss hinges and a machine to match service.
Do you Dado the top jamb where the leg meets? I suppose this works in place if you were to dutchman an existing jamb and remove the stop? Is there a way to make it work on rabbeted exterior jambs?
Thanks for the article.
Hey Sam,
The pre hung game is getting pretty competitive here too, but I’ve had a hard time finding well machined doors at a decent price.
My biggest issue has been with consistency from suppliers, odd lengths of jamb and inaccurately cut pieces.
Generally, we get mdf jambs, and for the trouble a dado doesn’t do much good. For paint grade stuff we staple our jambs together and use 2″ 18 gauge brads. As long as everything is shimmed tight these wont open up.
If we are getting stain grade jambs and casing we might use some trim screws to hold tight, or biscuits and some brads. I have a job coming up where all the jambs are solid maple, 8′ solid maple doors too. Going to have to buckle those guys up real good.
This template does not work for rabbeted exterior door jambs. This is for a fresh house with RO’s that need entirely new door assemblies.
Hey Justin, I just googled norfield and we have almost the exact same idea! Although mine costs much less than $900 ;)
I wish we had the same tool and templates available here in Canada, but seems we get a lot of the stuff you guys are using a bit later.
Hey Nolan. As for the bevelling of the door, i run my planer pretty hard sometimes and ufortunately do end up with less than razor sharp knives pretty often. So i do about two passes and belt sand , the process only takes me a minute or so. But whatever works!
Hey Big Bob, this template will last a year or so, unless i accidentally jam the router bit into it or damage it in some other way. Your best bet would be making the template out of something durable such as phenolic or good quality ply.
I just keep master templates for every successful template i build so i can reproduce them as needed.
I also carry the bosch jig in my trailer for service work or matching doors to existing jambs. The bosch does work well but i find it needs to be tightened every other use, and i have lost a few of the parts due to thing vibrating loose on site and disappearing into heaps of sawdust!
Hey to make those 200lb doors easier to lift into place check out the
Winbag from Lee Valley.
Also try plumbing your door with GRK – RT Composite™ Trim™ Head Screws. Driving one of those in flush to the surface of the jamb behind the doorstop will allow you to actually move the jamb in and out because of the reverse thread at the top the screw. These coupled with shims make hanging doors much simpler and faster. I tend to set everything after wards in place with a 3″ framing screw. Your Jambs will be solid as a rock and straight as an arrow.
Just Awesome, we need to train more guys to do the higher quality work. Awesome article, keep at it and keep writing.
Thanks for sharing. The more we learn, we really appreciate how little we know. Credit to all the “old timers” who have taught us so much.
The door bench is smart and makes working more enjoyable and efficient. Someone makes a door lifter with a pivot pad to help with those heavy doors and the air bag does work, might need two for heavy doors.
Do any of you guys know where I can get a “Norfield like” template without paying $1,000 and without making it? I only need it for 3.5″ hinges with a .625″ radius.
Dan H,
I know Porter Cable makes a plastic one that they sell at the box stores. Not high quality but it’s good in a pinch.
http://www.amazon.com/PORTER-CABLE-59370-Door-Hinge-Template/dp/B00004TI3O
They also make a higher quality steel set.
http://www.amazon.com/PORTER-CABLE-59381-Hinge-Butt-Template/dp/B0000224KV
The problem with both of these is that they leave a pin hole in the door edge.
Outstanding tutorial!
I admire not just the quality of your graphics and the design itself, but the professional description of each step in the build process and operation.
Thank you.
What are the benifits of having such large plywood squares. I love the jig, but want it to be less bulky.
I don’t understand why you’d take the bevel off, it’s there for a reason. I don’t want to appear rude but I also don’t understand why you wouldn’t just buy a professional Rockwell jig instead of trying to reinvent the wheel. I used one for years doing probably a thousand doors a year with no problems.