


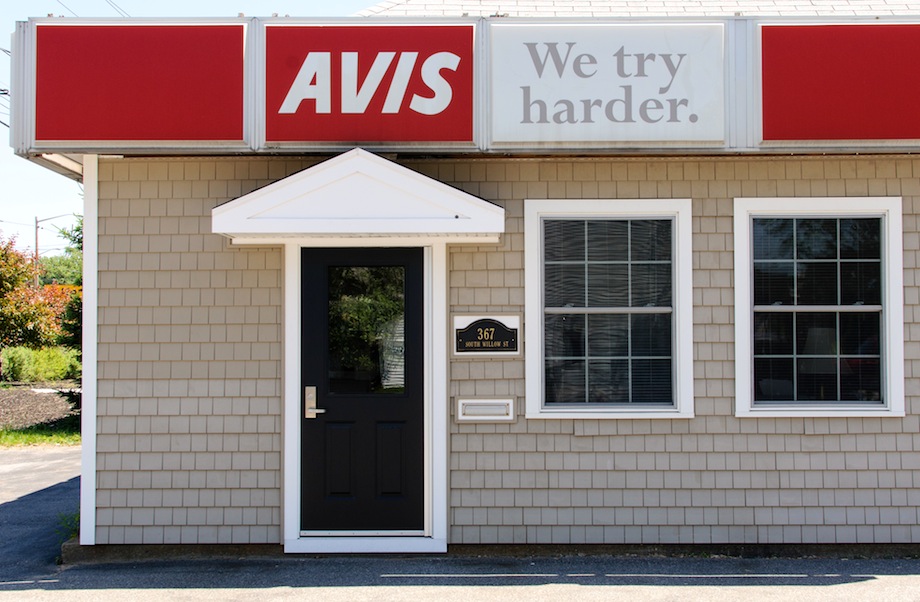
About six years ago, I remodeled an Avis car rental office. Prior to the remodel, the office had a showroom of cars on display, complete with showroom-style glass so that the cars could be seen from the road. Avis wanted to give the office a softer, more residential look, so the glass was removed, a wall was framed, and double-hung windows and vinyl cedar shake siding were installed. At the time, I figured my only option was to install a metal residential door—a typical one you’d find in a home, made of galvanized light-gauge steel—and a wood frame. I didn’t know I could get a raised panel commercial steel door with glass back then!
This decision to use a residential door in a commercial setting was a mistake from day one. The overall construction of a residential door is incapable of standing up to the demands of a commercial setting, and it affected the door’s usability and overall integrity. And because the door was relatively light, and there was a closer attached to it by code, the door would slam shut when it was left to close automatically. It shook the entire office, and caused a major disruption to the workday.
Of course, more recently, I received a phone call from the Avis office, asking me to return to look at the residential door I installed years ago.
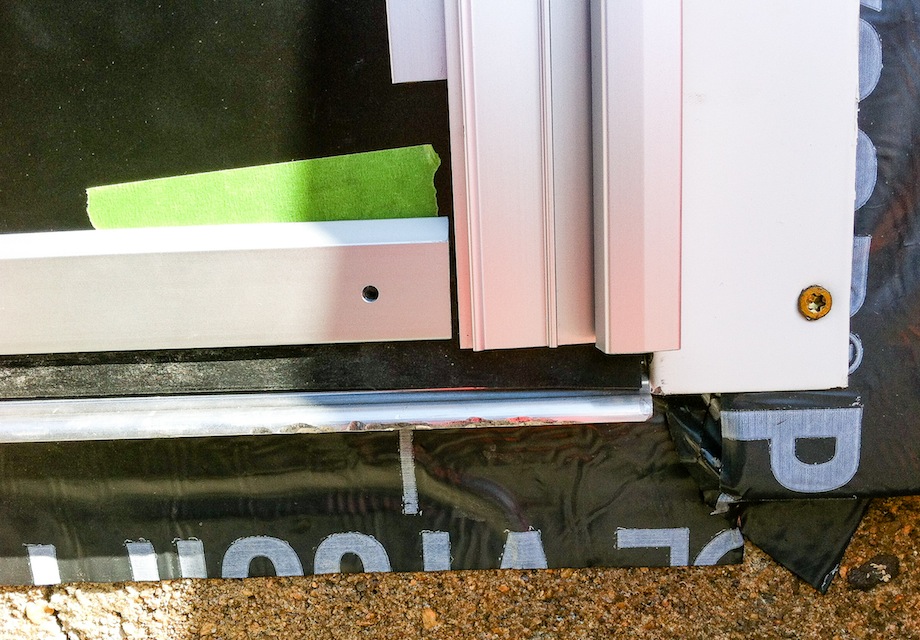
| This is what the job looked like when I returned to it. The door had obviously seen better days. |
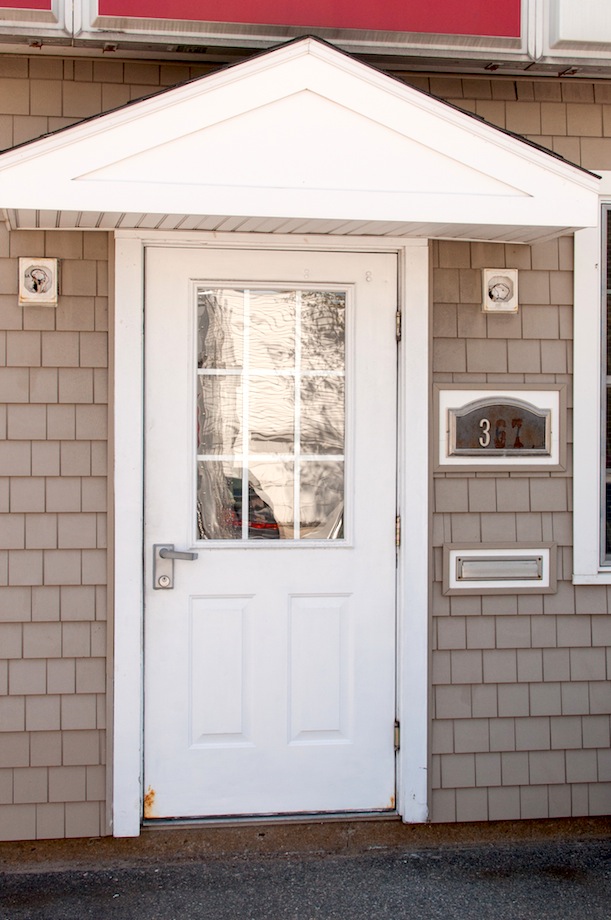 (Note: Click any image to enlarge) |
I knew this time we’d need to install a commercial steel door and frame. After all, there is a reason why steel doors and frames are used in commercial settings—they’re strong, durable, fire resistant, and heavy enough that when you attach a closer to them, you can gear them down so they don’t slam shut all the time.
Why Steel Doors and Steel Jambs
This was my eighth steel-door installation. I could’ve used a TiC article before I did my first one! Unlike wood, there is no forgiveness when working with steel. This can make it a daunting task for those of us who are primarily familiar with wood. My hope is that this article will help a residential contractor become more familiar with the proper steps of installing a commercial steel door, and installing a continuous hinge for a steel door.
Continues hinges aren’t very common because they’re expensive. But they’re something that I often recommend to my customers because they are such a good product (I used Steelcraft-brand for the doors, and Select Hinges for the continues hinge on this project.) Steel doors are very rugged, and heavy! Their weight can often lead to failure at the three hinge points, depending on how roughly the door is handled. That’s why I like the continuous hinge—it’s more like a piano-hinge, which gives you full contact up the side of the door and jamb, making it nearly impossible for it to come off its pivot point and cause problems. In fact, two of the replacement doors I have done actually had continuous hinges. In both cases, I just ordered new doors and reused the hinges! More often than not, you’ll replace the door because of rust and overall wear before you’ll replace the hinge.
Before Heading to the Jobsite
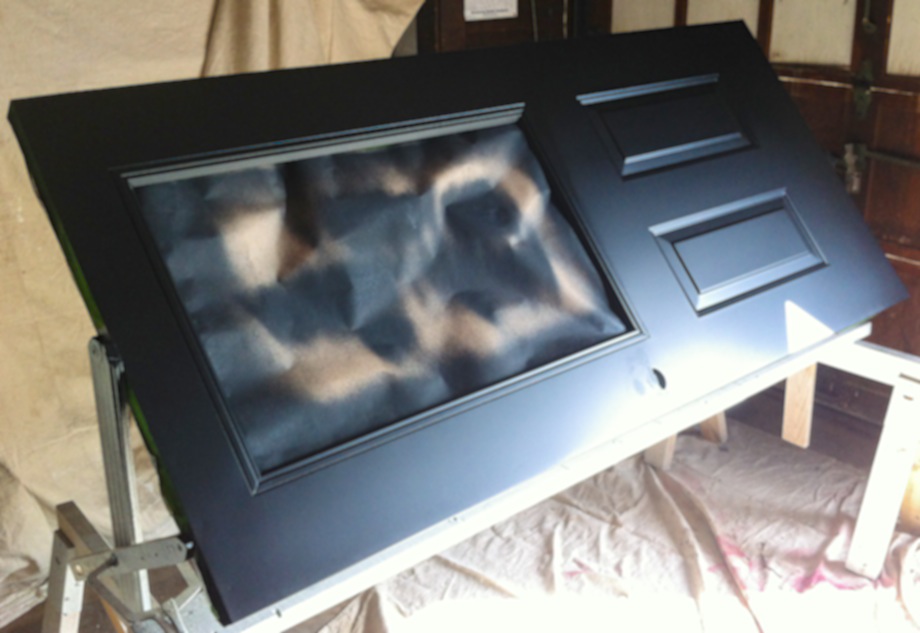
Most of the time, if a project requires painting, I’ll do it myself. For this job, the first step was to paint the door and jamb for finish installation. I knew that, unlike wooden doors, there weren’t going to be any adjustments or areas I would be able to plane down for a perfect fit. Also, being an active business, there would be no way to paint the door in-place after installation.
I used my trusty door horses (a tip from Fine Homebuilding!), which allowed the door to pivot so I could easily access both sides at the same time and lay it flat to dry. I sprayed an oil-based paint with my HVLP sprayer, giving it a perfectly smooth finish.
| I then installed the crash bar, lockset, and kick plate before bringing it to the site. This would make for one less thing to do onsite. Also, because of the way the strike plate was fastened, there would be no need to install it in-place. | 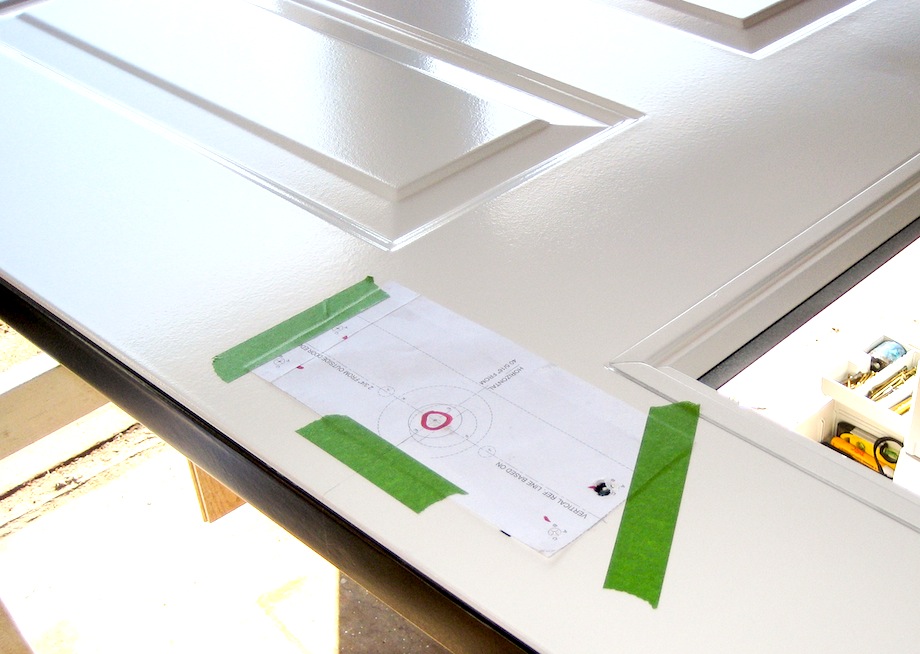 |
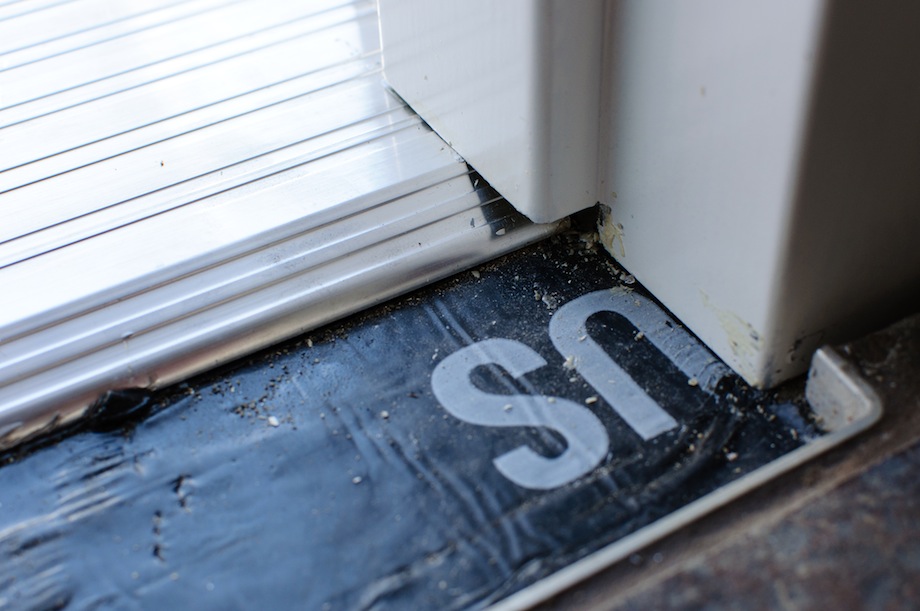 |
I used a grinder to cut out about half an inch off the bottom of each jamb before painting them. This would allow me to slide the threshold underneath. You’d think that they would automatically come this way, but I guess that wouldn’t work well for interior installations between rooms where there are no thresholds. |
On the Job: Preparing the Opening
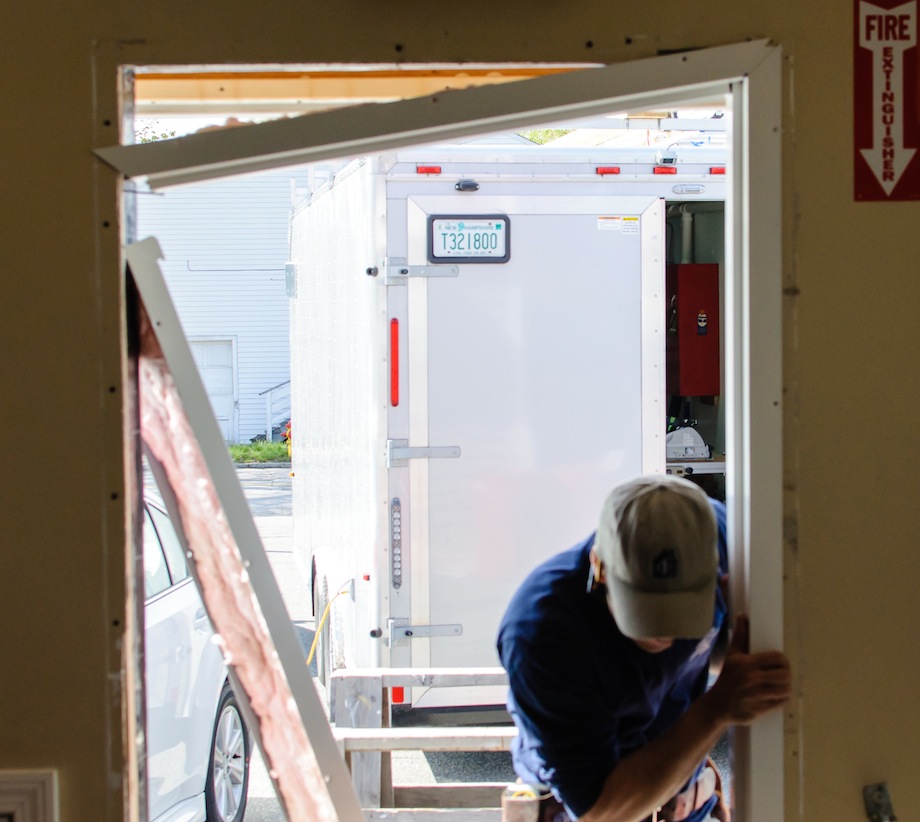
When I got to the jobsite, I began by removing the old door and preparing the opening for the new installation. I started by removing the exterior and interior moldings, taking care to not damage the interior wall.
One obstacle was the A-frame awning, which had been installed a few years earlier. Unfortunately it was built on the ground and fastened to the wall right over the siding and upper door molding. I decided to work around this problem, since it was more important to get the door back in the opening before the end of the day.
| After removing the remaining screws in the jamb, I made a cut with my circular saw at the bottom of one side, which made removing the old jamb much easier. | 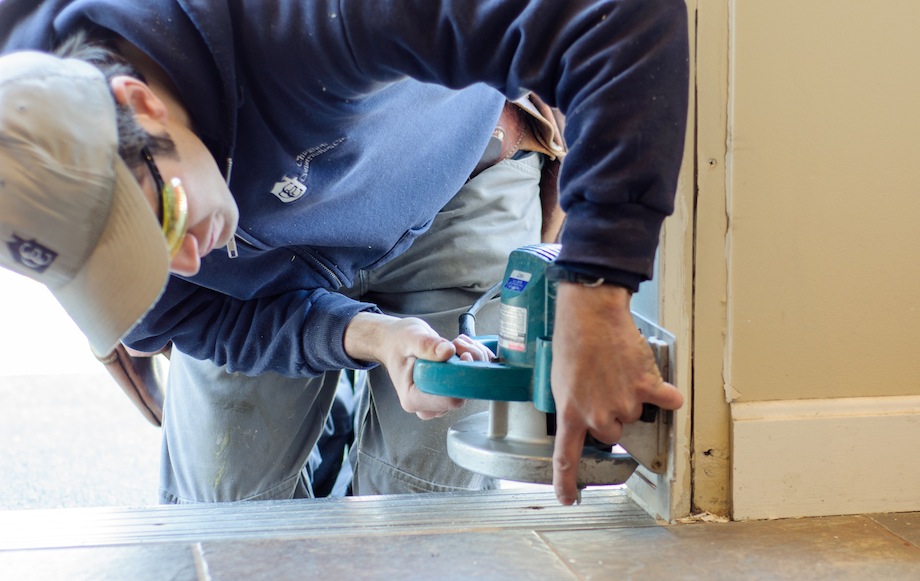 |
 |
Then, with a flat bar, I removed all the old glue from the sill that had been used to help fasten the old sill plate in place. |
At this point, it was important to make sure I had enough clearance on either side for the jamb to slip over both the interior and exterior sheathings. You want to have plenty of clearance. When it’s time to put the jamb in place, you’ll fight it the whole way if it’s too tight. When I placed the door order, I specified that the wall was 6 ½ in. thick (½ in. exterior sheathing, 2×6 stud, and ½ in. sheet rock).
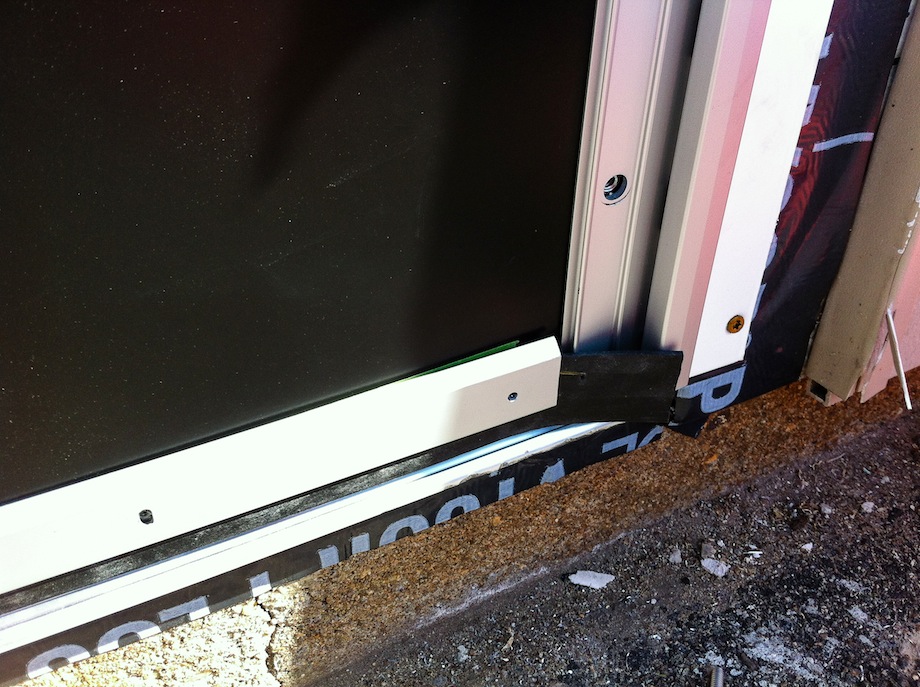
| After I drove in screws to refasten both the interior and exterior sheathings, I had between 1/4-1/8 in. clearance… |  |
 |
…which was perfect—I’d rather fasten the exterior side tight to the wall for weatherproofing purposes, and shim out the interior, than have the whole jamb be too tight. |
Plus it allowed room for the Vycor waterproofing I installed around the rough opening.
 |
As always, a dry fit is needed to find any obstructions. |
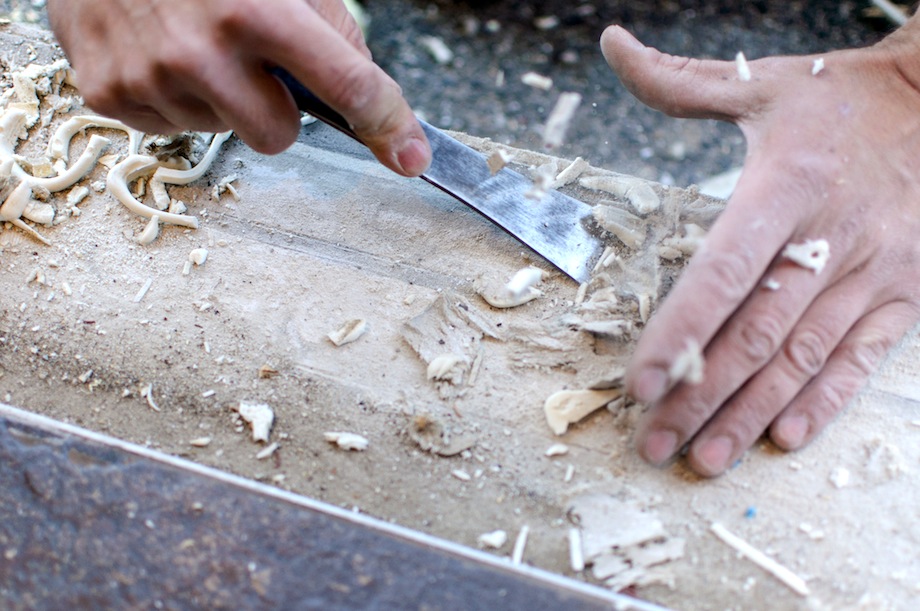
| The jamb wouldn’t sit flat in the door opening because of the tile and grout, so I scribed and cut the floor edging and grout back with a grinder, allowing the jamb to sit on the floor. | 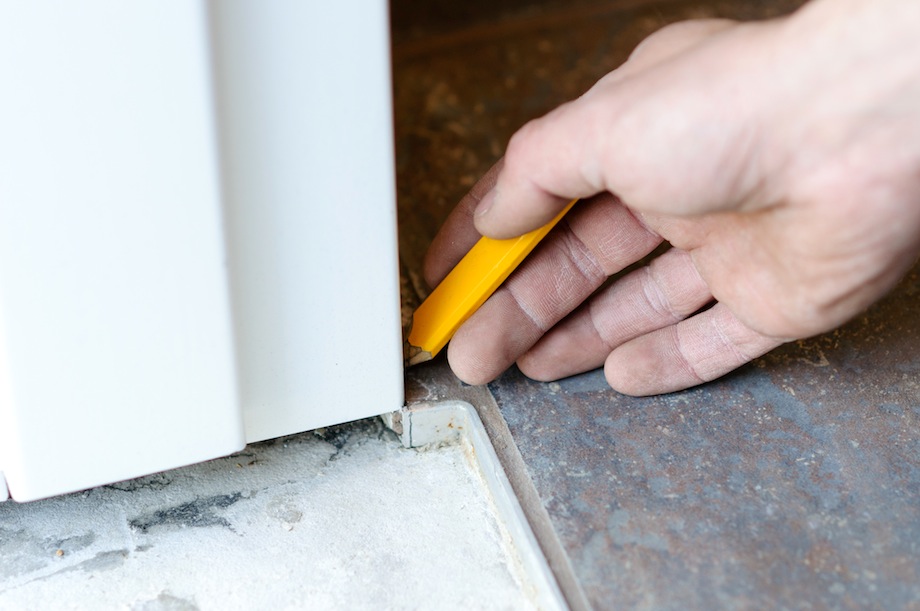 |
Next I applied the waterproofing sill membrane. Luckily the sill was already pitched toward the outside for drainage.
 Most waterproofing membranes are applied with a pressure-activated self-adhesive. I find that when the temperature outside is cooler, it doesn’t adhere as well as it would on a hot summer day. To aid the process, I like to use spray glue, which ensures a good bond between surfaces. I also like to use it in places that don’t see a lot of sun. On this project, I used the regular 3M spray glue found at the local hardware store.
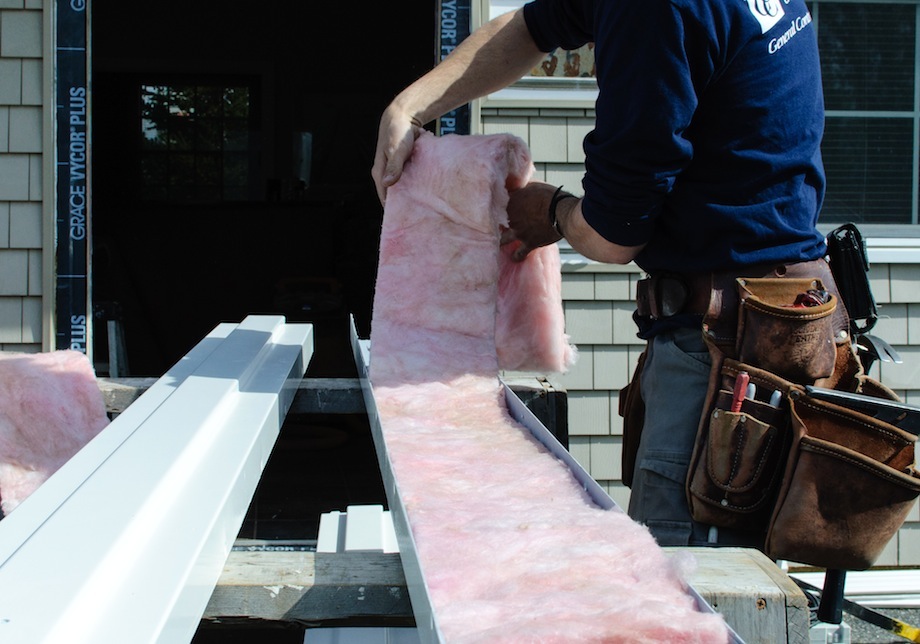
I typically use spray foam insulation around all doors and windows. But due to the way steel jambs are installed, I find the best way to add insulation on jambs like these is to use pieces of fiberglass batt insulation, cut from the roll. I set the jamb on top of the fiberglass and used it as a cutting guide to ensure a snug fit. I then applied spray contact adhesive to the inside of the jamb and set the fiberglass pieces in place.
 |
 |
Using the adhesive keeps the fiberglass in place while you’re handling them (otherwise they’ll just fall out). I cut the fiberglass approximately six inches from the floor, and I used spray foam at the bottom to give it a much better seal for moisture and insects.
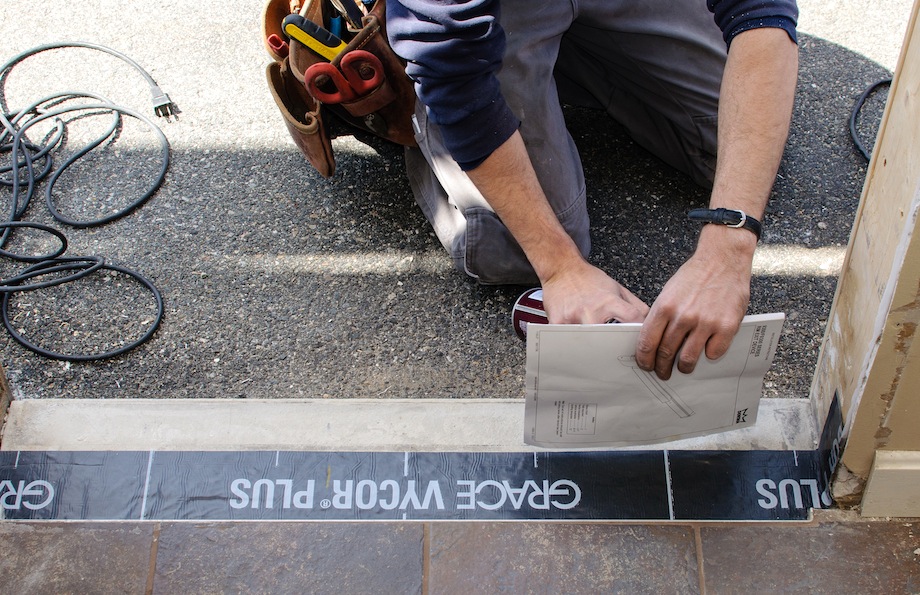
| Using my track-saw, I trimmed the threshold down to the appropriate length—something you have to do every time. | 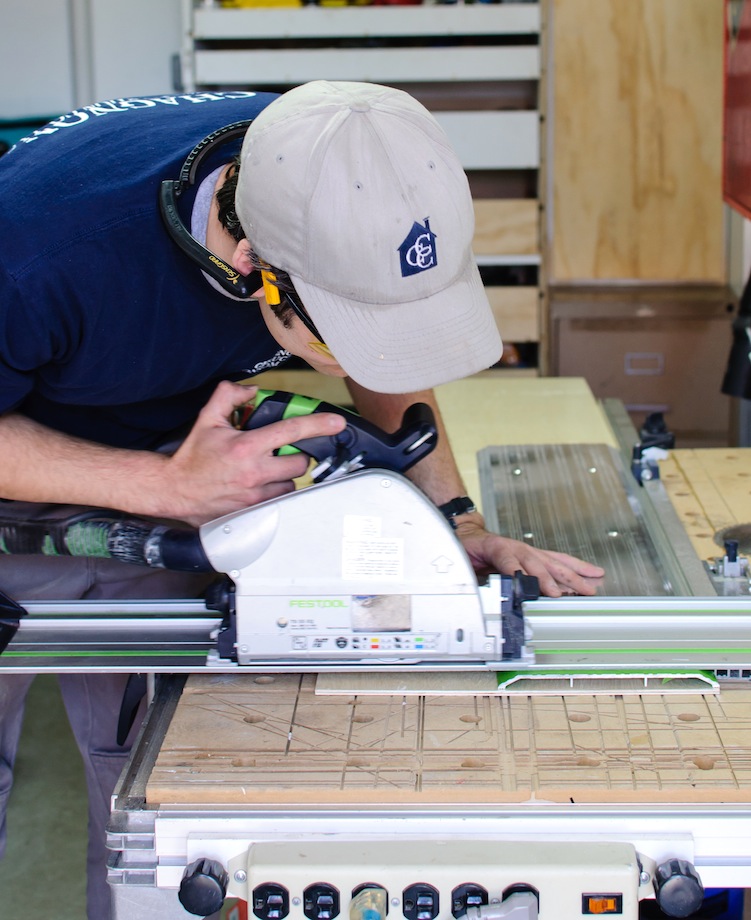 |
(By the way, is there something the manufacturers know that I don’t? I can never figure this out: there is only one possible length that will work for a 3-0 door, and yet it’s manufactured about a half inch longer. For what purpose?! But I digress.)
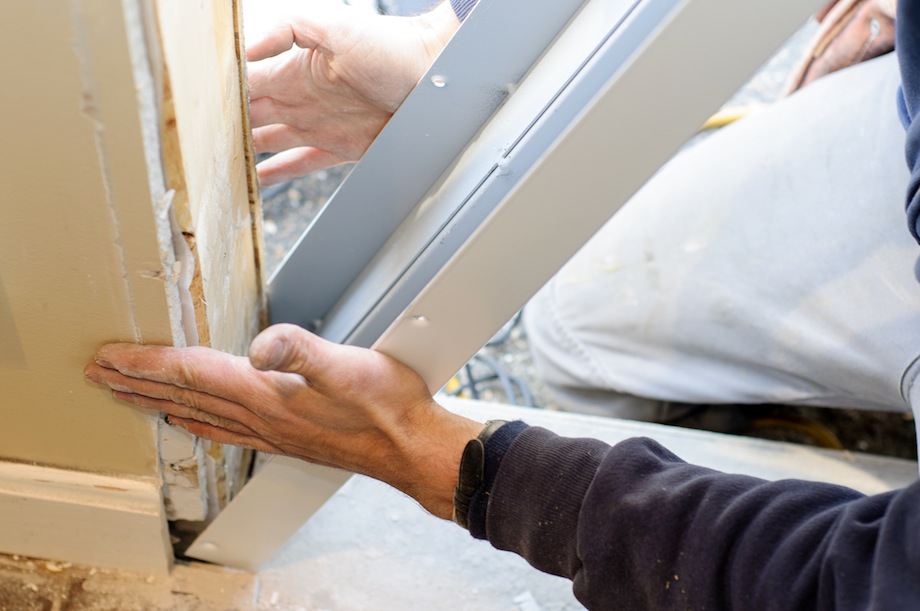
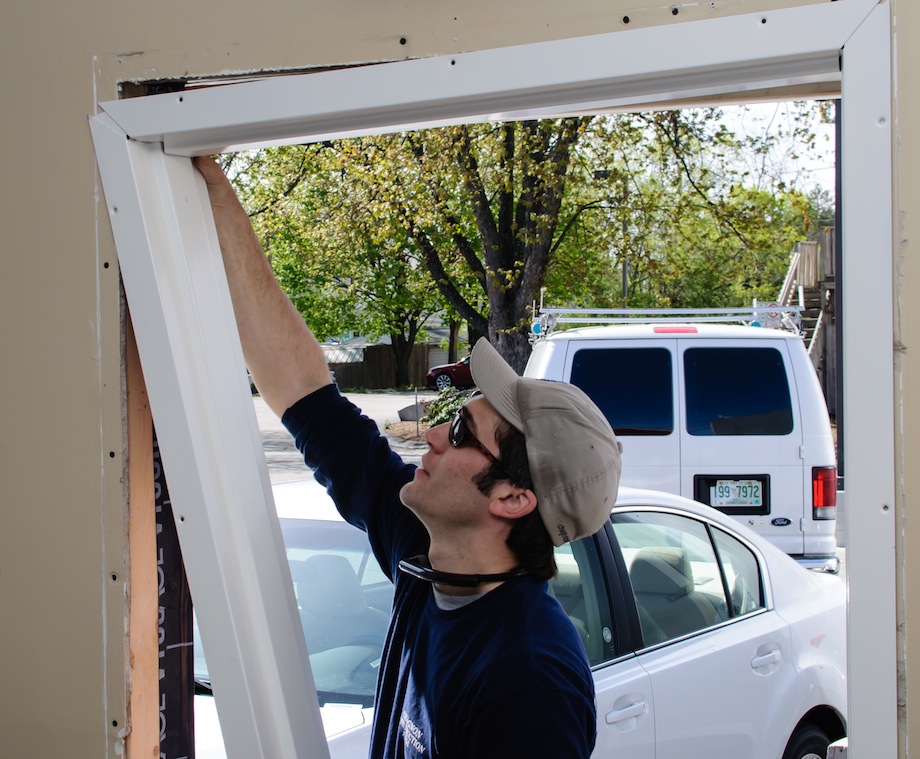
| Finally, I installed the jamb. The head jamb for these frames had little ears that slip into each side, bringing the whole frame together. | 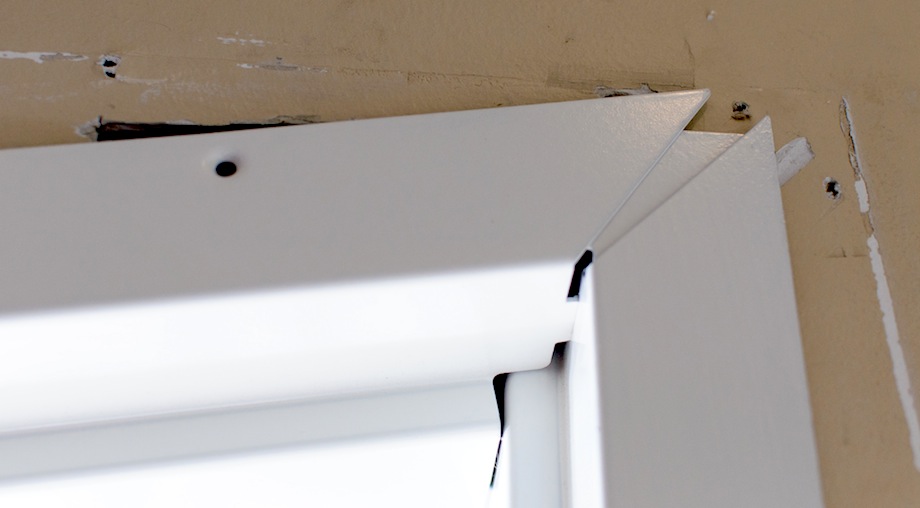 |
 |
It’s best to install one jamb leg first, nearly straight, then slip the top jamb over the header and slide it down to engage the tabs in the jamb leg. |
| Then I installed the opposite jamb leg, engaging the tabs, and raised the head jamb as I slid it over the wall. Overall, as long as you have enough clearance, the process is relatively easy. | 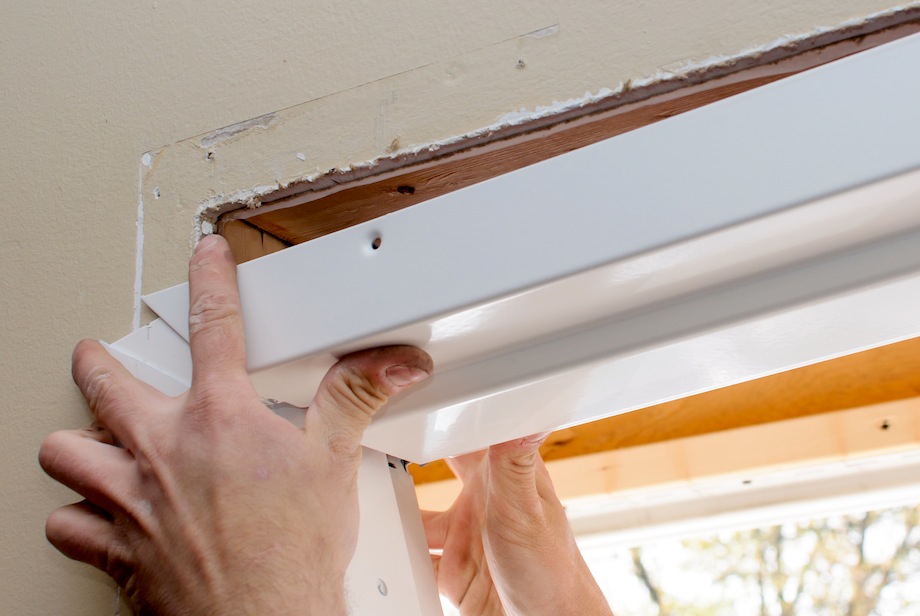 |
 |
If it’s tight…you’re going to have problems. |
| The jamb had an adjustment screw that pushes against the jack stud to drive the whole unit together securely. This secured the header to each side. But it’s important to know that the setscrew is threaded counter-clockwise. | 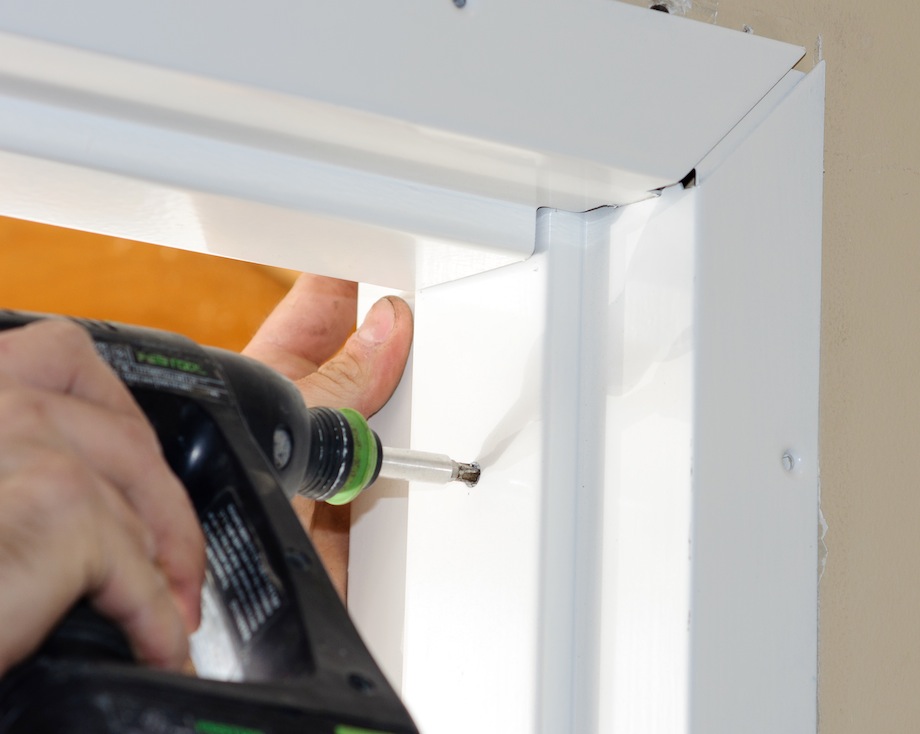 |
| I then put a screw in every other hole in the jamb—a couple on the exterior, but mainly on the interior. I wanted to leave some holes empty, since I was going to trim it with PVC. The empty holes would allow me to drive screws through the PVC and the jamb at the same time, and I wouldn’t have to drill new holes through the steel just to attach the PVC. | 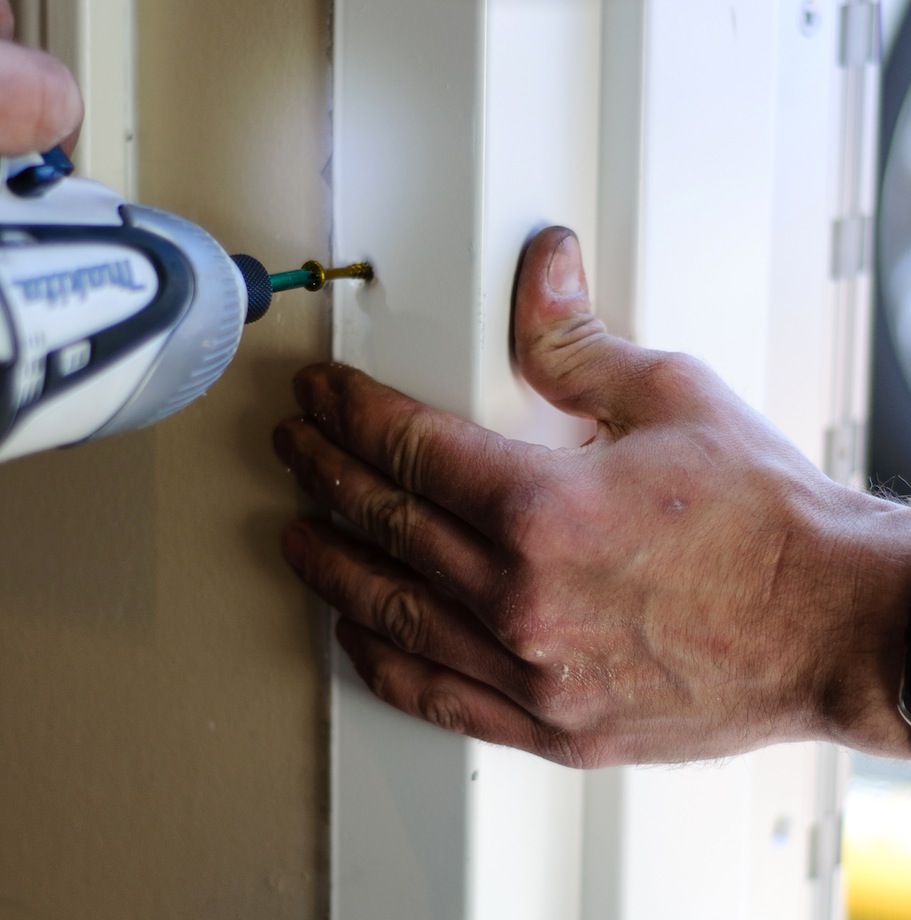 |
Installing the Hinge on the Jamb
Next, I installed the hinge on the jamb. After removing the cover that hides the exterior fasteners, it was time to attach the hinge to the frame.
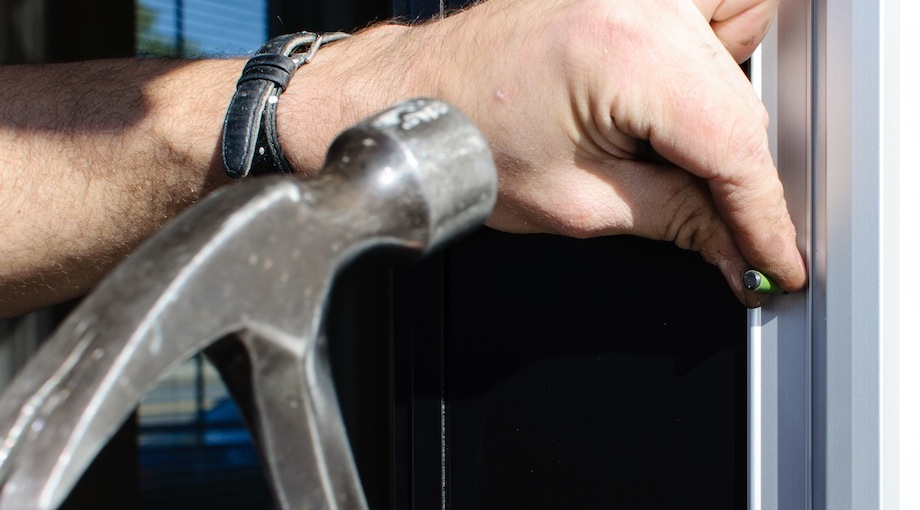
| I used a shim to hold the hinge up about 1/8 in. from the threshold, allowing me to mark all the centers of the pilot holes with a fine point nail set. | 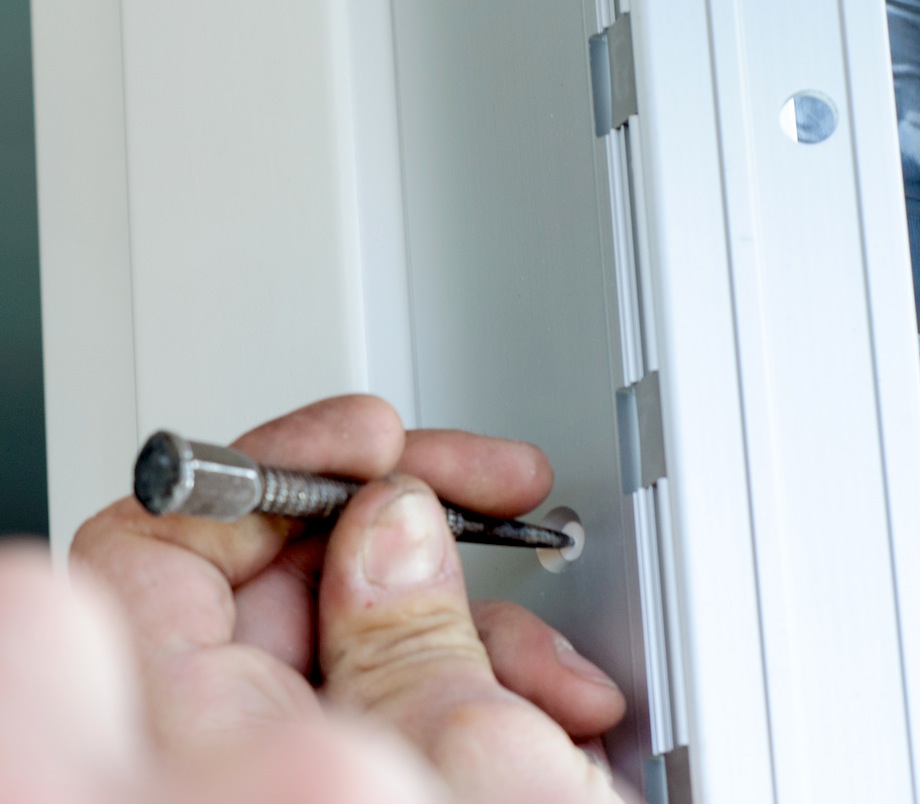 |
 |
The manufacturers provide self-tapping screws, but you still need a good 1/8 in. pilot hole. There are many holes that need to be drilled, but at this point you can just install a few screws at the top, one in the middle, and a few at the bottom. |
Installing the Door on the Hinge
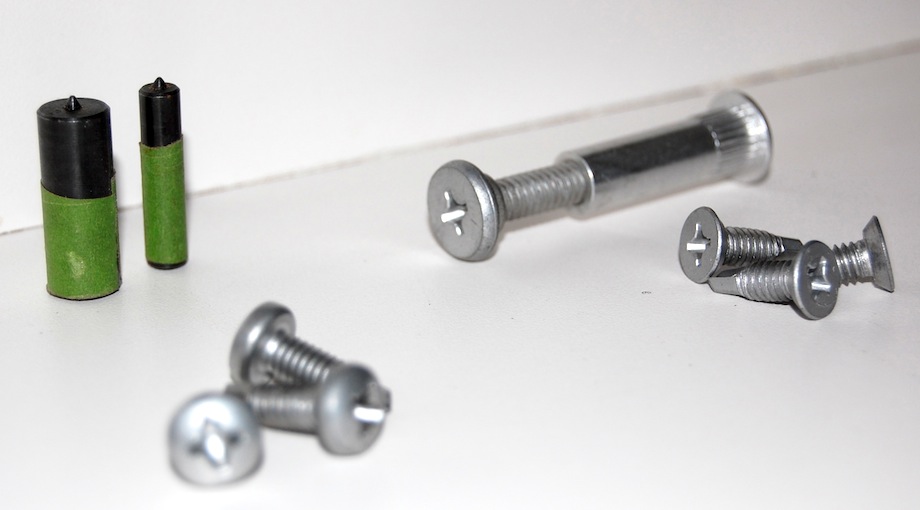
It was then time to install the door. The hinge came with two center punches and two types of screws for mounting it to the door.
| I should also note that, when I paint doors offsite, I wrap them in cellophane for transport—I’ve learned the hard way that it’s worth the extra time to protect your work. |  |
Using the small center punch provided with the hinge, I marked locations for the small self-tapping pan-head screws and drilled pilot holes. I used a minimal number of those screws to temporarily secure the door so that it would hang properly with an appropriate reveal.
 |
 |
Next, I removed the small screws and placed the door on a set of sawhorses. After removing the hinge from the jamb, I placed the hinge on the door so that I could locate the through-holes that had to be drilled for each sex bolt. The sex bolts are what really secure the hinge to the door.
| I marked locations for the sex bolts using the larger center punch. | 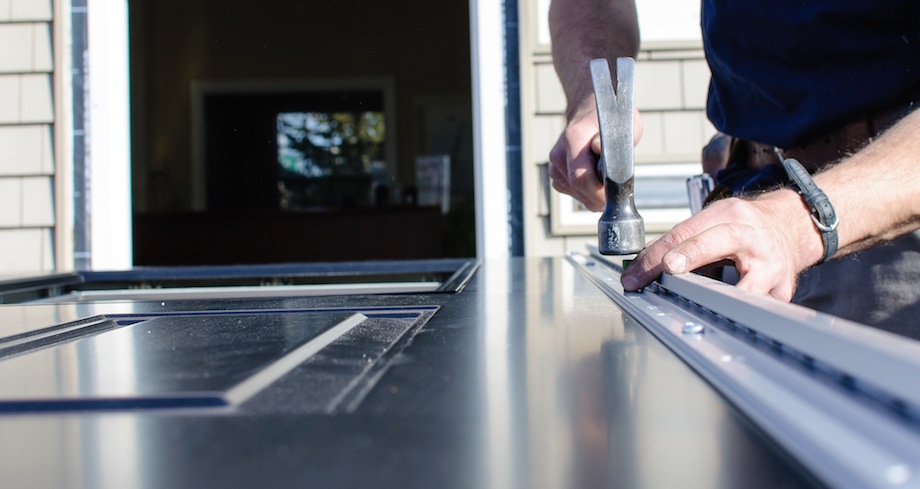 |
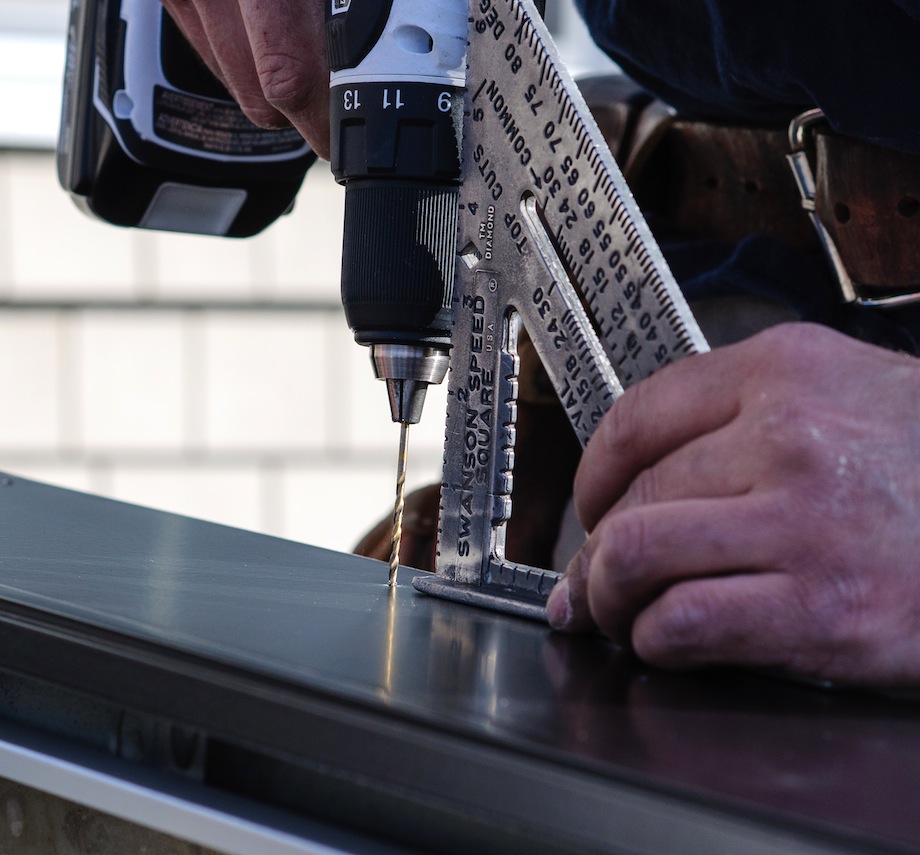 |
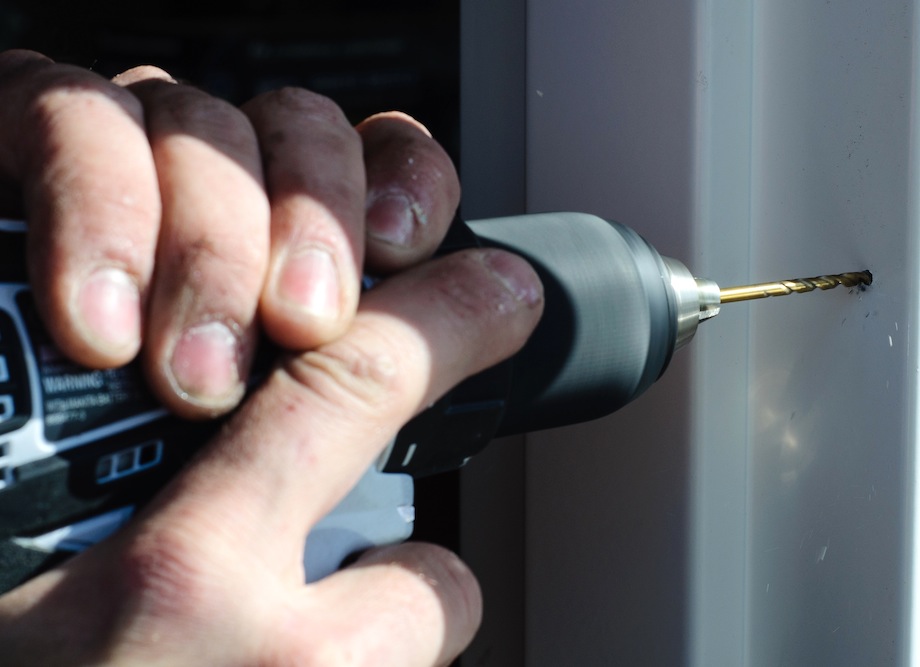
I then drilled pilot holes for the sex bolts, guiding my 1/8-in. bit with a speed square to be sure the holes were perpendicular to the door. |
| I finished the holes using a step bit. | 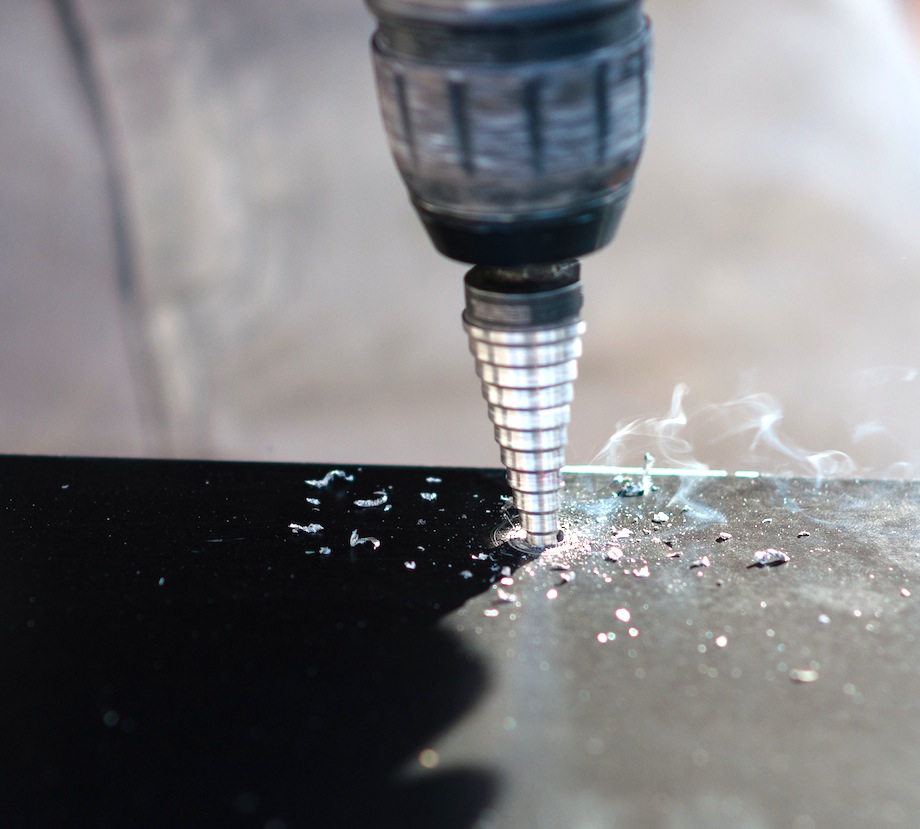 |
A step bit is extremely handy when you’re installing steel doors. It doesn’t dull quickly, like other bits. Most steel doors are made from a thin sheet of metal, so using this bit works extremely well for boring large holes.
 Now this is important: If there is going to be a kick plate on the inside of the door, you want to refrain from drilling the last through bolt. Otherwise you’re going to drill right through your kick plate, and it won’t look very good. Instead, you can simply use a self-tapping screw, which the manufacturers provide.
When drilling the holes, you’ll naturally create metal shards just as you make dust with wood. By force of habit, I would either wipe or blow them away. But both of these methods aren’t good when working with metal.
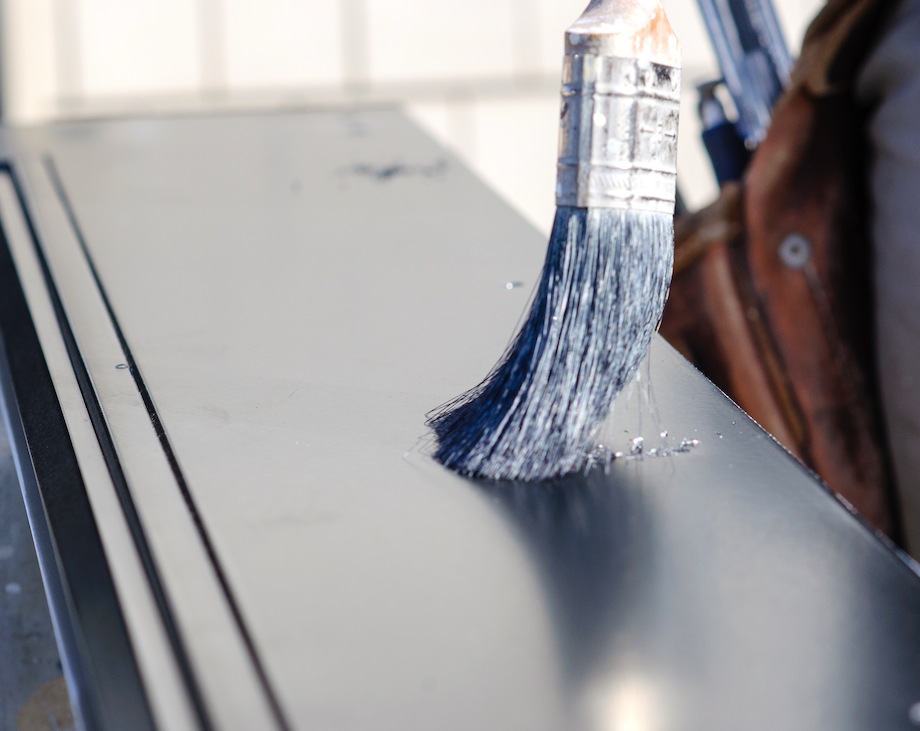 |
The metal is a little too heavy for blowing, and wiping only leaves little white scratches in the paint, especially on a black door. The best solution is a paintbrush. |
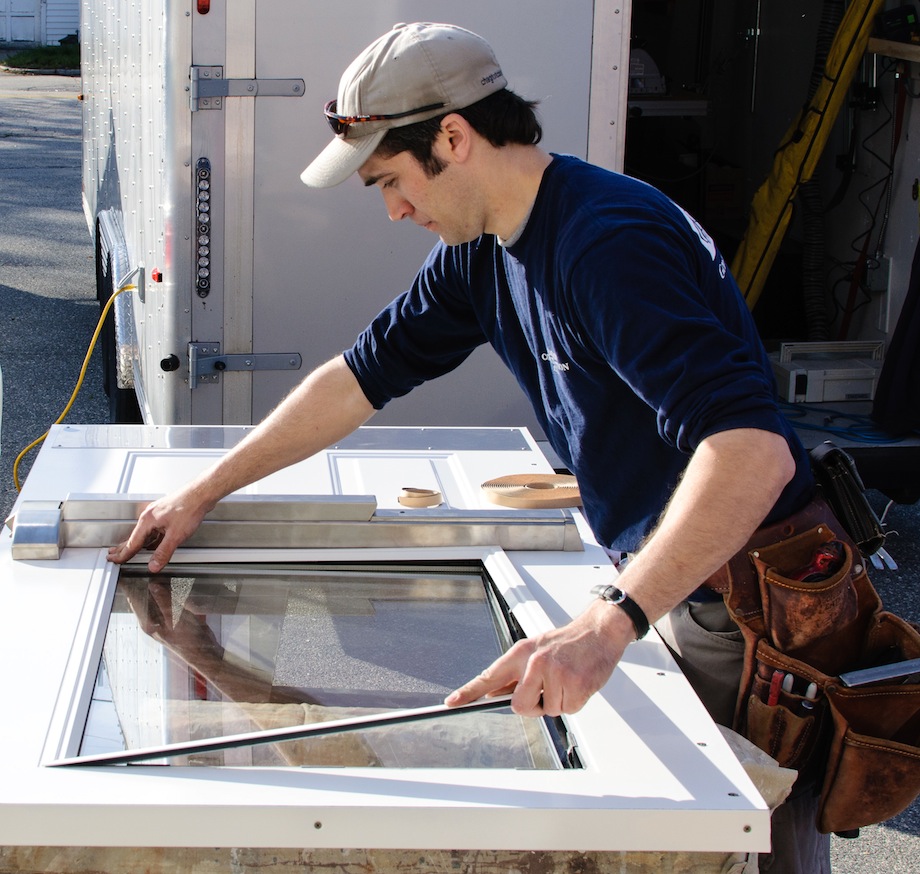
After setting the hinge, the glass was next. You need to apply some window glazing to the exterior side of the flange. Window glazing wasn’t provided with the door or the glass, and I couldn’t get it from my supplier, so I got some from my local glass company. I then positioned the glass and snapped on the interior flange.
| Because the door was so heavy, I installed the hinge back on the jamb using the flat-head self-tapping screws. I fastened the door to the hinge using the small pan head screws. And finally, I installed all the sex bolts that would permanently secure the door to the hinge. | 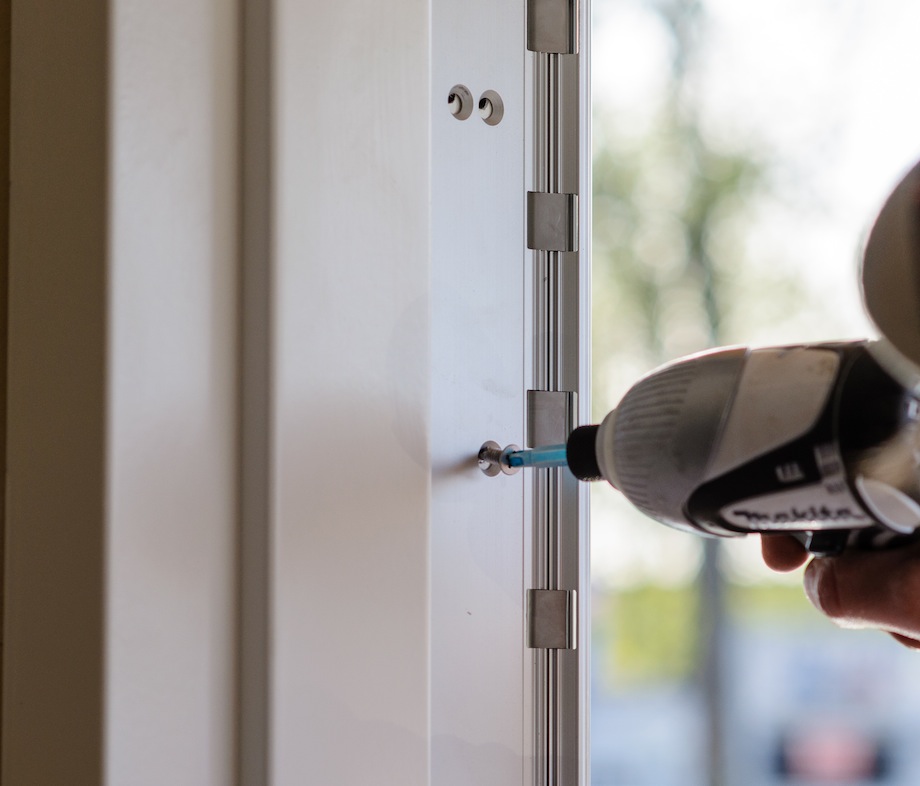 |
Then it was time to set the strike plate. The instructions say to drill and tap for a 12-24 bolt.
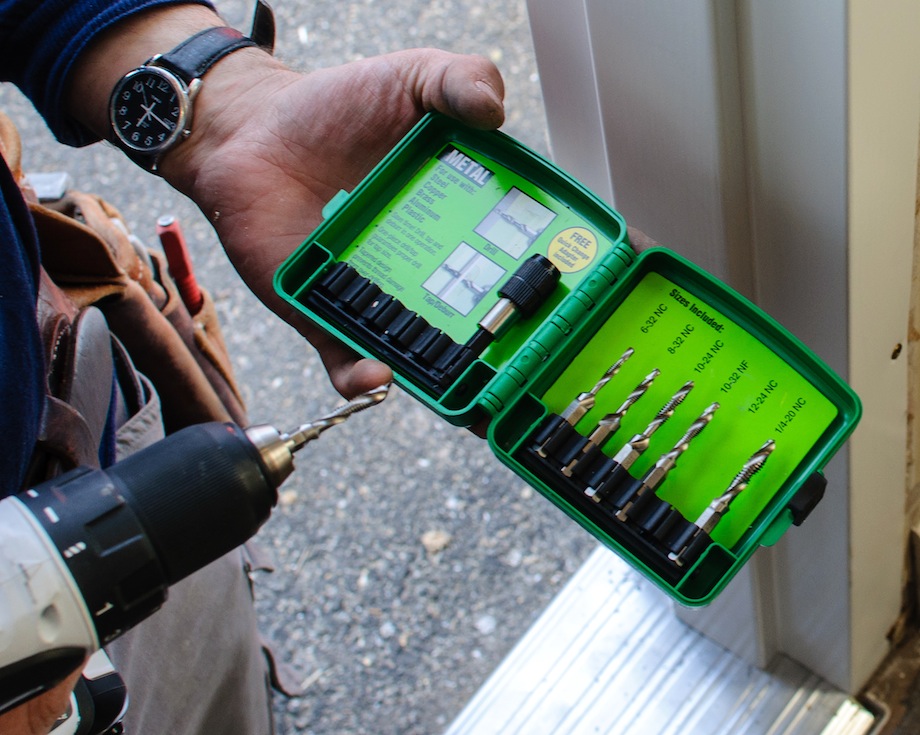 |
I was able to find another cool tool by Greenlee, with bits that allow you to drill and tap the hole in one motion. It’s perfect for this gauge of steel, and it’s very much worth the cost. I used the 12-24 bit to simultaneously drill and tap the holes for the strike plate. |
| Then I tapped the threshold into place and screwed it down. Instead of using the screws they provided, I got some stainless steel screws at the store and used those, just to avoid rust. | 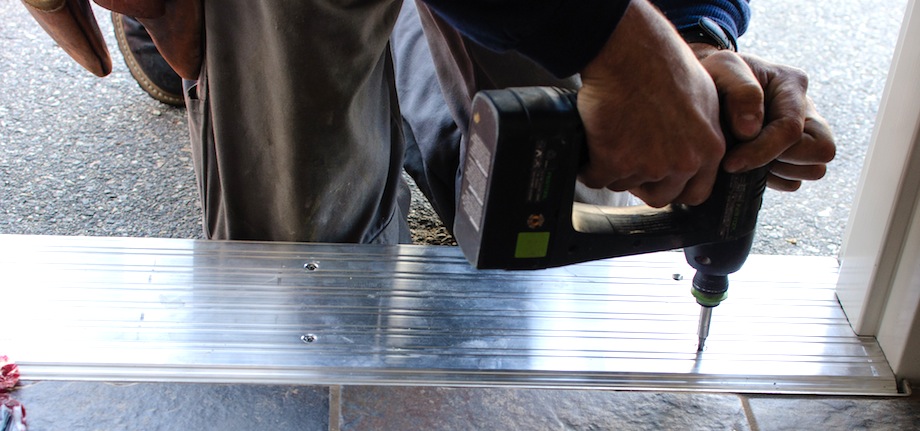 |
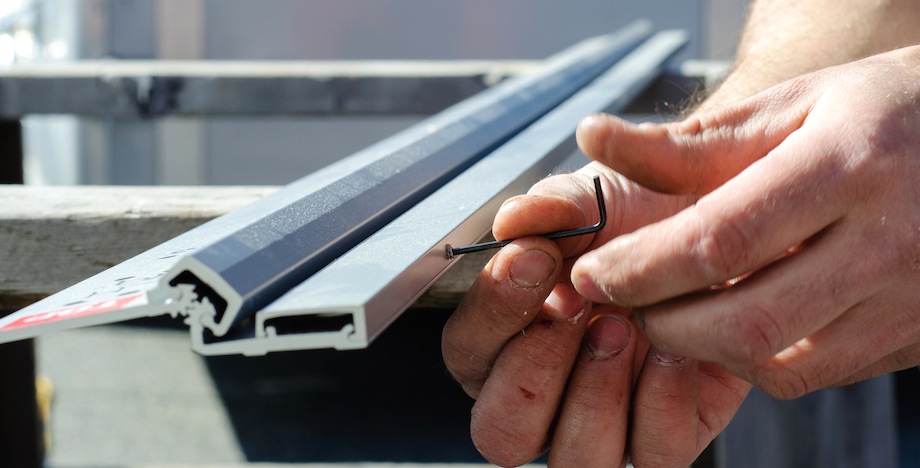
One typical challenge when using the continuous hinge comes when attaching the sweep seal. Typically, the seal would go from one end of the door to the other, and you’d just screw it in place.
 However, this hinge goes all the way down to the bottom of the door, forcing you to stop the seal at the hinge. I suppose you could cut the hinge, but that’s not something I’m comfortable doing, and it would risk weakening the hinge and its function-ability. Instead, I measured from the hinge to the end of the door and cut only the aluminum, leaving the rubber at full length.
After screwing the sweep seal in place, I cut back the rubber just enough so a little of it could go behind the hinge. This way, there wouldn’t be an open gap or little, unsecure flap of rubber that would eventually rip off over time. I then removed a few of the lower screws on the hinge and pried the hinge up a bit to tuck the rubber underneath.
Finishing the Interior
Because most walls vary somewhat in thickness, I always order the metal frames wide enough to cover the widest part of the wall.
| Before securing the jamb to the interior wall, any gap between the jamb and the wall must be shimmed or the jamb will deflect. To do this, I measured the gap, scribed it on the board, and cut it freehand on the tablesaw. | 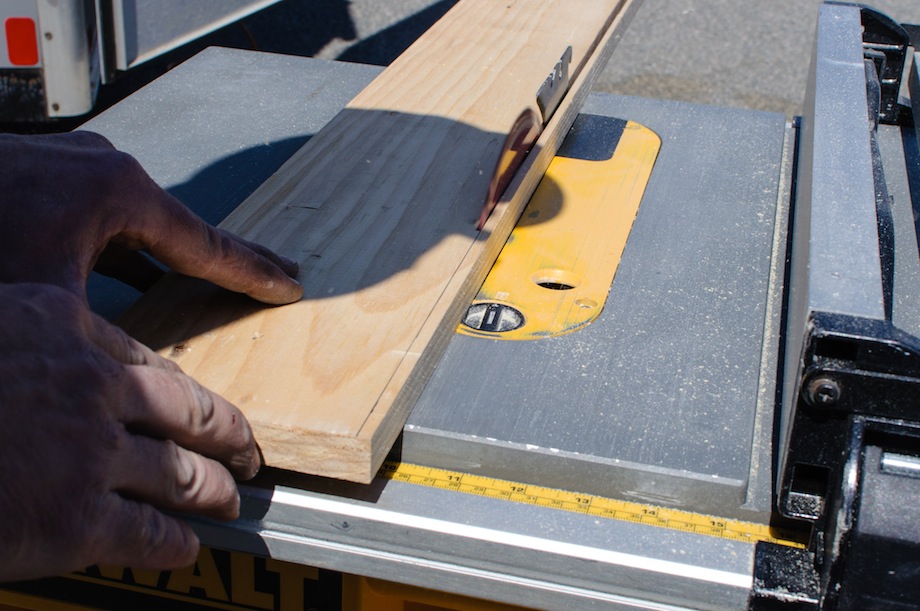 |
| And then I slipped the shims behind the jamb. Only then could I drive the screws home and ensure a nice, tight fit. | 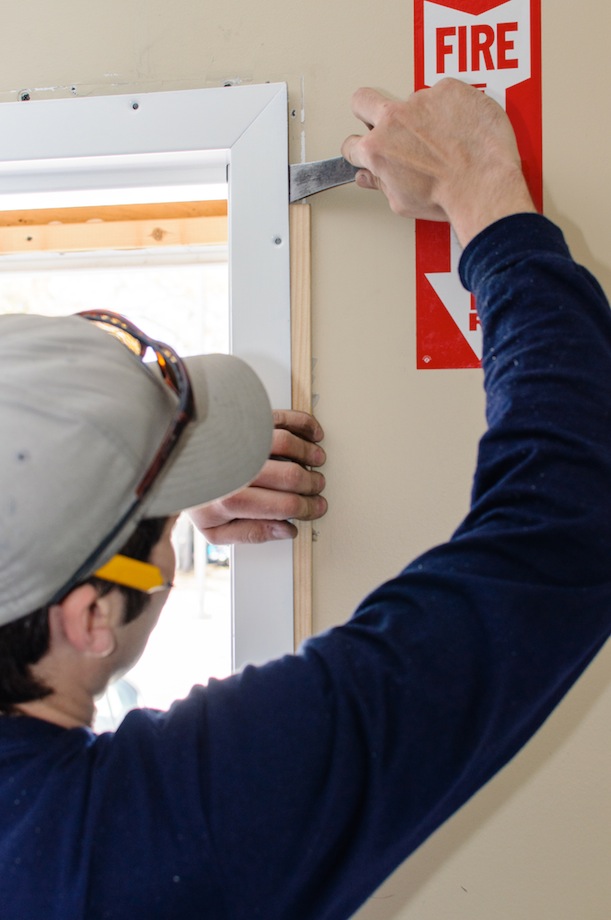 |
The last step was installing the door closer and applying the jamb weather-stripping. I used the Greenlee drill bit set again for securing the door closer, which required holes tapped for machine bolts. The closer had two adjustments: one for speed and one for back-check. I adjusted both until the door swung clean and clear to the jamb, and until it slowed slightly and latched securely without slamming.
Lastly, I installed the jamb weather-stripping with self-tapping pan head screws.
A couple days after the installation, I checked in to see how it was working out; the employees confirmed that it was much quieter and less disruptive. Most importantly, I’m confident that it will hold up to commercial use.
• • •
AUTHOR BIO
 Dylan Chagnon lives and works in southern New Hampshire. He started his company, Chagnon Construction, 6 1/2 years ago, shortly after graduating college.
During college summer vacations, Dylan worked in the construction industry, learning framing, roofing, and a little finish work. He grew up very involved with his father’s commercial floor-cleaning company, which planted the seeds of pride in work, business ownership, task management, and quality expectations. Dylan’s persistence and willingness to take on jobs he’s never done before has allowed him to develop and maintain a good client base, while continuing to broaden the services he can provide.
When he is able to find some free time, he enjoys playing guitar, going to concerts, and when the weather is nice, cruising around in his 1959 Chevy Bel-Air.
Acknowledgements
Dylan thanks his father for teaching him the importance of managerial and problem-solving skills, which would otherwise have taken years to develop, probably an entire career.
Dylan also wishes to acknowledge Darrin Wason, for giving him the opportunity and start in the trade, and Ray Blake as well. The skills and overall method of building that Dylan learned through the years of working with them (although framing) were, without a doubt, fundamental cornerstones of Dylan’s methodical approach to any project.
While I enjoyed reading the article, I cringed at this:
“…cut it freehand on the tablesaw.”
My first thought: “Ah, the true sign of a carpenter.” My second thought: “At least he has a riving knife.”
This was such a contrast to your careful, considerate attitude on the rest of the job that I had to comment. Please protect those guitar fingers and find a different way: jigsaw, circular saw, power planer, straight table saw rip then touch-up, etc. Anything but trusting in your dexterity to protect you from a 1HP whirling carnivore.
Keep up the good work!
Devin
I thought this was a great article full of tips for the novice and pro alike. A true joy to read… which made me all the more dismayed to see such a superficial comment regarding safety.
I believe that what Devin fails to realize is that to many experienced professionals, the safe use of the equipment is not so much mechanical reliance but rather experiential awareness. While free-handing a scribe cut on a table saw is certainly not a technique for the novice carpenter, to the experienced professional it is often a necessity.
I can say from my own experience that free-hand table saw cuts put my senses on a heightened level of alert. I know my saw well enough to have great awareness of the exacting distance of my appendages to the blade as well as the location of the switch in relation to my knee. I sense the blade cutting through the workpiece feeling every chatter, rub, and resist. I hear the motor whir and strain as I make minute moves. I see the kerf occur virtually as each tooth passes through and smell for burnt wood and brushes. I know my options ahead of time; whats in front of the saw and what is behind. I know that I have the ability to overpower and possibly kill the smallish 4hp universal saw motor, or let go of the workpiece, or stabilize the piece in order to power down the saw, or steady the piece out of the cut, or even to completely kick the saw away from me if necessary. Some options which I wouldn’t be allowed if following the manufacturer’s recommended safety guidelines.
While I am in no way declaring that experience curtails all the rules of safe tool operation, I do honestly believe that the author has a better awareness of his level of personal peril than we as the observers can understand simply through a sentence and a photograph.
Great article. Nice to see some commercial application.
Its encouraging to see people my age making a life with there own construction business. Its rough but most rewarding process.
Thank you for sharing and I look forward to future contributions.
Great article and photo’s.
Thanks!
Thank you.
Regarding the photos:
Many thanks goes to my brother Matt Chagnon who spent the day with me on site taking pictures through the whole process and later helping me sort through them all for the article. I couldn’t have done it without him.
Dylan,
Nice job! Thank you very much for contributing to TiC. I’m only sorry it took us SO LONG to publish your story!
Gary
Thank you Gary for taking the time helping me put the whole thing together. You made the process much easier.
–Dylan
Wow!!!!! I was very excited and pleased to see your article. Way to go. Great job on the craftsmanship and attention to details. Keep up the great work and I look forward to reading more of your articles.
Thanks for sharing.
Manny
Well done. Have installed only three metal doors in my career . you did an excellent job explaining your process.
Dylan, what did you charge for this door install with product? I’m doing the same thing and would like to see if I’m inline.
David-
David,
Sorry its taken me so long to reply, I had to locate the receipts from that job. Yes this is the million dollar question everybody wants to know.
For this particular door install, the total materials were around $1800 and around 10 labor hours which includes painting both sides separate colors.
Hope this helps.
–Dylan
Very good article, but the continuous hinge is something I’m not familiar with. It would have been nice to have a more thorough description of it, including what sex bolts are.
Regarding free handig on the table saw – experience here makes a difference. I often use this method to follow an uneven scribed line with great success. Caution and precise feed are required and this is where the experience comes in. Additionally, I only do this on my Bosch contractor saw which has limited power compared to a full fledged cabinet saw.
By the way, Gary I find this website to top notch and have recommended to my carpentry teacher friends at the local vocational school to introduce it to their students.
Actually there were a few areas that I would’ve liked to elaborate on, the hinge being one of them but it felt like the article was boarder lining on “too long” as it was. Sometimes editing gets in the way.
Dylan,
I realize you stated the door jigs were featured in Fine Homebuilding. Are they a shop made product or professionally manufactured? If you know the issue it was featured in that would be appreciated .
Thanks,
John
The “door horses” as I like to call them are shop made out of 2X material. This way you can make them to accommodate whatever it is your looking to paint.
Don Mathis, Macomb, IL
From Fine Homebuilding 205, pp. 20 July 16, 2009
Hope this helps.
–Dylan
Nice clear article – thanks for mentioning my tip from FHB – Don Mathis
The FHB legend does exist! Thank you for all of your fine tips, Don! I never stop amazing people with the “Small-Scale Drywall Texturing” trick.
A very minor point. Dylan states the weight of the door loosens the hinge points so he uses a continuous hinge. In my experience it is the action of the door closer that tries to rip the door from its hinge point. As one pulls on the door to open it, the closer is pulling in the opposite direction trying to close the door. It is extremely important whether using conventional hinges or continuous hinges (Roton is another manufacturer) that all screws for the upper portion of the frame , hinges and closer be attached solidly to the door framing and surrounding framing as substantially as possible to assure long service. Equally important be sure that the closer selected is matched to the door size and weight being used. Too heavy a closer is equally as bad as too light of a closer.
Very well written article. If your construction abilities are as good as your as your communication skills you should be very successful in your business.
Thanks to TiC for the forum for tradespeople to share their experiences.
Jim C.
Great job Dylan and a great read too !! I’ve been in the door trade for 25 plus years and artical was well writen and many good tips.Keep up the good work…doors are a wonderful thing!!!
What an informative article! There is so much to learn from this post. Installing a commercial steel door is never that easy. This takes so much to consider in order to have a successful installation. Thanks Dylan for sharing all these stuff! This is indeed so helpful.
Your welcome Cathy, I’m glad you enjoyed it.
More importantly, its good that you find it useful. For all the help I received over the years from articles like these–its good to give back!
–Dylan
I had a commercial client completing the same project, but I bet he wished he had read this article beforehand. It took twice as long as it should have and he didn’t have any of the proper materials before beginning. Luckily I suggested he install the door before remodeling the floor with a fresh coat on the interior because he left dents and a big gouge right in the entry way. Thanks for all of the information, I will definitely be sharing this the next time someone needs DIY details on a commercial door.
I work in an industrial setting for a major agency. We install metal doors and frames iaw fire coding on a regular basis. Metal doors for this typical setting are used in conjunction with metal studs (3 5/8) and 5/8 fire rated drywall times 2 layers for interior walls. Exterior jambs 9 1/4″ and wider are not uncommon.
A couple of my coworkers have opted for the full length piano style gear hinge. I think cost on these hinges that range around 280.00 is a bit overkill when standard 4″ BB1279 butts suffice even with a hydraulic closer installed. I have yet to see 1 1/2 pair fail. My coworkers have used the piano hinges on US American full glass Aluminum doors with good success. I still think that the gear hinges are cost preventive compared to OEM replacement hardware. US American Aluminum doors have a top and bottom pivot that have lasted 20+ years without replacement, and at a fraction of the cost to replace. So, while I am impressed with the information on this post, I disagree with the gear hinge being a necessary item for a long term solution.
Great work Dylan! I was surfing articles on installing slide bolts on steel doors when I came upon your article. Many don’t like to do the work, just show friends and company what they had installed.
As the saying goes, “learn by doing,” and you sure help people who don’t have the knowledge, or do it by being in the trades.
Thanks for taking the time and educating those who only wish they could achieve what you can accomplish.
Great article! The insulation and pre prepping were good ideas. I noticed a van in one of your pictures, I’ve been working from a Chevy Express AWD van for nearly eighteen years and love how my tools and materials are out of sight and nasty weather!
Doug Simmons Construction
Thank you Doug – glad to see that people still find it informative!
I couldn’t agree more that a van is far more useful than a pickup. Unfortunately my van is not a 4×4 so there are times when I wished I had that feature of a pickup. But the rest of the time its great to have tools and materials out of the weather.
There are also a couple pictures of my 20′ trailer which is my shop on wheels. Here I have a miter saw and Festool MFT table with dust extraction always setup and at the ready, which makes me that much more efficient. I’m also able to carry every other tool and clamp needed for any situation – as well as extra materials, fasteners and hardware. I’ve had it for eight years now and don’t know what I’d do without it.
Best regards!
–Dylan
I don’t know about where you order your doors but there should be no need to cut the jambs down to install a threshold. ITs also worth noting that any modifications you make to the door or frame VOIDS the fire rating. Every commercial door I have ever ordered came with a standard 3/4″ undercut which allows for a 1/2″ ADA threshold to be notched and installed between the jams. Most steel jambs have some sort of attachment at the bottom and cutting off the half inch will interfere with the straps or remove the screw plate. When in doubt, just order the door shorter.
A thank you for this article.. Saved a sale for me as a (now) customer was adamant that he wanted me to install a new steel door in addition to the main work he contracted me to do.. My business is resurfacing concrete not installing doors.. I pointed him to this article and told him if he needed help then I would help him… He printed your steps out, and when I showed up around noon he was just finishing the door install.. Much Thanks.
I had no clue that I could get a steel door with glass either. That sounds nice for my house. Maybe it will help raise my home’s value.
Great tip about getting a metal door frame. My office needs new windows and doors for the exterior. We’ll have to get combinations of steel and glass.